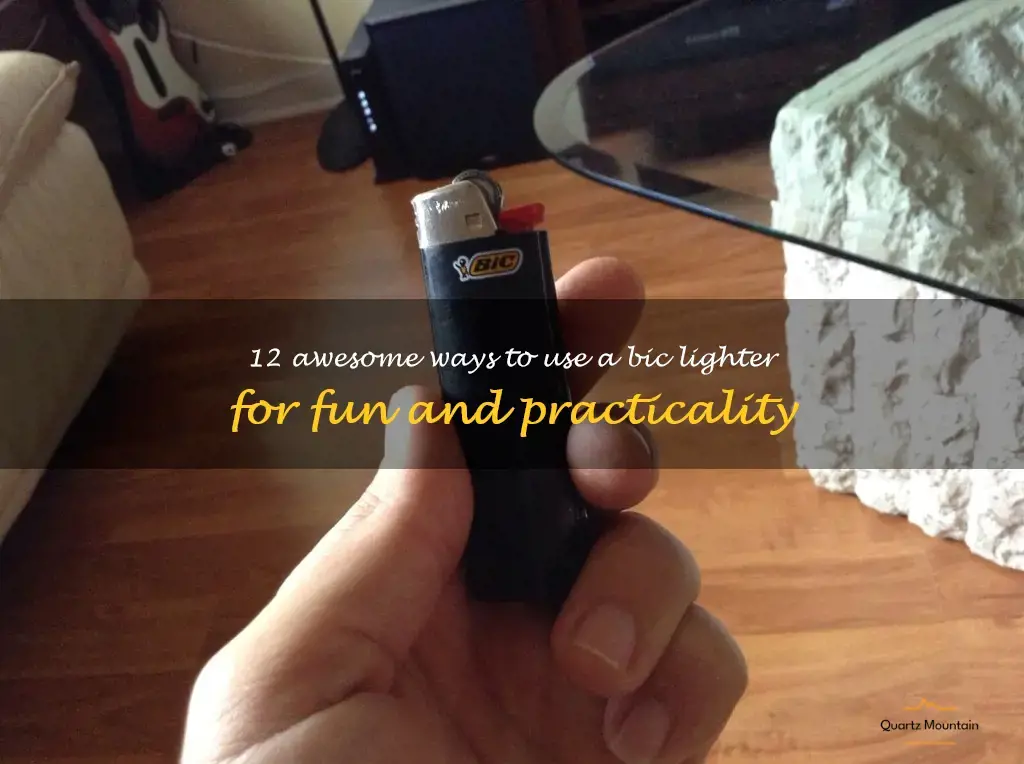
Fire up your imagination with the versatility of everyone's favorite pocket-sized tool - the Bic lighter. This simple but handy device has more uses beyond just lighting candles or starting a fire. From opening a beer bottle to melting the edges of a nylon rope, discover the 12 awesome ways to use a Bic lighter for fun and practicality that you never knew you needed. Whether you're a seasoned camper or simply looking for new tricks to impress your friends, these clever hacks will add a spark to your daily routine. So, grab your Bic lighter and let's ignite some adventure!
| Cool Things To Do With A Bic Lighter | Description |
|---|---|
| Fire tricks | Learn fire tricks like fire breathing, fire eating, and fire spinning with a Bic lighter. Make sure to use caution and safety precautions. |
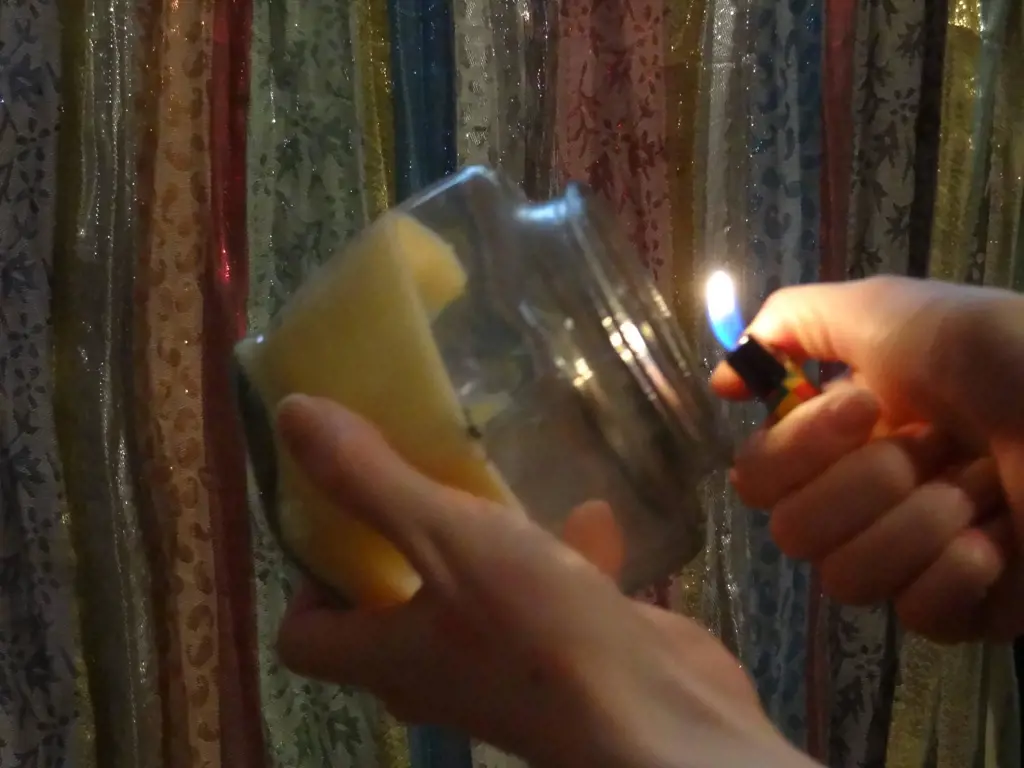
| Bottle torch | Make a bottle torch by filling a glass bottle with paraffin or lamp oil, inserting a wick into the top, and lighting it with a Bic lighter. It creates a unique ambience and can be used for outdoor lighting. |
| Emergency candle | If the power goes out, use a Bic lighter to make an emergency candle by melting the bottom of a candle and sticking it onto a plate or saucer. Light the wick with a Bic lighter, and enjoy the warm glow. |
| S'mores | Use a Bic lighter to make a campfire and roast marshmallows for the ultimate S'mores experience. |
| Hair removal | Light the tip of a Bic lighter and use it to singe off stray hairs or spiky frizz. |
| Fireworks | Use a Bic lighter to light up fireworks on special occasions like New Year's Eve, Fourth of July, or Diwali. |
| Grilling | Use a Bic lighter to light up a grill for a backyard BBQ. Make sure to keep a lighter close at hand for any necessary re-lighting. |
| Candles | Light candles in your room with a Bic lighter to create a cozy and relaxing ambiance. |
What You'll Learn
![]()
Starting a campfire
Step 1: Gather Firewood
Before starting a campfire, it is essential to gather firewood. Look around your campsite for dry wood, such as twigs, small branches, and larger logs. Ensure that the wood is dry because wet wood is challenging to get burning, and it will produce more smoke than fire. Also, gather some tinder, which can be dry grass, leaves, or paper. The tinder's purpose is to ignite easily and keep the flames going until the bigger wood catches fire.
Step 2: Clear the Area
Ensure that the area around your campfire is clear. Remove any twigs, dry leaves, or debris that could accidentally catch fire. Also, check to ensure there are no low-hanging branches that could catch fire. You don't want to start a forest fire, so always be cautious.
Step 3: Arrange the Firewood
Arrange the firewood in a pyramidal shape. Start with the tinder in the center, then add lightweight twigs to create a teepee shape around the tinder. Once the twigs are burning, add larger sticks and branches to fuel the fire, creating a larger pyramid shape.
Step 4: Light the Bic lighter
Hold the Bic lighter to the base of the tinder and ignite it. Make sure to keep the lighter's flame on the tinder until it ignites fully. Once the tinder catches fire, gently blow on it to encourage the flames to grow. Continue to add bigger sticks and branches as the fire grows.
Step 5: Keep the Fire Under Control
Once the fire has started, it is crucial to keep it under control. Never leave a fire unattended and always have a bucket of water or a fire extinguisher nearby in case of emergencies. Be sure to keep a safe distance from the flames and avoid throwing anything into the fire unless it is small twigs or branches. Throwing plastic or other materials into the fire is dangerous and can lead to an environmental disaster.
In conclusion, starting a campfire is an excellent way to connect with nature and enjoy time with friends or family. A Bic lighter is a fantastic tool to have on hand because it is easy to use and produces a consistent flame. Always be careful when starting a fire and follow the steps outlined in this article to ensure a fun and safe camping experience.
12 Fun Things to Do in New York City in April
You may want to see also
![]()
Lighting candles
When it comes to cool things to do with a Bic lighter, one of the top activities on the list is lighting candles. Whether you're enjoying a relaxing bath, setting the mood for a romantic evening, or simply need to add some light to a dark room, candles are an excellent option. And with a Bic lighter, you can light candles with ease and style.
Here are some tips and tricks for lighting candles with a Bic lighter:
- Hold the lighter close to the wick: To ensure that the flame catches on the wick, hold the Bic lighter as close as possible to the base of the wick without touching it.
- Tilt the candle: If you're having trouble getting the flame to catch, try tilting the candle slightly to one side. This can help the flame spread more easily across the wick.
- Use long-reach lighters for taller candles: If you're trying to light a candle that's too tall to reach with a regular Bic lighter, try using a long-reach lighter. These lighters have longer handles that allow you to reach higher without burning your fingers.
- Be patient: Sometimes it can take a few tries to get a candle lit, especially if the wick is buried deep within the wax. Don't give up! Keep trying until the flame catches.
- Use caution: When lighting candles with a Bic lighter, always use caution. Keep the flame away from flammable materials, and never leave a burning candle unattended.
In addition to lighting candles, there are plenty of other cool things you can do with a Bic lighter. From starting a campfire to lighting a barbecue grill, there are countless ways to put your Bic lighter to good use. So the next time you need a flame, reach for your trusty Bic and get creative!
14 Things to Do in Stafford, TX - Fun Activities for All Ages!
You may want to see also
![]()
Melting the ends of paracord
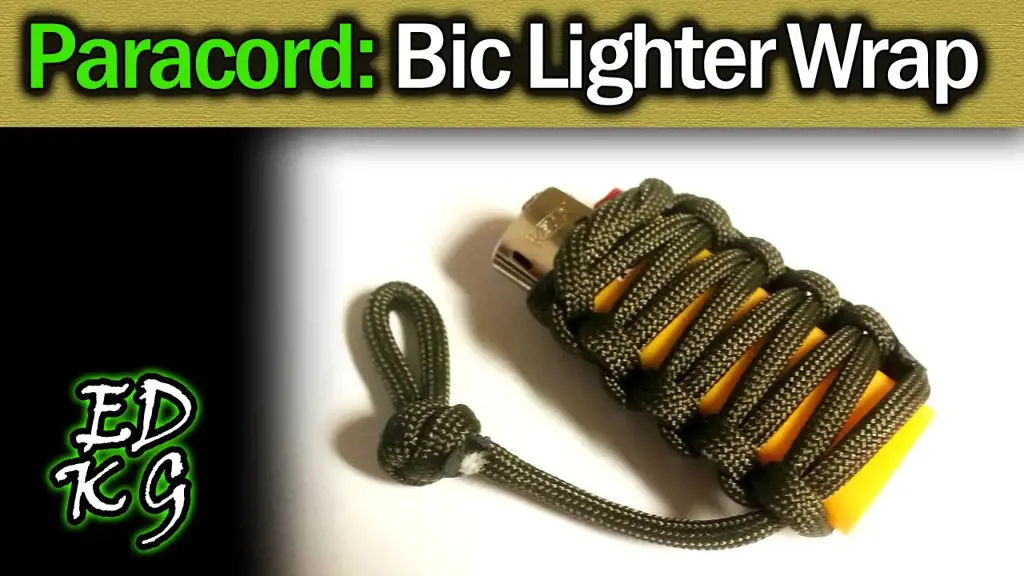
Looking for a cool and creative way to put your bic lighter to good use? Why not try melting the ends of paracord? This is a simple and easy technique that can be used to create a variety of cool and unique paracord goods, such as bracelets, keychains, and lanyards. In this article, we will provide you with a step-by-step guide on how to use a bic lighter to melt the ends of paracord, plus some inspiration for what you can create with this technique.
Step 1: Cut the Cord
The first step is to cut the length of paracord you will need for your project. Use a sharp pair of scissors or a knife to make a clean cut. Remember to leave a little extra length, as the melting process may cause the cord to shrink slightly.
Step 2: Melt the Ends
Hold the cut end of the cord in your non-dominant hand, and the bic lighter in the other. Hold the flame close to the end of the cord until it melts slightly. Be careful not to get too close to the flame, or you may burn the cord. Use a back-and-forth motion to melt a small area around the end of the cord. Once done, use your fingers or a pair of pliers to pinch the melted end and create a smooth and rounded shape. Repeat the process with the other end of the cord.
Step 3: Create Your Paracord Project
Now that you have two smooth and melted ends of your paracord, you can start creating your paracord project. Whether you choose to make a bracelet, keychain, or any other paracord goods, the melted ends will help keep your project from fraying and coming apart.
Here are a few project ideas to get you started:
- Paracord Bracelet: Use several pieces of paracord to create a braided bracelet. Melt the ends of each piece of paracord, then weave the pieces together to create a stylish and durable bracelet.
- Keychain: Create a paracord keychain by tying a length of paracord into a loop, then attaching a keyring to one end. Melt the ends of the paracord to keep the loop from unraveling, then add decorative knots or beads to the keychain.
- Lanyard: A paracord lanyard is a useful and practical accessory that can be used to hold keys, ID badges, or other small items. Use a longer piece of paracord to create a lanyard, and melt the ends to prevent fraying.
In conclusion, melting the ends of paracord using a bic lighter is a simple yet effective technique that can be used to create a variety of unique and cool paracord projects. By following the steps outlined in this article, you can create your own paracord accessories that are not just stylish but also durable and long-lasting. So go ahead and give it a try – you might just discover a new hobby or creative outlet to enjoy!
12 Productive Things to Do in the Summer
You may want to see also
![]()
Lighting a grill or BBQ
First, make sure your grill or BBQ is clean and ready to use. Remove any ash or residue from the previous use. Then, open the lid and adjust the air vents to allow oxygen to flow through. This will help ignite the charcoal or gas.
To light the charcoal, stack it in a pyramid shape in the center of the grill. Open the valve on your bic lighter and place it at the base of the pyramid. The flame will quickly catch and spread to the surrounding charcoal.
If you are using a gas grill, turn on the gas and adjust the heat to low. Open the lid and hold the Bic lighter next to the burners or ignition switch. The flames should ignite quickly, and you can adjust the heat as needed.
Remember to never leave a lit grill unattended, and always keep a fire extinguisher nearby just in case. With a bic lighter, lighting your grill or BBQ can be a quick and easy process, allowing you to enjoy delicious meals outside with family and friends.
12 Fun Activities to Experience in Point Pleasant NJ This Weekend
You may want to see also
![]()
Removing excess hair from clothing
When we wear clothes for long periods of time, the accumulation of hair on our garments can make them look old and worn out. This is particularly problematic for those of us who shed hair frequently, those who keep furry pets or those who work in a dusty environment.
But have no fear – there is a cool and simple hack for removing excess hair from your clothing that involves using a bic lighter. The heat from the lighter will cause the hairs to become stiff, making them easier to remove.
Here’s how to do it:
Step 1: Accustom yourself to safety measures
Before you start, please ensure that you take the necessary precautions – as with any object that produces heat, a lighter can be dangerous. Ensure that the garment you are handling is not highly flammable, and make sure that you keep the flame at a reasonable distance so as not to damage the material.
Step 2: Identify the area of clothing that needs to be treated
Identify the areas on your clothes where the hair is most concentrated. These areas might include the sleeves, cuffs, collar areas, and any other areas prone to gathering a lot of debris.
Step 3: Take the bic lighter
Hold the lighter approximately a few inches away from the garment, then run the lighter back and forth over the areas where the hair is most concentrated. The heat will lift the hairs, making them easier to remove.
Step 4: Remove the hair
After running the lighter back and forth a few times, use a damp cloth or lint roller to remove the hairs from the surface of the garment. The hair should now have been lifted, and the lighter has made it easier to collect them off the fabric.
Step 5: Check for any damage
Ensure that the garment is not damaged or discoloured by the procedure. Check that the garment is still safe to wear, and that there are no permanent marks or burns.
And voila! You now have a simple hack that can help you get rid of excess hair on your clothing. Using a bic lighter might sound silly but has been proven to be effective and safe when executed with caution. So give it a try and get rid of unwanted hair from your clothes today!
12 Fun Activities for Kids in Vevey!
You may want to see also
![]()
Sterilizing a needle
Introduction:
A Bic lighter is a small but versatile tool that has numerous practical applications. One such use is to sterilize a needle. In this article, you will learn how to use a Bic lighter to sterilize a needle and why it is crucial to do so.
Why Sterilizing a Needle is Important:
How to Sterilize a Needle with a Bic Lighter:
Here are the steps to sterilize a needle with a Bic lighter:
Step 1 - Gather Your Materials:
Make sure you have the following materials:
- A Bic lighter
- A needle
- Cotton ball or alcohol swab
- Pair of tweezers
Step 2 - Clean the Needle:
Use a cotton ball or alcohol swab to clean the needle thoroughly. Make sure that there is no dirt or residue present on the needle.
Step 3 - Hold the Needle:
Using a pair of tweezers, hold the needle at the blunt end. This will help you avoid burning your fingers while sterilizing the needle.
Step 4 - Heat the Needle:
Hold the needle over the flame of a Bic lighter. Heat the needle until the metal is glowing red. You can move the needle back and forth through the flame to ensure that it is evenly heated.
Step 5 - Allow the Needle to Cool:
After heating, allow the needle to cool down completely. A heated needle can cause burns or injuries. So, it is essential to wait until the needle returns to its normal temperature.
Step 6 - Use the Needle:
The sterilized needle is now safe for use. You can use it for various purposes like piercing your ears, giving injections to animals, or administering medication.
In conclusion, sterilizing a needle is crucial before every use to prevent infections and diseases. A Bic lighter can be an effective tool to sterilize a needle, provided you follow the recommended steps. By following the steps mentioned above, you can safely sterilize your needle whenever you need to. Remember, safety is paramount when using any tool or equipment.
12 Fun Activities to Enjoy in North Haven CT
You may want to see also
![]()
Sealing plastic bags
A bic lighter can come in handy for a variety of cool things, one of which is sealing plastic bags. Whether you want to keep your snack fresh or make sure your phone stays dry at the beach, using a bic lighter to seal your plastic bags is a smart and effective method.
To get started, make sure you have a plastic bag that you want to seal and a bic lighter on hand. First, fill the bag with your desired contents and make sure it is closed and free of any air. Then, take the top of the bag and fold it down around a half inch. Hold the fold firmly with one hand and use your other hand to press a bic lighter along the folded edge. This will create a small melted seal along the edge of the bag.
As you move the lighter along the folded edge, make sure to keep an even pressure and go slowly to ensure a perfect seal. You may need to go over the edge a few times with the lighter to make sure it's tightly sealed.
This method is perfect for sealing snacks like chips or crackers to keep them fresh in your lunchbox or backpack. It's also great for sealing your phone and other electronics in a plastic bag to protect them from water damage. Plus, it's an eco-friendly solution that saves money and prevents unnecessary waste from re-using the same plastic bags.
So next time you need to seal a plastic bag, try using a bic lighter for a quick and easy solution. You'll love the results, and feel great knowing that it's a sustainable and effective way to keep your belongings protected.
13 Fun Activities for Kids in Richmond, VA
You may want to see also
![]()
Lighting a pipe
Bic lighters are a common household item that can be used for many things, including lighting candles and cigarettes. However, one of the coolest things to do with a Bic lighter is lighting a pipe.
If you're a smoker, you know that lighting a pipe can be a bit of a challenge. Unlike a cigarette, which only needs a quick flick of the lighter, a pipe requires a slow and even flame to light properly. This is where a Bic lighter comes in handy.
First, you'll need to fill your pipe with tobacco. Then, take your Bic lighter and hold it at a 45-degree angle to the bowl of the pipe. Light the lighter with your thumb and hold it over the bowl, rotating the pipe to ensure an even light. Take slow, steady puffs to ensure the tobacco is lit evenly.
One of the great things about using a Bic lighter for lighting a pipe is that they have a long-lasting flame. This means that you won't have to constantly relight your pipe if you take your time and light it properly. Additionally, Bic lighters are very affordable and can be found in most convenience stores or gas stations.
It's important to note that when using a Bic lighter for a pipe, you should never inhale the smoke. Pipe smoking is a hobby and should be enjoyed responsibly. Make sure to practice good smoking techniques and use your Bic lighter safely and responsibly.
In conclusion, lighting a pipe with a Bic lighter is a cool and easy way to enjoy this hobby. With a little patience and the right technique, you'll be able to enjoy a smooth smoke with ease. So grab your pipe and your Bic lighter and enjoy some quality time relaxing with your favorite tobacco.
13 Exciting Things to Do in Pico Rivera to Add to Your Bucket List
You may want to see also
![]()
Removing labels or stickers
Bic lighters are a handy tool that many people keep on hand. Whether you use them to light candles, start a fire, or simply for emergency purposes, there are a number of cool things you can do with a Bic lighter. One of those is removing labels or stickers.
Step One: Hold the Bic lighter in your hand, making sure that the flame is facing away from you. Hold the label or sticker that you want to remove above the flame for a few seconds, being careful not to burn yourself.
Step Two: After a few seconds, remove the label or sticker from the flame. Use your fingernail or a plastic scraper to gently lift one corner of the label or sticker.
Step Three: Use the flame from the Bic lighter to heat the adhesive on the back of the label or sticker. Be careful not to hold the flame too close to the label or sticker, as this can scorch the surface.
Step Four: Once the adhesive has been heated, use your fingernail or scraper to gently peel the label or sticker away from the surface. If you encounter resistance, simply reheat the adhesive with the Bic lighter and try again.
Step Five: Once the label or sticker has been removed, use a clean cloth or paper towel to wipe away any remaining adhesive residue.
In addition to being an effective tool for removing labels or stickers, a Bic lighter can also be used for a variety of other cool tasks. For example, you can use a Bic lighter to start a fire, melt plastic, or even create small sculptures out of melted wax. Just be sure to use caution when working with an open flame, and always supervise children when they are handling Bic lighters.
In conclusion, using a Bic lighter to remove labels or stickers can be a quick and easy task. Just remember to take your time, use caution, and follow these simple steps for best results. And who knows? With practice, you may even discover some other cool things you can do with a Bic lighter!
11 Fun Things to Do in Canton, NC
You may want to see also
![]()
Heating up a spoon for wax sealing

Bic lighters are a great multi-purpose tool that has many cool applications, and one of the most interesting things you can do with it is to heat up a spoon for wax sealing.
Wax sealing is a decorative technique that has been around for centuries and is used to seal letters, invitations, and other documents. The process involves melting wax and then applying it to the surface of the paper before stamping it with a design. The wax then hardens, creating a seal that serves as a mark of authenticity and security.
To heat up a spoon for wax sealing, you'll need a few things:
- A Bic lighter
- A metal spoon
- Wax beads or a wax seal
First, hold the spoon in one hand and the lighter in the other. Light the lighter and hold the spoon over the flame. Move the spoon around a bit to ensure that it heats up evenly. You don't want to heat up just one area of the spoon, as this might cause the wax to burn or become too liquid.
Once the spoon is heated up, pick up a few wax beads or a wax seal with your other hand, and place them on the back of the spoon. The wax should melt within seconds, creating a glossy, liquid layer. Make sure not to use too much wax, as this can cause the letters or images to become blurry or undefined.
Next, take the spoon and hold it over your letter or document. Gently pour the liquid wax over the surface of the paper, making sure to cover the area you want to seal. Once the wax has been applied, take your wax seal or stamp, press it onto the wax, and hold it in place until the wax cools and hardens.
Voila! You've just created a beautiful and authentic way to seal your documents, and you've done it in a fun and creative way. And the best part? You've used a Bic lighter, a simple tool that you probably have lying around the house.
In conclusion, there are many ways to use a Bic lighter, but heating up a spoon for wax sealing is one of the coolest and most practical applications out there. It's easy to do, fun, and creates a beautiful wax seal that's sure to impress anyone who receives it. So go ahead, grab your lighter and your spoon, and start creating beautiful wax seals today!
13 Fun Things to Do Near the Ark Encounter in Kentucky
You may want to see also
![]()
Tightening loose screws on glasses

If you just can't seem to get your glasses to stay tight, or keep sliding down your nose, a Bic lighter could be the answer to your problems! Here's how to use a Bic lighter to tighten the screws on your glasses:
- Identify the loose screw. You'll need to tighten the screw holding the arm of the glasses to the main frame.
- Remove the glasses from your face and lay them on a flat surface.
- Hold the Bic lighter with the flame pointing up, and run the screw over the flame for about 5-7 seconds. This will heat up the metal slightly, making it easier to tighten.
- Using a screwdriver, gently and carefully tighten the screw. Be sure not to over-tighten, which can strip the screw or damage the frame.
- Repeat on the other side if necessary.
Using a Bic lighter to tighten the screws on your glasses is a simple and effective solution. Not only does it make it easier to tighten the screw, but it also helps prevent stripped screws and other wear and tear on your glasses. So, next time you notice your glasses slipping or feeling a bit loose, reach for a Bic lighter and get to work!
13 Exciting Activities Near Petco Park
You may want to see also
![]()
Thawing frozen locks
Bic lighters are a versatile tool that can be used for a variety of tasks, including thawing frozen locks. During the winter months, it's not uncommon for locks to freeze, making it difficult or impossible to open doors. In this article, we will discuss how a bic lighter can be used to thaw frozen locks.
Step 1: Assess the Situation
Before attempting to thaw a frozen lock with a bic lighter, it's important to assess the situation. Verify that the lock is, in fact, frozen and not damaged. If the lock is damaged, using a bic lighter may not be effective. Additionally, it's important to ensure that there are no flammable materials or objects nearby that could ignite.
Step 2: Hold the Bic Lighter to the Lock
Once you have determined that the lock is frozen and that there are no flammable materials nearby, hold the bic lighter to the lock. It's important to hold the lighter close enough to the lock so that the heat can be felt. However, be careful not to hold the lighter too close to the lock, as this could cause damage.
Step 3: Apply Heat
Apply heat to the lock by moving the bic lighter back and forth over the frozen area. It may take a few minutes for the ice to melt, so be patient. As the ice begins to melt, keep the lighter close to the lock to ensure that the heat continues to melt the ice.
Step 4: Test the Lock
Once you have applied heat to the lock for a few minutes, test the lock to see if it can be opened. If the lock still appears to be frozen, repeat the process until it is completely thawed.
Step 5: Keep the Bic Lighter Handy
During the winter months, it's a good idea to keep a bic lighter handy, just in case you encounter a frozen lock. By using a bic lighter to thaw a frozen lock, you can save time and avoid damaging the lock by using other tools that may be less effective.
In conclusion, bic lighters can be a useful tool for thawing frozen locks. By following these steps, you can safely and effectively use a bic lighter to thaw a frozen lock and avoid the inconvenience and frustration of being unable to enter your home or vehicle. However, always exercise caution when using the lighter and closely monitor the heat around the lock to avoid any potential damage or injury.
12 Must-Do Activities to Experience in New Zealand's North Island
You may want to see also
Frequently asked questions
You can try making a flame tornado by tilting the lighter slightly and quickly spinning it in a circular motion. Another trick is to light the lighter and then snap your fingers in front of it to extinguish the flame. You can also create a small firework by lighting the lighter and then quickly extinguishing it, causing a spark to fly out.
Yes, you can use a Bic lighter to start a campfire. Just make sure to use proper fire safety precautions and be sure to have enough kindling and wood to sustain the fire.
You can create designs by turning off the lights and using the lighter to cast shadows on the wall. You can also try drawing intricate designs on a black piece of paper and then lighting the paper on fire to create a unique aesthetic.
You can use a Bic lighter to seal the end of a rope by melting it slightly, or to heat up the end of a plastic tubing to make it moldable. You can also use the lighter to remove sticky residue from surfaces or to melt the wax on a candle to help it light more easily.


4 Comments
Husna Ponce
Annie Rangel
AuthorHaider Floyd
Alain Brady
Author