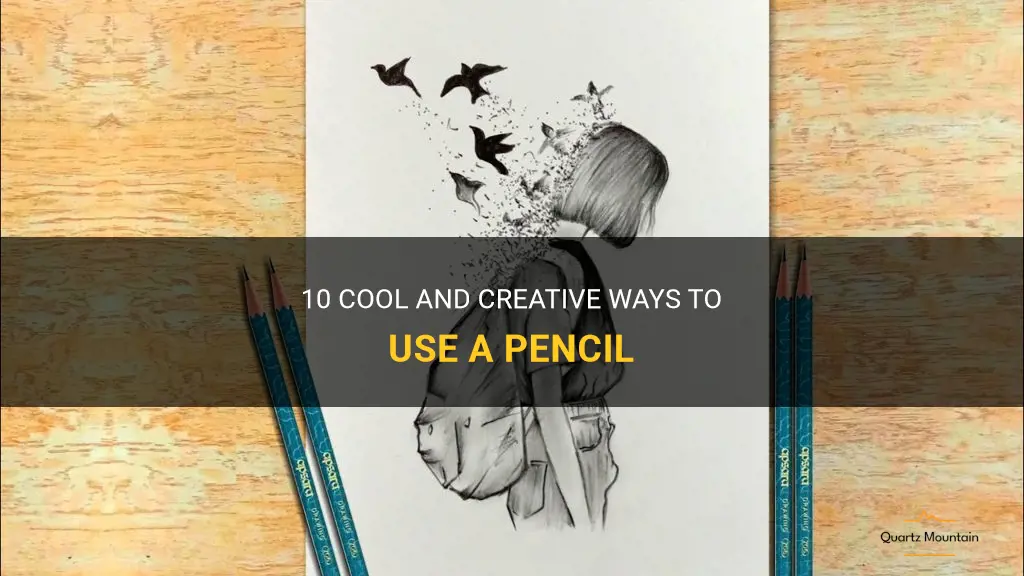
Pencils are often seen as simple writing tools, but did you know that they can be used in so many cool and creative ways? From creating unique artwork to solving everyday problems, pencils have endless possibilities. In this article, we will explore 10 innovative ways to use a pencil that will surely leave you inspired and amazed. Whether you are an artist, a DIY enthusiast, or simply looking for new ways to use this humble tool, get ready to discover the true potential of a pencil!
What You'll Learn
- Create intricate pencil drawings and sketch in an art studio
- Use colored pencils to add vibrant hues to adult coloring books
- Craft a DIY pencil holder using old tin cans or mason jars
- Use pencils as plant markers in a garden or indoor herb garden
- Create makeshift hair accessories by wrapping pencils with colorful ribbon or washi tape
- Utilize pencils as drumsticks to make music and explore rhythm
- Arrange pencils in a decorative pattern to create unique wall art
- Use a pencil as a bookmark to keep your place in a favorite novel
- Attach a small piece of sandpaper to a pencil to create a unique nail file
- Carve intricate designs into the eraser of a pencil to create personalized stamps
![]()
Create intricate pencil drawings and sketch in an art studio
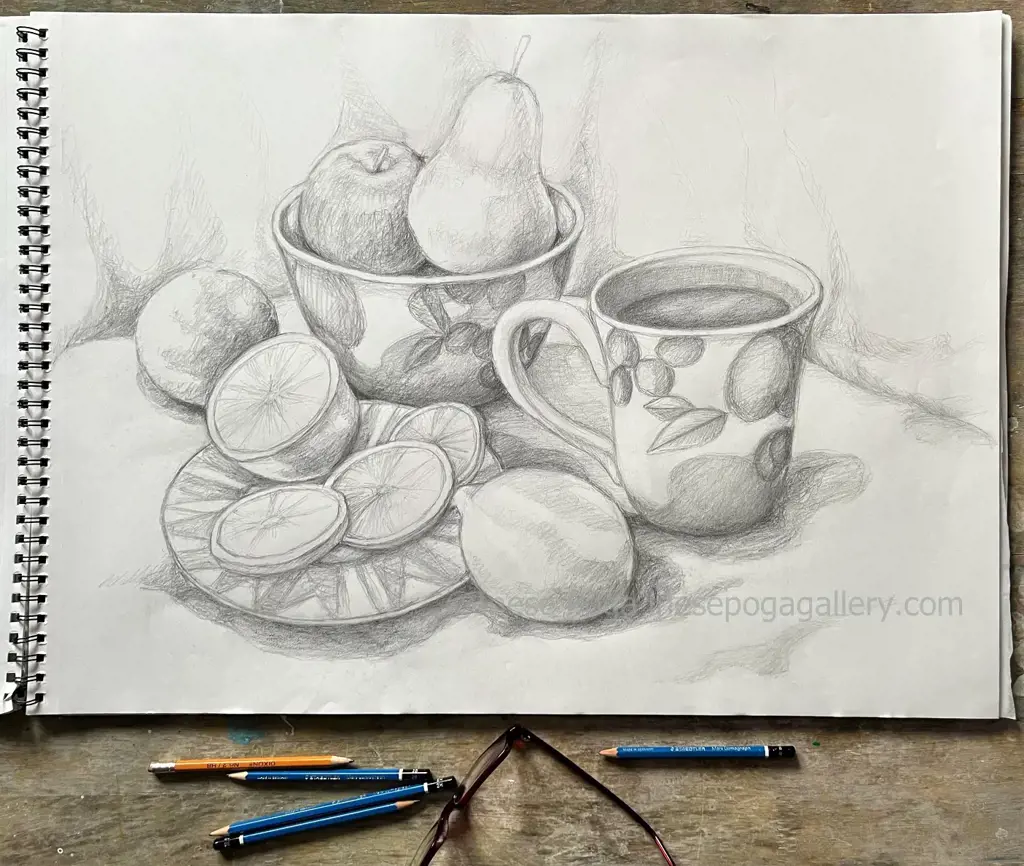
If you are a pencil enthusiast or an artist looking for cool things to do with a pencil, one of the most popular and creative options is creating intricate pencil drawings and sketching in an art studio. This not only allows you to explore your artistic skills but also provides a satisfying and therapeutic experience.
To begin, gather your favorite pencils, sketchbooks, and other drawing materials. You can choose from a variety of pencil grades, ranging from soft (B, 2B, 4B, etc.) to hard (H, 2H, 4H, etc.), depending on the level of detail you want to achieve. Experimenting with different grades can give your drawings a unique texture and shading effect.
Next, find a quiet and comfortable space where you can set up your art studio. It could be a dedicated room, a corner of your living space, or even an outdoor area if weather permits. Surround yourself with inspirational artwork, books, and supplies to create a creative atmosphere.
Once you have set up your art studio, it's time to let your imagination run wild. Start by exploring different subjects and styles for your pencil drawings. You can create realistic portraits, still life compositions, landscapes, or even abstract pieces. Experiment with different techniques like shading, cross-hatching, stippling, and blending to add depth and texture to your artwork.
To challenge yourself further, consider participating in art challenges or prompts that provide a daily or weekly theme for your drawings. This can help you expand your creativity and push the boundaries of your artistic abilities.
If you are looking for guidance or want to learn new tips and techniques, consider joining art classes or workshops in your area. These not only provide valuable insights but also give you the opportunity to meet other artists and share your passion for pencil drawings.
Remember, creating intricate pencil drawings and sketching in an art studio is a process that requires time, dedication, and patience. Don't be afraid to make mistakes or try new things. Embrace the learning experience and enjoy the journey of honing your skills.
Lastly, showcase your artwork by sharing it with others. You can create an online portfolio or participate in local art exhibitions and events. Not only will this give you a sense of accomplishment but also provide an avenue for feedback and recognition from fellow artists and art enthusiasts.
In conclusion, creating intricate pencil drawings and sketching in an art studio is a rewarding and cool thing to do with a pencil. It allows you to express your creativity, enhance your skills, and immerse yourself in the world of art. So grab your pencils, set up your art studio, and start exploring the endless possibilities of pencil drawing.
10 Fun Activities to Do in Vegas on a Wednesday Night
You may want to see also
![]()
Use colored pencils to add vibrant hues to adult coloring books
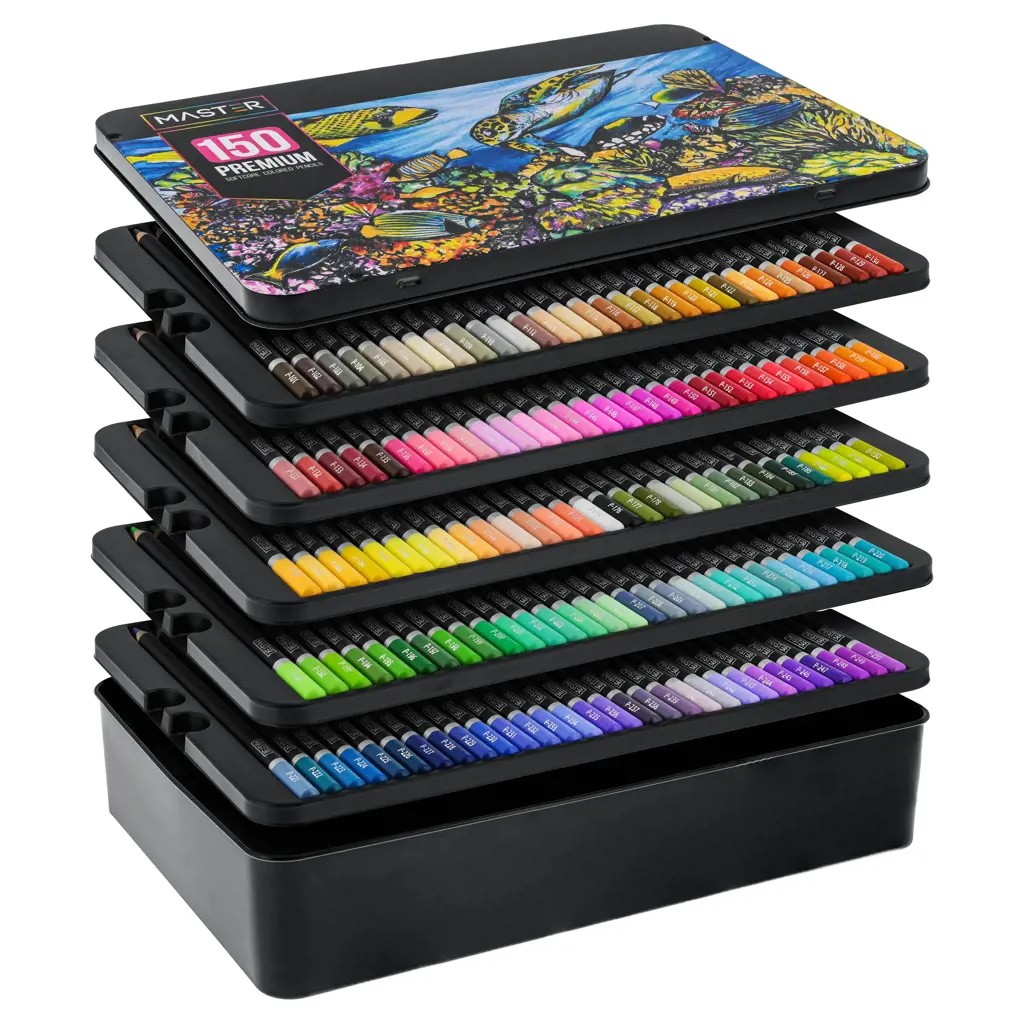
Are you tired of the same old crayons and markers when it comes to coloring? Why not try using colored pencils to add vibrant hues to your adult coloring books? Colored pencils are a versatile tool that allows you to create beautiful and intricate designs with ease. In this article, we will explore the various ways you can use colored pencils to bring your coloring books to life.
One of the advantages of using colored pencils is their ability to blend and layer colors. This makes it possible to achieve a wide range of hues and gradient effects. Start by selecting a base color and apply it lightly to the paper. Then, choose a second color that is slightly darker and layer it over the first color. Use a blending tool or your finger to gently blend the two colors together. This technique can create stunning shading and dimension in your coloring book illustrations.
Another technique that can be achieved with colored pencils is burnishing. This involves applying heavy pressure to the pencil to fill in the tiny white spaces between the colored lines. This creates a smooth and polished look that can give your coloring book pages a professional appearance. To achieve burnishing, start by layering multiple colors on your page. Then, use a white pencil to burnish over the colored areas, applying firm pressure. This will blend the colors together and create a smooth, glossy finish.
Colored pencils also allow for detailed coloring. With their fine tips, you can easily create small, intricate designs in your coloring books. From delicate flowers to intricate mandalas, colored pencils can bring out the tiny details in your illustrations. Simply sharpen your colored pencil to a fine point and carefully color in the intricate areas of your coloring book pages. This can be a soothing and relaxing activity, perfect for relieving stress and boosting your creativity.
If you want to add an extra touch of sparkle to your coloring book pages, try using metallic or shimmering colored pencils. These pencils have a beautiful sheen that can add depth and visual interest to your artwork. They work particularly well for coloring metallic objects, such as jewelry or metal elements in your illustrations. Additionally, you can use them to add highlights and shine to areas of your coloring book pages.
In conclusion, using colored pencils to add vibrant hues to your adult coloring books is a fun and creative way to bring your illustrations to life. Whether you want to achieve smooth blending, detailed coloring, or add a touch of shimmer, colored pencils offer endless possibilities. So grab your favorite coloring book and a set of colored pencils, and let your imagination flow as you create stunning works of art. Happy coloring!
13 Must-Do Activities in Branson, MO in March
You may want to see also
![]()
Craft a DIY pencil holder using old tin cans or mason jars
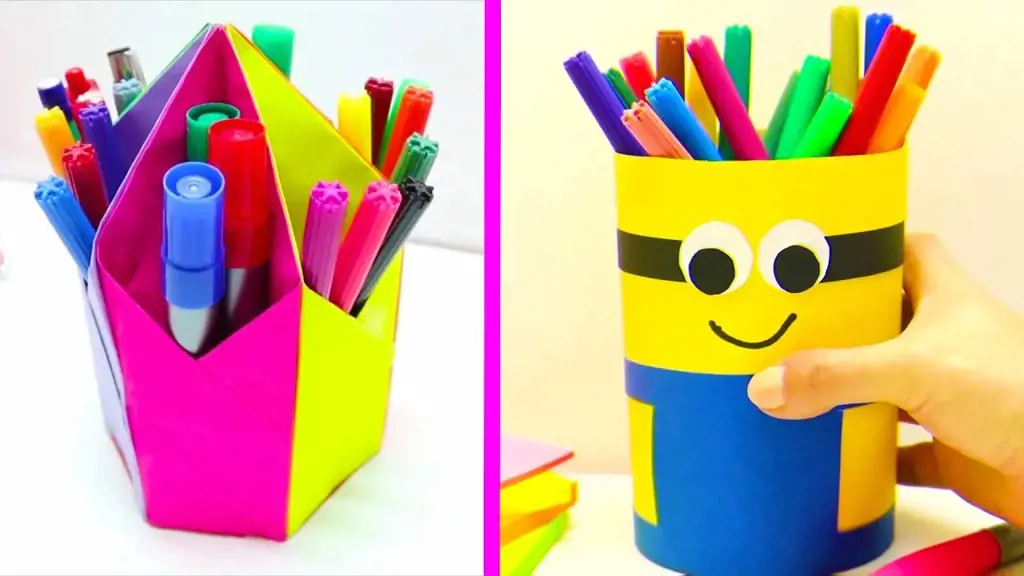
Crafting a DIY pencil holder can be a fun and creative way to organize your desk or workspace. By repurposing old tin cans or mason jars, you can create a unique pencil holder that not only helps keep your pencils organized but also adds a touch of personality to your workspace. Here's a step-by-step guide on how to create your own DIY pencil holder using old tin cans or mason jars.
Materials needed:
- Old tin cans or mason jars
- Paint (acrylic or spray paint)
- Paintbrushes
- Decorative materials (such as ribbons, stickers, or washi tape)
- Hot glue gun
- Scissors
Step 1: Clean and prepare the containers
Begin by cleaning the old tin cans or mason jars thoroughly to remove any labels or residue. Make sure they are completely dry before proceeding.
Step 2: Paint the containers
Choose your desired color of paint and apply a coat to the outside of the tin cans or mason jars using a paintbrush. If using spray paint, apply even coats by spraying from a 6-8 inch distance to ensure a smooth finish. Allow the containers to dry completely.
Step 3: Add decorative touches
Once the paint has dried, you can get creative with decorative materials. Use ribbons, stickers, or washi tape to add patterns or designs to the outside of the containers. You can wrap ribbons around the cans or mason jars, create patterns with stickers, or add strips of washi tape for a unique look. Secure any loose ends or pieces with a hot glue gun for durability.
Step 4: Customize the pencil holder
To make the pencil holder even more personalized, consider adding your initials, favorite quotes, or drawings. You can use paint, markers, or even adhesive letters to create your own designs on the containers. This step allows you to truly make the pencil holder your own and add that extra touch of creativity.
Step 5: Arrange your pencils
Once your DIY pencil holder is complete and any additional decorative elements have dried, it's time to arrange your pencils and other stationery items. Place the pencils into the container, ensuring they stand upright. You can also add other items such as pens, markers, or even paintbrushes if desired.
By following these steps, you can easily create a one-of-a-kind pencil holder that showcases your creativity and helps keep your desk or workspace organized. The DIY pencil holder is not only a functional item but also a cool and unique decoration for your office or study area. So gather your materials, let your imagination run wild, and enjoy the process of crafting your very own DIY pencil holder using old tin cans or mason jars.
14 Fun Things To Do In Greenpoint Brooklyn
You may want to see also
![]()
Use pencils as plant markers in a garden or indoor herb garden
If you are a gardening enthusiast or have a green thumb, you may find it useful to use pencils as plant markers in your garden or indoor herb garden. Not only are pencils easy and cheap to use, but they can also add a touch of creativity to your garden.
To use pencils as plant markers, follow these simple steps:
- Gather your pencils: Start by collecting some pencils that you no longer use or buy a pack specifically for this purpose. Wooden pencils are the best choice as they are more durable and can withstand outdoor conditions.
- Sharpen the pencils: Before using the pencils as plant markers, sharpen them to a fine point. This will make it easier to write or draw on them.
- Label the pencils: Using a permanent marker or a waterproof pen, write the names of the plants or herbs on each pencil. Alternatively, you can draw small pictures or symbols to represent different plants. Make sure to write legibly so that you can easily identify your plants later on.
- Insert the pencils into the soil: Insert the pointed end of the pencil into the soil next to the corresponding plant. Make sure to place the pencil deep enough so that it doesn't get easily knocked over by wind or other activities.
Using pencils as plant markers can offer several benefits:
- Cost-effective: Pencils are readily available and inexpensive, making them an affordable option compared to buying dedicated plant markers.
- Eco-friendly: Reusing old or unwanted pencils as plant markers is a great way to repurpose them and minimize waste. It's a sustainable choice that reduces your environmental footprint.
- Customizable: Pencils offer a blank canvas for your creativity. You can personalize each marker by using different colors or styles of pencils and experimenting with various designs or patterns. This customization adds a unique touch to your garden.
- Biodegradable: Unlike plastic or metal markers, pencils are biodegradable. Over time, the pencils will break down and naturally decompose in the soil without causing any harm to the environment.
Remember to maintain your plant markers by regularly checking the labels for fading or smudging. If necessary, touch up the writing or drawings to ensure clarity. Additionally, consider using a clear protective spray or coating on the pencils to prolong their lifespan.
Using pencils as plant markers is not only practical but also a fun and creative way to organize and label your garden or indoor herb garden. So, the next time you have some old pencils lying around, give them a new purpose and transform them into unique plant markers that will bring a touch of charm to your green space.
13 Exciting Things to Do Near Association Island
You may want to see also
![]()
Create makeshift hair accessories by wrapping pencils with colorful ribbon or washi tape
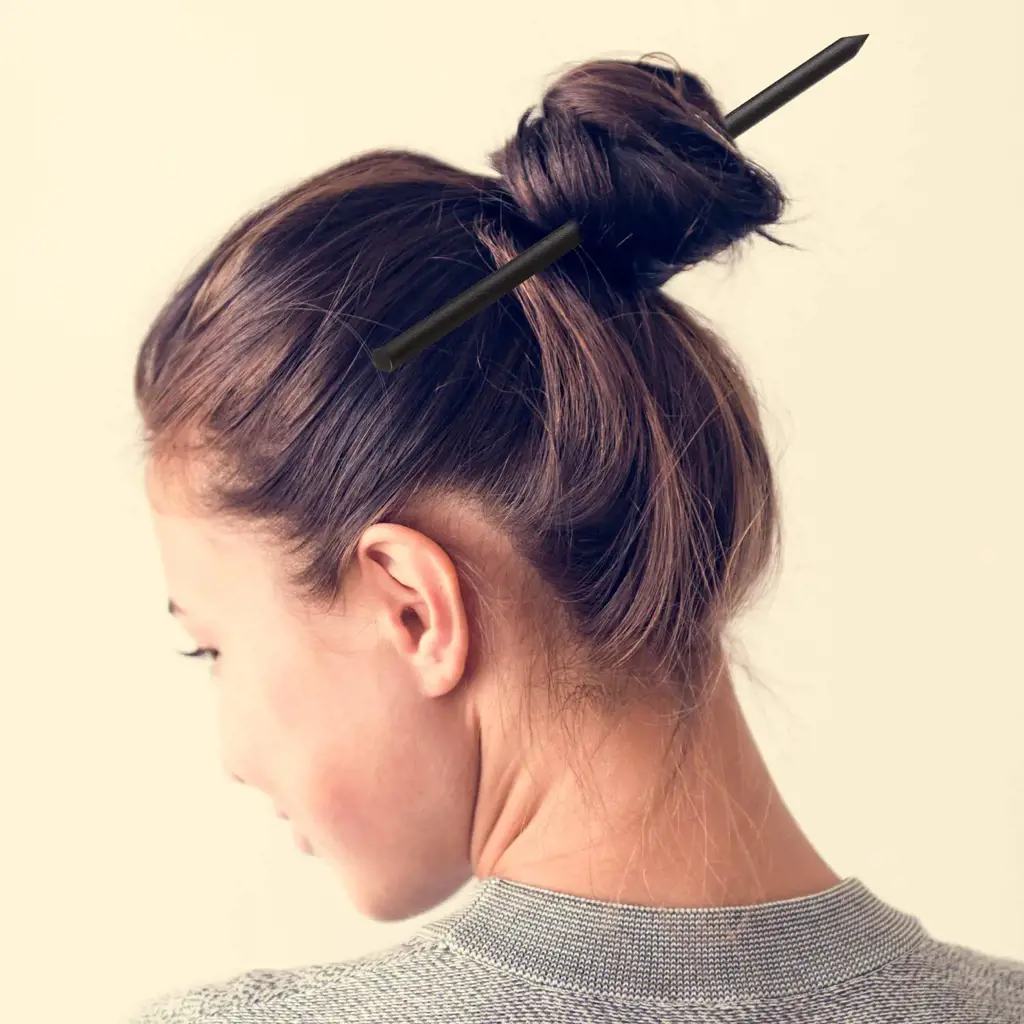
Looking for a unique and creative way to use your pencils? Why not turn them into stylish hair accessories? With just a few supplies, you can transform an ordinary pencil into a fun and eye-catching addition to your hair. Whether you're looking to add some flair to your everyday hairstyle or create a playful look for a special occasion, creating makeshift hair accessories with pencils is a fantastic idea. Here's how you can do it:
- Gather your supplies: You'll need pencils, colorful ribbon or washi tape, scissors, and a hot glue gun.
- Prep your pencils: Start by sharpening your pencils to ensure a smooth surface. Remove any erasers or pencil caps that may be attached to the end.
- Wrap the pencils: Take your colorful ribbon or washi tape and start wrapping it around the pencil from the top to the bottom. Make sure to wrap it tightly to secure it in place. You can choose a single color or mix and match different patterns and colors for a more whimsical look.
- Secure the ends: Once you reach the bottom of the pencil, use a dab of hot glue to secure the end of the ribbon or tape in place. Hold it down for a few seconds until it sets.
- Customize your hair accessories: Now that you have your wrapped pencils, it's time to get creative. You can leave them as they are for a simple and elegant hairpin or attach additional embellishments like mini bows, feathers, or beads for a more intricate look. Use your hot glue gun to attach these elements securely.
- Use your hair accessories: To use your new makeshift hair accessories, simply slide them into your hair as you would a regular hairpin or hair clip. You can position them to hold back a section of hair, secure a ponytail, or add an unexpected detail to an updo. The wrapped pencils will add a unique touch to any hairstyle and are sure to draw compliments.
- Care for your hair accessories: To ensure the longevity of your makeshift hair accessories, handle them with care. Avoid pulling or tugging on the ribbons or tape excessively, as this may cause them to come loose. If needed, you can reapply a small amount of hot glue to secure any loose ends.
Now you have a fun and creative way to use your pencils. Turn them into stylish hair accessories that are sure to make a statement. Experiment with different colors, patterns, and embellishments to create a unique look that reflects your personal style. Whether you're heading to a party, a special event, or just want to add some excitement to your everyday hairstyle, these makeshift hair accessories will definitely turn heads. So grab your pencils, get wrapping, and let your imagination run wild!
12 Must-Try Winter Activities in Moab
You may want to see also
![]()
Utilize pencils as drumsticks to make music and explore rhythm

Pencils are not just for writing and drawing, they can also be used to make music! By utilizing pencils as drumsticks, you can explore rhythm and create unique beats. Here are some cool things you can do with a pencil to make music:
- Drum on various surfaces: Pencils can create different sounds depending on the surface you drum on. Try drumming on a desk, a wooden table, or even a hardcover book. Each surface will produce a different tone, allowing you to experiment and create a variety of beats.
- Create rhythm patterns: Start by tapping the pencil lightly on a surface, gradually increasing the intensity and speed. Experiment with different patterns and rhythms by alternating the taps between your left and right hand. This will create a dynamic beat that you can use as a base for your music.
- Combine with other objects: Get creative and add other objects to create unique sounds. For example, you can tap the eraser of the pencil against a glass or a plastic bottle to produce a percussion-like sound. Combine these sounds with the beats you create with the pencil to add depth to your music.
- Practice finger techniques: Use the pencil to practice finger techniques such as rolls and paradiddles. Roll the pencil on a surface with your fingers to create a continuous sound, or try alternate sticking patterns to develop coordination and speed.
- Collaborate with others: Invite your friends or family members to join in on the fun! Each person can use a pencil as a drumstick and together you can create an ensemble of unique sounds and rhythms. This can be a great activity for building teamwork and creativity.
- Record your creations: Once you have experimented with different beats and rhythm patterns, consider recording your creations. You can use a smartphone or a simple recording device to capture your music. This way, you can listen back and analyze your performance, identifying areas for improvement as well as celebrating your unique compositions.
Remember to be mindful of the environment and those around you when drumming with pencils. Avoid drumming too loudly or on delicate surfaces that could be damaged. Show respect for others by finding an appropriate space where you can freely explore your creativity without disturbing others.
By utilizing pencils as drumsticks, you can transform a simple writing tool into a musical instrument. So go ahead, grab a pencil, and let your imagination run wild as you explore rhythm and create your own unique beats. The possibilities are endless, so have fun and keep experimenting!
Exploring the Charm of Narvon, PA: Exciting Activities and Attractions to Experience
You may want to see also
![]()
Arrange pencils in a decorative pattern to create unique wall art
If you're looking for a fun and creative way to decorate your walls, why not try using pencils to create unique and eye-catching wall art? With just a few simple steps, you can arrange pencils in a decorative pattern to add a touch of charm and personality to any room.
To start, gather a collection of pencils in various colors and sizes. You can use regular wooden pencils or even opt for colored pencils to add even more visual interest to your art piece. Be sure to sharpen the pencils before you begin, as this will enhance their appearance and make them stand out.
Next, choose a design or pattern that you want to create on your wall. This could be a simple geometric shape, like a square or triangle, or something more complex, like a flower or a starburst. You can sketch out your design on a piece of paper beforehand to guide you during the arrangement process.
Once you have your design in mind, it's time to start arranging the pencils. Begin by measuring and marking the wall where you want your art piece to be. Use a level or a ruler to ensure that your lines are straight and even. This will make the final result look polished and professional.
Now, take your first pencil and apply a small amount of adhesive to the back of it. Press it firmly against the wall, following the guidelines you've marked. Repeat this process with the remaining pencils, fitting them together like puzzle pieces to create your chosen design. You may need to trim some pencils to fit specific sections of your pattern, so make sure you have a sharp knife or a pair of scissors on hand.
Once all the pencils are in place, step back and admire your handiwork. You now have a beautiful piece of wall art made entirely of pencils! This unique and quirky decoration is sure to spark conversation and add a touch of creativity to any space.
To further enhance the appearance of your pencil wall art, consider adding additional elements. For example, you could glue small beads or sequins to the eraser ends of some pencils for a bit of sparkle. Alternatively, you could wrap colored thread around certain sections of the pencils to create a textured effect.
If you want to switch up your pencil wall art later on, it's easy to remove and rearrange the pencils. Simply heat the adhesive with a hairdryer and gently pull the pencils off the wall. Be careful not to damage the paint or wallpaper in the process.
In conclusion, arranging pencils in a decorative pattern to create unique wall art is a fun and creative way to add a personal touch to your space. Whether you choose to create a simple design or something more complex, this DIY project is sure to impress and delight anyone who sees it. So grab your pencils, get creative, and start decorating your walls with this charming and whimsical art form.
Fun-filled Family Activities in Cambridge, MA for Kids
You may want to see also
![]()
Use a pencil as a bookmark to keep your place in a favorite novel
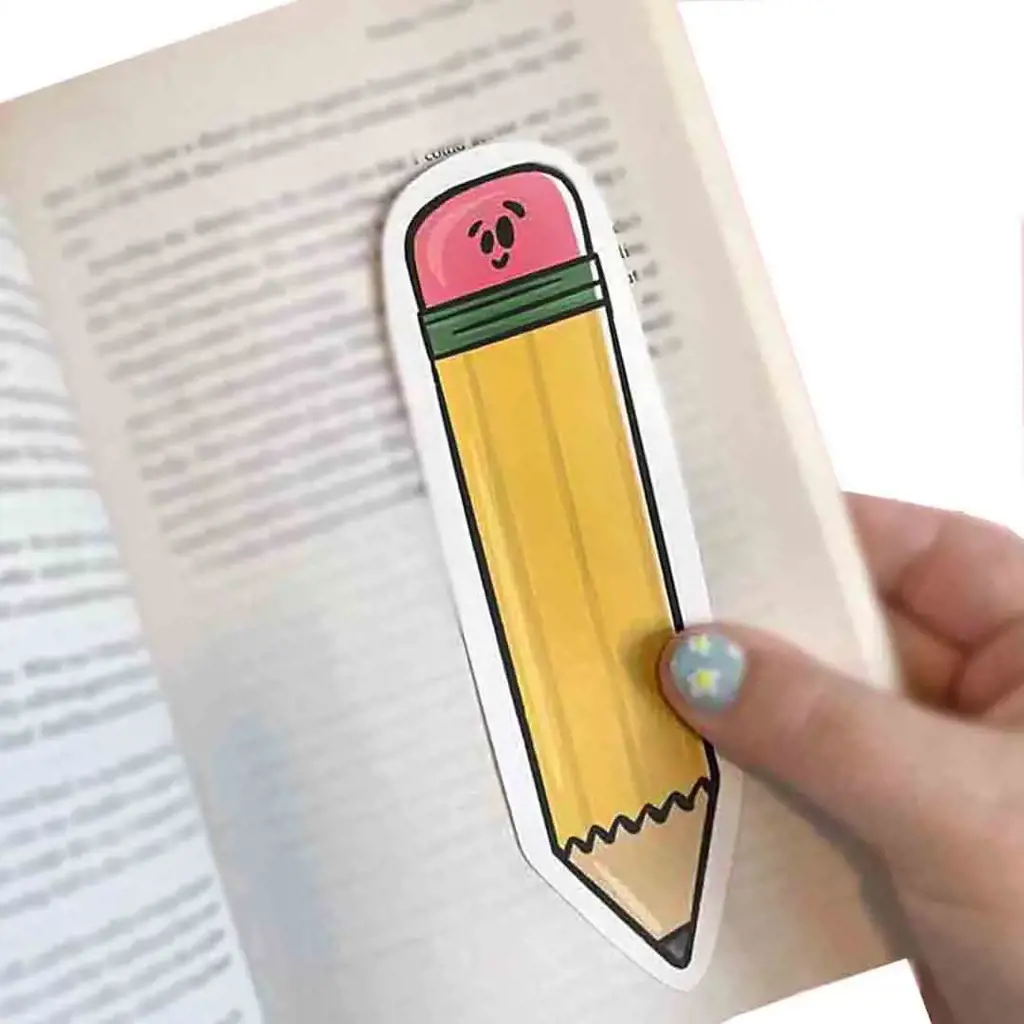
We all know that a pencil is a versatile tool that can be used for many purposes - from writing and drawing to crafting and DIY projects. But did you know that a pencil can also be used as a bookmark to keep your place in a favorite novel? In this article, we will explore this cool and unconventional use of a pencil as a bookmark.
Using a pencil as a bookmark is not only practical but also adds a touch of creativity to your reading experience. With a little bit of imagination, you can turn a simple pencil into a unique and personalized bookmark. Here are a few ideas to get you started:
- Personalize your pencil: One of the simplest ways to transform a pencil into a bookmark is by personalizing it. You can use colored tape or washi tape to wrap around the pencil, creating a decorative design. Alternatively, you can use stickers or paint to add your name or favorite quote to the pencil. This will not only make your bookmark stand out but also add a personal touch to your reading experience.
- Use the eraser: The eraser at the end of the pencil can also be utilized as a bookmark. Just insert the pencil into the desired page of your book, leaving the eraser exposed. The eraser will hold the pencil in place, ensuring that you don't lose your page. This is perfect for those who don't want to modify the pencil itself but still want to use it as a bookmark.
- Create a decorative tassel: If you want to take your pencil bookmark to the next level, you can create a decorative tassel to attach to the pencil. You can use embroidery floss, yarn, or strips of fabric to make the tassel. Simply tie the tassel to the end of the pencil, and you will have a unique and eye-catching bookmark. You can also experiment with different colors and textures to match the theme of your book or your personal style.
- Combine with other materials: Don't limit yourself to using just a pencil as a bookmark. You can combine it with other materials to create a more elaborate bookmark. For example, you can attach a ribbon or a piece of string to the pencil, making it easier to find and grab. You can also add small charms or beads to give your bookmark an extra flair. The possibilities are endless, and you can let your creativity run wild.
In conclusion, using a pencil as a bookmark is a fun and creative way to enhance your reading experience. Whether you choose to personalize the pencil, use the eraser, create a decorative tassel, or combine it with other materials, you can create a unique bookmark that reflects your personality and style. So, next time you reach for a pencil, consider using it to mark your place in a favorite novel.
12 Exciting Adventures to Try in Hebron Ohio
You may want to see also
![]()
Attach a small piece of sandpaper to a pencil to create a unique nail file
Have you ever found yourself in need of a nail file, but couldn't find one anywhere? Well, look no further than your pencil case! With just a few simple steps, you can transform an ordinary pencil into a handy nail file.
To create your pencil nail file, you will need the following materials:
- A pencil - any type of pencil will work, whether it's wooden or mechanical.
- Sandpaper - choose a fine-grit sandpaper for a gentle filing experience.
- Scissors - to cut the sandpaper to the desired size.
Now, let's dive into the steps:
- Measure and cut the sandpaper: Start by measuring the width of your pencil's barrel. Then, cut a small strip of sandpaper that matches this width. The length of the strip should be approximately 1-2 inches long, depending on your preference.
- Prepare the pencil: Take your pencil and remove any eraser or cap attached to the end. You want to have a clear surface to attach the sandpaper.
- Apply adhesive: Apply a small amount of glue or double-sided tape to the back of the sandpaper strip. Make sure to cover the entire strip evenly.
- Attach the sandpaper: Carefully wrap the sandpaper strip around the pencil, starting from the top and working your way down. Press firmly to ensure it sticks securely.
- Trim the excess: Once the sandpaper is wrapped around the pencil, use scissors to trim any excess sandpaper that extends beyond the length of the pencil.
And there you have it - your very own homemade pencil nail file! Now, whenever you find yourself in need of a quick fix for a chipped nail or uneven edges, just reach for your trusty pencil nail file. It's a quick, portable, and convenient solution.
Not only is this DIY pencil nail file practical, but it also adds a touch of uniqueness to your pencil case. Plus, it's a fun and creative way to repurpose an ordinary pencil.
So, the next time you're looking for a cool thing to do with a pencil, give this pencil nail file a try. You never know when it might come in handy!
13 Fun Things to Do in the Texas Panhandle
You may want to see also
![]()
Carve intricate designs into the eraser of a pencil to create personalized stamps
Pencils have always been a staple tool in every artist's arsenal. From doodling and writing to shading and sketching, pencils are versatile tools that can help turn an idea into a work of art. However, there's more to a pencil than just its graphite core. The eraser can also be a canvas for creativity, allowing you to carve intricate designs and create personalized stamps.
Carving intricate designs into the eraser of a pencil is a fun and unique way to showcase your artistic skills. It adds a personal touch to your creations and can be a great way to make your own personalized stamps. Here's how you can get started:
- Choose the right pencil: Not all pencils have erasers that are suitable for carving. Look for pencils with large erasers that have a solid core. Mechanical pencils may not be the best choice for this project as their erasers are usually smaller and more fragile.
- Design your stamp: Before you start carving, decide on the design you want to create. Keep in mind that intricate designs work best for this project. Consider creating patterns, animals, flowers, or any other image that inspires you. You can sketch the design on paper first or draw it directly on the eraser with a pencil.
- Start carving: Use a sharp craft knife or a small carving tool to carefully remove the eraser material around your design. Take your time and be cautious as you work to prevent any injuries. Start by outlining the design and then gradually carve out the details. Remember to keep the carving shallow, as deeper cuts may cause the eraser to break.
- Clean up the edges: Once you finish carving, use a soft brush or a damp cloth to remove any eraser residue or dust from the stamp. This will ensure clean and crisp impressions when you use your stamp.
- Test your stamp: Apply some ink or paint to the carved surface of the eraser and press it onto a piece of paper or cardstock to test the stamp. Adjust any areas that need refinement or touch-ups until you're satisfied with the result.
- Experiment and explore: Don't be afraid to experiment with different designs and techniques. You can create multiple stamps with various patterns and sizes to expand your collection. Play around with different colors and mediums to see how they can enhance your stamped creations.
Carving intricate designs into the eraser of a pencil is a rewarding and enjoyable activity that allows you to showcase your creativity in a unique way. Whether you use your personalized stamps for card making, journaling, or any other paper crafting projects, they are sure to make a statement and add a special touch to your creations. So grab a pencil, sharpen your carving tools, and let your imagination run wild!
12 Must-Do Activities in Valbona for a Memorable Experience
You may want to see also
Frequently asked questions
Yes, there are plenty of cool things you can do with a pencil! One fun activity is creating a pencil sculpture. You can shape the lead and eraser into different forms to create a mini work of art. Another cool thing you can do is learn how to do pencil tricks, such as twirling and spinning the pencil around your fingers. It's a great way to impress your friends and pass the time!
If you want to make your pencil unique, you can try customizing it. One way is to decorate the pencil using washi tape or colorful duct tape. You can also attach decorative charms or eraser toppers to give it a personal touch. Another option is to buy pencils with interesting designs or patterns to make them stand out in your pencil case.
Absolutely! One popular game is the pencil toss, where you try to toss the pencil and land it in a cup or target. You can also play a game of pencil jousting, where you and a friend try to knock each other's pencil off a table using rubber bands. If you're feeling creative, you can invent your own pencil game, combining elements of drawing, writing, and physical challenges.
There are some amazing pencil inventions out there! One cool invention is the mechanical pencil, which allows you to push a button to extend the lead instead of sharpening it. Another innovative pencil is the carpenter pencil, designed specifically for construction work with a flat shape that prevents rolling. Additionally, there are pencil grips that add comfort and ergonomic support, making it easier to write or draw for long periods of time.
Definitely! One popular craft is creating pencil jewelry. You can make earrings, necklaces, and bracelets by attaching small pencil pieces to jewelry findings. Another cool project is pencil weaving, where you weave colored threads through the holes of sharpened pencils to create intricate patterns. Additionally, you can try pencil painting, using the sharpened end of a pencil as a brush to create miniature paintings on small surfaces. There are endless possibilities for cool pencil crafts!


4 Comments
Iestyn Bolton
Julia May
AuthorEdwin Hull
Jorja Cannon