When it comes to military uniforms, they often hold a lot of sentimental value and history for those who have served in the armed forces. But what do you do with them once they're no longer needed for their original purpose? The answer lies in the art of repurposing! With a little creativity, these uniforms can be transformed into something new and beautiful. In this article, we'll explore 12 unique and creative ways to repurpose old military uniforms, from quilts to handbags and everything in between. Get ready to be inspired and give new life to your old military uniforms!
What You'll Learn
- Turn old uniforms into a patriotic quilt
- Use uniform patches to make a unique tote bag
- Create a memory bear stuffed animal from old uniforms
- Make a flag or decorative banner with uniform scraps
- Transform uniforms into a sturdy messenger bag
- Use uniform buttons to create unique jewelry pieces
- Frame uniform pieces and create a one-of-a-kind military shadow box
- Create a hand-sewn throw pillow from uniform material
- Turn your uniform into an apron
- Make a unique Christmas stocking from uniform scraps
- Use uniform material to re-cover an old chair or ottoman
- Create a patriotic wreath from uniform bits and pieces
![]()
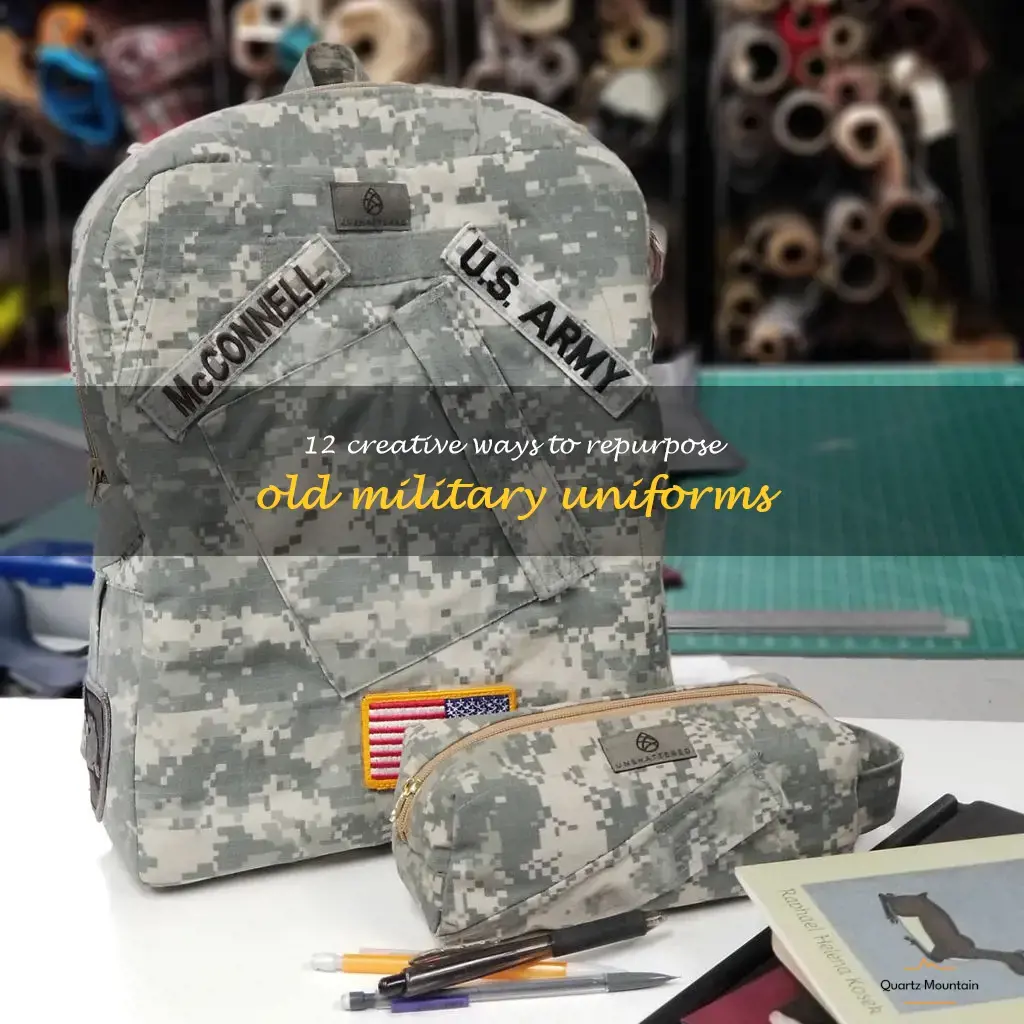
Turn old uniforms into a patriotic quilt
If you have old military uniforms lying around and are uncertain what to do with them, why not consider turning them into a patriotic quilt? Not only will this allow you to keep a piece of history close to you, but it will also make for a unique and heartfelt way to honor those who have served.
Here are some steps to get you started:
- Gather your materials: You will need a collection of old military uniforms, a sewing machine, thread, and batting. Choose uniforms that hold sentimental value or that have unique patches or designs.
- Cut the uniforms: Cut the uniforms into squares or rectangles, ensuring that they are all the same size. If some uniforms have a specific design you would like to highlight, cut those pieces larger than others.
- Arrange the squares: Arrange the squares in a pattern that is aesthetically pleasing to you. Consider mixing up the colors and designs to create a visually interesting quilt top.
- Sew the squares together: Using a sewing machine, sew the squares together row by row. Make sure to press the seams to one side to keep the quilt top flat.
- Add batting: Cut a piece of batting to match the size of your quilt top. Place it underneath the quilt top and pin the three layers together.
- Quilt the layers: Using a sewing machine or by hand, quilt the three layers together. You can create designs that follow the squares or create a unique pattern of your own.
- Add finishing touches: To finish the quilt, trim the edges and add binding using a coordinating fabric.
With these steps, you can transform old military uniforms into a beautiful quilt that will serve as a reminder of the bravery and sacrifice of those who served. Not to mention, it's also a great way to keep warm on those chilly nights!
11 Fun Activities to Add to Your August Charleston Bucket List
You may want to see also
![]()
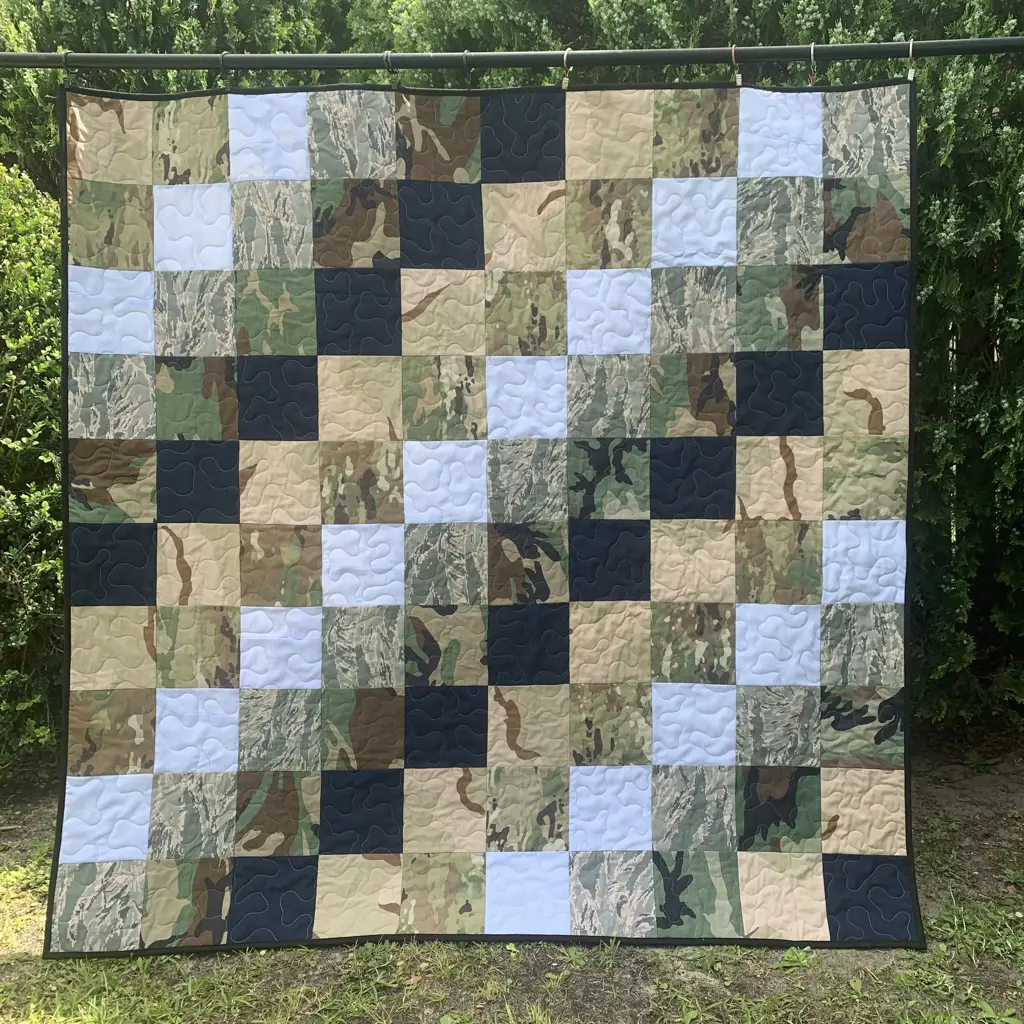
Use uniform patches to make a unique tote bag
If you have old military uniforms lying in your closet, it's time to put them to use! There are many unique and creative ways to reuse military uniforms, patches, and buttons. One such idea is using uniform patches to create a unique tote bag.
Creating a tote bag from old military uniforms is not only environmentally friendly, but it is also a great way to showcase your military pride. Whether you are an ex-serviceman or the spouse of a veteran, this project allows you to display your support and appreciation for the military.
To create a military-inspired tote bag, you will need to gather the following materials:
- Sewing machine
- Thread
- Scissors
- Ruler
- Iron
- Military uniform patches
- Military uniform fabric
- Lining fabric
- Webbing for straps
Step-by-Step Instructions:
- Begin by selecting a military uniform that you no longer wear. Choose a uniform that is still in decent condition and has an array of patches and buttons that you can use for the tote bag. Keep in mind that you may need to remove some of the patches from the uniform before starting.
- Cut out pieces of the uniform fabric as per your preference. You can choose the size of the tote bag according to your own specifications, but a standard tote bag should be around 14 inches by 16 inches.
- Arrange the patches and buttons on the military uniform fabric to create a unique design for your tote bag.
- Use a sewing machine to attach the patches, buttons, and any other decorations. You can do this by sewing over the edges of the patches or by zigzagging around them.
- Cut a piece of lining fabric to match your military uniform fabric, making sure they are of the same size. Place them face to face and take them to the sewing machine, sewing the sides and the bottom of the fabric pieces together. Once done, set your lining aside.
- Cut two pieces of webbing, making sure they are long enough to function as tote bag straps. Sew them to the top of the military fabric piece, ensuring that the straps are long enough to carry the bag comfortably.
- Now, place the military fabric piece and the lining piece, right sides facing each other. Stitch along the top edge of the tote bag.
- Turn the bag inside out, making sure to push the corners all the way out. Press the top edges with an iron. Your military-inspired tote bag is now ready to use!
By using your old military uniform patches and buttons in a unique tote bag design, you can create something special that will allow you to carry your love for the military wherever you go. Give it a try and show off your patriotism in style!
11 Exciting Things to Do Near O'Hare Airport
You may want to see also
![]()
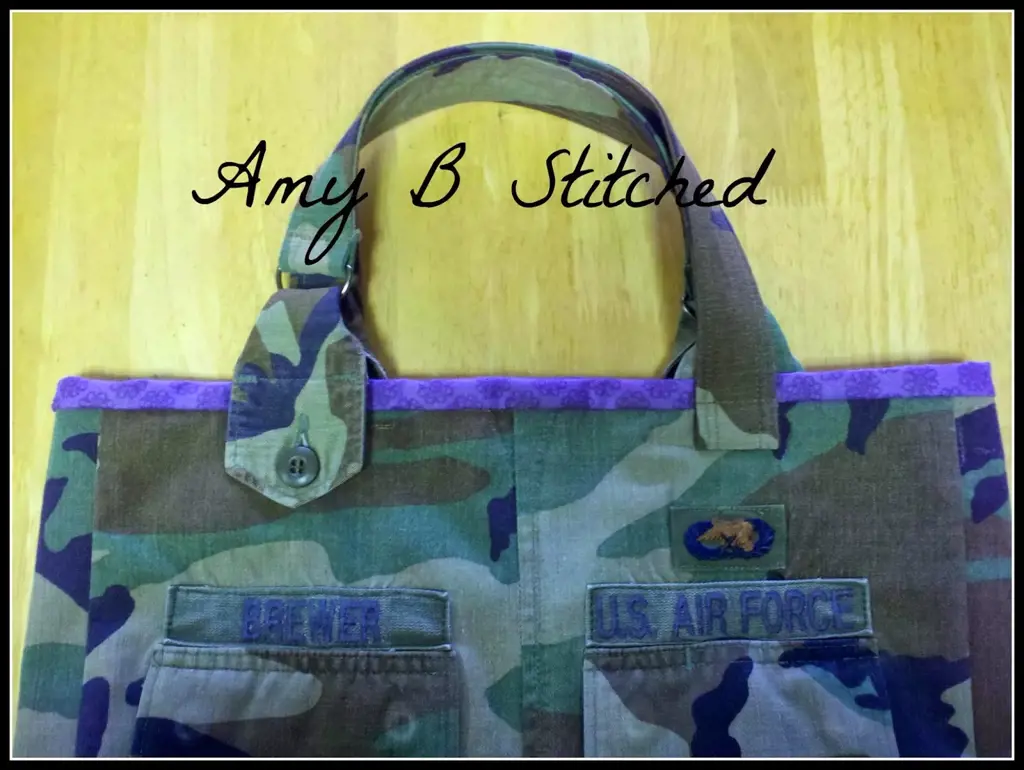
Create a memory bear stuffed animal from old uniforms
Do you have old military uniforms from a loved one that you don't know what to do with? Instead of keeping them in a drawer or throwing them away, consider creating a memory bear stuffed animal!
Memory bears are a great way to repurpose old clothing and create a sentimental keepsake. With a little bit of sewing knowledge and some creativity, you can turn those old uniforms into a unique and special stuffed animal that will bring comfort and memories for years to come.
Here are some simple steps to get started on your memory bear creation:
Step 1: Gather materials
Aside from the old military uniforms, you will need some basic sewing supplies such as scissors, sewing machine (or needle and thread), stuffing material, buttons, and safety eyes if desired.
Step 2: Choose your pattern
There are a variety of memory bear patterns available online, or you can create your own. Choose a pattern that suits the amount of fabric you have available, the style you prefer, and the personality of the person you are creating the bear for.
Step 3: Cut out the fabric
Using your chosen pattern, cut out the fabric pieces from the old uniforms. Be sure to save any patches, insignia, or buttons that will give the bear a personalized touch.
Step 4: Sew the pieces
Using a sewing machine or needle and thread, sew the pieces together following the pattern instructions. Don't forget to leave an opening to stuff the bear with filling.
Step 5: Add details
Once the basic shape is complete, add details such as eyes, nose, mouth, and any other personal touches you would like such as a name or date.
Step 6: Stuff the bear
Carefully stuff the bear with your chosen filling, making sure it is evenly distributed and firm to the touch.
Step 7: Sew up the opening
Using your sewing machine or needle and thread, sew up the opening once the bear is fully stuffed.
With these simple steps, you can turn old military uniforms into a special and sentimental memory bear stuffed animal. It's a great way to preserve the memory of a loved one while also creating something useful and beautiful.
11 Fun-Filled Activities at Ginnie Springs You Can't Miss
You may want to see also
![]()
Make a flag or decorative banner with uniform scraps
If you have old military uniforms lying around your attic, closets, or storage area, you may be wondering what to do with them. Sure, you can donate them to charity or use them as costumes for Halloween parties, but did you know that you can also turn them into something cool and meaningful? One creative idea is to make a flag or decorative banner with uniform scraps.
Materials Needed
To make a flag or banner with old military uniforms, you will need the following materials:
- Several military uniform pieces in different colors and patterns (camouflage, khaki, olive, navy, etc.)
- Scissors
- Ruler or measuring tape
- Sewing machine or needle and thread
- Iron and ironing board
- Fabric glue (optional)
Steps to Make a Flag or Decorative Banner
Follow these steps to create a unique and patriotic decoration out of uniform scraps:
- Cut uniform scraps into rectangular or triangular shapes using scissors and ruler. You can choose to make them all the same size or vary them for a more eclectic look. Try to include different colors and patterns to add interest and texture.
- Arrange the uniform pieces into a pattern that you like, such as a diagonal stripe, a checkerboard, or a star shape. You can lay them on the floor or a large table to get a better sense of how they will look together.
- Use a sewing machine or needle and thread to sew the uniform pieces together, leaving a small margin (about 1/4 inch) between them. You can use a straight or zigzag stitch, depending on the look you want. Make sure to backstitch at the beginning and end of each seam to secure the thread. If you don't have a sewing machine or aren't comfortable with sewing, you can also use fabric glue to attach the pieces together.
- Iron the seams flat using a hot iron and steam. This will make the flag or banner look more professional and neat.
- Attach a ribbon or string to the top of the flag or banner using a needle and thread, or fabric glue. This will allow you to hang it on a wall, door, or window. You can also add tassels, beads, or other decorations to the bottom edge if you like.
- Display your new flag or decorative banner with pride! You can use it to decorate your home, office, or special event. It makes a great conversation piece and shows your appreciation for the men and women who have served in the military.
Making a flag or decorative banner with old military uniforms is a unique and creative way to honor our veterans and repurpose unused clothing. You can customize it to your liking and showcase your patriotism in a meaningful way. So, gather your uniform scraps and start creating a piece of art that you can be proud of.
13 Fun Things to Do in Long Branch, NJ
You may want to see also
![]()
Transform uniforms into a sturdy messenger bag

Are you wondering what to do with that old military uniform that's been sitting in your closet for years? Why not transform it into a stylish and sturdy messenger bag!
Not only is this a practical and eco-friendly way to repurpose your old uniform, but it also serves as a unique and sentimental item that you can carry with you wherever you go.
To get started, gather your materials. You will need your old military uniform, a pair of scissors, a sewing machine, thread, lining fabric, and any additional accessories such as zippers, buttons, or snaps.
Step 1: Cut the Uniform
Start by cutting the uniform into various pieces depending on the size of the bag you want to create. Cut the uniform down the middle to create two main pieces - one for the front and one for the back of the bag. Cut additional pieces for the bottom of the bag and the flap that will cover the top.
Step 2: Create the Lining
Using the lining fabric, cut additional pieces that correspond to each piece of the uniform. These will serve as the lining for the inside of the bag. You can choose a fabric that complements the colors of the uniform or something that contrasts for a more unique look.
Step 3: Sew the Pieces Together
Using a sewing machine, stitch the individual pieces of the uniform and the lining fabric together, leaving enough room for the seams. Be sure to sew the bottom pieces together first, then attach them to the front and back pieces of the bag. Finally, sew the flap and attach it to the top of the bag.
Step 4: Add Accessories
To give your bag a finished look, add any additional accessories such as zippers, buttons, or snaps that you desire. This is also a great opportunity to add sentimental or personal touches, such as patches or pins from your time in the military.
And there you have it - a unique and sturdy messenger bag made from your old military uniform. Not only will it carry your daily essentials, but it will also serve as a reminder of your service and sacrifice for our country. So why not give it a go and create something meaningful and practical out of your old military uniform today!
14 Fabulous Things to Do in Red River, New Mexico
You may want to see also
![]()
Use uniform buttons to create unique jewelry pieces
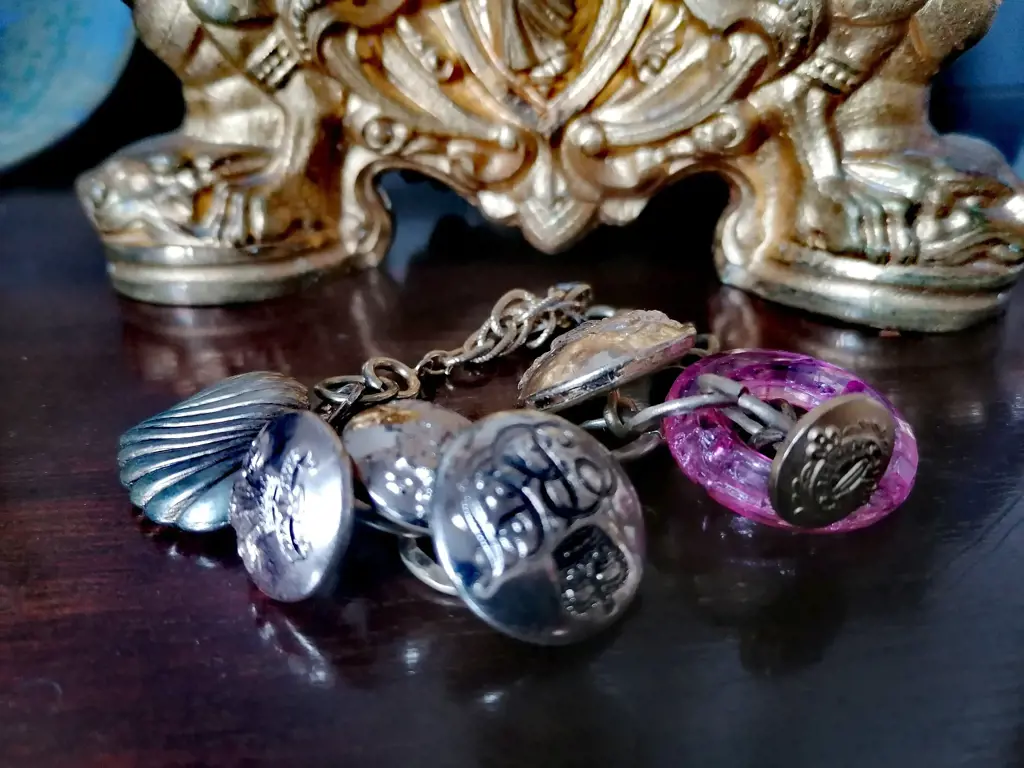
If you have old military uniforms lying around, there are plenty of ways to repurpose them into something cool and stylish. One idea is to use uniform buttons to create unique jewelry pieces, which are perfect for displaying your patriotism or preserving the memory of a loved one who served in the armed forces.
Here are some steps that you can follow to make your own jewelry using military uniform buttons:
- Gather your supplies. You'll need a selection of old uniform buttons, jewelry findings (such as jump rings, ear wires, and chain), pliers, a drill, and a drill bit.
- Choose your buttons. You can use buttons from any type of military uniform, such as army, navy, air force, or marines. Look for buttons that have interesting designs, colors, or textures that will make your jewelry stand out.
- Drill a hole in each button. Use a drill and a small drill bit to make a hole in the center of each button. Make sure the hole is large enough to fit the jewelry finding that you'll be using.
- Attach the jewelry findings. Use pliers to attach jump rings, ear wires, or chain to each button, depending on what type of jewelry you'd like to create.
- Experiment with different designs. You can create a single pendant necklace using one button, or mix and match buttons to make a statement necklace or bracelet. You can also try painting or decorating the buttons to add extra flair.
- Wear and enjoy! Your unique new jewelry pieces are now ready to wear and show off to all your friends. They make great conversation starters and are a wonderful way to honor the military service of yourself or a loved one.
Overall, using uniform buttons to create unique jewelry pieces is an easy and fun way to repurpose old military uniforms. You'll love the way your new jewelry looks, and it's a great way to show your patriotism or honor those who have served in the armed forces.
12 Must-Try Nighttime Activities in Augusta, GA
You may want to see also
![]()
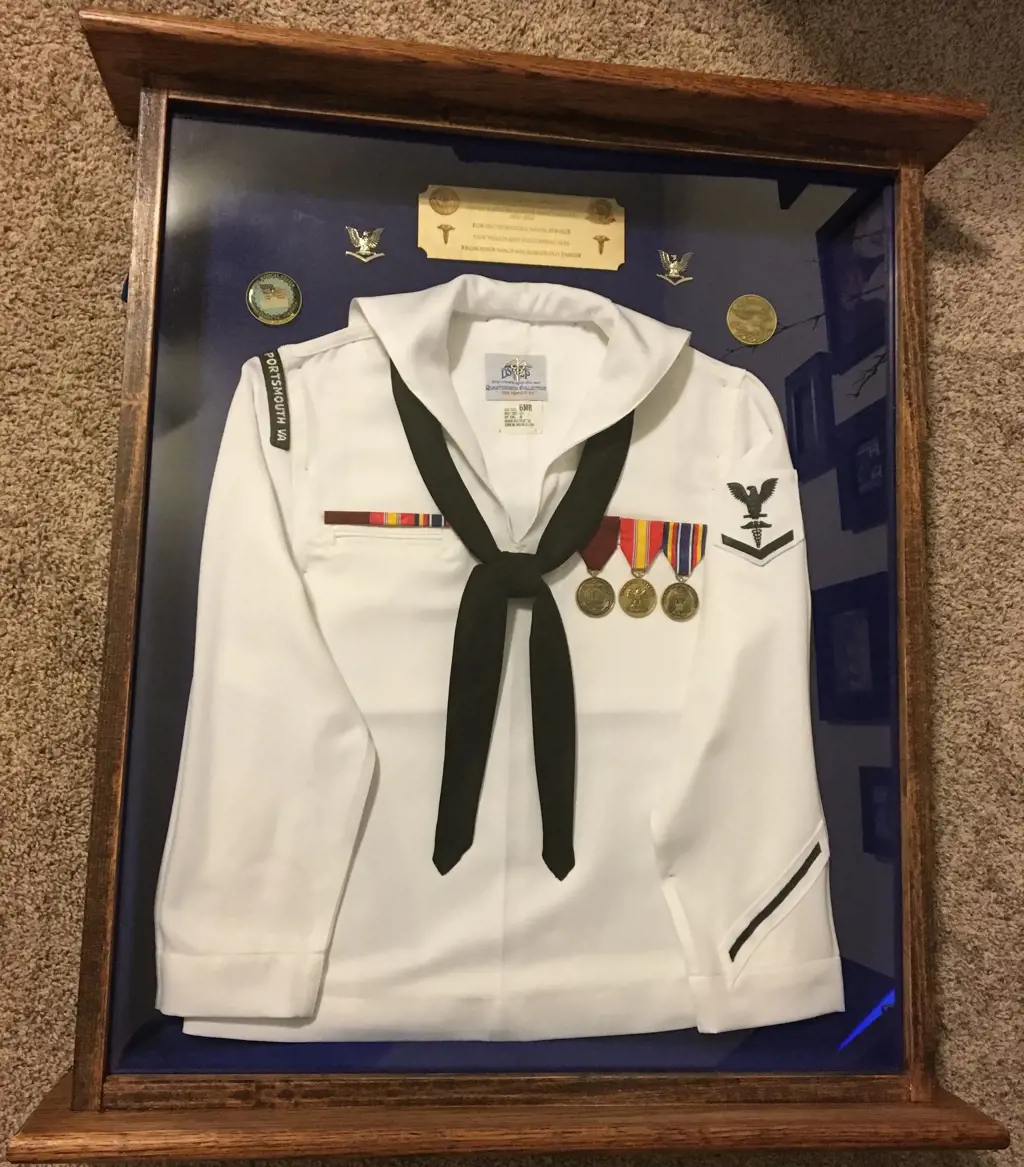
Frame uniform pieces and create a one-of-a-kind military shadow box
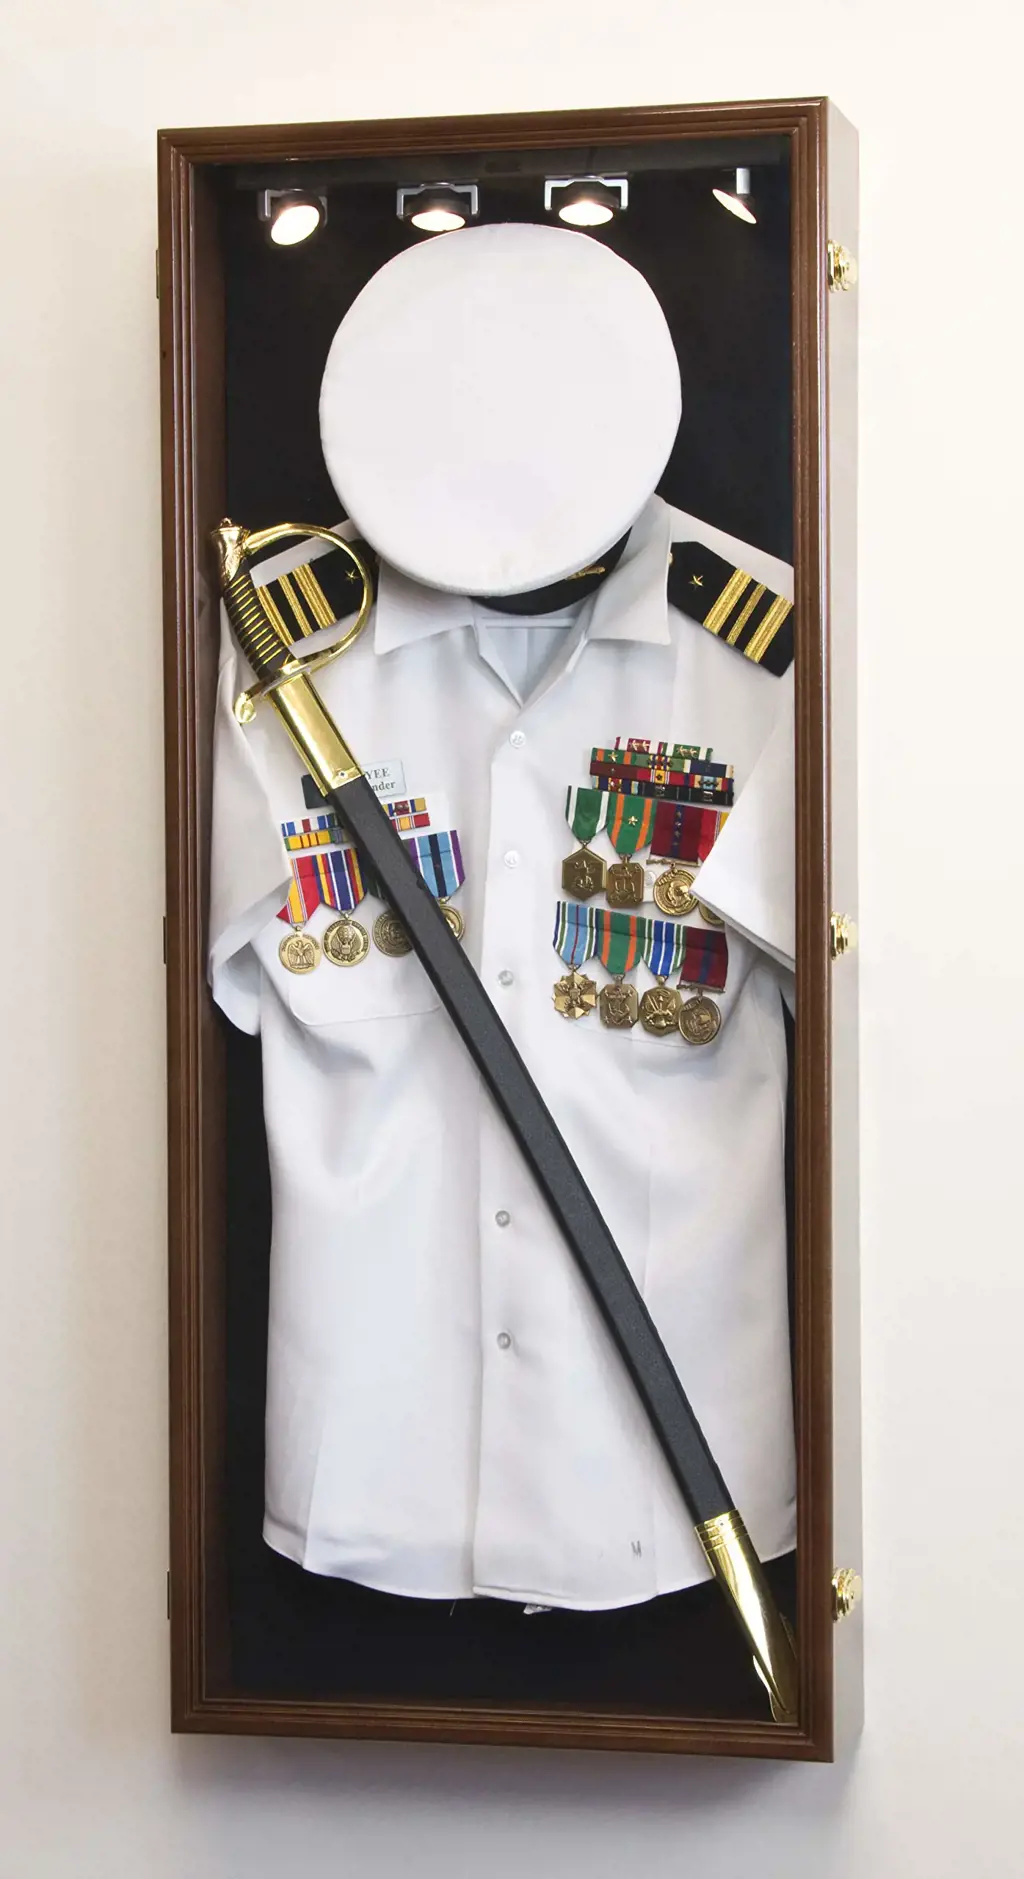
If you come across old military uniforms in your attic or inherited from a family member, you might be wondering what to do with them. Some people choose to donate them to organizations or museums, but others prefer to keep them as keepsakes or to repurpose them into something new. One creative option is to create a one-of-a-kind military shadow box.
A military shadow box is a case that displays military memorabilia such as medals, badges, ribbons, and uniform pieces. Crafting a shadow box containing pieces of an old military uniform can be an excellent way to honor and preserve a cherished veteran's memory. Here is how to create your own military shadow box:
- Gather Materials: You'll need a picture frame with a clear glass front, a piece of mat board, a foam board, and glue or tape. The frame size will depend on the size of the uniform pieces you want to display.
- Choose the Uniform Pieces: Decide which pieces of the uniform you want to include in the shadow box. Consider medals, patches, badges, ribbons, hats, and boots. Select the pieces that have the most personal significance, or those that best represent the veteran's service.
- Cut the Mat and Foam Boards: Use a mat cutter to cut the mat board to fit the size of the frame. Cut the foam board to the same size as the mat board.
- Construct the Display: Use glue or tape to attach the uniform pieces to the foam board. Arrange them in a way that is aesthetically pleasing and honors the veteran's service. Cut two strips of foam board to prop up the uniform pieces within the frame.
- Put It Together: Place the foam board with the uniform pieces onto the mat board and secure it in place. Then, place the entire display into the picture frame and secure the back of the frame.
An alternative to framing and displaying the uniform is to create a keepsake quilt, fashion a personalized tote bag from the uniform or use the fabric for a manufactured item like wallets or purses.
In conclusion, creating a military shadow box is a meaningful and creative way to honor the service of a veteran. It can breathe new life into old uniforms, and preserve a piece of military history for generations to come. So, gather your materials and get started. Show off your loved one's military service today.
11 Fun Things to Do in Skyrim When You're Bored
You may want to see also
![]()
Create a hand-sewn throw pillow from uniform material
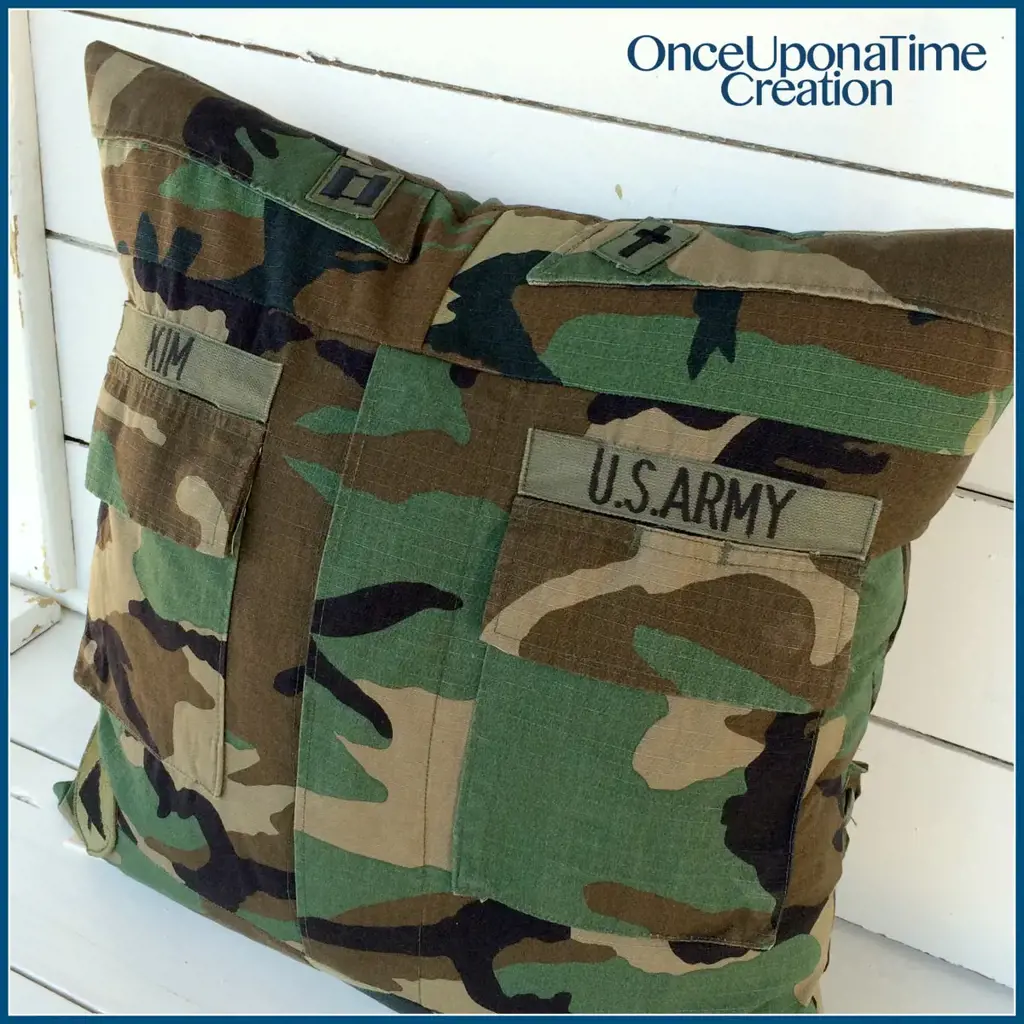
If you have some old military uniforms lying around, you might be wondering what to do with them. Instead of letting them collect dust in the back of your closet, why not repurpose the material into something useful and unique? One great idea is to create a hand-sewn throw pillow.
First, gather your materials. You'll need a sewing machine, thread, scissors, a pillow form, and of course, your old uniform(s). Start by cutting out two pieces of fabric that are the same size as your pillow form. You can either use one uniform for both sides or mix and match different pieces for a more eclectic look.
Next, pin the two pieces of fabric together with the right sides facing each other. Sew around three of the four sides, leaving one side open for stuffing. Use a seam allowance of about 1/2 inch. Trim the corners to remove excess fabric and turn your pillow cover right side out.
Now it's time to stuff your pillow form into the cover. Depending on the size of your uniform and pillow form, you may need to adjust the amount of stuffing to get the desired level of firmness. Once the pillow is full, fold the raw edges of the open side inwards and pin them closed. You can either hand-sew the opening shut or use a machine to give it a clean finish.
To add a personal touch to your pillow, consider embellishing it with patches, embroidery, or buttons from the uniform. You could also experiment with different shapes or sizes to create a set of matching pillows. Not only is this a great way to repurpose old clothing, but it's also a meaningful way to honor a loved one's military service.
In conclusion, creating a hand-sewn throw pillow from an old military uniform is a fun and creative way to give new life to otherwise unused material. With a little bit of time and effort, you can transform a piece of history into a cozy and stylish addition to your home decor.
10 Fun Activities to Explore in Contra Costa County
You may want to see also
![]()
Turn your uniform into an apron
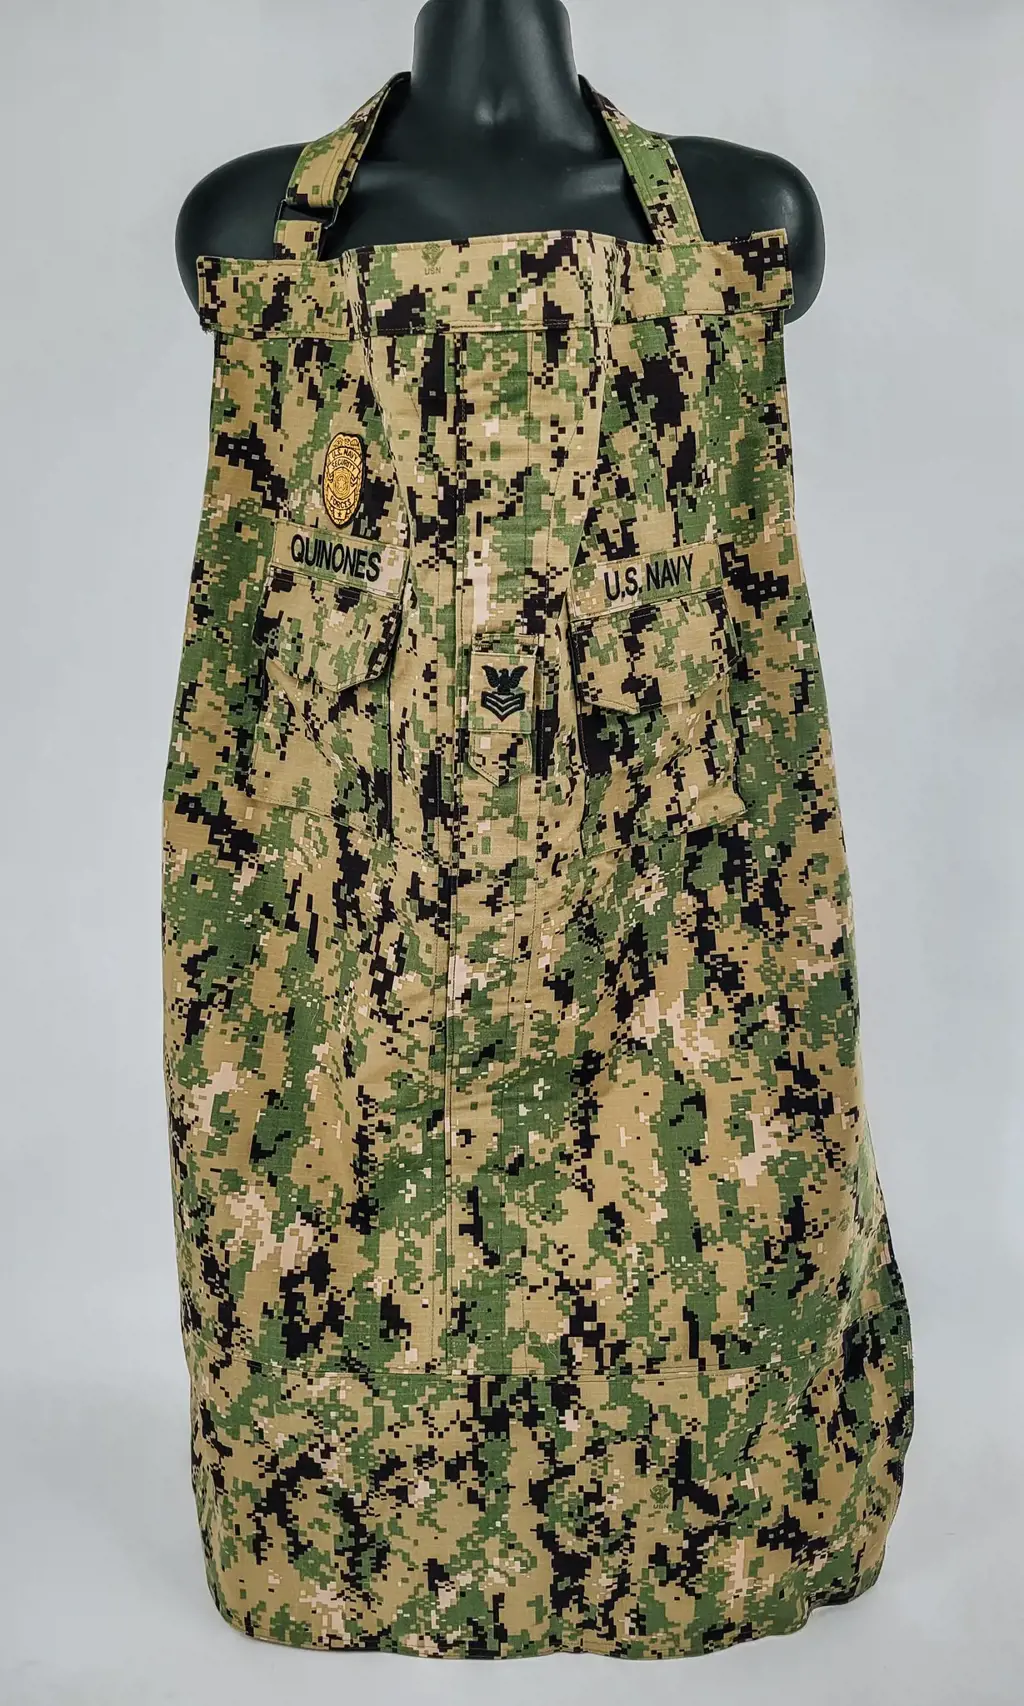
Military uniforms are often associated with duty, remembrance, and sacrifice. These special garments are an essential part of a soldier's life, and their significance lasts beyond their service period. However, after fulfilling their duty, many military personnel's uniforms end up gathering dust in their wardrobes or packed away in boxes. Instead of stashing them away forever, why not reuse them to create something unique and useful? One of the coolest things you can do with your old military uniforms is to turn them into an apron.
Given that military uniforms are made of durable materials, they are perfect for upcycling projects like aprons. Aprons are ideal for a variety of tasks, whether you are cooking, doing some DIY projects, or working on your car. Reusing your military uniform to make an apron honors its continued service in your life by re-purposing it. Here are some steps to create an apron.
Find the required supplies
To make an apron from your old military uniform, you need scissors, a measuring tape, a sewing machine, threads, and some fabric paints. You might want to add additional fabric for lining or other purposes.
Cut and prepare the uniform
Take your old military uniform and remove any unwanted patches, tapes, or buttons. If you want to add some design, use fabric paints to create a whimsical or inspiring border or paint the entire uniform. You can position the patches on the front of the apron if required to enhance its appearance. Cut the uniform according to the right size you are looking for the apron. Focus on the details, such as leaving openings for the neck and armholes. You can decide whether you want a bib style or a skirt style using the uniform fabric.
Sewing the apron
Place the front and back pieces right-side together and sew around the entire apron leaving the neck and armholes unsewn. Turn it right side out, and then neatly fold and stitch the edges of the neck and armholes to give them a clean finish. You can then attach the ties or belt to the sides of the apron at your waist circumference measurements and stitch it along the sides of the apron.
Final touches
After completing the sewing, you can iron the apron to refine the finishing. You can also add other decorative elements like pockets using extra fabric, buttons, or attaching additional patches on the apron to give it a personalized touch.
In conclusion, an apron made out of your old military uniform is one of the coolest things you can do with it. It pays homage to the uniform's history while giving your life a unique and durable product. An apron is an ideal gift for friends, family members, veterans, or anyone who loves American icons, and you can customize it to suit their personality. So go ahead, use your creative skills, and turn your old military uniform into an apron and enjoy the continued use of a cherished commodity.
12 Must-Do Activities in Centralia, IL
You may want to see also
![]()
Make a unique Christmas stocking from uniform scraps

As the holiday season approaches, it's time to start thinking about unique and special ways to celebrate with family and friends. If you have old military uniforms that are just gathering dust, why not turn them into something special that you can use every year? A unique and personal Christmas stocking is a great way to repurpose an old uniform and create something that is both meaningful and useful.
To make a Christmas stocking from old military uniforms, you'll need a few basic supplies and some sewing skills. Here's a step-by-step guide to help you get started:
- Gather your materials. In addition to a set of old military uniforms, you'll need some white cotton or canvas fabric (for the lining), some red or green fabric (for the cuff), a piece of ribbon or twill tape (for hanging the stocking), and some basic sewing supplies such as scissors, thread, and a sewing machine.
- Cut out the stocking pieces. Use a stocking pattern (either purchased or handmade) to cut out two pieces of fabric from the uniform material and two pieces of lining fabric. Cut one of the uniform pieces in half horizontally, so you have a shorter piece and a longer piece. These will form the cuff of the stocking.
- Sew the stocking together. With right sides facing, sew the two uniform pieces together along the sides and bottom, leaving the top (where the cuff will go) open. Repeat with the lining pieces. Trim any excess fabric and turn the uniform stocking right side out.
- Assemble the cuff. With right sides facing, sew the two pieces of the cuff together along one short end and both long sides. Turn right side out and fold in half so that the short end is on top. Pin the cuff to the top of the stocking (with raw edges aligned) and sew in place.
- Add the ribbon hanger. Cut a 6-inch length of ribbon or twill tape and fold it in half. Tuck the fold into the seam where the cuff and stocking meet and stitch in place.
- Finish the lining. With right sides facing, sew the two lining pieces together along the sides and bottom, leaving a 3-inch opening along one side. Turn the lining right side out and tuck it inside the uniform stocking, with wrong sides together. Fold the raw edges of the opening in and stitch it closed.
And there you have it - a beautiful and unique Christmas stocking made from old military uniforms! Not only is this a great way to repurpose old clothing, but it's also a wonderful tribute to the service and sacrifices made by our military men and women. Hang it by the fireplace and enjoy the holiday season with a special touch of military pride.
11 Fun Things to Do in Grayling, MI
You may want to see also
![]()
Use uniform material to re-cover an old chair or ottoman

When it comes to military uniforms, they hold a lot of sentimental value. Whether they belonged to a family member, friend, or even yourself, parting ways with them can be tough. However, there are several creative ways you can repurpose old military uniforms, and one of them is by re-covering a chair or ottoman. This not only gives new life to the uniform, but it also creates a unique piece of furniture that reflects your personal style and history.
But first, before you start cutting into your uniform, there are a few things to consider. Depending on the age and condition of the garment, some compromises may need to be made to ensure it can withstand being re-purposed. For example, if parts of the uniform are too damaged to be used, you may have to cut out smaller sections to incorporate into the design. Additionally, not every part of the uniform may translate well to furniture, such as sharp pins or buttons. As with any re-purposing project, it's important to think through the design and plan accordingly.
Once you have evaluated your uniform and determine how much of it can be used, it's time to get creative. One option is to utilize the patterns and colors of the uniform to create modern and unique shapes on the chair or ottoman. For instance, you could cut out several circles from the uniform and use them to re-cover a round ottoman or use a stripe pattern for the back of a dining chair. The options are endless, and a little imagination can go a long way.
Another approach is to highlight the more memorable parts of the uniform. For example, you can use patches, medals, or other decorations to add character and texture to your furniture. You can also mix and match uniforms from different branches of service to create an eclectic and individualized look. Just remember to keep the overall design cohesive by sticking to a uniform color palette or theme.
In terms of the actual re-covering process, you'll need to strip the old fabric and padding from the chair or ottoman. This can be time-consuming and requires some basic upholstery skills, but there are plenty of online tutorials and books that can guide you through the process. Once the frame is exposed, you can begin to cover it with the uniform material of your choice using staples or tacks.
Finally, to complete the look of your new furniture piece, you can add complementary accents such as piping or decorative trim. You can use civilian decorative pieces or military-themed accents, such as knots or cords, to add a unique touch to your new piece. This will also help to tie in the history and tradition of the military uniform with the modern design of your furniture.
In conclusion, re-covering old furniture with military uniforms is a great way to incorporate history and personal significance into your home decor. By using the colors, patterns, and details of the uniform, you can create a furniture piece that is modern and unique, yet still honors the legacy of the garment. So, if you're looking for a way to preserve and utilize old military uniforms, consider this creative and meaningful option.
13 Fun Things to Do in Spearfish, South Dakota
You may want to see also
![]()
Create a patriotic wreath from uniform bits and pieces
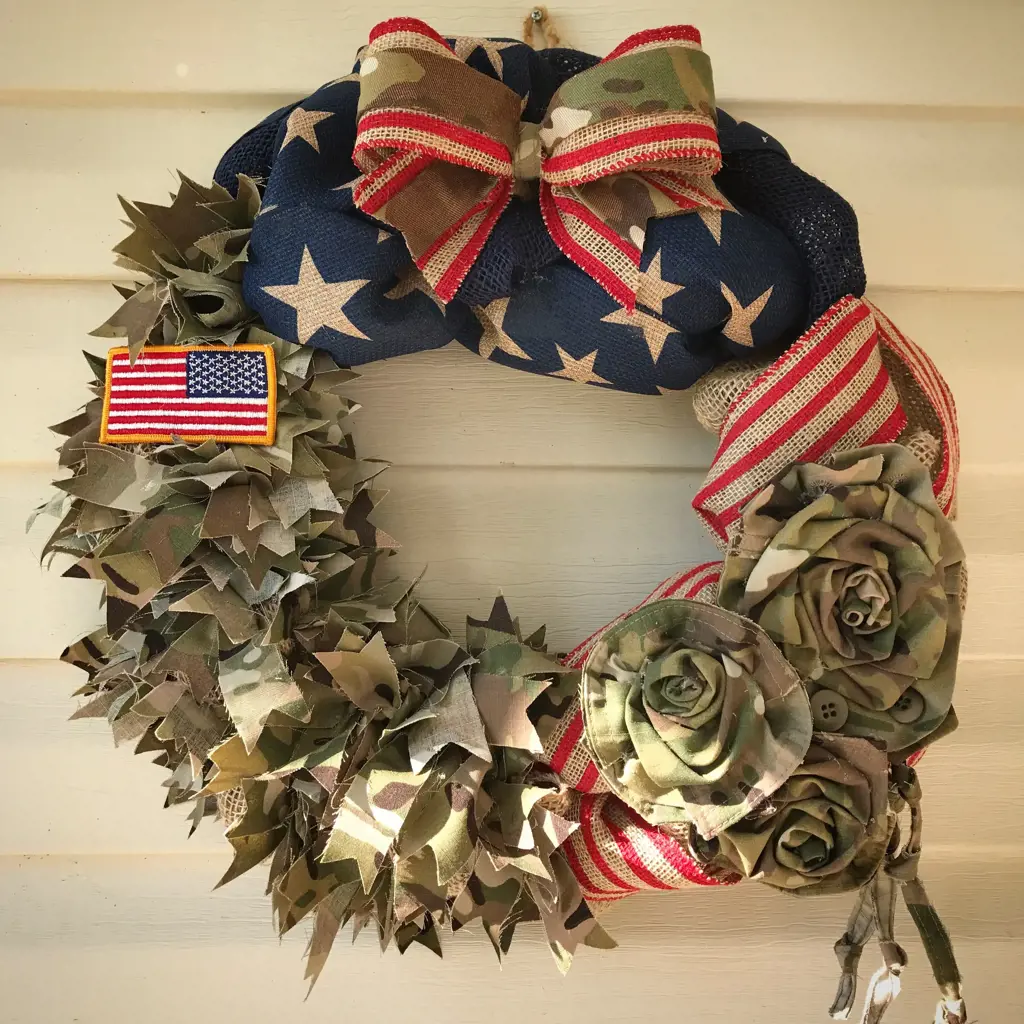
Military uniforms carry a sense of nostalgia and honor for those who have served our country. However, when we no longer need them, we are often unsure of what to do with them. One creative solution is to turn old military uniforms into a patriotic wreath.
To create a wreath, you will need to gather a few supplies. These will include scissors, hot glue, a wire wreath frame, some twine or ribbon, and of course, parts of the uniform. You can choose to dismantle the uniform or use it as it is, depending on the design you want to achieve.
First, take the wire wreath frame and wrap it with a twine or ribbon. This will act as the base for your wreath. Next, cut out any significant uniform pieces you want to use. This can be anything from the buttons, patches to ribbons. You can also use the uniform's fabric to create a unique texture for your wreath.
Using hot glue, start attaching the uniform pieces to the base. You can choose to alternate them or create symmetrical patterns. Create a focal point or centerpiece for your wreath by attaching a larger piece, such as a medal or hat.
As you add elements, take a step back to make sure you like the arrangement. You can keep it simple with a few pieces or go all out with a full patriotic display. The choice is yours!
Once you have completed the design, you can add a final touch by attaching a loop on the back for hanging. This can be made with a sturdy ribbon or piece of twine.
In conclusion, creating a patriotic wreath from old military uniforms is a great way to honor those who serve our country while creating a sentimental decoration for your home. It is also an eco-friendly way to repurpose old uniforms and give them a new life. Go ahead, get creative, and have fun!
12 Fun Things to Do in Elgin, IL
You may want to see also
Frequently asked questions
There are a variety of creative ways to repurpose old military uniforms, such as creating a quilt or blanket, turning the uniform into a bag or purse, or using the fabric to make a statement piece of clothing.
Absolutely! There are many ways to use the unique patterns and colors of military uniforms in fashion. Some people have created unique skirts, blouses, or even prom dresses out of old military gear.
Displaying old military uniforms can be a great way to honor your military service or that of a loved one. Consider framing the uniform, or using it to create a shadow box display that includes photos and other memorabilia that tell the story of your service.


5 Comments
Saarah Chapman
Karisa Garcia
AuthorCassandra Branch
Josephine Wang
Paolo Barresi
Author