In a world inundated with digital images, printed photographs have become a rarity. But these tangible memories have a charm of their own, and can be used in creative ways beyond just being stuck in an album. From home decor to personalized gifts, the possibilities are endless. In this article, we’ll showcase 14 innovative ways to use printed photographs that go beyond the usual. So, dust off your photo albums and get ready to be inspired!
| Activity | Description |
|---|---|
| Scrapbooking | Create unique and personalized scrapbooks by arranging and decorating printed pictures on pages. |
| Wall Art | Use printed pictures as wall decor by framing or hanging them on a gallery wall. |
| Photo Collages | Create stunning photo collages by combining multiple printed pictures into one image. |
| DIY Photo Gifts | Personalize and create thoughtful gifts using printed pictures, such as photo albums, mugs, or phone cases. |
| Memory Jar | Collect printed pictures and keep them in a jar as a way to reflect on special memories. |
| Vision Board | Print pictures that represent your goals and dreams and create a vision board to inspire and motivate yourself. |
| Photo Bingo | Print out multiple pictures and play a game of photo bingo with friends or family. |
| Travel Journal | Document your travels by printing pictures and using them in a travel journal. |
| Greeting Cards | Create unique and personalized greeting cards by using printed pictures and adding captions or messages. |
What You'll Learn
- DIY Photo Wall, at home
- Personalized Photo Magnets, at home
- Photo Coasters, at home
- Customized Phone Cases, at home
- Mod Podge Photo Blocks, at home
- Travel Scrapbook, on vacation
- Memory Jar, at home
- Photo Collage Lampshade, at home
- Photo Clipboard, at office
- Decorative Photo Globe, at home or office
- Personalized Photo Bookmarks, at home
- Photo Advent Calendar, at home
- Photo Wall Clock, at home
- Unique Photo Gift Wrapping, for special occasions
![]()
DIY Photo Wall, at home
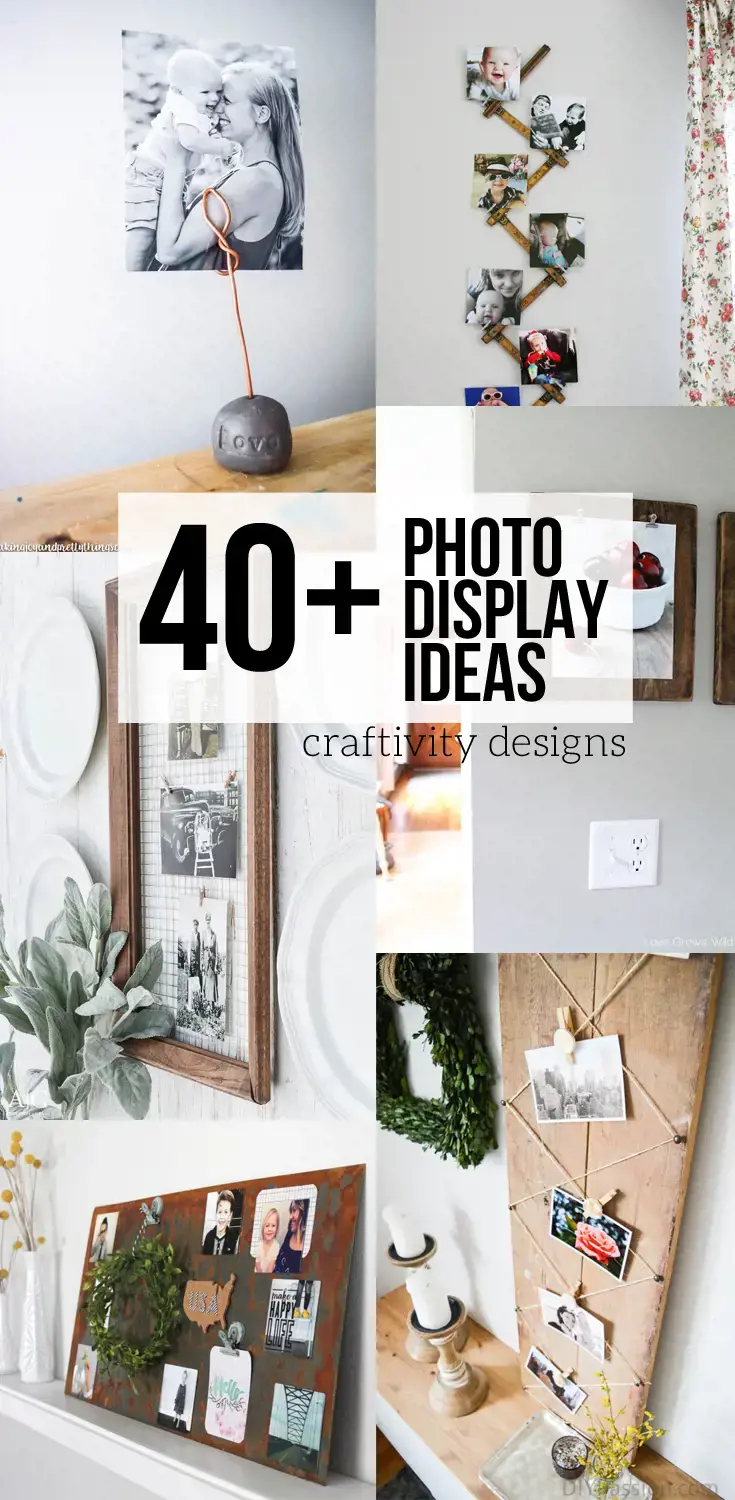
In the digital age, photos have become more disposable than ever before. But despite this, there's still something special about printed photos. Perhaps it's the physicality of them, or the way they immortalize a moment that would otherwise be forgotten. So if you're looking for a way to display your printed photos at home, why not try creating a DIY photo wall? Here's how.
Materials you'll need:
- Printed photos (of course!)
- Tape or adhesive
- Scissors
- String or twine
- Clothespins or clips
- Optional: decorative items like tassels or glitter
Step 1: Choose a Space to Create Your Photo Wall
The first step in creating a DIY photo wall is to decide where you want it to go. Consider an empty wall in your bedroom, living room, or office. You may want to choose a space that receives plenty of natural light, so your photos can shine.
Step 2: Choose Your Theme
In order to create a cohesive photo wall, you should choose a theme. This could be a collection of photos from a single trip or event, or it could be a collection of photographs of all shapes and sizes, bound together by a colour scheme or aesthetic.
Step 3: Cut Out Your Photos
Take your printed photos and cut them out into fun shapes, such as circles or triangles, or leave them as they are. You might also want to consider printing them in black and white to give them a more classic or vintage feel.
Step 4: Hang the String or Twine
Using tape or adhesive, secure a piece of string or twine to the top of your wall. You may want to use a level to make sure it's straight.
Step 5: Add Clips and Glitter
Using clothespins or clips, hang your cut-out photos from the string or twine. You can also add some decorative touches, such as tassels or glitter, if you'd like to add a little extra flair.
Step 6: Keep Adding to Your Collection
Your DIY photo wall doesn't have to be a stagnant piece of decor. As you print more photos, or collect new memories, continue to add to your display.
Creating a DIY photo wall is a fun and easy way to bring some life to an empty space in your home. Whether you decide to create a themed display or a hodgepodge of your favourite snapshots, your photo wall will be a personal and cherished piece of home decor.
10 Must-Do Activities in Budva: Exploring the Charm of Montenegro
You may want to see also
![]()
Personalized Photo Magnets, at home
Are you tired of your pictures just sitting on your phone or computer? Want a unique way to display those special memories? Look no further than personalized photo magnets!
With just a few supplies, you can easily create your own custom magnets at home. Here's what you'll need:
- Printed pictures (either on photo paper or regular paper will work)
- Self-adhesive magnetic tape
- Scissors
Step 1: Cut out your pictures into the desired shape and size.
Step 2: Remove the adhesive backing from the magnetic tape and attach it to the back of your picture.
Step 3: Repeat with all of your pictures.
And voila! You now have your very own personalized photo magnets ready to display on your fridge or any magnetic surface.
Not only is this a fun and creative way to showcase your favorite photos, but it also makes for a great gift idea. Personalized photo magnets add a personal touch to any household and are perfect for the upcoming holiday season.
So, don't let your pictures go to waste. Get creative and make your own personalized photo magnets today!
12 Fun Labor Day Activities to Try in Nashville
You may want to see also
![]()
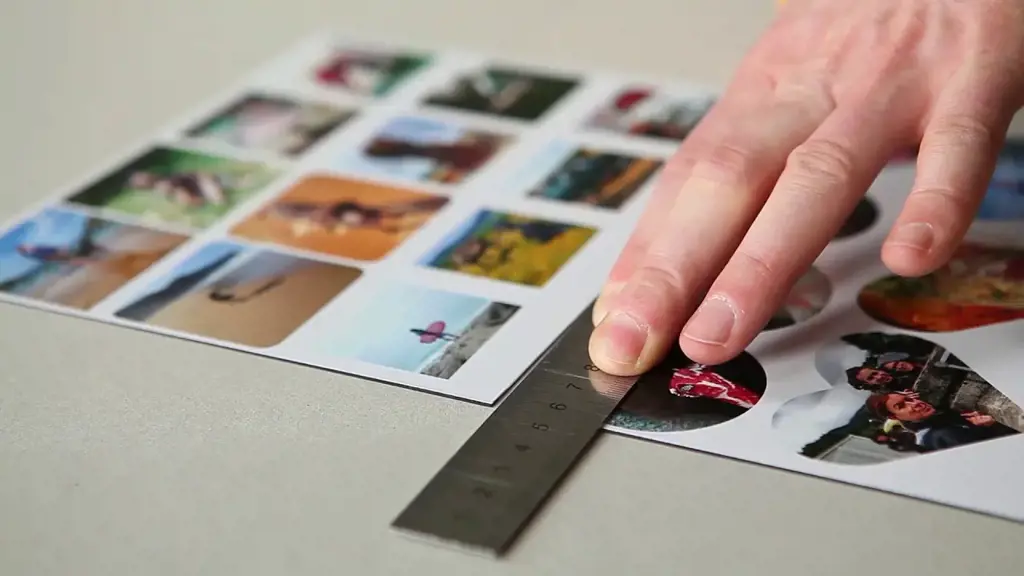
Photo Coasters, at home
Printing out pictures has become increasingly popular in the digital age as we have the power to capture moments and memories at the click of a button. But what can we do with all the printed photos we accumulate over time? One cool idea is to turn them into photo coasters – a fun and practical craft project that can be enjoyed right at home.
To start, gather the materials you'll need - printed photos, ceramic tiles, Mod Podge (or other decoupage glue) and felt pads. You can easily find all of these items at a craft store or online.
Next, trim your photos to fit the size of the tiles you're using. Make sure to trim them a little bit smaller than the tiles to avoid any overhang. Coat the tile with Mod Podge and carefully press the photo onto the tile. Be sure to smooth out any air bubbles or wrinkles, then let the tiles dry for about 15-20 minutes.
After the tiles have dried, apply a layer of Mod Podge on top of the photo. This will help seal it and protect it from any wet glasses or spills. Let the coasters dry for another 15-20 minutes, then repeat the process with a second coat of Mod Podge.
Once the coasters have fully dried, attach felt pads to the bottom of each tile. This will prevent them from scratching any surfaces and creating a non-slip grip.
Voila! You now have a set of personalized photo coasters that can be used for your own drinks or make a great gift. With the endless possibilities of photos to use, you can create a one-of-a-kind set that represents your unique style and personality.
Using printed photos to create homemade photo coasters can be a fun and easy way to preserve memories while adding an extra personal touch to your home decor. So gather up your favorite photos, grab some tiles, and get creative!
13 Fun Things to Do in Oakley, CA for All Ages
You may want to see also
![]()
Customized Phone Cases, at home
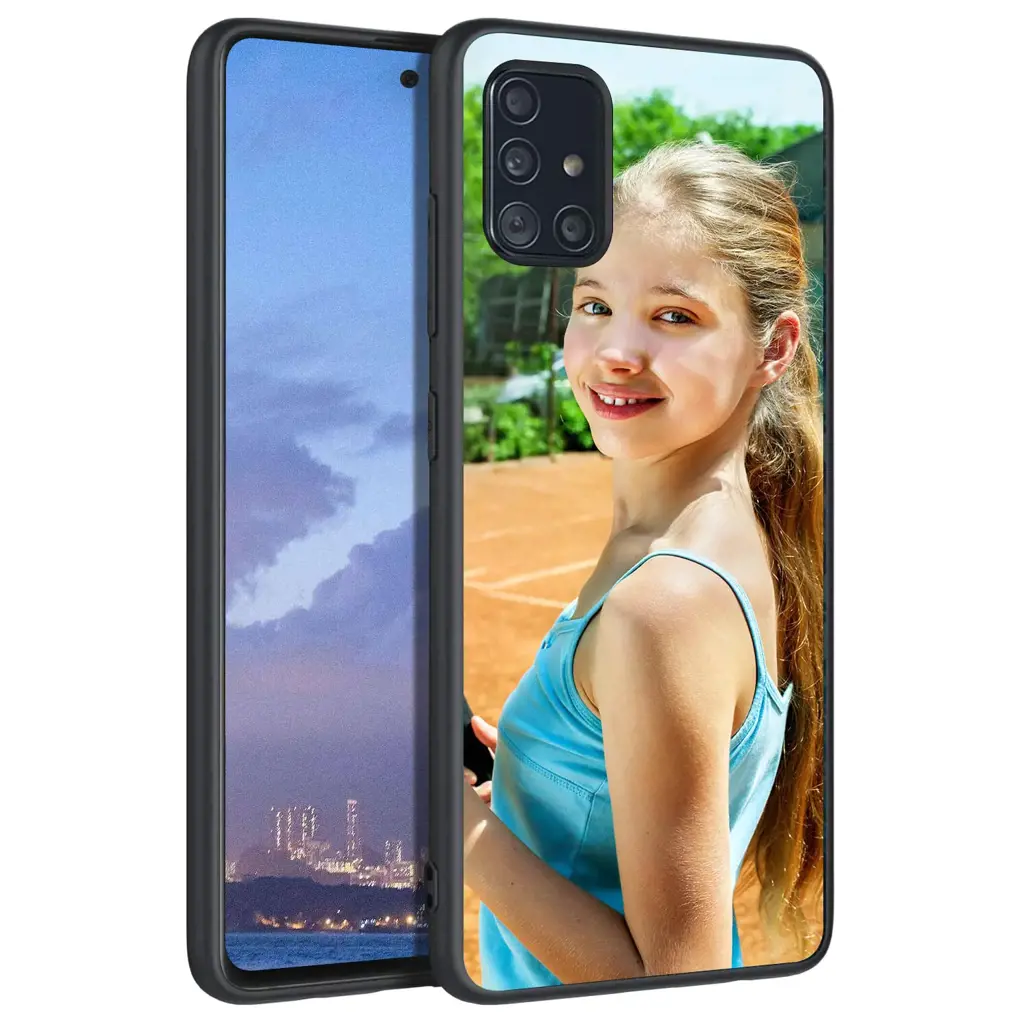
Printed pictures are a great way to bring your memories to life and you can use them in all sorts of ways. One creative and exciting way to use printed pictures is to customize a phone case at home. This is a fun and easy project that can be done in a matter of minutes, with amazing results that are sure to impress.
To get started, you will need a clear phone case, some printed pictures, a pair of scissors, and a pencil or marker. You can find clear phone cases online, at your local phone accessory store, or even at some dollar stores. Make sure to order or purchase the right size for your phone.
Once you have all your supplies, trace the outline of your phone onto the clear case using a pencil or marker. This will help you see where to cut your pictures to fit perfectly onto the case. Then, cut out selected pictures to fit inside the traced outline.
Carefully place your chosen pictures inside the phone case and arrange them as desired. You can arrange them in a collage-like fashion or line them up in rows vertically, horizontally or diagonally. Get creative and experiment with different layouts until you achieve the perfect look.
If you’d like to add an extra touch of creativity, try using multiple images to create a layered effect. Simply layer one image on top of the other, then place them inside the phone case. This will create a 3D effect that makes your phone case look even more unique and interesting.
And there you have it, a customized phone case that is both practical and personal. You can add new pictures anytime you like and update the design of the phone case. This is an especially great way to show off your favorite pictures or memories that are meaningful to you.
In conclusion, customized phone cases are a great way to show off your creativity and love for printed pictures. It's an easy and fun project to do at home, and the best part is that you get to enjoy it every day! So gather up those pictures and get started on a cool design for your next phone case!
13 Fun Things to Do in Longboat Key, Florida
You may want to see also
![]()
Mod Podge Photo Blocks, at home
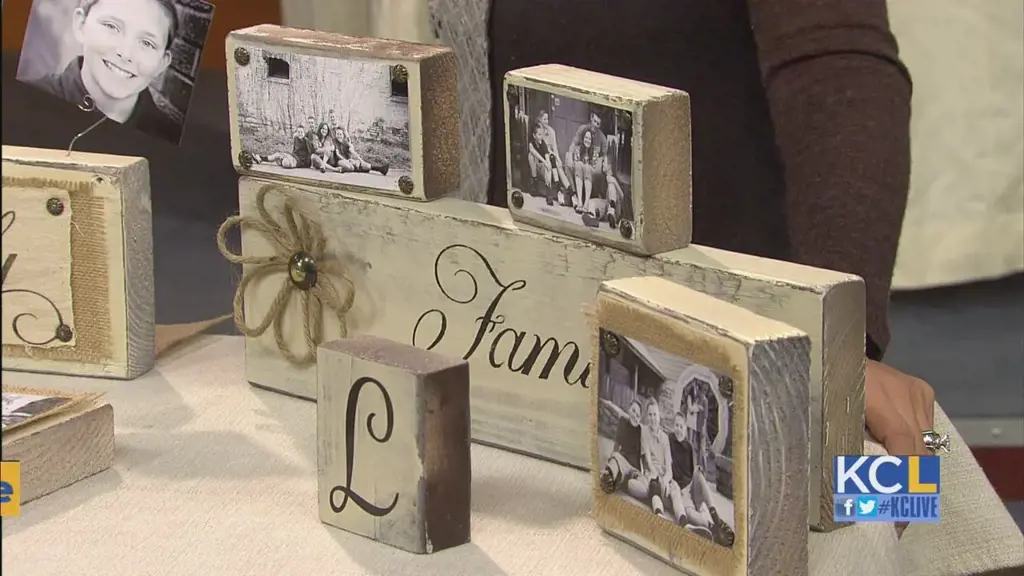
Are you looking for a creative way to display your favorite printed photos? Look no further than Mod Podge photo blocks! This fun and easy DIY project will allow you to turn your printed photos into stylish decorations that you can proudly display in your home.
To get started, you will need a few basic supplies, including wooden blocks (available at most craft stores), Mod Podge, printed photos, and a craft brush. You can use any size block you like, but 3x3 or 4x4 blocks work well for this project.
Once you have gathered your supplies, choose the photos you want to use and cut them to fit the size of your blocks. Make sure to center the image on the block, leaving a small border around the edges.
Using your craft brush, apply a thin layer of Mod Podge to the top of the block and place the photo on top. Carefully smooth out any wrinkles or bubbles with your fingers, making sure the photo is securely in place. Repeat the process until all of your blocks are covered with photos.
Once the Mod Podge has dried, apply another thin layer of Mod Podge over the top of the photo. This will help protect the photo from damage and give it a glossy finish. Allow the Mod Podge to dry completely before handling the blocks.
Once your blocks are dry and ready to use, arrange them on a shelf, mantel, or table to create a unique and personalized display. You can even stack them on top of each other to create different height levels for added interest.
Get creative with your Mod Podge photo blocks by using different photos or adding embellishments like ribbon, paint, or glitter. These versatile decorations make great gifts for family and friends, or you can keep them for yourself as a stylish and sentimental way to celebrate your favorite memories.
In conclusion, Mod Podge photo blocks are a fun and easy way to display your printed photos in a unique and creative way. With just a few basic supplies and a little bit of time, you can create a personalized decoration that will add style and sentimentality to any room in your home.
12 Fun Things to Do on the Upper West Side of NYC
You may want to see also
![]()
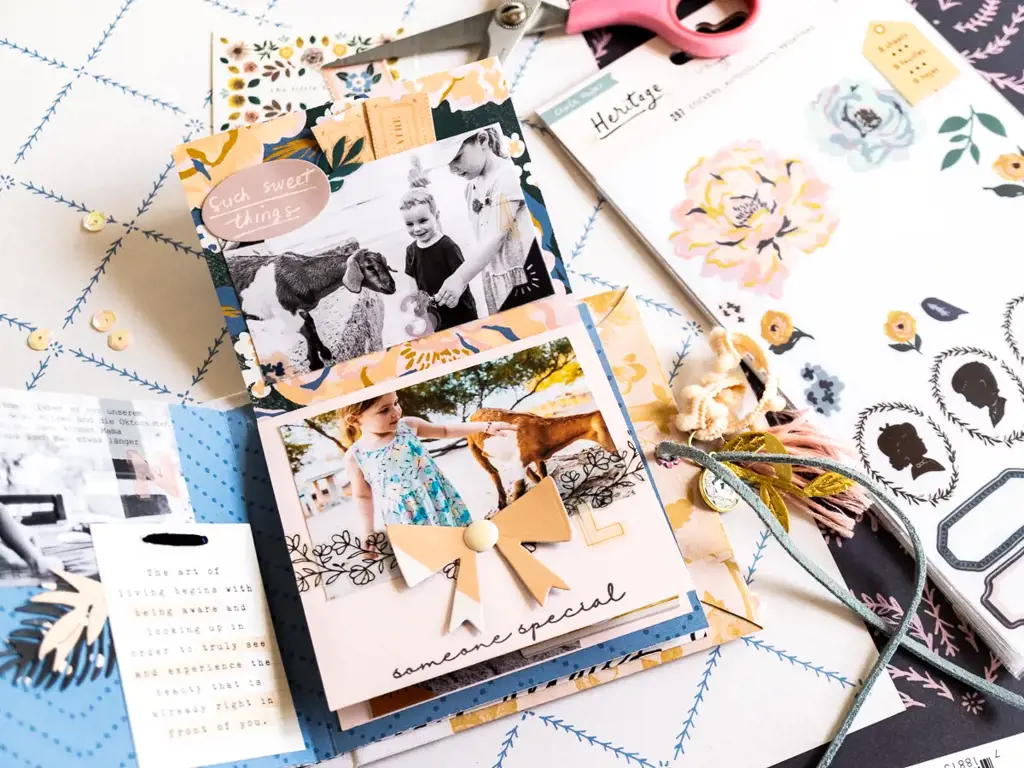
Travel Scrapbook, on vacation
Travel Scrapbook – The Perfect Way to Preserve Your Precious Vacation Memories
Traveling is one of life's greatest adventures. We all love the thought of escaping from routine and exploring new places, connecting with new cultures, and indulging in new experiences. Holidays provide us with memories that we cherish for a lifetime and most of us love capturing those beautiful moments on camera.
Printing pictures is an excellent way to preserve those precious vacation memories that you can share with friends and family or cherish for yourself. Whether it's to add to your personal collection or create something unique to display in your home, there are many cool things that you can do with printed pictures from your vacation.
One great idea to preserve your travel memories is through an exciting and colorful travel scrapbook. Not only is it a great way of displaying your travel photos, but creating a travel scrapbook is also a way of reflecting on and remembering the highlights of your vacation, both big and small.
The first step to creating your travel scrapbook is to select your favorite vacation photos. Once you have chosen your pictures, group them together by the events or experiences that you had during your vacation. You could organize them chronologically or thematically.
When you have all your photos organized, it's time to think about how you want to present them in your scrapbook. You could add captions, travel quotes, or anecdotes to recount the story behind each picture. Additionally, you can complement your photos with tickets, maps, brochures, or postcards.
There are countless creative ways to decorate your travel scrapbook, from drawing doodles and highlighting your photos with colorful pens to incorporating stickers, ribbons, and other materials. The goal is to make the book fun and exciting, as well as representing the unique experience of your vacation.
Aside from acting as a memento of your vacation, a travel scrapbook is an excellent way of revisiting those beautiful and unique memories all year round, especially when the troubles of life interfere with our desire to get away. It will serve as a reminder of the beautiful moments you experienced, places you visited and people you connected with on your vacation.
In conclusion, creating a travel scrapbook is a fantastic and unique way of preserving the special memories of your vacation. It is easy, fun, and allows you to get really creative. So, next time you return home from your vacation, instead of letting your photographs disappear into your camera roll, organize them into a scrapbook and relive your fantastic adventure whenever you want.
13 Must-Try Activities for a Memorable Labor Day Weekend in Myrtle Beach
You may want to see also
![]()
Memory Jar, at home
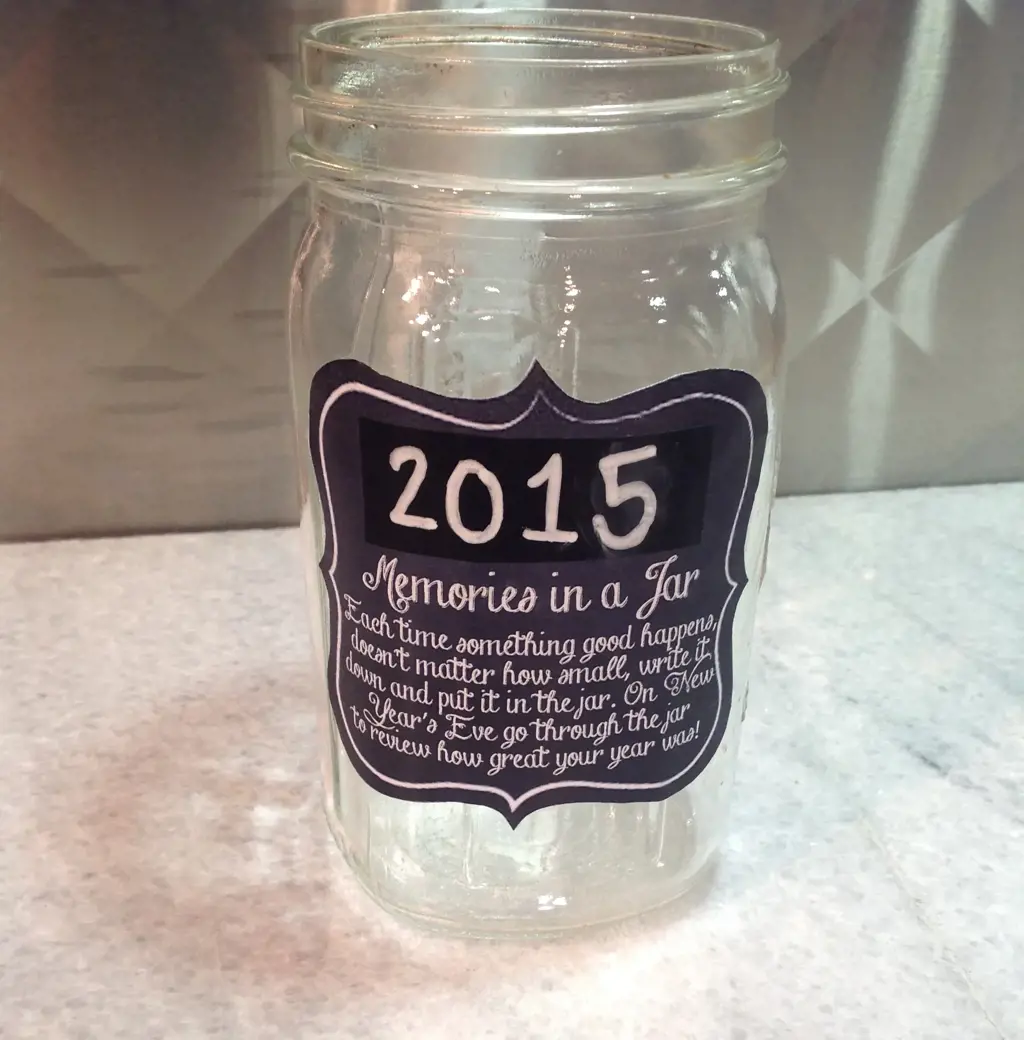
Whether you're looking for a creative way to display your favorite photos, or you need to find a fun project to occupy your time at home, a memory jar is a simple and customizable option. This unique DIY project is perfect for preserving your memories in an elegant and easily-accessible way.
To create a memory jar, all you need are a few basic supplies. First, gather some of your favorite printed photos. These can be pictures of anything – from family vacations and weddings, to snapshots of your pets or nature scenes. Next, find a clear jar or container that is large enough to hold your photos. You can choose any size or shape, depending on your personal preference. Finally, you'll need some decorative elements to add a personal touch to your memory jar. This could be anything from ribbon, twine, or stickers, to seashells, flowers, or any other trinkets you'd like to include.
To begin the memory jar process, start by sorting through your photos and selecting your favorites. Be sure to choose a variety of pictures – both new and old, colorful and black-and-white, etc. Then, roll up each photo or cut it into a small square so it fits inside your jar. Begin filling the jar with the photos, layering them carefully and adding any decorative elements throughout the process. You can also include small notes or mementos to add to the sentimental value of your memory jar.
Once your memory jar is complete, keep it in a prominent place in your home where you can easily access it and share your memories with others. You can also add to your memory jar over time, filling it with new photos and trinkets as you collect them. This makes it an ongoing project that can be enjoyed for years to come.
Whether you're looking for a way to preserve memories from a specific event or want a unique way to showcase your favorite photos, a memory jar is a fun and simple DIY project. With just a few basic supplies, you can create a personalized memory jar that will make a great addition to any home.
12 Fun Things to Do for Sweetest Day in Detroit
You may want to see also
![]()
Photo Collage Lampshade, at home
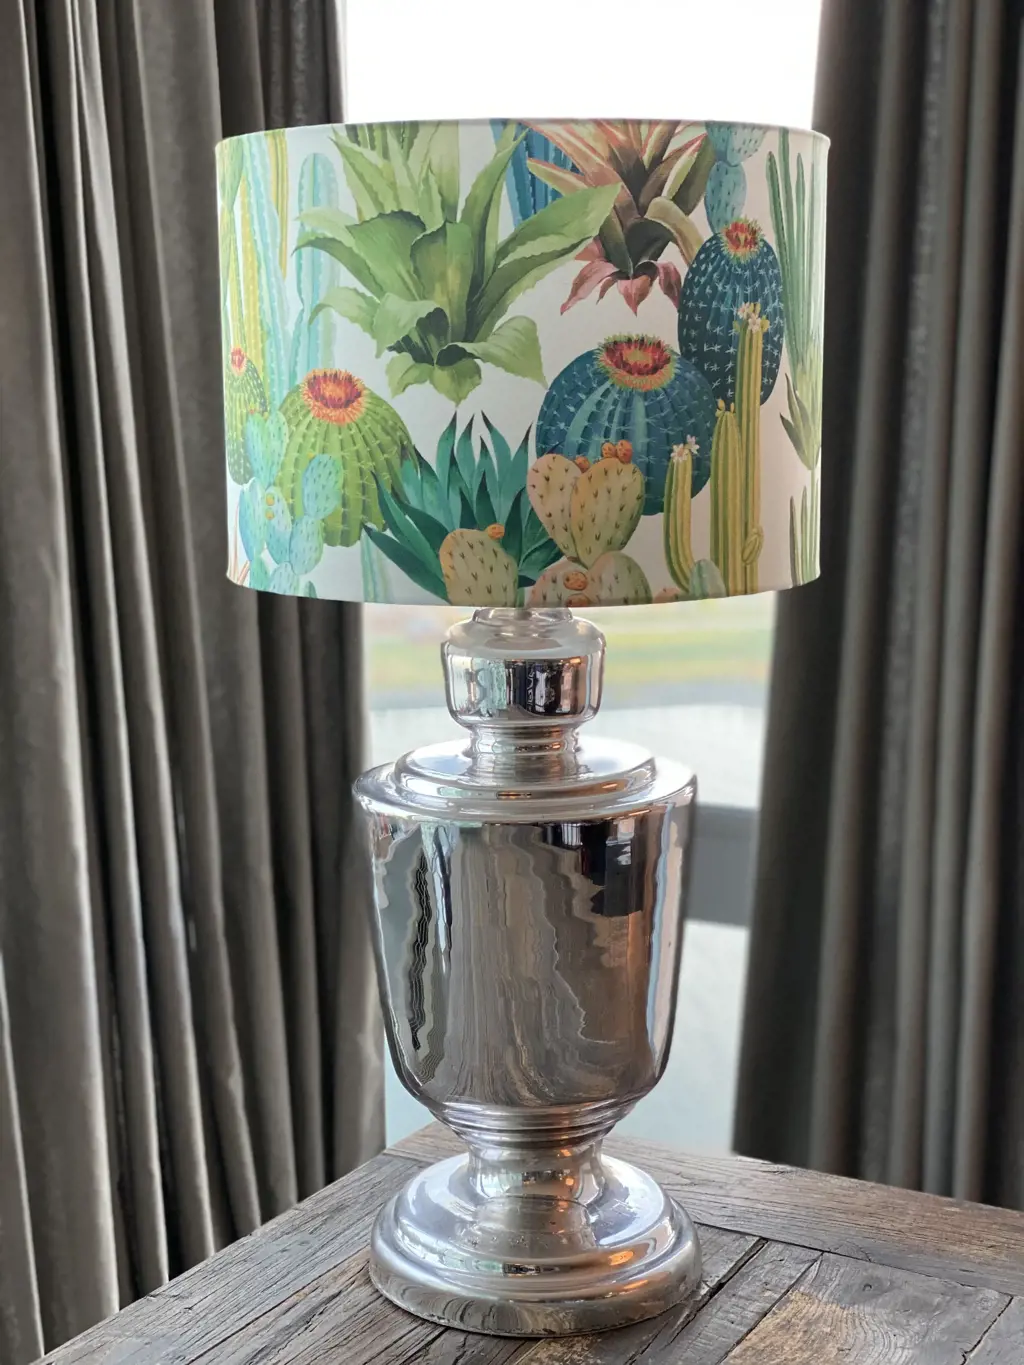
Are you looking for a unique way to display your favorite printed photos? Look no further than a photo collage lampshade! This DIY project is easy and affordable and will create a beautiful and meaningful centerpiece for any room in your home.
To get started, gather your favorite printed photos. You can choose photos of family and friends, travel pictures, or even beautiful landscapes and abstract art. The possibilities are endless! Once you have your photos, cut them into smaller sizes that will fit onto your lampshade.
Next, you'll need a plain white lampshade. You can find these at most home decor stores, or even at discount stores like Walmart or Target. Make sure your lampshade is clean and free of any dust or debris before beginning your project.
Using a glue stick or double-sided tape, begin attaching your photos to the lampshade. You can arrange them in any pattern or design that you like. Some people choose to arrange their photos in a spiral pattern, while others prefer a random and scattered look. There is no right or wrong way to do this - just have fun and get creative!
Once all of your photos are attached, allow the glue or tape to dry for a few hours. Then, attach the lampshade to your lamp and turn it on to see your beautiful creation come to life!
This photo collage lampshade is a great way to showcase your memories in a unique and personalized way. It also makes a great gift for friends and family members. So, the next time you're looking for a fun and creative project to tackle, try making a photo collage lampshade - you won't be disappointed!
13 Fun Things to Do in Camp Hill, PA
You may want to see also
![]()
Photo Clipboard, at office
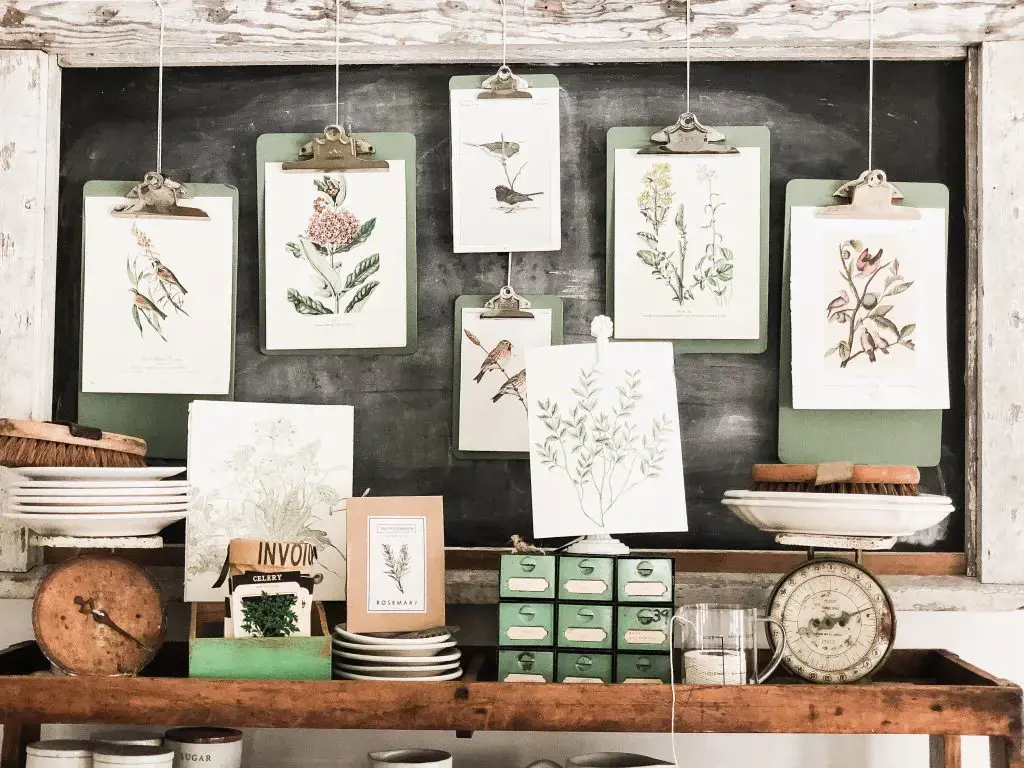
In today's digital age, printed photographs have become a rarity. However, they still hold a special place in our hearts and are often treasured possessions. If you have a collection of printed pictures lying around, don't let them go to waste. Instead, use them to decorate your workspace with a photo clipboard!
A photo clipboard is a simple DIY project that is perfect for displaying your favorite photographs. All you need is a wooden clipboard, a few photographs, and some basic crafting supplies. You can create this project in less than an hour, and the end result will be a unique and personalized addition to your office.
To get started, choose a wooden clipboard of your preferred size. You can find them in most craft stores, and they are relatively inexpensive. Then, select the photos you want to display. You can use vintage family photos, scenic landscapes, or photos from your recent vacation.
Next, you need to prepare the photos for display. You can either use a photo editing software to resize the photos or trim them down to fit the clipboard. Once you have the photos resized, arrange them on the clipboard to create a collage.
Now, it's time to add some finishing touches to complete your photo clipboard. You can add some stickers, quotes, or other embellishments to enhance the appearance of the clipboard. You can also use a decoupage medium to transfer images onto the clipboard.
Once you have completed your photo clipboard, all you need to do is hang it in your office. The clipboard will hold your photos securely, and you can easily change the photos whenever you want to refresh the look of your office.
In conclusion, a photo clipboard is a simple and easy DIY project that allows you to display your personal photographs while adding a personalized touch to your office space. It is a great way to showcase your treasured photographs and memories, while also adding some color and creativity to your workspace. So, grab your clipboard, some photographs, and get crafting!
11 Fun and Exciting Things to Do in Chino Hills
You may want to see also
![]()
Decorative Photo Globe, at home or office
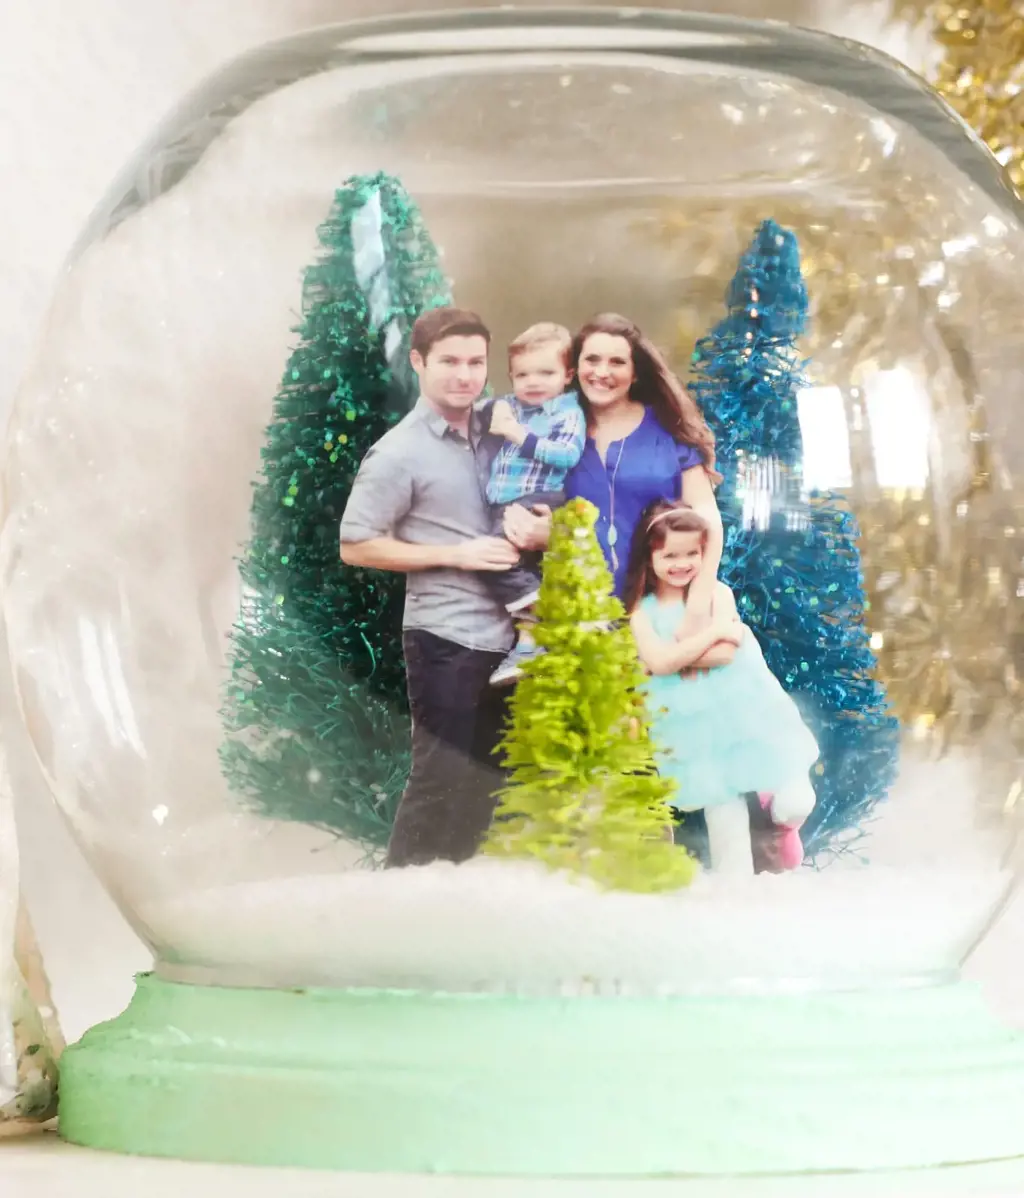
Do you have a collection of printed photos and you don't know what to do with them? Why not try making a decorative photo globe? It's a cool and fun way to display your precious memories at home or in the office.
To start, you'll need a few items: a clear glass or plastic globe, your printed photos, and some double-sided tape. You can purchase the globe at a craft store or online. They come in various sizes, so pick one that'll fit in your space.
Next, choose the photos that you want to display and trim them to fit the shape and size of the globe. You can also choose to make them black and white or color, depending on your preference. Arrange them in the order that you want and then attach them using the double-sided tape.
If you want to add some extra touches, you can also include some decorative elements such as glitter, small ornaments or beads, and ribbon.
Once you've completed the arrangement and decoration of your photo globe, it's ready to be displayed. You can place it on a table, desk, or shelf. You can also put a small light inside the globe to illuminate your photos and make them stand out.
This decorative photo globe is not only a fun project to do, but it's also a perfect at-home or in-office décor. It also makes an excellent gift for family and friends who love displaying their favorite memories.
In conclusion, the next time you're looking for cool things to do with printed pictures, try making a decorative photo globe instead. It's a creative and fun way to display your photos, and it will surely make your space look more personalized and meaningful.
12 Fun Things to Do in Colorado Springs During the Winter
You may want to see also
![]()
Personalized Photo Bookmarks, at home
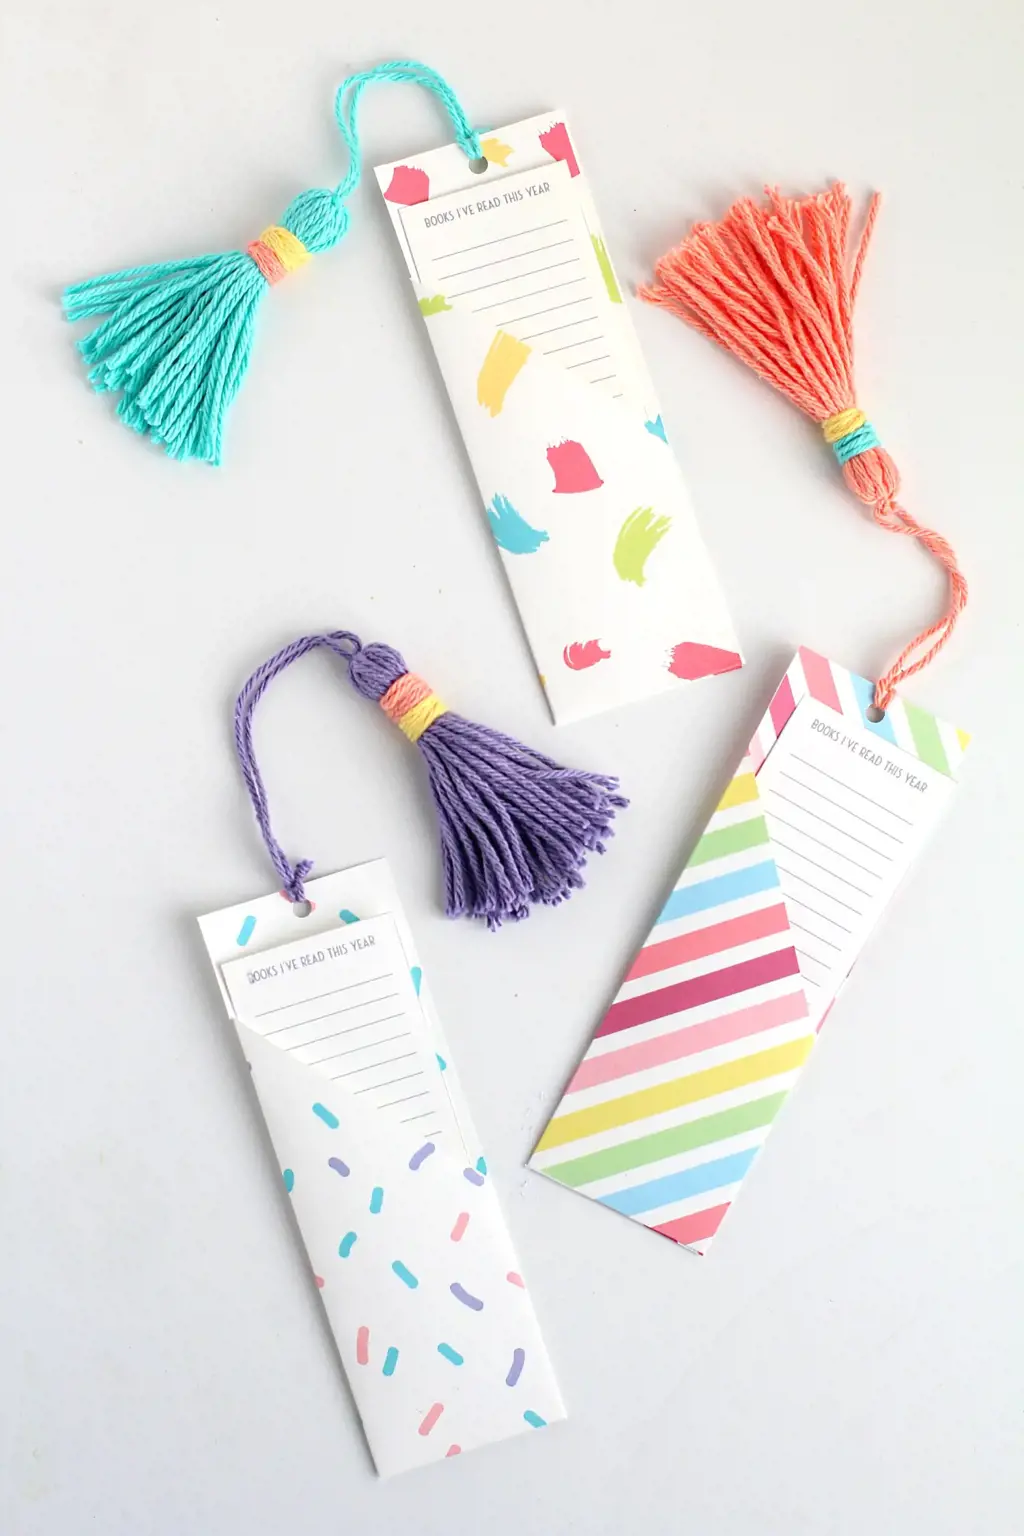
Are you tired of using boring old bookmarks to save your place in your favorite book? Why not add a personal touch and create your own photo bookmarks? With just a few materials and some printed pictures, you can create custom bookmarks that not only look great, but also hold a special place in your heart.
Here's how to create your own personalized photo bookmarks:
Materials:
- Printed photos (preferably on cardstock)
- Scissors
- Laminator or clear contact paper
- Hole punch
- Ribbon or twine
Instructions:
Step 1: Choose your photos
Select the photos you would like to use for your bookmarks. Choose pictures that are clear and colorful, and that have some meaning to you - maybe a photo of your pet, a loved one, or a favorite vacation spot.
Step 2: Cut out your bookmarks
Using scissors, cut your photos into the shape of a bookmark. You can make them any size you want, but a good size is around 2 inches wide by 6 inches long.
Step 3: Laminate or protect your bookmarks
To make your bookmarks durable, you'll want to laminate them or protect them with clear contact paper. If you have a laminator, simply run each bookmark through it. If you don't have a laminator, you can use clear contact paper to cover both sides of each bookmark.
Step 4: Punch a hole in your bookmarks
Using a hole punch, create a hole at the top of each bookmark. This is where you'll tie your ribbon or twine.
Step 5: Add your ribbon or twine
Cut a piece of ribbon or twine to the desired length and tie it through the hole in your bookmark.
And there you have it - your very own personalized photo bookmarks! Not only are these bookmarks functional, but they are also a great way to showcase some of your favorite photos. Plus, they make great gifts for friends and family who love to read. So grab some photos and get crafting!
13 Fun Things to Do After Prom!
You may want to see also
![]()
Photo Advent Calendar, at home
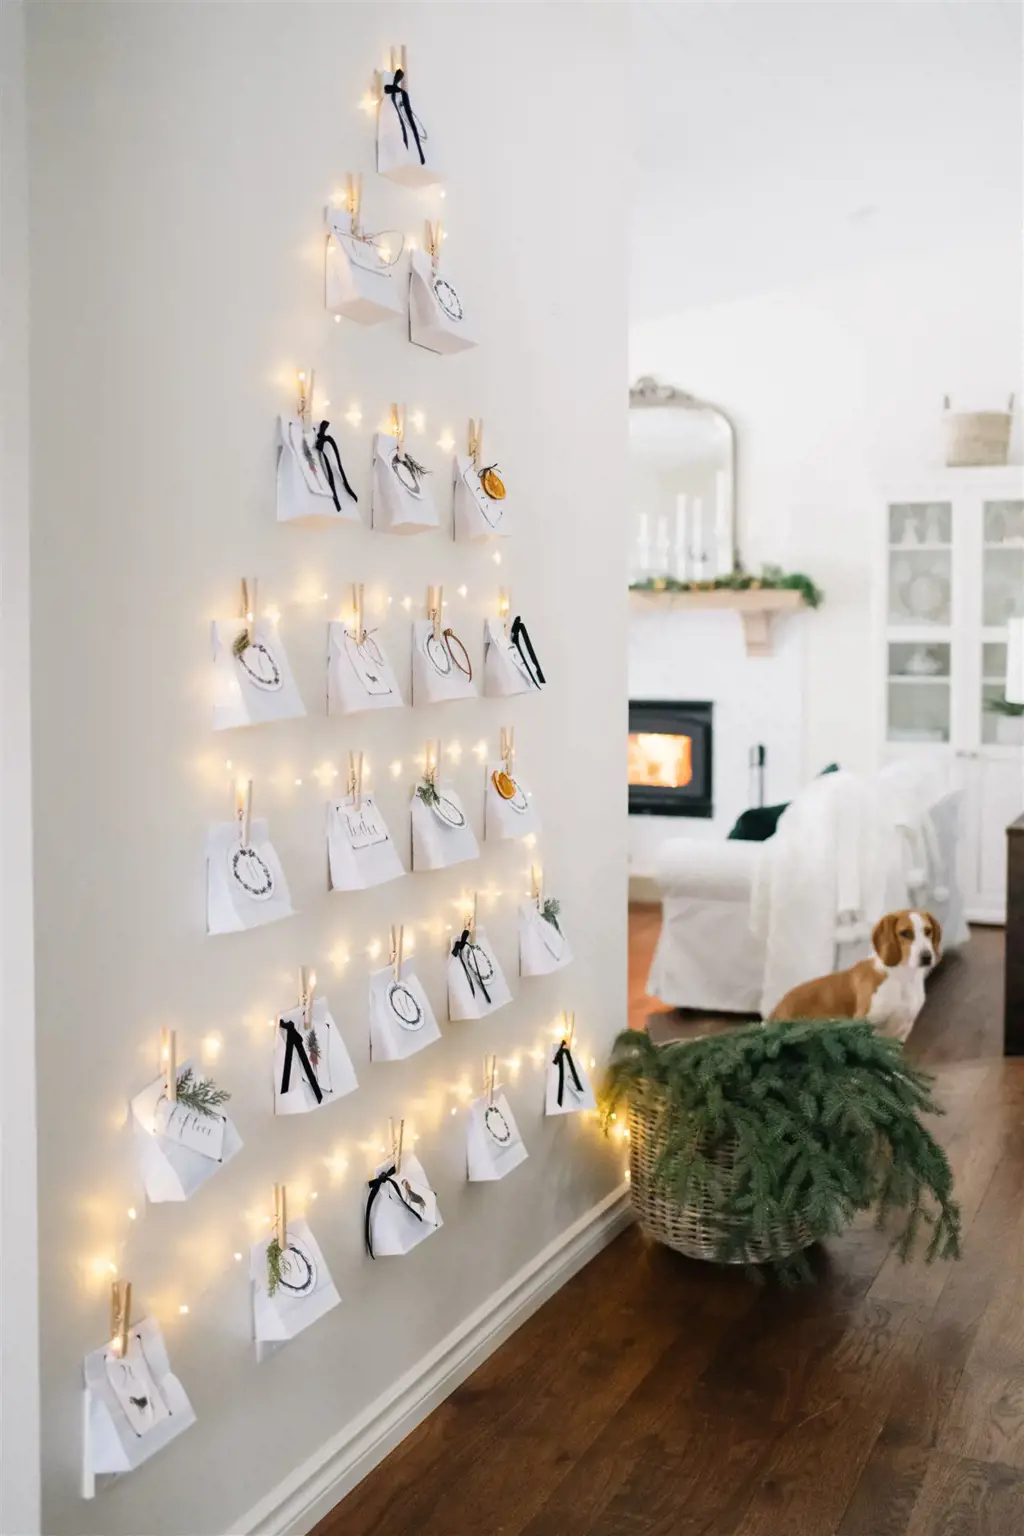
The holiday season is approaching and what better way to count down the days than with a photo advent calendar. Use your printed pictures to create a DIY advent calendar to display in your home. Here are some cool things to do with printed pictures for your photo advent calendar.
Pick 24 of your favorite pictures.
Choose 24 pictures that you love and that have special meaning to you. It could be pictures of your family, pets, or even places you have visited. You can use old or new pictures that you have printed.
Use a corkboard or a wire mesh grid.
Get a corkboard or wire mesh grid to hang your pictures. This will be the base for your advent calendar. You can buy them at any office or home decor store.
Use tiny wooden pegs or clips.
Once you have your base, use tiny wooden pegs or clips to hang your pictures. You can also use washi tape or string to hang them. Arrange the pictures in rows of 6 by 4. This will give you the 24 slots you need for your advent calendar.
Decorate each picture with numbers.
After you have your 24 pictures up, use stickers or markers to decorate each picture with a number from 1 to 24. Make sure you mix up the numbers so they are not in order.
Choose a different picture for each day of December.
Starting from December 1st, choose one picture a day to remove from your advent calendar. You can enjoy looking at the picture for the day, or even create a game for you and your family to guess which picture will be next.
This DIY photo advent calendar is a fun and creative way to display your printed pictures. It adds a personal touch to your holiday decor and is a great way to reminisce on some special memories. Give it a try this holiday season and see how much joy it brings to your home.
12 Exciting Activities to Try Outdoors in Fort Worth!
You may want to see also
![]()
Photo Wall Clock, at home
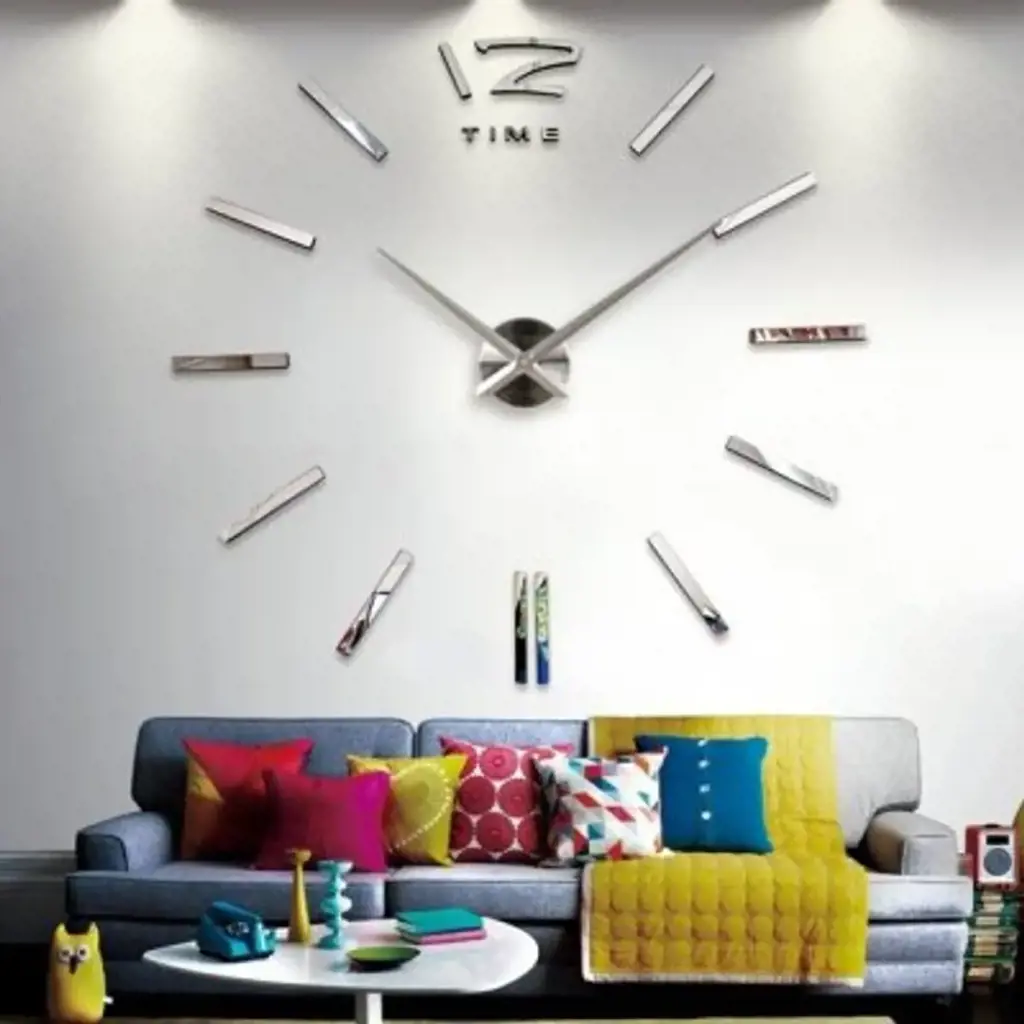
Are you bored of having plain wall clocks at home? Do you have a bunch of printed pictures lying around that you don't know what to do with? Well, here's a cool idea to spice up your home decor. How about creating a personalized photo wall clock?
To start, you'll need a clock kit with clock hands, a clock motor, and a clock face. These are easily available at any craft store or online. You'll also need printed pictures of your choice, scissors, glue, and a ruler.
Begin by choosing the pictures you want to use for your clock. You can use family photos, vacation pictures, or any other pictures that you like. It's important to select pictures that are not too small and that have a good resolution. You don't want them to look blurry once you print them out.
Using the ruler, measure the diameter of the clock face and then cut out circles from the pictures that are slightly smaller than the clock face. Be sure to cut the circles accurately as you don't want them to overlap or be too small.
Once you have your circles, it's time to start gluing them onto the clock face. Apply glue to the back of each picture and stick them to the clock face, making sure there is an even distance between each picture. Leave it to dry for a few minutes.
After the pictures have dried, it's time to assemble the clock. Follow the instructions that come with the clock kit to attach the clock motor and hands to the clock face. Once you've secured the clock motor, place the clock hands in the center of the clock and tighten the nut on the hands.
And just like that, your personalized photo wall clock is ready to hang! Not only does it look amazing, but it's also a great conversation starter. Every time you check the time, you'll be reminded of precious memories captured in those pictures.
In conclusion, the photo wall clock is an easy and unique way to showcase photos at home. Give it a try and see how it transforms any space in your home. Happy crafting!
10 Winter Activities to Enjoy in Green Bay
You may want to see also
![]()
Unique Photo Gift Wrapping, for special occasions
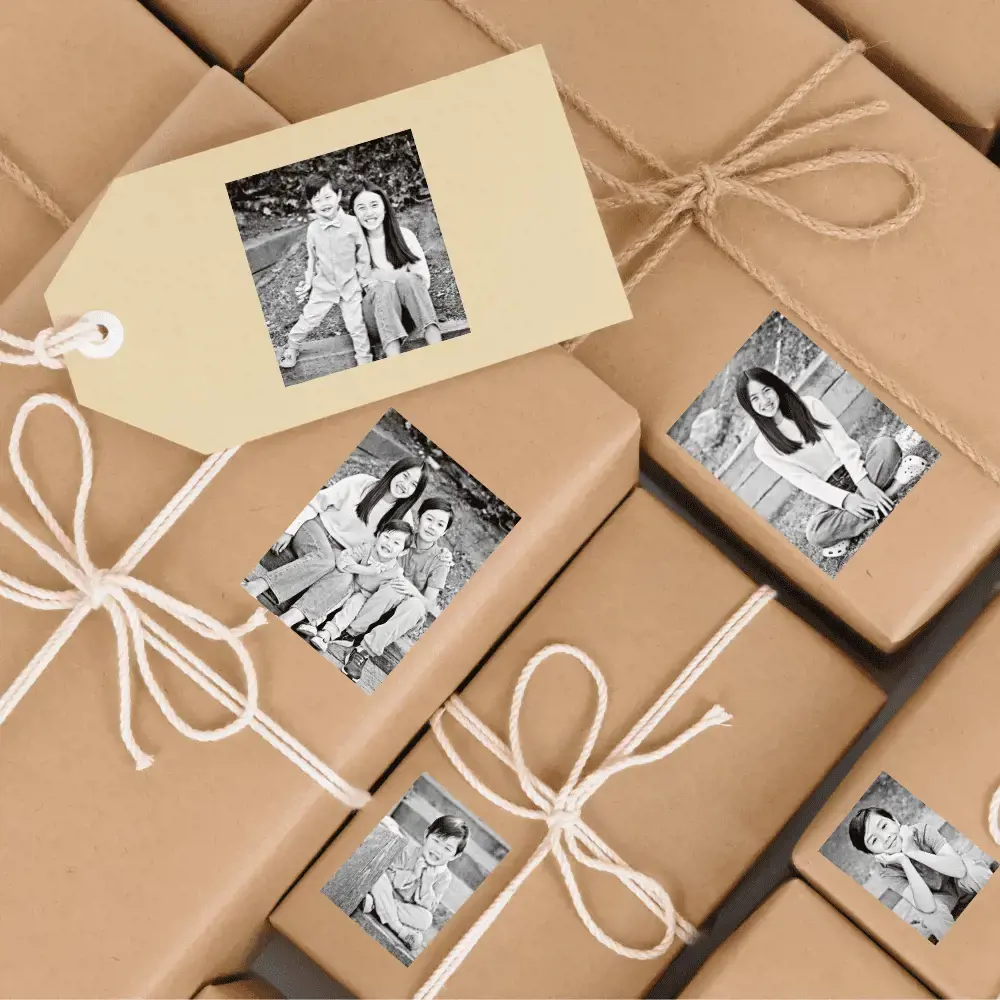
Are you tired of boring gift wrapping? Want to add a special touch to your gifts? Look no further than printed pictures! Here are some unique ways to use printed pictures for gift wrapping on special occasions:
- Personalized wrapping paper: Take a picture of the gift recipient or a memorable moment you shared together and print it onto wrapping paper. This not only adds a personal touch, but it also creates a memorable keepsake for the recipient.
- Photo gift tags: Instead of traditional gift tags, print a small picture of the recipient onto a tag and attach it to the gift. Not only does this personalize the gift, but it also saves time by not having to write out a traditional tag.
- Timeline wrapping paper: For milestone occasions like birthdays or anniversaries, print a timeline of pictures on the wrapping paper. From childhood to present day, this creates a unique and sentimental touch to the gift.
- Collage wrapping paper: Create a collage of pictures using special software or an app and print it onto wrapping paper. This design can work for any occasion from weddings to baby showers.
- Picture puzzle wrapping paper: Print a picture of the gift recipient on the wrapping paper, but cut it into puzzle pieces. This adds a fun touch to the gift and also serves as a family activity for the recipient to complete.
- Picture book wrapping paper: Print a series of pictures onto wrapping paper and create a mini-book design. This creative approach adds a personal touch and also allows the gift recipient to see a series of related images.
In conclusion, using printed pictures for gift wrapping adds a unique touch to special occasions. From personalized wrapping paper to picture puzzle wrapping paper, there are many ways to incorporate printed pictures into your gift wrapping. Start experimenting and see how creative you can get!
14 Fun Things to Do in Oakhurst, California
You may want to see also
Frequently asked questions
You can create a photo wall collage, scrapbook or photo album, create a personalized photo gift like a mug or pillow, or even turn photos into a puzzle.
You can use a shadow box, clip the photos on a string with clothespins, create a gallery wall with different sized frames, or create a photo book.
Consider adding quotes, captions, or dates to the photos using a marker or sticker. You can also try printing pictures in different sizes or using a photo editing app to add filters.
Yes, you can use pictures to create a DIY photo coaster, a photo clock, or use them as decoupage on a furniture piece. The possibilities are endless.


3 Comments
Clayton Mcguire
Reuben Sears
Lazar Odonnell
Author