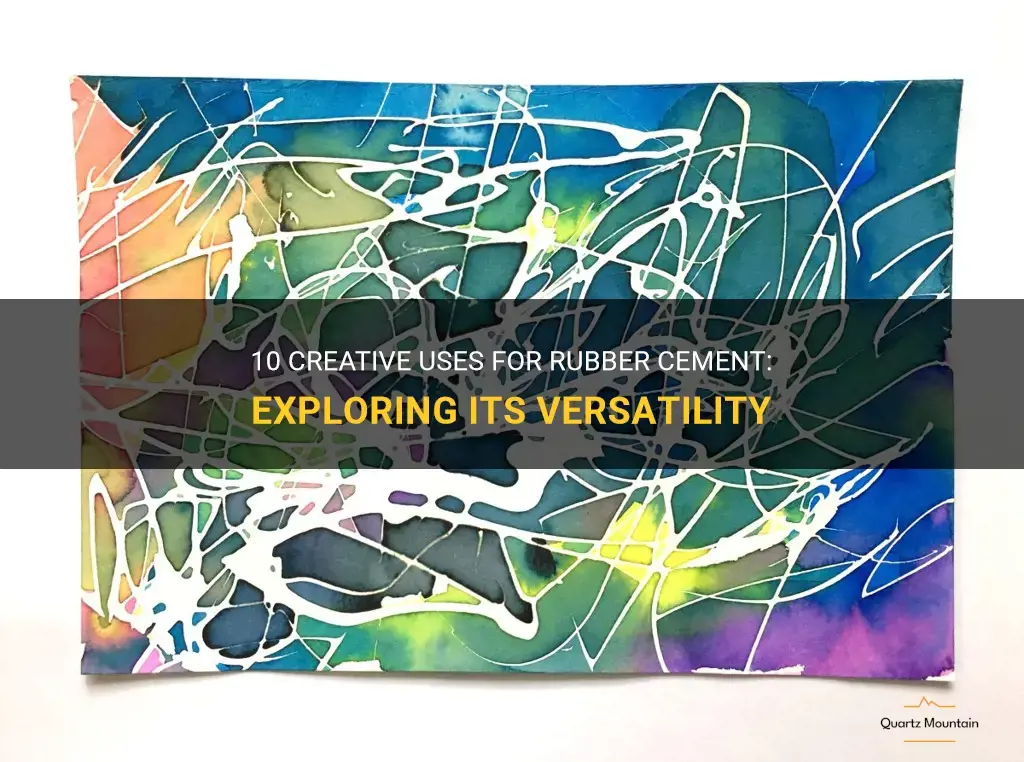
Rubber cement is often overlooked as a typical adhesive but its versatility goes far beyond sticking paper together. From unconventional DIY projects to practical everyday uses, this article will explore 10 creative and unexpected ways to use rubber cement. Get ready to be amazed by the countless possibilities this underrated adhesive has to offer!
| Activity | Description |
|---|---|
| Create abstract artwork | Use rubber cement to create unique and organic shapes on paper |
| Make your own stickers | Apply rubber cement to the back of paper cutouts for DIY stickers |
| Repurpose old jars with rubber cement | Use rubber cement to create interesting patterns on glass jars |
| Customize your phone case | Add a personal touch to your phone case with rubber cement designs |
| Decorate notebooks and journals | Use rubber cement to add designs and patterns to your stationery |
| Create textured artwork | Experiment with different textures by layering rubber cement |
| Make your own temporary tattoos | Use rubber cement to create unique temporary tattoo designs |
| Customize clothing and accessories | Add an edgy touch to your clothes and accessories with rubber cement |
What You'll Learn
- Cardmaking and scrapbooking projects
- Collage and mixed media artwork
- Repairing torn book pages or documents
- Securing photos in photo albums
- Mounting posters or artwork on walls
- Creating temporary stencils for painting or crafting
- Adhering small objects to surfaces, like buttons or beads
- Sealing envelopes or gluing envelopes together
- DIY fabric applique or patching
- Craft foam and felt projects
![]()
Cardmaking and scrapbooking projects
Cardmaking and scrapbooking are two popular hobbies that many people enjoy. They allow for creativity and personalization, and they also make for excellent gifts. One versatile and fun tool to use for these projects is rubber cement. Rubber cement is a type of adhesive that has a flexible and removable bond, making it perfect for temporary projects like cardmaking and scrapbooking. Here are a few cool things you can do with rubber cement in these crafts:
- Masking: Rubber cement can be used as a masking agent in cardmaking and scrapbooking. Apply it to the areas you want to protect or leave blank, and then paint or ink over it. Once the paint or ink is dry, you can easily remove the rubber cement to reveal the untouched area. This technique is especially useful for creating interesting backgrounds or adding unique designs to your projects.
- Resist technique: Rubber cement can act as a resist when applied to a surface before painting or inking. Once dry, the rubber cement will repel the paint or ink, creating a cool effect. Use a brush or a small applicator to apply the rubber cement to your project, let it dry, and then apply your desired colors. Once dry, gently rub or peel off the rubber cement to reveal the resist pattern.
- Adding texture: Rubber cement can be used to add texture to your cardmaking and scrapbooking projects. Apply a thin layer of rubber cement to a surface, let it dry, and then apply another layer on top. You can repeat this process multiple times to create raised or textured areas. Once the rubber cement is dry, you can leave it as is or paint over it for even more dimension.
- Faux-torn paper edges: For a distressed or torn paper effect without actually tearing your paper, rubber cement can be a great tool. Apply a thin line of rubber cement along the edges of your paper and let it dry. Then, gently rub the rubber cement to create a frayed or torn appearance. This technique is perfect for vintage or shabby chic cardmaking and scrapbooking projects.
- Repositioning elements: One of the best things about rubber cement is its repositionable nature. If you're not satisfied with the placement of an element on your project, or if you want to experiment with different compositions, simply apply a bit of rubber cement to the back of the element and stick it onto your project. If you change your mind, the element can be easily removed and repositioned without damaging your paper.
Rubber cement is a versatile and handy tool for cardmaking and scrapbooking projects. Experiment with different techniques and have fun adding unique touches to your creations. Remember to always work in a well-ventilated area and read the instructions on the rubber cement packaging for safety precautions. Happy crafting!
14 Fun Things to Do in Lowell, Arkansas
You may want to see also
![]()
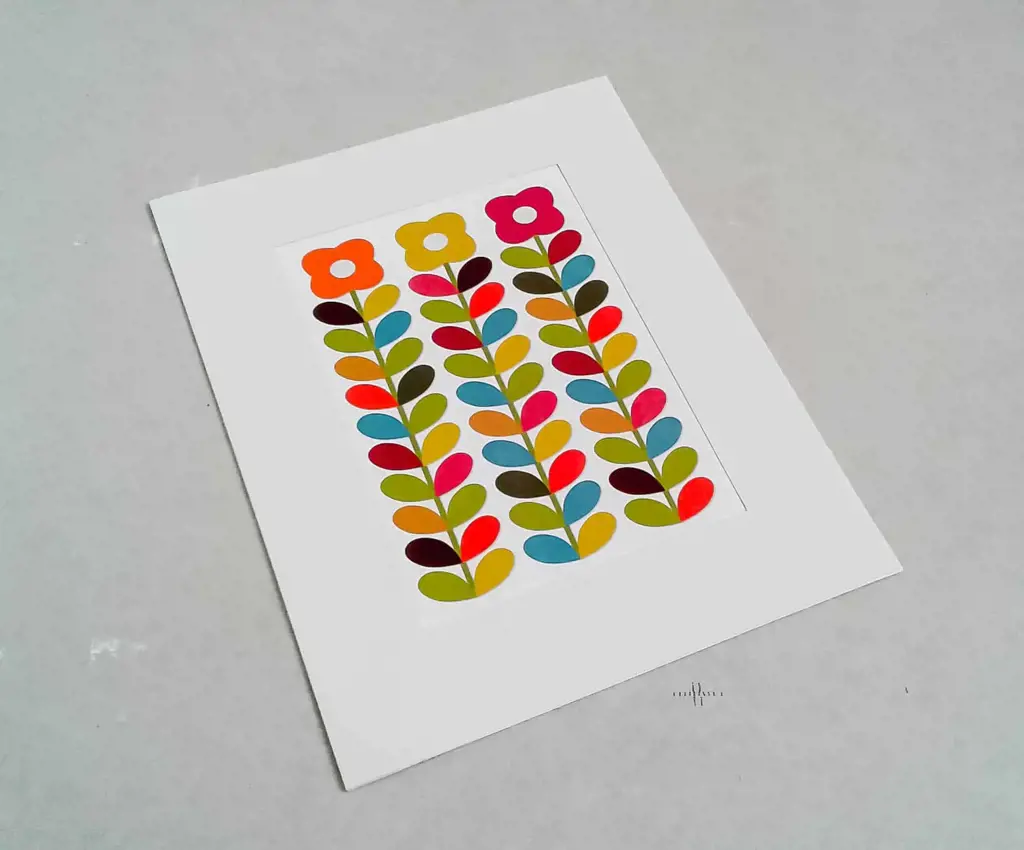
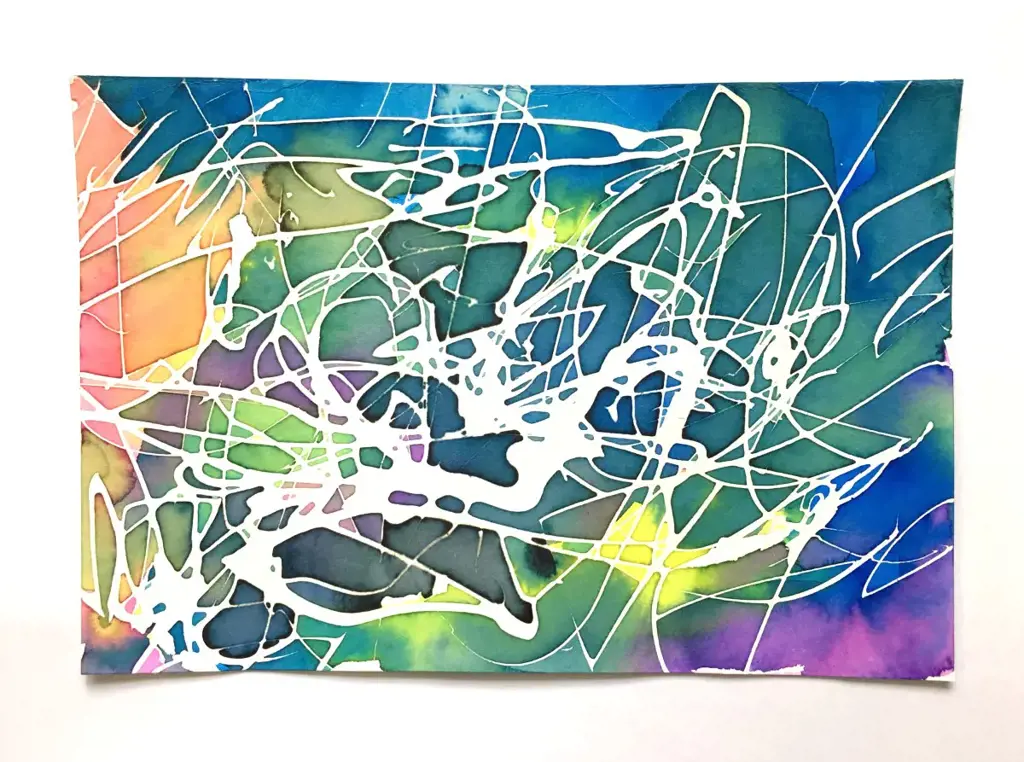
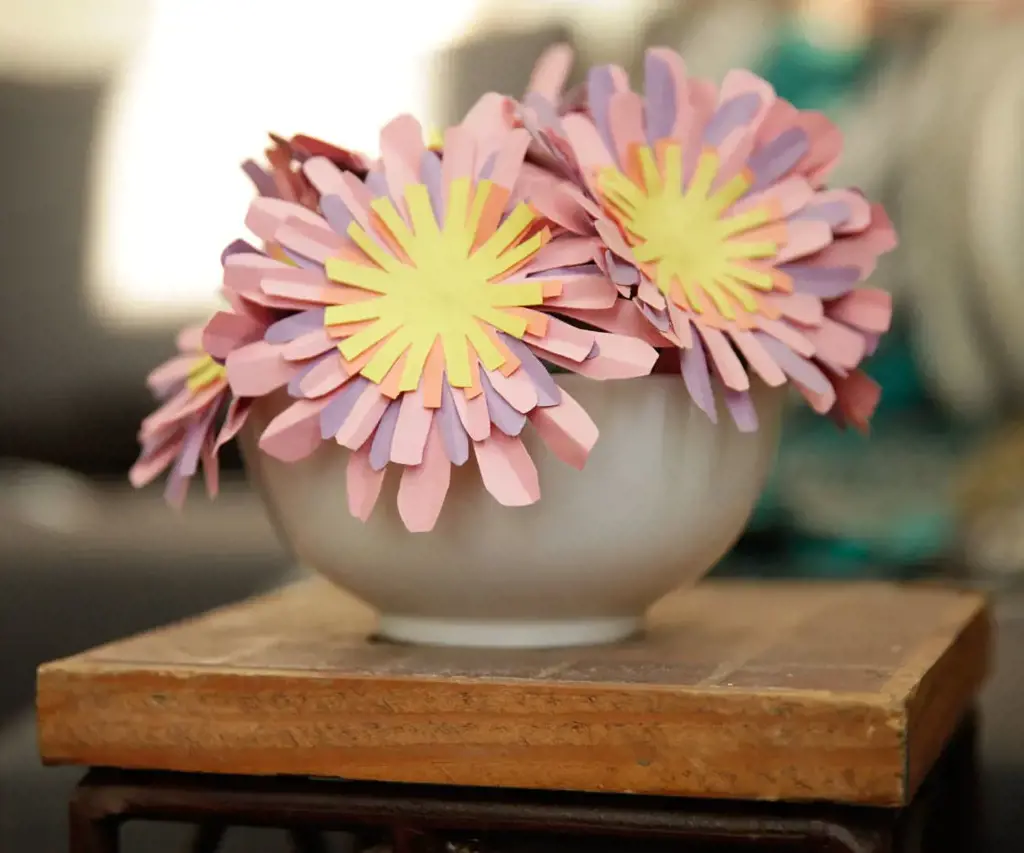
Collage and mixed media artwork
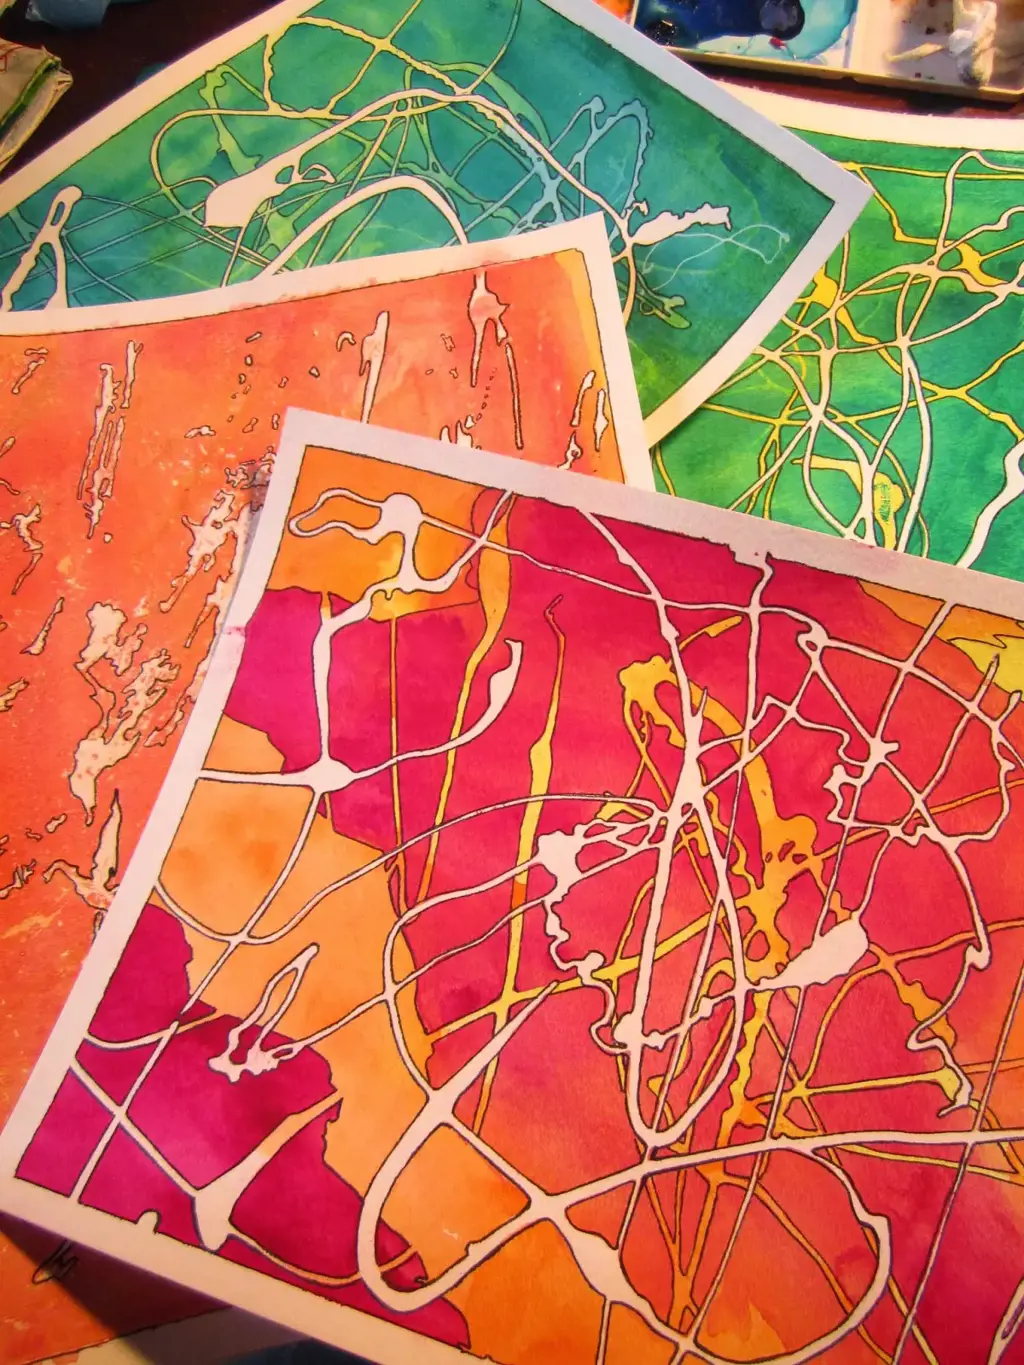
- Texture and Dimension: Rubber cement can be used to add interesting texture and dimension to your artwork. Apply a layer of rubber cement onto your surface and let it dry. Once dry, you can create a variety of effects by dragging a toothpick or any other pointed tool through the rubber cement to create lines, swirls, or other patterns. This will add a three-dimensional element to your artwork.
- Masking Technique: Rubber cement can be used as a masking agent, allowing you to create crisp edges and defined shapes. Apply a thin layer of rubber cement onto the areas you want to mask, let it dry, and then proceed with your artwork. Once you are done, gently peel off the rubber cement to reveal the clean, untouched areas of your artwork.
- Resist Technique: Rubber cement can also be used as a resist technique, where it repels certain materials while allowing others to adhere. Apply rubber cement onto your surface in a desired pattern or shape, and let it dry. Then add layers of paint, ink, or other materials over the rubber cement. Once the materials have dried, you can remove the rubber cement to reveal the patterns and shapes created by the resist.
- Collage Adhesive: Rubber cement works great as an adhesive for collaging. Simply apply a thin layer of rubber cement onto the back of your chosen collage elements, press them onto your surface, and smooth out any air bubbles or wrinkles. Rubber cement provides a strong bond and allows for repositioning of the collage elements before it dries completely.
- Faux Encaustic Effects: Encaustic is a painting technique that involves using heated beeswax mixed with pigment. Rubber cement can help you achieve a similar effect without the need for heat. Apply a layer of rubber cement onto your surface and let it dry. Then, use oil pastels or colored pencils to draw or paint over the dried rubber cement. The rubber cement will resist the color, creating a faux encaustic effect.
Rubber cement is a versatile and fun medium to incorporate into your collage and mixed media artwork. Experiment with these techniques and let your creativity flow. Whether you're looking for texture, dimension, masking, resist, or adhesive properties, rubber cement is sure to add a cool touch to your creations. So grab a bottle of rubber cement and start exploring the endless possibilities it offers for your artistic expression.
10 Fun and Family-Friendly Activities to Do with Kids in Boardman, Ohio
You may want to see also
![]()
Repairing torn book pages or documents
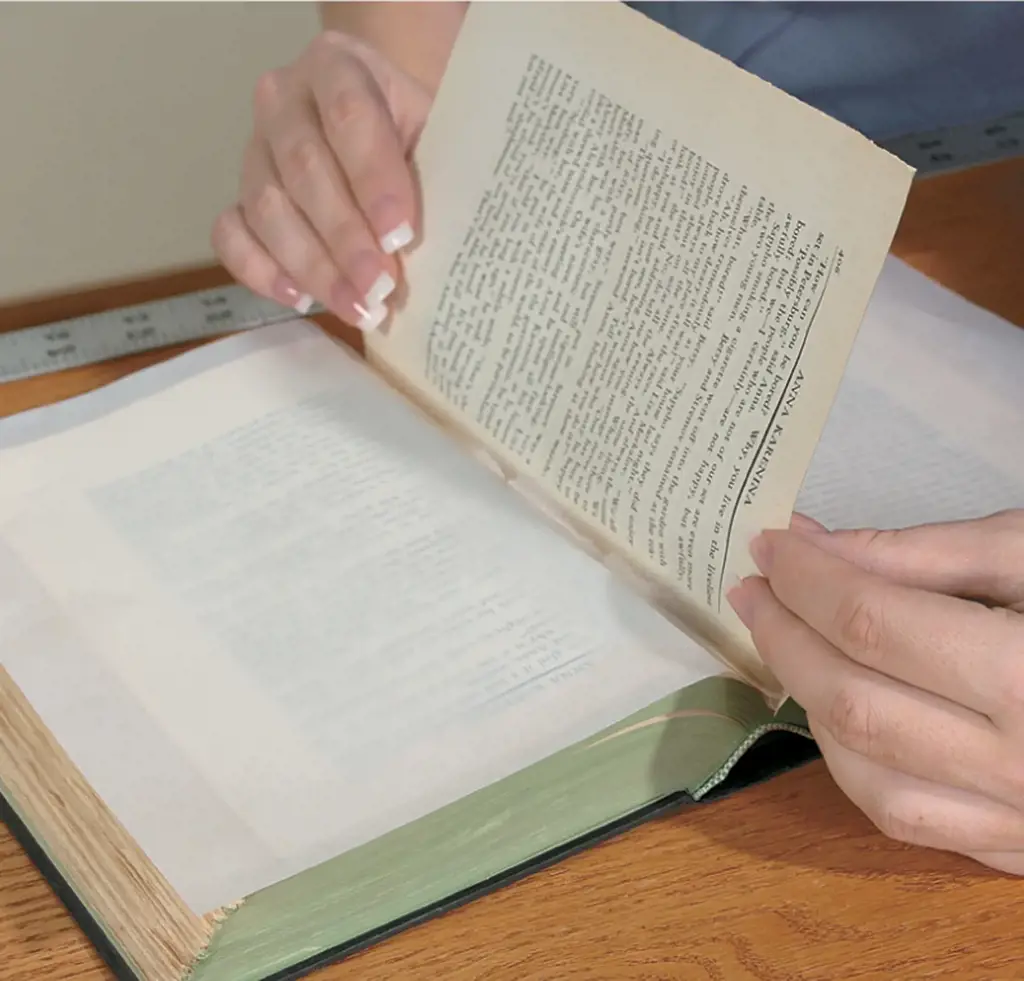
Rubber cement is a versatile adhesive that can be used for various purposes. One of the cool things you can do with rubber cement is to repair torn book pages or documents. This handy adhesive is ideal for fixing tears in paper as it provides a strong bond without causing further damage to the material.
To repair torn book pages or documents using rubber cement, follow these simple steps:
- Clean the torn area: Before applying the rubber cement, make sure the torn area is clean and free from any debris. Use a soft brush or cloth to gently remove any dirt or dust.
- Apply rubber cement to the torn edges: Squeeze a small amount of rubber cement onto a clean surface like a disposable plate or a piece of scrap paper. Using a small brush or a cotton swab, apply a thin layer of rubber cement to the torn edges of the paper. Make sure the adhesive is evenly spread and covers the entire torn area.
- Press the torn edges together: Carefully align the torn edges of the paper and gently press them together. Hold the edges in place for a few seconds to allow the rubber cement to bond. Be cautious not to press too hard as it may cause the adhesive to squeeze out.
- Remove excess rubber cement: Once the torn edges are properly bonded, remove any excess rubber cement. You can use a clean cloth or a rubber cement pick-up square to gently lift off any excess adhesive. Be careful not to disrupt the repaired area while removing the excess cement.
- Allow the adhesive to dry: Give the repaired paper some time to dry. Rubber cement typically dries quickly, but it's best to leave it undisturbed for at least 15-30 minutes to ensure a strong bond. Avoid touching or folding the repaired area until the adhesive is fully dried.
Note: It's important to mention that rubber cement may not be suitable for all types of paper or documents. It's always recommended to test the adhesive on a small, inconspicuous area before applying it to the torn area. Additionally, if you're dealing with valuable or irreplaceable documents, it's advisable to consult a professional conservator or bookbinder for proper repair techniques.
Rubber cement provides a convenient and effective solution for repairing torn book pages or documents. By following the steps outlined above, you can restore the integrity of your torn paper and prevent further damage. So the next time you come across a torn page in your favorite book or a document in need of repair, reach for your rubber cement and fix it like a pro.
10 Fun Activities to Experience in Allegany County NY
You may want to see also
![]()
Securing photos in photo albums
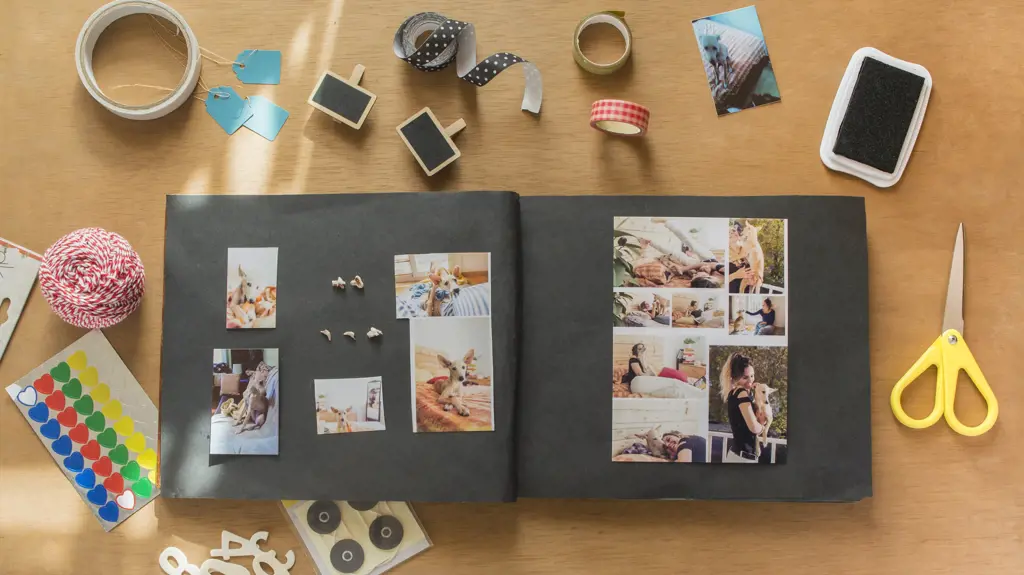
Rubber cement is a versatile adhesive that provides a strong and flexible bond. While it is commonly used in crafts and artwork, it can also be incredibly useful for securing photos in photo albums. In this article, we will explore some cool things you can do with rubber cement when it comes to organizing and preserving your precious memories.
One of the biggest advantages of using rubber cement to secure photos in your album is that it does not damage the pictures or the album pages. Unlike other adhesives that may leave a sticky residue or cause the photo to tear when removed, rubber cement allows for easy repositioning and removal without any damage. This makes it an ideal choice for those who like to rearrange their photos or frequently update their albums.
To secure a photo using rubber cement, start by applying a thin and even layer onto the back of the picture. Be sure to cover the entire surface, including the corners and edges. Next, carefully place the photo onto the album page and press down firmly to ensure a good bond. If you need to reposition the photo, gently lift it off the page and adjust as desired. Rubber cement provides a temporary bond, allowing you to make changes until you are satisfied with the layout.
Another cool thing you can do with rubber cement is create a collage or mosaic effect in your photo album. Rather than simply placing the photos in a linear fashion, you can overlap them, create patterns, or even cut them into different shapes and sizes. Rubber cement provides the perfect amount of adhesive to hold the photos securely in place while adding a unique and artistic touch to your album.
If you are worried about the longevity of rubber cement, rest assured that it is a durable adhesive that will keep your photos securely in place for years to come. Rubber cement is resistant to yellowing and aging, making it a great choice for preserving your memories for future generations. Additionally, it is acid-free, meaning it will not damage or discolor your photos over time.
In conclusion, rubber cement offers a variety of cool things to do when it comes to securing photos in photo albums. Its repositionable nature allows for easy adjustments and changes, while its durability ensures long-lasting preservation. Whether you are looking to organize your photos in a creative way or simply want a secure and damage-free method of attaching them, rubber cement is a fantastic adhesive that can meet all your needs. So go ahead and get creative with your photo albums using rubber cement and enjoy preserving your treasured memories in a unique and artistic way.
12 Exciting Things to Do in Loon Mountain
You may want to see also
![]()
Mounting posters or artwork on walls
Rubber cement is a versatile adhesive that can come in handy for various tasks and projects. One of the cool things you can do with rubber cement is mounting posters or artwork on walls. This easy and affordable method allows you to showcase your favorite posters or artwork without damaging your walls. Here's a step-by-step guide on how to do it:
- Gather your materials: You will need rubber cement, a brush or sponge applicator, a clean cloth, and the poster or artwork you want to mount.
- Prepare the area: Make sure the wall surface is clean and free of dust or debris. Use a damp cloth to wipe down the wall if necessary.
- Apply rubber cement to the poster: Flip your poster or artwork face down on a clean surface. Use the brush or sponge applicator to apply a thin and even layer of rubber cement to the back of the poster. Make sure to cover the entire surface but don't apply too much to avoid any excess leaking out from the sides.
- Position the poster on the wall: Carefully lift the poster and position it on the wall where you want it to be mounted. Take your time to align it properly, as the rubber cement will create a strong bond once it dries.
- Press and smooth: Gently press the poster against the wall, starting from the center and working your way outwards. This will ensure good adhesion and remove any air bubbles or wrinkles. Use your clean cloth to smooth out the poster, applying even pressure to help the rubber cement adhere to the wall.
- Allow it to dry: Let the rubber cement dry completely. This typically takes around 15-20 minutes, but it's best to leave it overnight for a stronger bond.
With these simple steps, you can quickly and easily mount your posters or artwork on the walls using rubber cement. The rubber cement creates a strong bond without damaging the posters or the walls themselves. When you're ready to remove the poster, simply peel it off the wall. The rubber cement should come off easily, but if there is any residue, you can use a mild adhesive remover or rubbing alcohol to clean it up.
Whether you're decorating your bedroom, dorm room, or office space, using rubber cement to mount posters or artwork offers a convenient and hassle-free solution. It allows you to change up your wall decor as often as you like without leaving any marks or holes. So go ahead and get creative with your rubber cement and transform your space with your favorite posters and artwork!
12 Fun Things to Do in Moline, IL
You may want to see also
![]()
Creating temporary stencils for painting or crafting
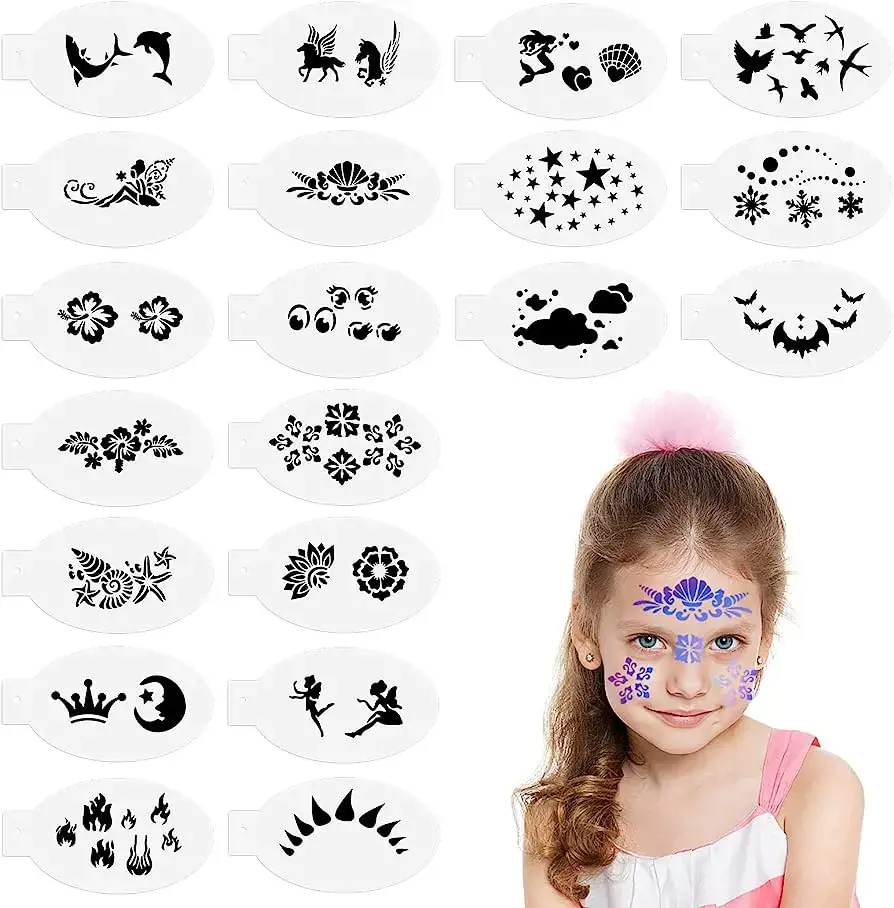
Rubber cement is one of those versatile crafting materials that can be used in a variety of creative ways. One of the coolest things you can do with rubber cement is creating temporary stencils for painting or crafting projects. Stencils are a great way to achieve clean and crisp designs on different surfaces, and with rubber cement, you can easily create and use temporary stencils without damaging your materials.
Here's a step-by-step guide on how to use rubber cement to create temporary stencils for your painting or crafting projects:
- Gather your materials: You will need rubber cement, a pencil, a piece of cardboard or stencil sheet, a craft knife or scissors, and the surface you want to paint or craft on.
- Design your stencil: Use a pencil to draw the design or pattern you want to create on the rubber cement. You can also print or trace a design onto the stencil sheet or cardboard. Make sure to keep the design simple and bold for easier cutting.
- Cut out the stencil: Using a craft knife or scissors, carefully cut out the design from the stencil sheet or cardboard. Take your time and make sure to cut along the pencil lines precisely. This will ensure clean and accurate stencil shapes.
- Apply rubber cement to the back of the stencil: Flip the stencil over and apply a thin layer of rubber cement on the backside of the stencil. Make sure to cover the entire stencil area evenly. Rubber cement is easy to apply and dries clear, which makes it ideal for creating temporary stencils.
- Let the rubber cement dry: Allow the rubber cement to dry completely. This usually takes around 10-15 minutes, depending on the thickness of the layer applied. Make sure the rubber cement is completely dry before moving on to the next step.
- Position the stencil on the surface: Once the rubber cement is dry, carefully position the stencil on the surface where you want to create your design. Press the stencil firmly to ensure it adheres to the surface without any gaps or bubbles.
- Paint or craft over the stencil: Now it's time to get creative! Use paint, spray paint, markers, or any other crafting material to apply color or texture to the surface through the stencil. Make sure to gently dab or brush the paint over the stencil, being careful not to apply too much pressure to avoid smudging the design.
- Remove the stencil: Once you are satisfied with the application of color or texture, carefully remove the stencil from the surface. The rubber cement will come off easily, leaving behind a clean and crisp design. If there are any small remnants of rubber cement left, you can gently rub them off with your finger or a soft cloth.
- Clean and store the stencil: After using the stencil, clean it thoroughly with warm water and mild soap to remove any residue. Allow it to dry completely before storing it for future use. Rubber cement stencils can be reused multiple times if handled and stored properly.
Using rubber cement to create temporary stencils for painting or crafting can open up a world of creative possibilities. Whether you want to personalize a t-shirt, decorate a notebook, or add unique designs to your artwork, rubber cement stencils can help you achieve professional-looking results. So grab your rubber cement and start experimenting with temporary stencils in your next painting or crafting project!
12 Creative Ways to Celebrate Beltane and Honor the Season of Renewal
You may want to see also
![]()
Adhering small objects to surfaces, like buttons or beads

Rubber cement is a versatile adhesive that can be used for a variety of projects. One fun and creative way to use rubber cement is by adhering small objects to different surfaces, such as buttons or beads. This can be a great way to add a unique touch to various crafts or decorative items. In this article, we will explore some cool things you can do with rubber cement and small objects.
One idea is to create a personalized picture frame using rubber cement and buttons. Start by selecting a plain picture frame and gather an assortment of buttons in different sizes and colors. Apply rubber cement to the back of each button and then press them onto the frame, arranging them in a pattern or design of your choice. Allow the rubber cement to dry completely before adding a photo to your newly decorated frame. This can be a fun and easy way to make a unique gift or add a pop of color to your home decor.
Another cool project is to create a beaded coaster using rubber cement and beads. Begin by selecting a plain coaster or a small piece of thick cardboard. Apply rubber cement to the surface of the coaster and then carefully press beads onto the adhesive. You can create patterns or designs using different colors and sizes of beads. Allow the rubber cement to dry completely before using your new beaded coaster. This can be a great way to add a touch of sparkle to your coffee table or to create personalized gifts for friends and family.
Rubber cement can also be used to create custom jewelry. For example, you can create a unique pendant using a small glass or plastic container and a few beads or small decorative objects. First, choose a small container with a lid, such as a bottle cap or a glass vial. Apply rubber cement to the inside of the container and then carefully place beads or small objects inside. You can also add glitter or tiny charms for extra flair. Once the rubber cement is dry, attach a jump ring or a chain to the container to make it into a pendant. This can be a great way to create one-of-a-kind jewelry pieces that reflect your personal style.
Rubber cement is a versatile adhesive that can be used for a wide range of projects. Adhering small objects such as buttons or beads to different surfaces can be a fun and creative way to add a unique touch to your crafts or decorative items. Whether you're making personalized picture frames, beaded coasters, or custom jewelry, using rubber cement can help you create cool and eye-catching projects. So, get your rubber cement and start getting creative!
10 Romantic Things to Do in Winston Salem NC
You may want to see also
![]()
Sealing envelopes or gluing envelopes together
Rubber cement is a versatile adhesive that is widely used for crafts, office projects, and household repairs. While it may not be the most exciting material, there are indeed some cool things you can do with rubber cement. One such application is sealing envelopes or gluing envelopes together.
Sealing envelopes is a common task that we all do from time to time. While traditional glue sticks or water-based adhesives work well for this purpose, rubber cement offers a unique advantage. Its strong and flexible bond ensures that your envelopes will stay securely sealed, even during transit. Additionally, rubber cement dries clear, so you won't have to worry about any unsightly marks on your envelopes.
To seal an envelope with rubber cement, start by applying a thin layer of rubber cement along the inner flap of the envelope. Be sure to spread it evenly, using a brush or a small sponge. Next, press the flap firmly against the envelope to ensure a strong bond. Allow the rubber cement to dry completely before handling the sealed envelope.
Aside from sealing envelopes, you can also use rubber cement to glue envelopes together. Whether you're creating a special gift or organizing documents, gluing envelopes together can be a convenient way to keep related items together. For example, if you have multiple receipts or photos that you want to store in a single envelope, gluing them together can prevent them from getting lost or mixed up.
To glue envelopes together using rubber cement, follow these steps. First, open the envelopes and align them in the desired order. Apply a thin layer of rubber cement along one edge of the first envelope. Next, press the second envelope firmly against the cemented edge, ensuring proper alignment. Continue this process for any additional envelopes you want to glue together. Allow the rubber cement to dry completely before handling the glued envelopes.
When using rubber cement, it's important to apply it in a well-ventilated area and to avoid inhaling the fumes. Additionally, make sure to close the container tightly after each use to prevent the rubber cement from drying out.
In conclusion, while rubber cement may not be the most exciting material, it can certainly be useful in sealing envelopes or gluing envelopes together. With its strong and flexible bond, rubber cement ensures that your envelopes will stay securely sealed or glued together. So, the next time you're faced with a stack of envelopes, consider reaching for rubber cement for an effective and reliable solution.
12 Fun Things to Do in Murfreesboro, TN
You may want to see also
![]()
DIY fabric applique or patching
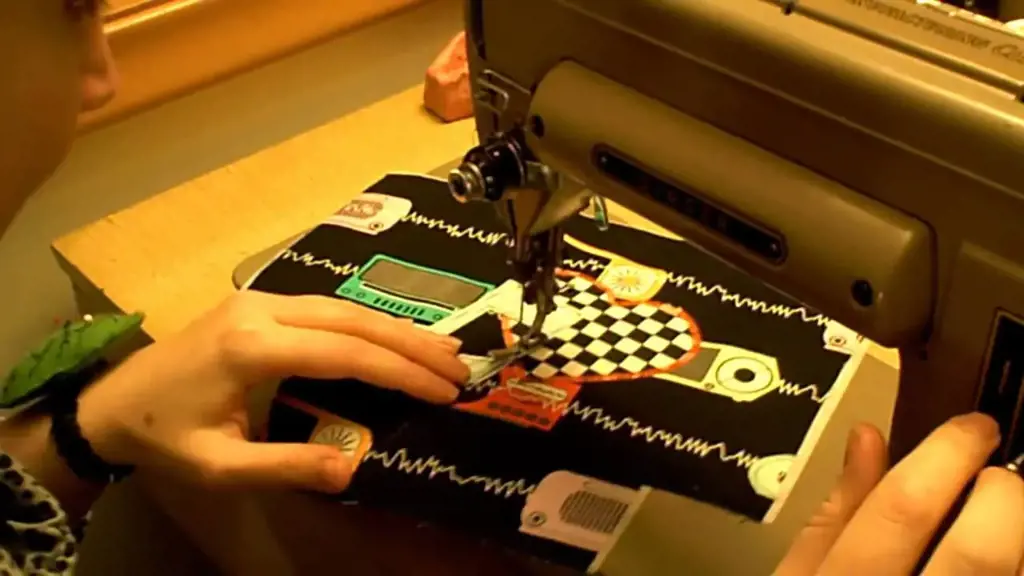
Rubber cement is a versatile adhesive that can be used in various craft projects. One cool thing you can do with rubber cement is creating DIY fabric applique or patching. This technique allows you to decorate clothing or accessories with fabric designs or repair torn fabrics in a creative way.
Here's how you can create your own fabric applique or patching using rubber cement:
- Gather your materials: You will need rubber cement, fabric scraps, a pencil, scissors, and the item you want to decorate or repair (such as a shirt, jeans, bag, or hat).
- Design your applique: Use a pencil to draw your desired design on the fabric scrap. You can create simple shapes like hearts, stars, or flowers, or go for more intricate designs. Make sure the size of your design fits the area you want to decorate or repair.
- Cut out the design: Carefully cut out the design from the fabric scrap. Take your time to ensure clean edges.
- Apply rubber cement: Apply a thin layer of rubber cement to the back of the fabric design. Make sure the entire back surface is covered but avoid using too much adhesive.
- Position the design: Place the fabric design on the item you want to decorate or repair. Press it firmly onto the surface, making sure it sticks well. The rubber cement will hold the fabric in place.
- Let it dry: Allow the rubber cement to dry completely. This may take around 10-15 minutes, but it's best to let it sit for a bit longer to ensure a secure bond.
- Optional: Stitch around the edges: If you want to add extra durability, you can use a needle and thread to stitch around the edges of the fabric applique. This will help prevent the design from peeling off over time.
Once your fabric applique or patch is applied and dried, you can proudly wear or use your personalized item. Rubber cement provides a strong bond, making your fabric design secure and long-lasting. Moreover, this DIY technique allows you to showcase your creativity and gives your clothing or accessories a unique touch.
Remember to follow the manufacturer's instructions when using rubber cement and work in a well-ventilated area. It's also a good idea to test a small area of the fabric before proceeding with your project to ensure compatibility with the rubber cement.
So go ahead and get creative with rubber cement! Whether you want to add a fun design to your favorite shirt or repair a tear in your jeans, fabric applique or patching using rubber cement can be a cool and practical way to breathe new life into your wardrobe.
12 must-do activities in Casey Key, FL.
You may want to see also
![]()
Craft foam and felt projects
Craft foam and felt are versatile materials that can be transformed into amazing projects with the help of rubber cement. Whether you are an experienced crafter or just starting out, here are some cool things you can do with these materials and rubber cement.
- Foam or Felt Stickers: Rubber cement is the perfect adhesive to create your own stickers using craft foam or felt. Simply cut out shapes and designs from the foam or felt sheets, and then apply a thin layer of rubber cement on the back. Press it onto any surface like notebooks, cards, or even walls, and enjoy your personalized stickers that can be easily removed without leaving any residue.
- Foam or Felt Jewelry: Get creative by making unique jewelry pieces using foam or felt. Cut out various shapes, such as flowers, stars, or animals, and layer them using rubber cement to create vibrant and lightweight pendants or charms. Add jump rings and chains to complete the jewelry piece. You can also use rubber cement to attach beads or sequins for extra sparkle.
- Foam or Felt Masks: Let your imagination run wild and create your own foam or felt masks using rubber cement. Cut out a mask shape, whether it's a superhero, an animal, or a mythical creature, and then use rubber cement to attach embellishments like feathers, buttons, or glitter. Personalize your mask with paints or markers, and attach an elastic band to wear it comfortably.
- Foam or Felt Bookmarks: Make reading more enjoyable with personalized foam or felt bookmarks. Cut out shapes or simple rectangles from craft foam or felt, and use rubber cement to attach different colors or patterns together. You can also add decorative elements like ribbons, buttons, or beads. These bookmarks also make great gifts for bookworms.
- Foam or Felt Puppets: Bring stories to life by creating foam or felt puppets with rubber cement. Cut out puppet shapes, such as animals, people, or fantasy creatures, and use rubber cement to attach details like eyes, mouths, or clothing. Add wooden or craft sticks as handles. Use your puppets to put on shows, entertain friends and family, or simply have imaginative playtime.
Remember to use rubber cement in a well-ventilated area, as it can have a strong smell. Also, allow the rubber cement to dry before handling your projects for a strong and long-lasting bond. These cool things to do with rubber cement, craft foam, and felt are not only fun but also allow you to explore your creativity and make unique handmade items. So, gather your materials and start crafting!
12 Exciting Things to Do in Dalian for Travelers
You may want to see also
Frequently asked questions
Yes, rubber cement can be used to repair tears in fabric. However, it is important to note that rubber cement is not as flexible as fabric glue or other specialized fabric adhesives. It may not be the best option for repairing delicate or stretchy fabrics. For sturdier fabrics like denim or canvas, rubber cement can provide a temporary fix until a more permanent solution is found.
Rubber cement is not recommended for use on valuable or irreplaceable photos or artwork. The chemicals in rubber cement can interact with the pigments in the artwork or cause discoloration over time. It is always best to use archival-quality adhesives specifically designed for preserving artwork and photographs.
Yes, rubber cement can be a fun and versatile tool in mixed media art. By applying rubber cement to your art surface and allowing it to dry, you can create raised texture that can be painted or inked over. This can add dimension and interest to your artwork. Just make sure to experiment on a small test piece first to ensure the desired effect.
Yes, rubber cement can be a great temporary adhesive for crafts and DIY projects. It can be used for temporarily adhering paper, cardstock, or other lightweight materials together. It allows for easy repositioning and doesn't leave a residue when removed. However, keep in mind that rubber cement is not a strong, permanent adhesive, so it may not be suitable for long-term or heavy-duty projects.


5 Comments
Amna Myers
Majid Rana
AuthorFaith Mays
Kelsey Wu
Arjun Yadav
Author