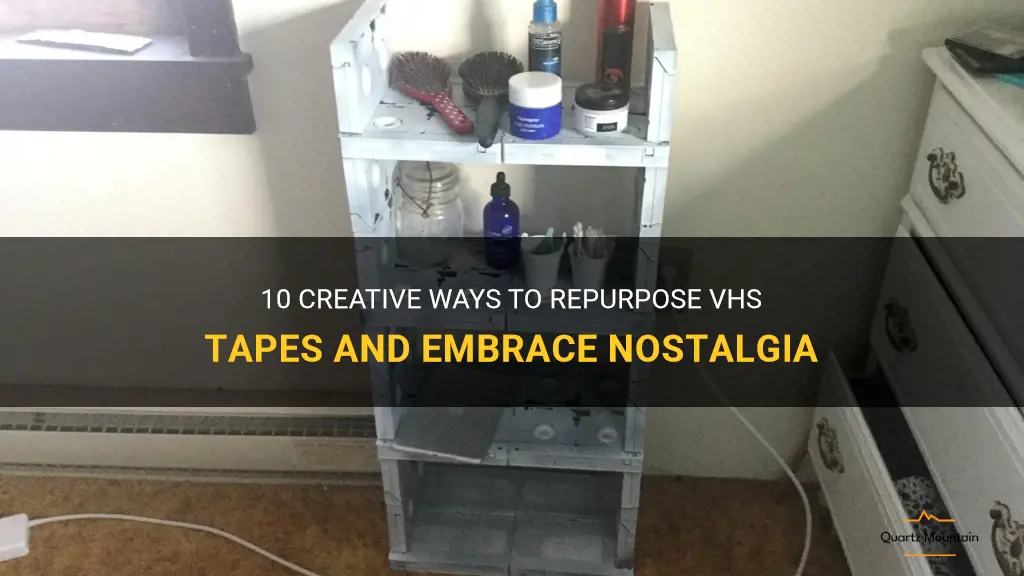
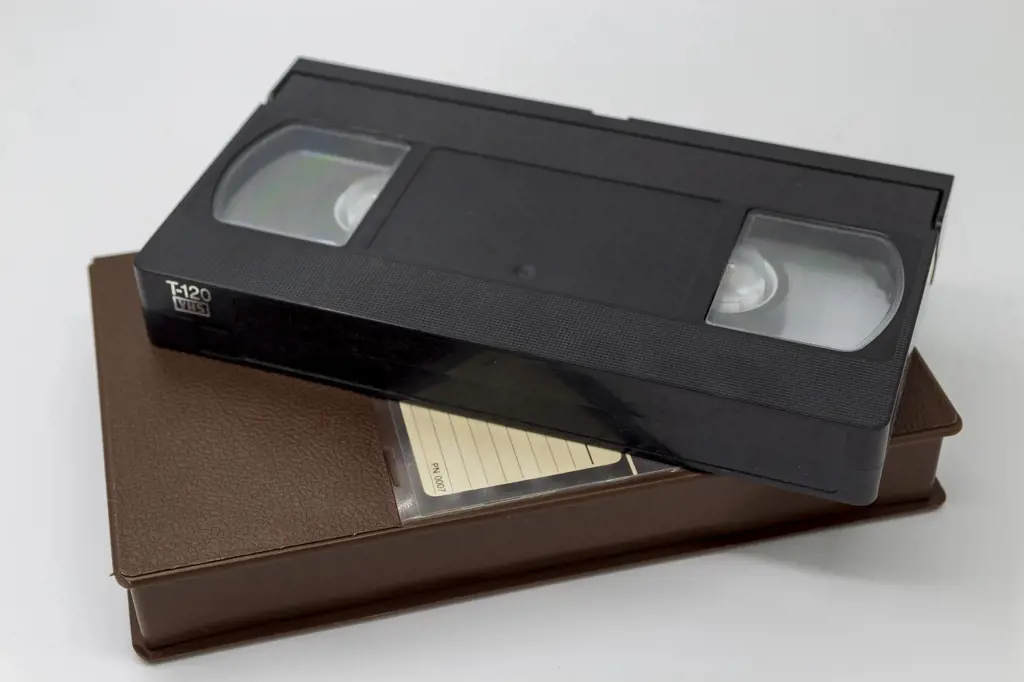
In this digital age, VHS tapes may seem like relics from a bygone era, collecting dust in attics and basements across the world. However, don't be so quick to dismiss these outdated forms of media. With a little creativity and a touch of nostalgia, VHS tapes can be transformed into unique and functional pieces of art. From repurposing them into planters to creating retro-inspired home decor, here are 10 creative ways to repurpose VHS tapes and embrace the nostalgia of a bygone era.
What You'll Learn
- Transform VHS tapes into unique bookends for your shelves
- Turn old VHS cases into stylish and functional storage containers
- Create a nostalgic photo frame by repurposing a VHS tape
- Use VHS tapes as retro-inspired drink coasters for your next gathering
- Transform your VHS collection into a unique piece of wall art
- Turn VHS tapes into a unique and trendy clutch or wallet
- Embrace nostalgia by turning VHS tapes into funky cassette tape holders
- Use VHS tapes as funky and unique bookshelves
- Create a VHS tape lamp to add a vintage touch to any room
- Turn old VHS tapes into funky and trendy wall clocks
![]()
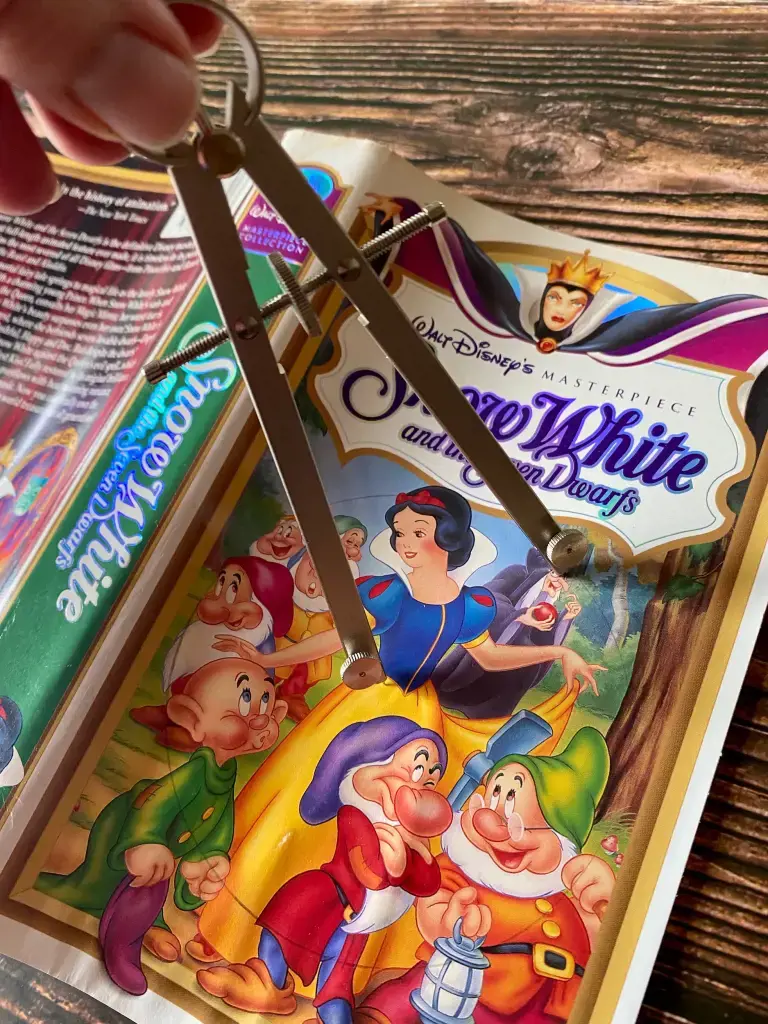
Transform VHS tapes into unique bookends for your shelves
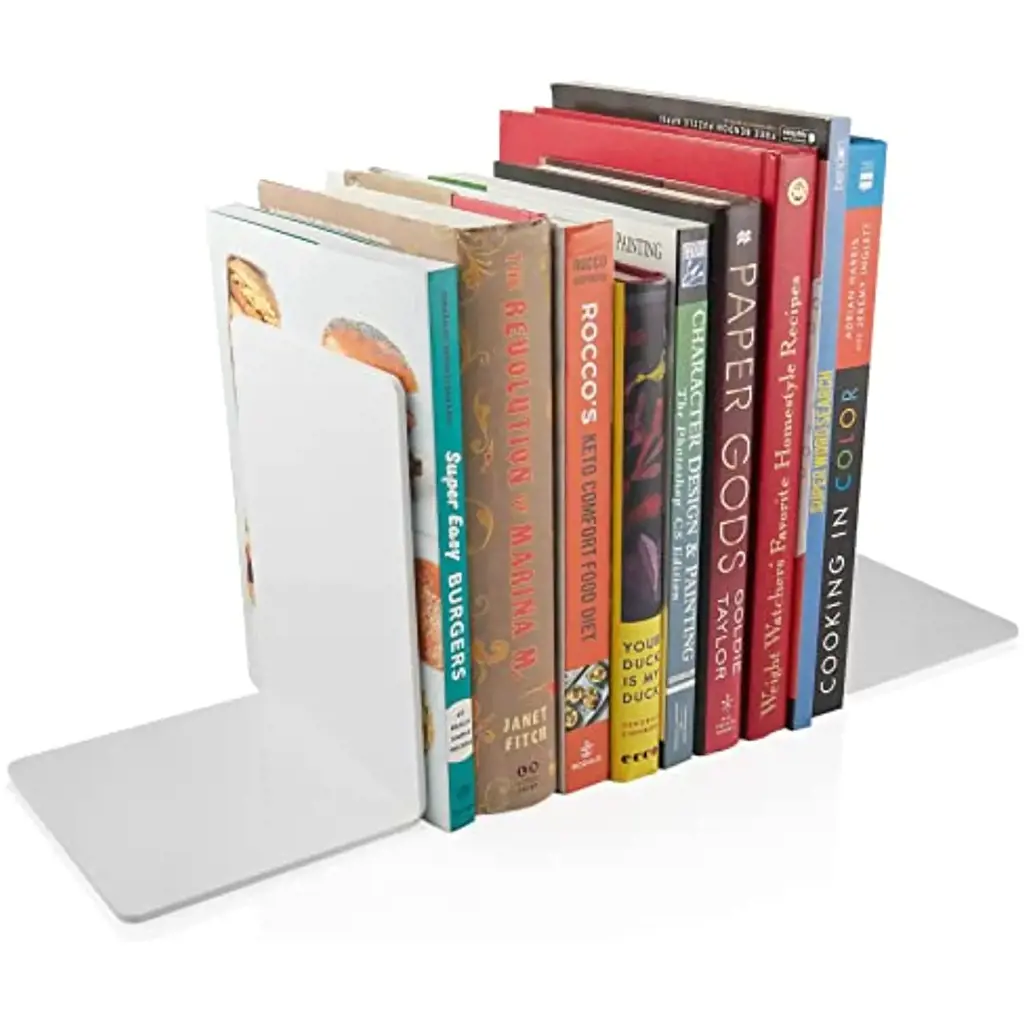
Are you wondering what to do with those old VHS tapes that have been taking up space in your attic or basement? Why not repurpose them into something fun and functional, like unique bookends for your shelves? With a little creativity and some basic crafting supplies, you can transform your VHS tapes into a cool and eye-catching addition to your home decor.
Here's a step-by-step guide to help you turn your old VHS tapes into stylish bookends:
Gather your supplies:
- Old VHS tapes (you can use ones that are no longer playable or that you no longer need)
- Utility knife or scissors
- Strong adhesive (such as epoxy or super glue)
- Decorative paper or fabric
- Craft paint or spray paint (optional)
- Paintbrushes (if you're using craft paint)
- Mod Podge or clear sealant (optional)
- Sandpaper (optional)
Prepare the VHS tapes:
- Start by removing the plastic covers from the VHS tapes. This can usually be done by using a utility knife or scissors to carefully pry them off.
- If the tapes have any stickers or labels on them, peel them off and try to remove as much adhesive residue as possible. You can use an adhesive remover or rubbing alcohol to help with this step.
- If the tapes are dirty or sticky, you can clean them using a damp cloth or mild soap and water. Allow them to dry completely before proceeding.
Customize the tapes:
- This step is optional but can add a personal touch to your bookends. If you want to paint the VHS tapes, use craft paint or spray paint in your desired color. Be sure to protect your work area and follow the instructions on the paint container. Allow the paint to dry completely before moving on.
- Alternatively, you can cover the tapes with decorative paper or fabric. Measure and cut the paper or fabric to fit the surface of the VHS tapes. Apply a layer of adhesive to the tape and carefully press the paper or fabric onto it, smoothing out any wrinkles or air bubbles. Trim any excess material if needed. Allow the adhesive to dry completely.
Assemble the bookends:
- Take one VHS tape and stand it upright on its edge, with the open side facing outwards. Apply adhesive to the bottom edge of the tape, making sure to cover the entire surface area.
- Press the tape firmly onto a flat surface, such as a tabletop or countertop, for a few minutes to ensure a strong bond.
- Repeat this process for the second VHS tape, making sure it is level with the first tape and aligned properly.
- Allow the adhesive to dry completely according to the manufacturer's instructions.
Finishing touches:
If desired, you can add a protective coat of Mod Podge or clear sealant to the VHS tape bookends to help protect the paper or fabric and provide a glossy finish. Follow the instructions on the product you're using and allow it to dry completely before handling.
And there you have it – your very own customized VHS tape bookends! These unique and conversation-starting pieces will add a touch of nostalgia to any bookshelf and serve as a fun reminder of a bygone era. So, instead of letting your old VHS tapes gather dust, give them a new lease on life by turning them into cool and functional decor items. Happy crafting!
12 Exciting Activities to Experience at Choctaw Casino.
You may want to see also
![]()
Turn old VHS cases into stylish and functional storage containers
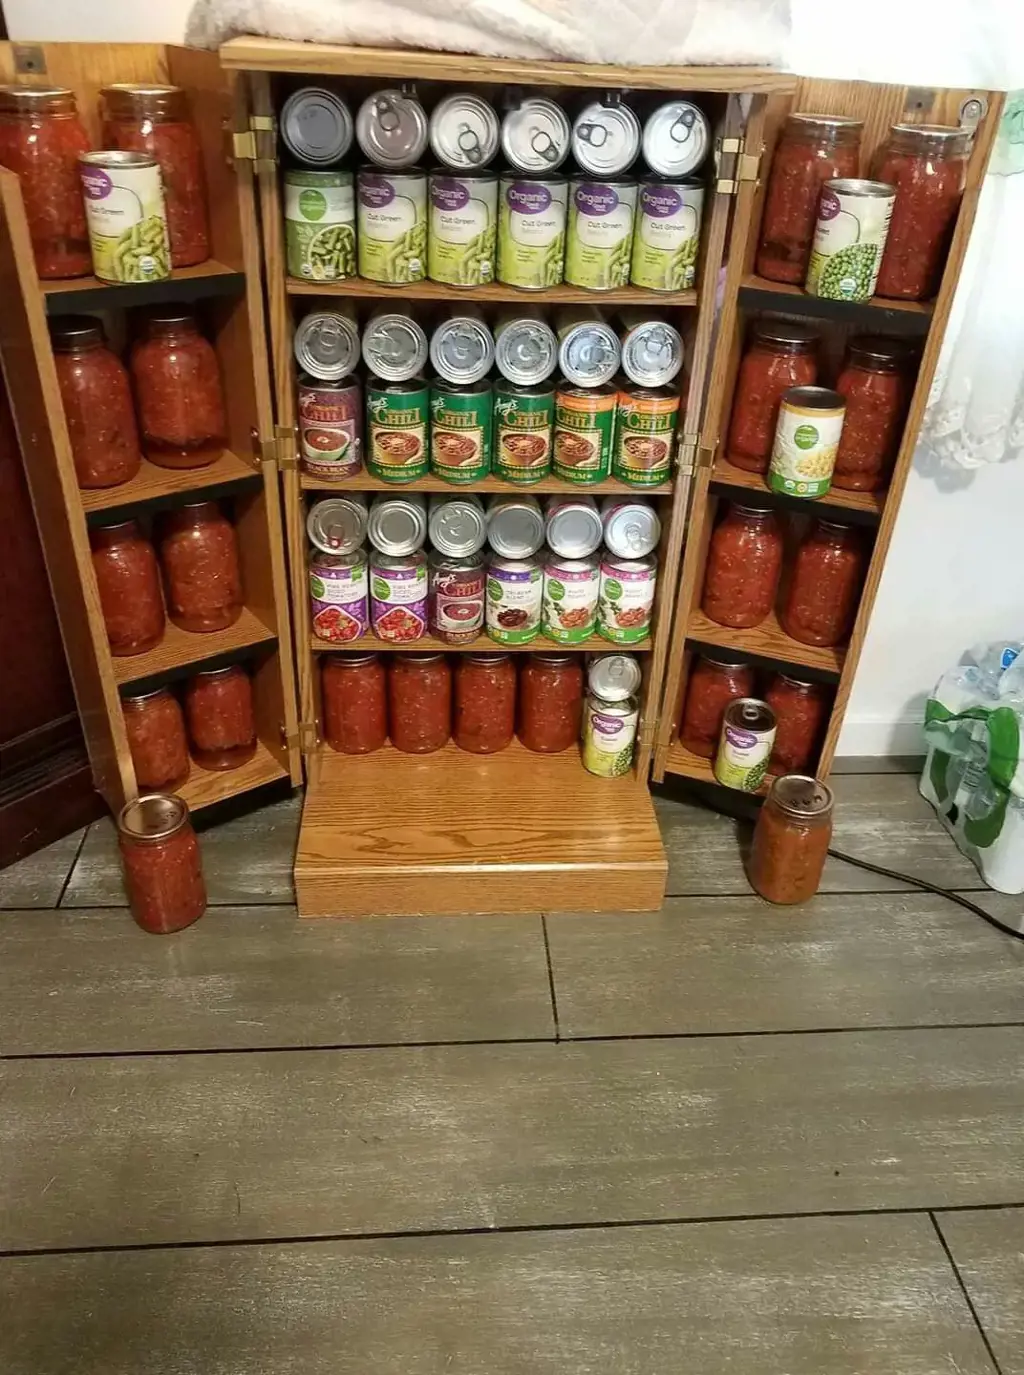
If you have a collection of old VHS tapes lying around that you no longer use, instead of throwing them away, why not repurpose them into something stylish and functional? One great idea is to turn your old VHS cases into storage containers, which not only helps you organize your belongings but also adds a unique touch to your home decor. So, let's get creative and transform those forgotten VHS tapes into cool storage containers!
To start, gather your old VHS cases and remove the tape and cassette from inside. You can keep the tape and cassette for future projects or recycle them, as they are not essential for this particular DIY. Next, clean the cases thoroughly, both inside and out, to ensure they are free from any dust or residue.
Once the VHS cases are clean and dry, it's time to get creative with the exterior. You can choose to leave the original artwork on the cases for a nostalgic look, or you can completely cover them with a new design. To add a personal touch, consider covering the cases with decorative paper, fabric, or even painting them. This step allows you to customize the containers to match your personal style and home decor.
After the exterior is complete, it's time to work on the interior of the VHS cases. One option is to leave them empty and use them as open storage containers, perfect for holding small items like pens, pencils, or office supplies. If you prefer a neater look, you can add dividers inside the case using cardboard or foam board. These dividers will help you separate and organize your belongings, such as craft supplies, jewelry, or even small electronic accessories.
For a more functional storage option, you can transform the VHS cases into mini drawers by attaching drawer handles to the front. Measure and mark the desired positions for the handles on the lower front side of the cases, drill small holes, and then attach the handles using screws. This will give your containers a more professional and finished appearance, making them perfect for storing socks, underwear, or other small clothing items.
If you want to take it a step further, you can add labels to your newly created storage containers. Labeling each container will make it easier to find and retrieve your belongings, especially if you plan to stack them on a shelf or inside a drawer. You can use adhesive labels or get creative by using a label maker or even handwritten tags tied with a string.
Finally, it's time to arrange and display your new storage containers. Whether you choose to stack them on a bookshelf, line them up on a desk, or even mount them on a wall, these repurposed VHS cases are sure to be conversation starters and add a unique touch to your space.
So, instead of throwing away those old VHS tapes, recycle them into stylish and functional storage containers. By repurposing these nostalgic relics, not only are you reducing waste, but you are also turning something old into a cool and useful addition to your home decor. Let your creativity flow and give a new lease of life to those forgotten VHS tapes!
10 Romantic Things to Do in Detroit for a Perfect Date Night
You may want to see also
![]()
Create a nostalgic photo frame by repurposing a VHS tape
In the age of digital media and streaming services, VHS tapes have become obsolete and are often forgotten about. However, instead of letting them gather dust in your basement, why not repurpose them into something cool and nostalgic? One idea is to create a photo frame using a VHS tape.
To make a VHS tape photo frame, you will need the following materials:
- A VHS tape
- Scissors
- Glue or double-sided tape
- Photos or printed images
- Cardboard or thick paper
- Optional: decorations like stickers, colored paper, or markers
Here's a step-by-step guide to creating your VHS tape photo frame:
- Begin by removing the cassette from the VHS tape. You won't be needing the actual tape for this project.
- Take the scissors and carefully cut along the sides of the VHS tape, removing the plastic cover. Be cautious while doing this to avoid any accidents.
- Once you have removed the plastic cover, you will be left with the VHS tape shell. Clean it thoroughly to remove any remaining debris or tape residue.
- Next, measure the dimensions of the VHS tape shell. Transfer these measurements onto the cardboard or thick paper and cut out a rectangle that matches these dimensions. This will serve as the backing for your photo frame.
- Glue or tape your chosen photos or printed images onto the cardboard or thick paper. Ensure that they are centered and aligned properly.
- Apply glue or double-sided tape along the edges of the cardboard or thick paper. Carefully attach it to the inside of the VHS tape shell, ensuring that it is centered.
- Once the backing is securely glued or taped inside the VHS tape shell, your photo frame is almost complete. You can choose to leave it as it is or add additional decorations. Some ideas include placing stickers or colored paper around the edges of the VHS tape shell or using markers to personalize it.
- Allow the glue or tape to fully dry before inserting the frame into an upright position or hanging it on a wall.
By repurposing a VHS tape into a photo frame, you not only create a unique and nostalgic piece to display your favorite memories, but you also give new life to an old object that would otherwise be discarded. This project also serves as a reminder of the bygone era of VHS tapes and can be a great conversation starter.
So, next time you come across an old VHS tape, don't toss it aside. Instead, embrace your creativity and turn it into something cool and memorable—a VHS tape photo frame.
11 Romantic Things to Do in Myrtle Beach for Valentine's Day
You may want to see also
![]()
Use VHS tapes as retro-inspired drink coasters for your next gathering
If you have a collection of VHS tapes gathering dust in the corner of your home, don't throw them away just yet. Instead, repurpose them into unique and retro-inspired drink coasters for your next gathering. Not only will this breathe new life into these nostalgic relics, but it will also add a touch of vintage charm to your home decor. Here's how you can turn your old VHS tapes into cool drink coasters.
- Gather your materials: To create VHS tape coasters, you'll need a few basic supplies. These include old VHS tapes, a pair of sharp scissors or a utility knife, sandpaper, clear adhesive contact paper or epoxy resin, and a felt or cork sheet.
- Preparation: Start by removing the VHS tape from its plastic casing. Carefully cut along the sides of the tape to free it from the casing. Once removed, use sandpaper to smooth out any rough edges or corners. This will ensure a neat and polished look for your coasters.
- Protect the VHS tape: To prevent the artwork on the VHS tapes from fading or getting damaged by moisture, cover them with clear adhesive contact paper. Cut out a piece of contact paper slightly larger than the VHS tape and carefully apply it, smoothing out any bubbles or wrinkles. Alternatively, if you prefer a sleeker look, you can use epoxy resin to create a glossy finish on the VHS tape surface. Follow the instructions on the epoxy resin packaging for the best results.
- Create the base: Cut out circular or square pieces from the felt or cork sheet to serve as the base for your VHS tape coasters. Make sure they are slightly smaller than the size of the VHS tape to allow the artwork to be visible.
- Attach the base: Once you have your cork or felt pieces ready, apply a layer of adhesive to one side and carefully stick it to the bottom of the VHS tape. Press firmly to ensure a strong bond. The cork or felt will not only protect your surfaces from scratches but also provide a bit of grip to prevent the coaster from sliding around.
- Personalize your coasters: If you want to add a personal touch to your VHS tape coasters, you can get creative with the artwork. You can print out labels with catchy phrases or movie titles and attach them to the top of the VHS tape using double-sided tape. This will give your coasters a more customized and playful look.
Once your VHS tape coasters are ready, place them on your coffee table, bar cart, or any other surface where you serve drinks. Not only will they protect your furniture from unsightly water rings, but they will also serve as a great conversation starter with your guests.
In conclusion, repurposing old VHS tapes into drink coasters is a fun and environmentally-friendly way to give these relics a new lease on life. With just a few simple materials and some creativity, you can create unique and retro-inspired coasters that will add a touch of nostalgia to your home decor. So, why not gather those forgotten VHS tapes and turn them into cool drink coasters for your next gathering?
13 Fun Ideas for a Palm Springs Bachelorette Party
You may want to see also
![]()
Transform your VHS collection into a unique piece of wall art
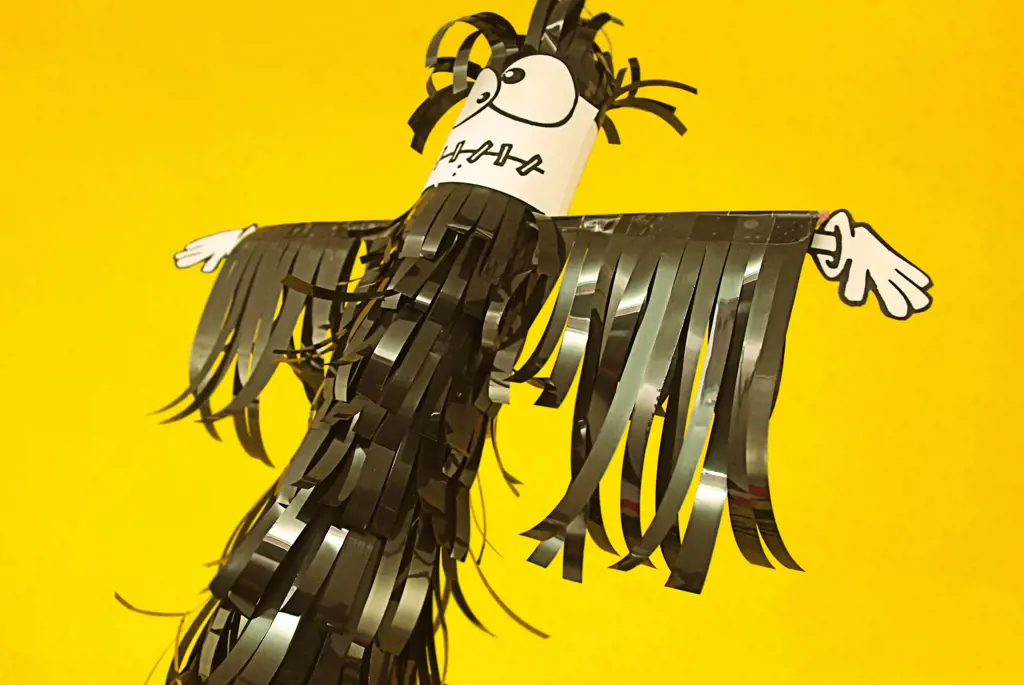
If you have a collection of old VHS tapes lying around and you're looking for a creative way to upcycle them, why not turn them into a unique piece of wall art? Transforming your VHS collection into a decorative display is a fun and nostalgic project that will add a touch of retro charm to any room. Here are some cool ideas to get you started.
Create a VHS tape mosaic:
Take a large, blank canvas and gather your VHS tapes. Cut off the plastic cases and trim the tapes to create pieces of varying sizes. Use a strong adhesive to attach the tape pieces to the canvas, arranging them in a mosaic pattern. You can mix colors and patterns or stick to a specific theme. Experiment with different layouts until you achieve the desired effect. Once everything is dry, hang your VHS tape mosaic on the wall for a striking piece of art.
Design a VHS tape collage:
For a more eclectic look, try creating a VHS tape collage. Cut out pictures or shapes from magazines or prints that resonate with your interests or chosen theme. Arrange these cutouts on a backing board, leaving space in between. Fill the gaps with pieces of VHS tapes, adhering them with glue or double-sided tape. The combination of images and VHS tape will create a visually captivating collage that tells a unique story.
Make a VHS tape photo frame:
Enhance your favorite photographs with a VHS tape photo frame. Start by removing the tape from the plastic case, leaving the spool intact. Choose a picture frame that fits your photo and cut pieces of VHS tape to cover the sides of the frame. Glue the tape onto the frame, making sure to align it neatly. Insert your chosen photo and display it proudly on your wall or a shelf. This creative frame will give your pictures a vintage twist.
Craft a VHS tape wall hanging:
Transform your VHS tapes into a hanging sculpture that adds movement and dimension to your walls. Cut the tape into long, thin strips and create a loop at one end. Attach the loops to a metal hoop or embroidery hoop, spacing them evenly around the circumference. Continue attaching loops until you achieve your desired density. Hang the finished tape sculpture from a hook on the wall or suspend it from the ceiling for a captivating piece of kinetic art.
Construct a VHS tape shadow box:
Turn a VHS tape into a three-dimensional artwork by building a shadow box. Remove the tape and cut it into small segments of various lengths. Glue these segments to the back of a deep picture frame, arranging them in layers to create depth. You can also add other small objects like toys, buttons, or trinkets to further enhance the visual appeal. Display your VHS tape shadow box on a wall or a shelf to give an ordinary space a touch of whimsy.
Transforming your VHS collection into wall art not only breathes new life into old tapes but also adds a unique and personal touch to your decor. Get creative, experiment with different techniques, and let your imagination run wild. With a little time and effort, you can turn your once-forgotten VHS tapes into a stunning display that celebrates the nostalgia of a bygone era.
12 Fun Activities for Kids in Perdido Key
You may want to see also
![]()
Turn VHS tapes into a unique and trendy clutch or wallet
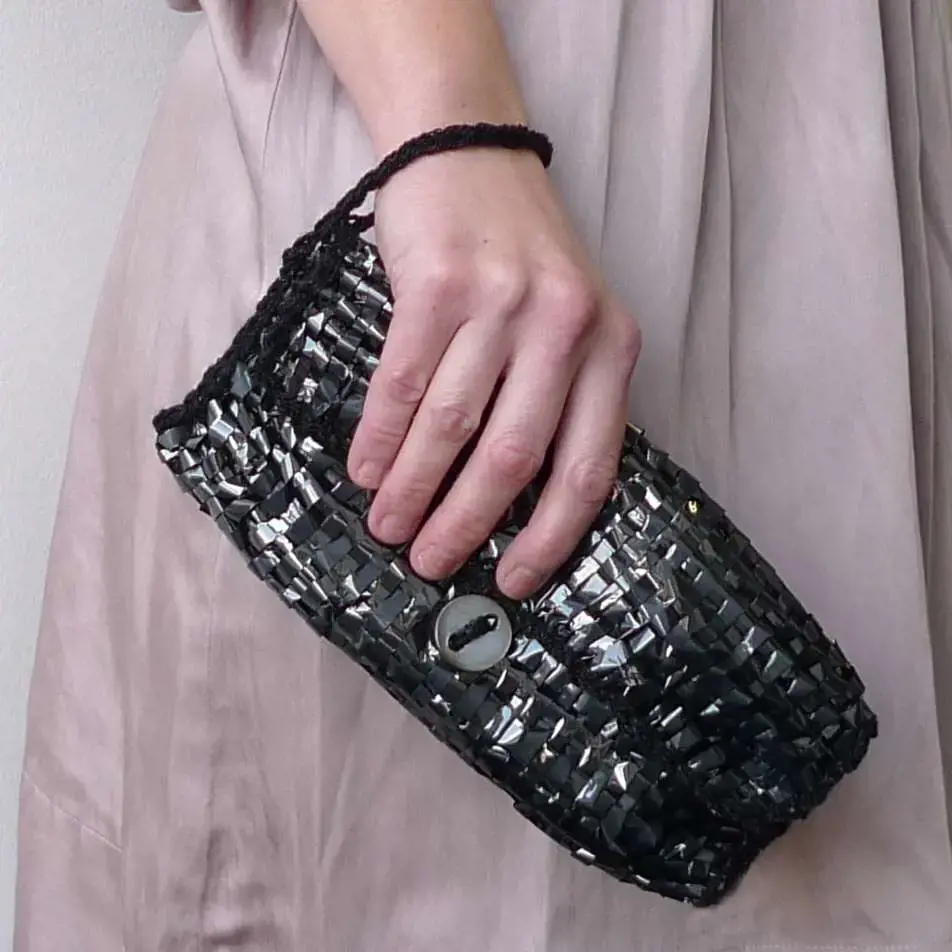
Have you ever wondered what to do with your old VHS tapes? Instead of throwing them away or letting them collect dust in the attic, why not get creative and turn them into something unique and trendy? One fun idea is to transform your VHS tapes into a clutch or wallet. This DIY project is not only a great way to repurpose old items but also a fun way to create a one-of-a-kind accessory that will surely turn heads.
To begin, you will need a few VHS tapes, a screwdriver, a ruler or measuring tape, a craft knife, a pencil, a small saw, sandpaper, a hot glue gun, a fabric lining, and a magnetic closure. Additionally, you may want to choose a decorative fabric or paint to add a personal touch to your creation.
To start the process, carefully open the VHS tape case with a screwdriver, being mindful not to damage the tape inside. Gently remove the tape and set it aside. Measure the length of the tape case and mark it on the backside of the decorative fabric or paint.
Using a ruler or measuring tape, draw lines on the decorative fabric or paint to divide it into four even sections. These sections will become the panels of your clutch or wallet. Use the craft knife to cut along the lines, ensuring clean edges. Repeat this process with another VHS tape case, creating two sets of four panels.
Once you have your panels ready, glue them together using a hot glue gun, ensuring that the edges align properly. Take your time to ensure a clean and sturdy construction. Once the glue has dried, lightly sand the edges to smooth out any roughness.
Next, measure and cut a piece of fabric lining to fit the inside of the tape case. This lining will protect your belongings and add a professional touch to the finished product. Glue the fabric lining onto the inside of the tape case using a hot glue gun.
Finally, attach a magnetic closure to the clutch or wallet to secure it shut. Simply glue one half of the magnetic closure to the front flap of the tape case, and the corresponding half to the front panel of the clutch or wallet. This will ensure that your belongings stay safely inside.
Now that your VHS tape clutch or wallet is complete, you can proudly showcase your unique accessory. The vibrant colors and retro feel of the tapes will surely catch the eye of onlookers. Additionally, this DIY project allows you to personalize your creation by choosing your favorite films or tape designs.
Not only is turning VHS tapes into a clutch or wallet a creative way to repurpose old items, but it is also a trendy and unique accessory. By transforming your old tapes into a fashionable item, you are not only reducing waste but also showcasing your individuality. So gather your old VHS tapes and get ready to create a stylish and conversation-starting accessory!
Explore Franklin: An Exciting Guide to Things to Do in Franklin, NJ
You may want to see also
![]()
Embrace nostalgia by turning VHS tapes into funky cassette tape holders
In today's digital age, it's easy to forget about the days when VHS tapes were the main way we watched movies and recorded our favorite shows. But if you're feeling nostalgic and have a stash of old VHS tapes lying around, why not repurpose them into something fun and unique? One creative idea is to transform them into cool cassette tape holders. Not only will this give your old tapes a new lease on life, but it will also add a touch of vintage charm to your space.
To start this DIY project, gather your collection of VHS tapes. You can either use tapes that you no longer need or ones that have already been rewound, as you won't be able to watch them once they're repurposed. Depending on how many tapes you have and how big you want your cassette tape holder to be, you may need anywhere from five to ten tapes.
Next, gather your materials. In addition to the VHS tapes, you'll need a hot glue gun, a ruler, and a pencil. You may also want to use a craft knife or scissors to cut the tapes to the desired length. Keep in mind that you'll want to leave the spines intact, as they will serve as the edges of your cassette tape holder.
To begin assembling your cassette tape holder, start by determining the desired height and width. Use a ruler and a pencil to mark the measurements on the tapes. Then, carefully cut the tapes to size using a craft knife or scissors. Be sure to measure twice and cut once to ensure a neat and even finish.
Once you have cut all the tapes to size, it's time to start gluing them together. Apply a thin bead of hot glue along one edge of a tape, and press it firmly against another tape. Hold the tapes together for a few seconds to allow the glue to dry and create a secure bond. Repeat this process until all the tapes are glued together, forming a rectangular shape.
After the glue has dried and your cassette tape holder is sturdy, you can add some finishing touches. If you want to keep the original look of the VHS tapes, you can simply leave them as is. However, if you want to personalize your cassette tape holder, you can get creative with paint, stickers, or even decoupage. Consider adding a label or design that reflects your personal style or the type of music you plan to store in the holder.
Finally, your cool cassette tape holder is complete! Now you can use it to store your favorite cassette tapes, or even repurpose it as a unique desk organizer. Embrace the nostalgia of the VHS era and show off your love for all things retro with this fun and practical DIY project.
11 Unique Things to Do in Norristown, PA That Will Leave You Amazed
You may want to see also
![]()
Use VHS tapes as funky and unique bookshelves
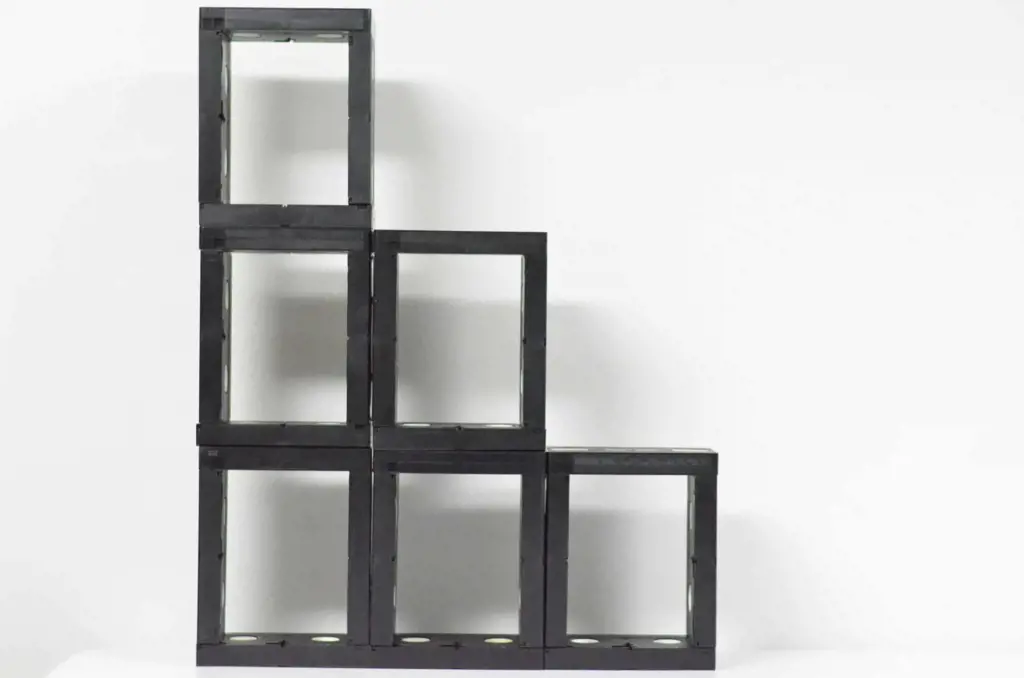
VHS tapes were once a popular form of entertainment, but now they have become obsolete with the rise of digital media. However, there are still plenty of cool things you can do with your old VHS tapes to give them a new purpose. One creative and unique idea is to use VHS tapes as funky bookshelves. Not only does this offer a practical storage solution for your books, but it also adds a retro and nostalgic touch to your home decor.
To transform your VHS tapes into bookshelves, you will need a few materials and tools. Here's a step-by-step guide on how to create these funky bookshelves:
Gather your materials:
- Old VHS tapes: You can use tapes from your own collection or find them at thrift stores or garage sales.
- Epoxy adhesive: This is a strong adhesive that will help secure the tapes together.
- Shelf brackets: These will provide support for the books and tapes.
- Screws and a drill (if necessary): Depending on your chosen method of attachment, you may need screws and a drill to secure the brackets to the tapes.
Prepare the tapes:
- Remove the film from the cassette. Start by opening the VHS tapes and carefully remove the film inside. Be cautious not to damage the tape or pull it too forcefully.
- Clean the tapes. Use a damp cloth or gentle cleaning solution to wipe any dust or dirt off the tapes. Let them dry completely before moving on to the next step.
Arrange the tapes:
- Lay out the tapes in a design that you find visually appealing. You can experiment with different configurations and positions to create a unique pattern or shape.
- Apply epoxy adhesive to the surfaces where the tapes will be attached. Ensure that the adhesive is evenly spread and covers enough of the surface for a secure bond.
- Press the tapes firmly together, applying pressure to ensure they stick together. Allow the adhesive to dry according to the manufacturer's instructions.
Attach the shelf brackets:
- Determine the desired height and position of the shelf brackets. Mark the spots where you will attach them on the back of the tapes.
- If necessary, use a drill to create pilot holes for the screws. This will make it easier to attach the brackets securely.
- Align the brackets with the marked spots and screw them into place. Make sure they are firmly attached and provide enough support for the books.
Mount the bookshelves:
- Find a suitable location on your wall for the bookshelves. Use a level to ensure they are straight.
- Attach the bookshelves to the wall using screws or other appropriate mounting hardware. Double-check that they are secure and stable.
Once your VHS tape bookshelves are in place, you can start arranging and displaying your books. The shelves can hold both smaller paperbacks and larger hardcovers, giving you a unique and eye-catching way to showcase your literary collection. Plus, the retro vibe of the VHS tapes adds a distinctive touch to any room.
Using VHS tapes as bookshelves is not only an eco-friendly way to repurpose old technology but also offers a fun and creative DIY project. So go ahead and transform your old tapes into funky bookshelves and bring a touch of nostalgia to your home decor.
12 Amazing Things to Do Near Kohler-Andrae State Park
You may want to see also
![]()
Create a VHS tape lamp to add a vintage touch to any room
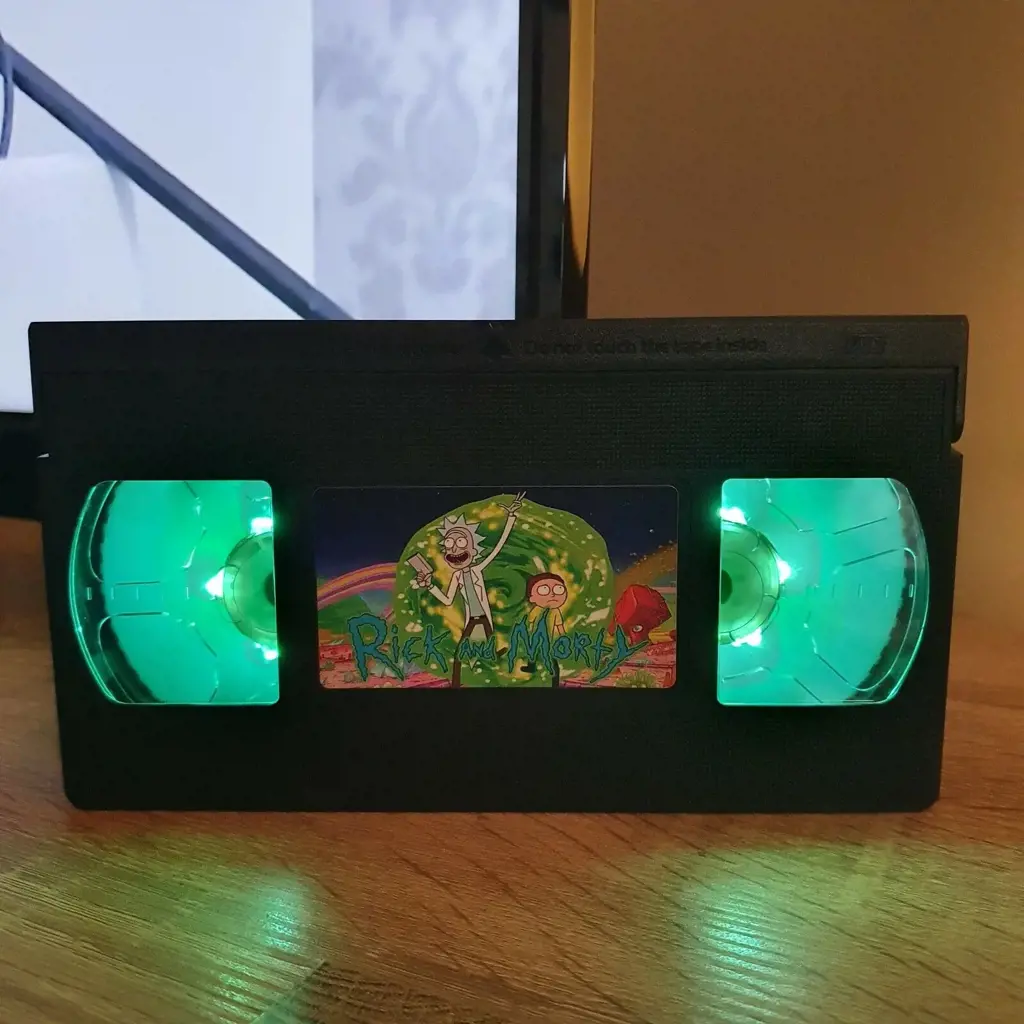
If you're feeling nostalgic and want to add a vintage touch to your home decor, why not repurpose your old VHS tapes? One creative way to give them a new lease on life is by creating a VHS tape lamp. This unique and eye-catching piece will not only serve as a conversation starter but also showcase your love for all things retro.
To create your VHS tape lamp, you'll need a few materials and a sense of adventure. Here's a step-by-step guide to help you through the process:
Gather the materials:
- VHS tapes (preferably ones you no longer need and are willing to repurpose)
- Lamp kit (easily available at any home improvement store)
- Lampshade frame
- Craft knife or a pair of scissors
- Clear tape or glue
- Lightbulb compatible with the lamp kit
Prepare the VHS tapes:
- Deconstruct the VHS tapes by removing the outer plastic casing. You should be left with just the tape itself.
- Use a craft knife or scissors to carefully cut open the tape and remove the magnetic tape inside. Be cautious not to damage the tape while doing this.
Construct the lamp base:
Follow the instructions on the lamp kit to assemble the base. This usually involves attaching the lamp rod to the lamp base.
Attach the VHS tapes:
- Starting from the bottom, tape or glue the VHS tapes around the lamp rod in a spiral manner, ensuring that the tape edges overlap slightly.
- Continue adding tapes until you reach the top of the lamprod. Make sure the tapes are secure and evenly spaced.
Attach the lampshade frame:
- Place the lampshade frame on top of the VHS tapes.
- Secure the frame to the lamp rod using clear tape or glue, ensuring it is centered and stable.
Install the lamp kit:
- Follow the instructions on the lamp kit to install the electrical components.
- Make sure the lightbulb you choose is compatible with the lamp kit and provides the desired lighting effect.
Test and adjust:
- Insert the lightbulb into the lamp kit and plug in the lamp to test its functionality.
- If necessary, adjust the VHS tapes or the lampshade for a more balanced look.
Congratulations! You have now successfully created your very own VHS tape lamp. Place it in your living room, bedroom, or any space that could use a touch of vintage charm. Turn it on, and watch as the flickering light casts a nostalgic glow, reminiscent of the VHS era.
Remember, this lamp is not limited to VHS tapes. You can also use cassette tapes, film reels, or any other nostalgic medium that you find appealing. Let your creativity run wild and customize your lamp to reflect your personal style and interests.
Creating a VHS tape lamp is not only a fun DIY project, but it also helps reduce waste by repurposing old materials. So go ahead, channel your inner nostalgia and add a unique and quirky statement piece to your home decor.
14 Fun Things to Do in Hillcrest San Diego
You may want to see also
![]()
Turn old VHS tapes into funky and trendy wall clocks
Whether you have a stack of old VHS tapes collecting dust in your basement or you're just a fan of vintage decor, turning these relics of the past into unique and stylish wall clocks can be a fun and creative project. Not only does it breathe new life into these outdated items, but it also adds a touch of nostalgia and character to any room. So, if you're wondering what to do with those old VHS tapes, read on for a step-by-step guide on how to turn them into funky and trendy wall clocks.
Materials Needed:
- Old VHS tapes
- Clock mechanism kit
- Wall-mountable clock hands
- Screwdriver
- Glue or double-sided tape
- Optional: Spray paint or acrylic paint
Step 1: Gather your VHS tapes
Start by gathering all the VHS tapes you want to convert into wall clocks. You can choose tapes with colorful labels or ones that hold sentimental value. If you don't have any VHS tapes lying around, consider visiting thrift stores, garage sales, or online platforms where vintage items are sold.
Step 2: Remove the tape and labels
Using a screwdriver, carefully open the VHS tape casing. Remove the tape itself and set it aside (you can recycle it later). Next, take off the labels on both the front and back of the cassette. This will create a blank canvas for your clock design.
Step 3: Design and paint (optional)
Before attaching the clock mechanism, you have the option to paint the VHS tapes to match your room's decor or to create a specific theme. Spray paint or acrylic paint works well for this purpose. You can go for solid colors, gradients, or even get creative with patterns and designs.
Step 4: Attach the clock mechanism
Following the instructions provided with the clock mechanism kit, affix it to the center of the VHS tape. Typically, this involves inserting the clockwork through a small hole in the tape and securing it on the other side with a washer and a nut. Use a screwdriver to tighten it securely.
Step 5: Add the clock hands
Most clock mechanisms come with basic clock hands, but you can always replace them with more unique and decorative ones. Simply attach the hour and minute hand to the clock mechanism's spindle using the provided nut or screw.
Step 6: Mount on the wall
Decide where you want to display your VHS tape clock and mark the spot on the wall. Attach a wall-mountable hook or adhesive strip to ensure it stays in place. Hang the clock by attaching it to the hook or strip.
Step 7: Set the time
Finally, set the time on your newly transformed VHS tape wall clock. Use the small knob on the back of the clock mechanism to adjust the hour and minute hands accordingly.
Voila! You now have a funky and trendy wall clock made from old VHS tapes. Admire your handiwork and enjoy the unique touch it brings to your space. Get creative and make multiple clocks using different tapes to add variety and an eclectic vibe to your wall decor.
12 Must-Do Activities on Chicago's North Shore
You may want to see also
Frequently asked questions
Yes, you can still watch VHS tapes on a modern TV, but you will need a VCR or a VCR/DVD combo player. Most modern TVs do not have built-in VCRs, so you'll need an external device to play the tapes.
Absolutely! There are many fun and creative ways to repurpose old VHS tapes. You can turn them into unique and stylish bookends by removing the tape reel and gluing the cases together. You can also transform them into planters by removing the tape reel and inserting a small potted plant. Additionally, VHS tapes can be used as quirky and retro-looking storage containers for small items like pens, makeup brushes, or even coins.
Yes, you can convert your VHS tapes to a digital format. There are various methods to do this, including using a standalone VHS-to-DVD converter or using a video capture device connected to your computer. Once digitized, you can transfer the video files to a USB drive, external hard drive, or even upload them to the cloud for safekeeping.
Yes, certain rare VHS tapes can be worth a significant amount of money to collectors. These may include limited edition releases, out-of-print movies, or obscure cult classics. Some popular examples include the original "Star Wars" trilogy on VHS, the "Little Mermaid" Black Diamond edition, and the elusive "Tales from the Quadead Zone." However, it's important to note that the value of VHS tapes fluctuates and is dependent on factors such as condition and demand.
To clean and preserve your VHS tapes, start by gently wiping the exterior of the cassette case with a soft cloth to remove dust and fingerprints. Avoid using harsh chemicals or abrasive materials that could damage the artwork or labeling. When handling the tape itself, be sure to keep your fingers away from the tape itself to prevent smudges or debris from getting on it. If the tape is visibly dirty or sticky, you can use a VCR tape cleaner kit or a soft cloth slightly dampened with isopropyl alcohol to clean the tape heads. However, be cautious and follow the instructions carefully to avoid any potential damage.


5 Comments
Teddy Porter
Omari Garcia
Jose Ramos
AuthorLouisa Meyers
Olivia Jacobs
Author