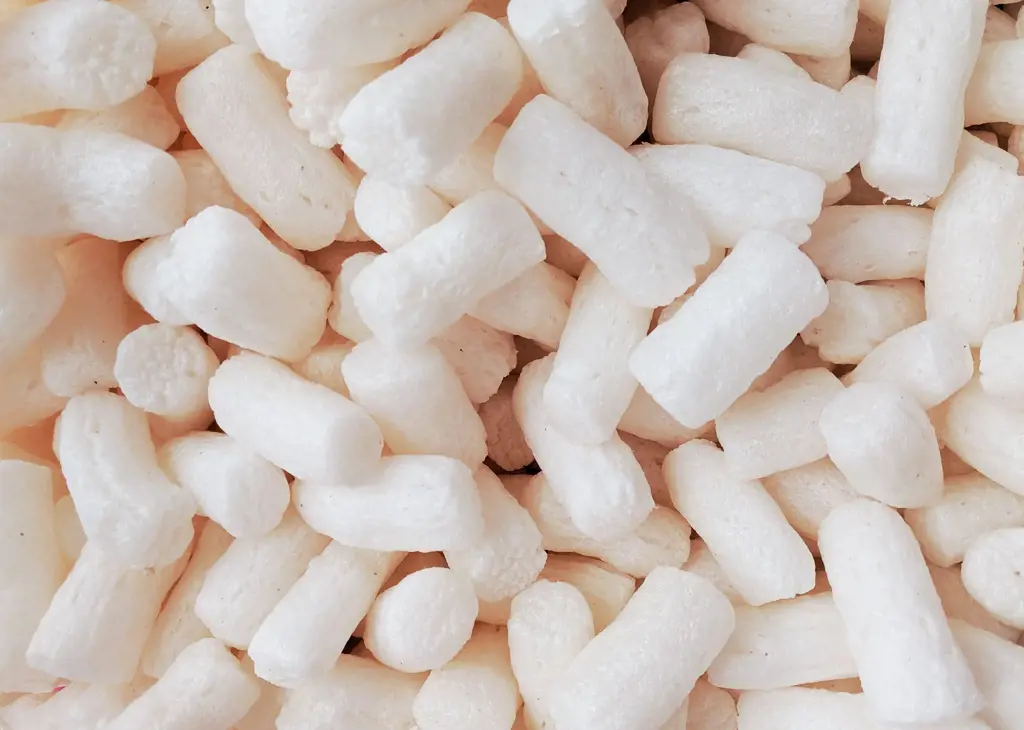
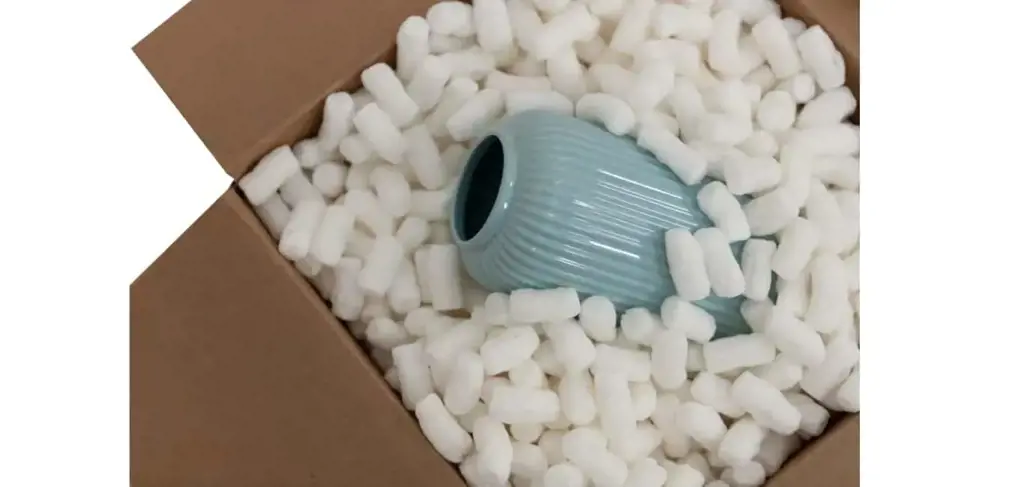
If you're like most people, packing peanuts are simply something that ends up in the trash after you receive a package. However, these little foam nuggets can actually be used in a variety of creative and fun ways. From arts and crafts projects to household hacks, there's no shortage of innovative ways to put packing peanuts to use. So instead of tossing them in the trash, why not give these 10 fun and inventive ideas a try? You'll be amazed at what you can do with these unassuming little nuggets of foam.
| Activity | Materials Needed |
|---|---|
| Packing Peanut Sculptures | Packing peanuts, glue |
| Sensory Bin | Packing peanuts, small toys |
| Packing Peanut Slime | Packing peanuts, clear glue, borax solution |
| Shooting Gallery | Packing peanuts, cups/containers, toy guns |
| Packing Peanut Mosaics | Packing peanuts, different colored paint |
| Packing Peanut Stomp | Packing peanuts, large plastic bags |
| Bubble Wrap Popping | Packing peanuts, bubble wrap |
What You'll Learn
- DIY stress ball
- Filler for bean bag chairs
- Create a sensory bin for kids
- Insulate a cooler for picnics
- Make a DIY bath mat
- Create a cushion for fragile items during shipping
- Stuff a scarecrow for Halloween decorations
- Make homemade packing material for gifts
- Create an obstacle course for small pets
- Use as a base for artificial flower arrangements
![]()
DIY stress ball
Packing peanuts are usually a nuisance when it comes to unpacking packages. However, did you know that these small foam pieces can be used for more than just shipping? One DIY project that you can try using packing peanuts is making your own stress ball. With just a few simple steps, you can create a fun and squishy toy that will help you relax when you're feeling stressed.
To make a DIY stress ball, you will need the following materials:
- Packing peanuts: Gather a handful of packing peanuts. The exact amount will depend on the size of your stress ball.
- Balloon: Choose a balloon in your preferred color. Make sure the balloon is stretchy and can hold the packing peanuts.
- Funnel: Use a funnel to make it easier to pour the packing peanuts into the balloon.
Now, let's get started on creating your stress ball:
Step 1: Inflate the balloon to stretch it out and then release the air. This step will make it easier for you to fill the balloon with the packing peanuts.
Step 2: Take the deflated balloon and stretch the neck of the balloon over the funnel. Make sure it is secure and won't come off while pouring in the packing peanuts.
Step 3: Slowly pour the packing peanuts into the balloon using the funnel. Be mindful not to overfill the balloon as it may burst. Leave enough space for the packing peanuts to move around and provide a soft and squishy texture.
Step 4: Once you've filled the balloon with the desired amount of packing peanuts, remove the funnel carefully. Hold onto the neck of the balloon to prevent the packing peanuts from falling out.
Step 5: Give the balloon a gentle squeeze to redistribute the packing peanuts and create an even texture inside the balloon.
Step 6: Tie off the neck of the balloon tightly to secure the packing peanuts inside. Make sure it is tightly knotted to prevent any air or packing peanuts from escaping.
And voila! You have your very own homemade stress ball using packing peanuts. The foam texture of the packing peanuts provides a satisfying squishiness when you squeeze the stress ball, making it an ideal stress-relieving toy. You can use it whenever you feel stressed or overwhelmed, giving you a fun and creative way to relax.
Additionally, you can customize your stress ball by using different colored balloons or even adding decorative elements such as stickers or markers. Get creative with your stress ball design and make it your own!
So the next time you find yourself drowning in packing peanuts, remember that they can be transformed into something fun and useful. Give this DIY stress ball a try and discover a creative way to de-stress and have a little fun!
12 Amazing Things to Do in Caracas, Venezuela
You may want to see also
![]()
Filler for bean bag chairs
If you have ever opened a package and found packing peanuts inside, you probably know that they can sometimes create more of a mess than they are worth. But did you know that packing peanuts can actually be used for fun and practical purposes? One clever and frugal way to use packing peanuts is as filler for bean bag chairs.
Bean bag chairs are known for their comfort and flexibility. They are perfect for lounging and relaxing. However, over time, the beans that fill the chair can compress and lose their shape, resulting in a less comfortable seating experience. This is where packing peanuts can come to the rescue.
Using packing peanuts as filler for bean bag chairs is not only a cost-effective solution, but it also provides added support and comfort. The peanuts are lightweight and can easily conform to the shape of the body, ensuring a snug and cozy fit. Additionally, the peanuts are durable and will not break down or deteriorate over time, meaning your bean bag chair will maintain its shape and comfort for longer.
To use packing peanuts as filler for your bean bag chair, you will need to remove the original filling. Empty the old beans into a bag or container to be reused or disposed of. Next, fill the bean bag chair with an appropriate amount of packing peanuts. Be sure not to overfill the chair, as this can result in a stiff and uncomfortable seat. It may be helpful to gradually fill the chair and test the comfort level as you go.
Once your bean bag chair is filled with packing peanuts, give it a good shake and fluff to distribute the peanuts evenly. Sit on the chair to test the comfort and adjust the filling if necessary. You may find that you need to add or remove a few peanuts to achieve your desired level of comfort.
Not only does using packing peanuts as filler for bean bag chairs provide a practical solution for maintaining comfort and support, but it also has an environmental benefit. By repurposing the packing peanuts, you are reducing waste and giving them a second life. This is a great way to be eco-friendly and creative at the same time.
In conclusion, packing peanuts can be repurposed in a fun and practical way by using them as filler for bean bag chairs. This cost-effective solution provides added support and comfort, while also being environmentally friendly. So the next time you receive a package filled with packing peanuts, consider giving them a new purpose and filling up your bean bag chair for a cozy and comfortable seating experience.
13 Awesome Free Things to Do in Beaufort SC
You may want to see also
![]()
Create a sensory bin for kids
Packing peanuts can be a great, inexpensive way to create a fun sensory experience for kids. Creating a sensory bin with packing peanuts can provide hours of entertainment and stimulate your child's senses. Here are some tips on how to create a sensory bin using packing peanuts:
- Gather the materials: Besides the packing peanuts, you will need a large plastic tub or bin, various items to hide in the peanuts such as small toys or sensory objects, and some scoops or spoons for scooping and pouring.
- Fill the bin: Start by filling the bin with a generous amount of packing peanuts. You want enough to cover the bottom of the bin but still leave some space for your child to play and explore.
- Hide objects: Once the bin is filled with packing peanuts, bury small toys or sensory objects within the peanuts. You can choose items that match a specific theme, such as ocean animals or dinosaurs, or simply use items that your child enjoys playing with.
- Explore and discover: Invite your child to start exploring the sensory bin. Encourage them to use their hands to dig through the packing peanuts and search for hidden objects. They can also use the scoops or spoons to collect and pour the packing peanuts, enhancing their fine motor skills.
- Encourage sensory play: As your child interacts with the packing peanuts, they will experience various sensations, such as the texture of the peanuts and the sound they make when touched or poured. Encourage them to describe their experience and ask open-ended questions to stimulate their language development.
- Extend the activity: To further enhance the sensory experience, you can add additional elements to the bin. For example, you can sprinkle in some scented sensory materials like dried herbs or essential oils to add a pleasant aroma. You can also introduce different textures by adding items such as fabric scraps or cotton balls.
- Clean up: When playtime is over, remember to collect and store the hidden objects for future use. Scoop up the packing peanuts and place them in a bag or container for easy storage. You can reuse the packing peanuts for future sensory bins or find alternative ways to recycle them.
Creating a sensory bin with packing peanuts is a simple and affordable way to engage your child in sensory play. It allows them to explore different sensations, develop fine motor skills, and encourages imaginative play. So, next time you receive a package with packing peanuts, consider repurposing them to create a fun and educational activity for your child.
Exploring the Best Free Experiences in Dublin, Ohio
You may want to see also
![]()
Insulate a cooler for picnics
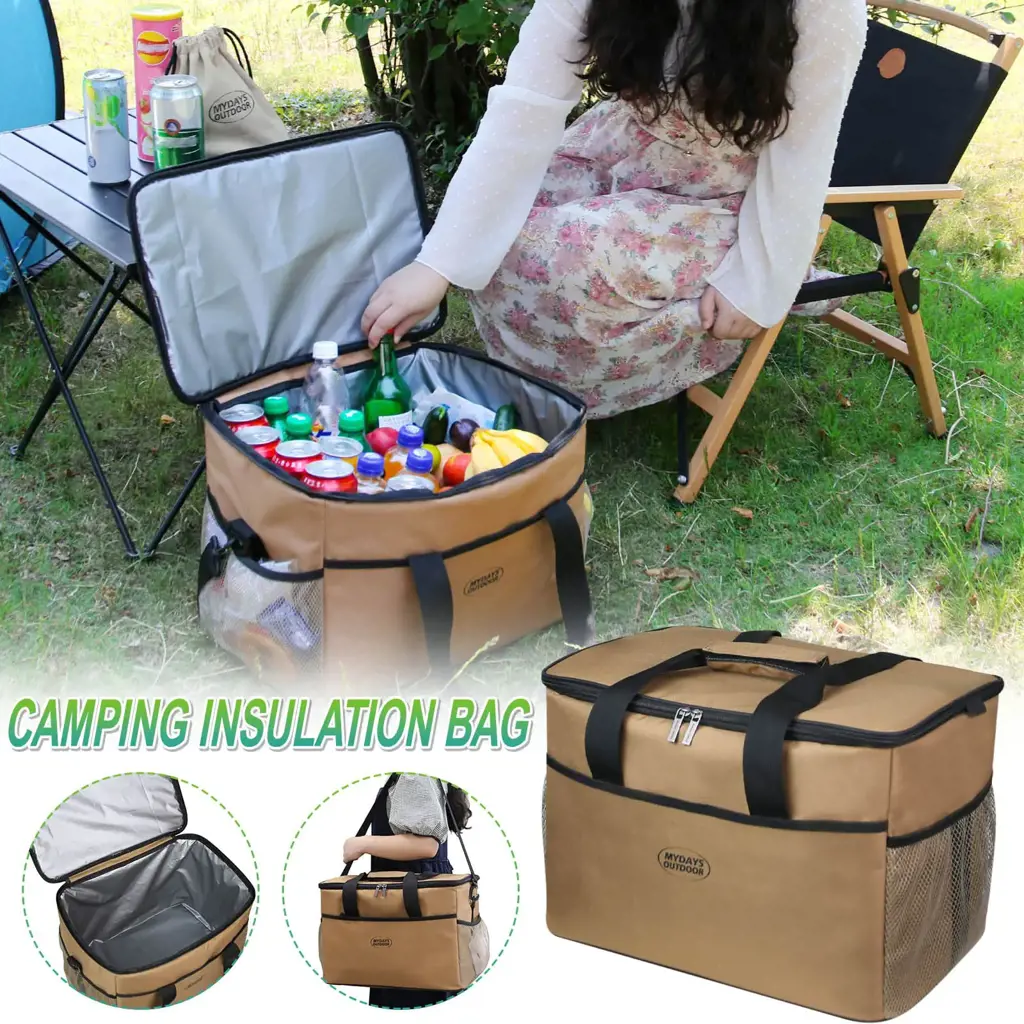
Packing peanuts are not just for filling empty spaces in packages anymore. These little foam wonders have a multitude of uses, including insulating a cooler for an outdoor picnic. Whether you're going on a hike, camping trip, or simply heading to the beach, packing peanuts can help keep your food and drinks cool throughout the day. Here is a step-by-step guide on how to use packing peanuts to insulate your cooler.
Step 1: Gather your supplies
To get started, you'll need a cooler, packing peanuts, a trash bag or plastic liner, and your picnic items. Ensure that your cooler is clean and free of any debris or odors.
Step 2: Line your cooler
Begin by lining the inside of your cooler with a trash bag or plastic liner. This will help prevent any water from seeping into the packing peanuts and making a mess. Secure the liner by folding it over the edges of the cooler.
Step 3: Add a layer of packing peanuts
Pour a layer of packing peanuts onto the bottom of your cooler, making sure to distribute them evenly. The thickness of the layer will depend on the size of your cooler, but aim for around 1-2 inches.
Step 4: Place your picnic items on top
Next, place your food and drinks on top of the layer of packing peanuts. Make sure to leave some space around the edges of the cooler to allow for additional packing peanuts.
Step 5: Fill the gaps
Once your picnic items are in place, start filling the empty spaces between them with packing peanuts. Use your hands to gently push down the peanuts and create a snug fit. The goal is to create a layer of insulation around your food and drinks.
Step 6: Add more layers if necessary
If you have a larger cooler or are planning for an extended picnic, you may need to add additional layers of packing peanuts. Repeat steps 3-5 until your cooler is filled to the top.
Step 7: Close the lid
Once your picnic items are packed and the cooler is filled with packing peanuts, secure the lid tightly. This will keep the cold air inside and the warm air out, ensuring that your food and drinks stay cool for longer periods.
Step 8: Enjoy your picnic!
Now that your cooler is properly insulated with packing peanuts, you can head out for your picnic adventure. Whether you're enjoying a hike in the mountains or soaking up the sun at the beach, you can be confident that your food and drinks will stay cool and refreshing.
Using packing peanuts to insulate your cooler for picnics is a creative and effective way to keep your items chilled. Not only are packing peanuts lightweight and easy to use, but they also help reduce waste by giving them a second life. So the next time you plan an outdoor picnic, don't forget to grab some packing peanuts and enjoy the convenience of a well-insulated cooler.
14 Fun Things to Do at Tahquamenon Falls
You may want to see also
![]()
Make a DIY bath mat
Packing peanuts, those tiny foam pieces that often come as protective fillers in packages, can actually be used for more than just packing material. If you have an abundance of packing peanuts lying around and you're looking for a fun and creative way to repurpose them, you can easily make a DIY bath mat. Here's how:
Materials you'll need:
- Packing peanuts
- Rubber bath mat or shower mat (as a base)
- Hot glue gun
- Scissors
- Marker or pen
Step 1: Prepare the base
Take a rubber bath mat or shower mat that you already have or purchase one if needed. This will serve as the base of your DIY bath mat.
Step 2: Mark the layout
Place the bath mat on a flat surface and use a marker or pen to mark the areas where you want to place the packing peanuts. You can go for a uniform pattern or get creative with different designs.
Step 3: Cut the packing peanuts
Using scissors, cut the packing peanuts into smaller pieces or trim them into desired shapes. This step helps you achieve a customized look for your DIY bath mat.
Step 4: Glue the packing peanuts
Once you have cut the packing peanuts, heat up your hot glue gun. Apply a small amount of hot glue to the marked areas on the bath mat and press the packing peanuts onto the glue. Hold them in place for a few seconds until the glue sets. Repeat this step for all the marked areas until your desired design is complete.
Step 5: Let it dry
After gluing all the packing peanuts, allow the bath mat to dry completely. This usually takes a few hours, but it's best to check the manufacturer's instructions for the specific drying time of the adhesive you use.
Step 6: Clean and test
Before using your DIY bath mat, make sure to clean off any excess glue or loose packing peanuts. Shake or lightly brush off any loose debris. Once cleaned, test out your new bath mat by placing it inside your bathtub or shower. Enjoy the cushioned and unique texture of the packing peanuts as you bathe or shower.
Bonus tip:
You can enhance the look of your DIY bath mat by painting the packing peanuts with non-toxic acrylic paint before gluing them onto the base. This adds a pop of color and personalizes the mat even further.
So, instead of throwing away those packing peanuts, give them a new life by making a fun and unique bath mat. It's not only a creative way to repurpose an everyday item, but also a practical addition to your bathroom décor. Get crafting and enjoy your DIY bath mat!
12 Fun Activities to Do at Orange Lake Resort
You may want to see also
![]()
Create a cushion for fragile items during shipping
Shipping fragile items can often be a stressful experience. With the fear of breakage looming, it's crucial to find ways to protect your delicate goods during transportation. One of the most effective and fun ways to ensure the safety of your items is by using packing peanuts to create a cushion within the package. These lightweight and cushiony materials are not only practical but can also be transformed into creative designs. In this article, we will explore how you can use packing peanuts to create a cushion for fragile items during shipping while having fun along the way.
First and foremost, it's essential to gather all the necessary materials. You will need a sturdy shipping box, packing peanuts, bubble wrap, and your fragile items. Start by placing a layer of bubble wrap at the bottom of the box. This will provide an additional layer of protection for your items. Now, it's time to get creative with the packing peanuts!
One of the easiest ways to use packing peanuts is by pouring them into a plastic bag and using it as a cushion. This method is particularly useful if you're shipping smaller items such as jewelry or electronics. Simply place your item in the bag filled with packing peanuts, ensuring it is fully covered and surrounded by the cushion. Once your item is safely secured, seal the bag tightly, and place it in the center of the shipping box.
If you're feeling a bit more adventurous and artistic, you can create your own packing peanut sculpture! Start by placing a layer of packing peanuts at the bottom of the box. Then, carefully arrange your fragile item on top of the layer. Now, it's time to get creative with the packing peanuts. Add more peanuts around your item, gently pressing and shaping them to create a secure cushion. You can shape the peanuts into interesting designs or patterns, making the unpacking experience more enjoyable for the recipient. Remember to leave enough space on the sides of the box to provide additional cushioning with more packing peanuts. Once your sculpture is complete, seal the box and your package is ready for shipment.
Using packing peanuts not only ensures the protection of your fragile items during shipping but also adds an element of fun to the process. Whether you opt for the simple plastic bag cushion or the more elaborate packing peanut sculpture, you can rest easy knowing that your items are well-protected.
In addition to their functionality, packing peanuts also offer environmental benefits. Many packing peanuts are now made from biodegradable materials, such as cornstarch, ensuring a greener packaging solution. These eco-friendly options are designed to dissolve in water, reducing their impact on the environment.
So, the next time you find yourself in need of shipping fragile items, don't forget to have fun with packing peanuts. Whether you choose the simple and efficient bag cushion method or get creative with a packing peanut sculpture, these lightweight materials will help keep your precious goods safe during transport. Happy shipping!
11 Exciting Activities to Try at Detroit Airport
You may want to see also
![]()
Stuff a scarecrow for Halloween decorations
Do you have a bunch of packing peanuts lying around and don't know what to do with them? Well, we have a fun and creative idea - use them to stuff a scarecrow for your Halloween decorations! This project is not only budget-friendly but also a great way to make use of all those packing peanuts that would otherwise go to waste.
To create your own scarecrow, here's what you'll need:
- Packing peanuts: Gather as many packing peanuts as you have on hand. Make sure they are clean and dry before starting.
- Old clothes: Look for a pair of jeans and a flannel shirt that you don't mind sacrificing for this project. You can also use an old hat or a floppy hat for the scarecrow's head.
- Straw or hay: This is optional, but adding straw or hay to the scarecrow's body will give it a more authentic look.
- Scissors and sewing materials: You'll need these to cut and sew the clothes together to create the scarecrow's body.
Now that you have all your materials ready, follow these steps to make your packing peanut scarecrow:
- Start by stuffing the jeans and shirt with packing peanuts. Use a combination of both loose packing peanuts and straw or hay if desired. Fill up the clothes until they are nice and plump.
- Once the clothes are stuffed, you can sew or tie off the openings to secure the packing peanuts inside. This will keep them from falling out or shifting around.
- If you are using a floppy hat, stuff it with packing peanuts as well to give it shape. If you have an old hat, you can simply place it on top of the scarecrow's head.
- Once all the pieces are stuffed, it's time to assemble your scarecrow. Attach the jeans to the shirt using safety pins or by sewing them together. For the head, attach it to the shirt or stuff it into the collar area of the flannel shirt.
- Now it's time to add the finishing touches. Use buttons for eyes, draw or paint a nose and mouth on the scarecrow's face, and add some straw or hay to the cuffs of the jeans and sleeves of the shirt for a more realistic look.
- Finally, find a spot in your garden or front yard where you want to display your scarecrow. Use stakes or poles to secure it in place, making sure it stands upright.
Voila! You've just created a unique and creative Halloween decoration using packing peanuts. Not only is it a fun project to do, but it's also a great way to repurpose materials that would otherwise go to waste. So gather up those packing peanuts and get ready to scare up some fun this Halloween!
11 Fun Things to Do in Indio, California
You may want to see also
![]()
Make homemade packing material for gifts
When it comes to packing peanuts, most people think of them as just a means to protect fragile items during shipping. However, these little foam wonders can also be used in a variety of fun and creative ways. One particularly enjoyable activity is making homemade packing material for gifts.
To start, gather a bunch of packing peanuts. You can either use ones that you have saved from previous packages or purchase them from a packaging supply store. The great thing about packing peanuts is that they are easily accessible and affordable.
Next, choose a container to hold your packing peanut gift. This can be anything from a small box to a jar or even a decorative tin. The choice is really up to you and what you think will look best for the recipient.
Once you have your container ready, it's time to get creative. Place a layer of packing peanuts at the bottom of the container to create a cushion for the gift. Then, carefully position the gift on top of the peanuts. Make sure it is centered and secure.
After the gift is in place, fill the remaining space in the container with more packing peanuts. You want to create a nice, full appearance without overpowering the gift. This will not only provide additional protection but also add a whimsical touch to the packaging.
To add an extra element of surprise, consider including small treats or trinkets within the packing peanuts. This could be anything from candy or small toys to personalized notes or coupons. This will make the unpacking experience even more enjoyable for the recipient.
Once the container is filled, close it up and decorate it as desired. You could wrap it in colorful paper, tie a ribbon around it, or even attach a personalized tag. Let your creativity shine and make it a gift that is as beautiful on the outside as it is on the inside.
When it's time to give the gift, watch as the recipient excitedly opens the container. They will be delighted to see the unusual and fun packing material and will appreciate the effort that went into creating such a unique presentation.
So the next time you have packing peanuts to spare, don't just throw them away. Instead, use them to create homemade packing material for gifts. It's a fun and creative way to turn something ordinary into something extraordinary. Plus, it's a great way to make your gifts even more memorable and enjoyable to receive.
13 Fun Things to Do in Pacific Beach, San Diego
You may want to see also
![]()
Create an obstacle course for small pets

If you have some packing peanuts lying around and a small pet looking for some fun, why not create an obstacle course for them? Packing peanuts can be a great tool to create a stimulating and entertaining environment for your furry friend. Here are some ideas to get you started on creating a fun and engaging obstacle course using packing peanuts.
- Fill a tunnel: Grab a cardboard tube or a PVC pipe and fill it up with packing peanuts. Place the tunnel on the floor and encourage your pet to crawl through it. The packing peanuts will create a soft and cushioned path for them to explore. You can even place treats or toys inside the tunnel to add an extra incentive.
- Create a digging box: Take a shallow box or a storage container and fill it with loose packing peanuts. Hide some treats or toys inside the box to entice your pet. They will have a great time digging and rummaging through the peanuts to find their rewards.
- Build a maze: Use empty cardboard boxes to create a maze for your pet. Fill the boxes with packing peanuts to provide a soft landing for your pet as they navigate through the maze. Make sure to create different paths and dead ends to challenge your pet's problem-solving skills.
- Set up a jumping course: Arrange a series of cardboard boxes at different heights and distances. Fill them with packing peanuts to create a soft landing area. Encourage your pet to jump from box to box, rewarding them with treats or praise along the way. This activity will help improve their coordination and agility.
- Design a treasure hunt: Hide treats or toys in a room or an enclosed area and scatter packing peanuts all around. Your pet will have a blast searching for the hidden treasures while navigating through the soft packing peanuts.
It's important to supervise your pet while they are playing with packing peanuts to ensure their safety. Although packing peanuts are generally non-toxic, it's always better to be cautious. Additionally, make sure your pet does not ingest the packing peanuts as they can cause blockages.
Creating an obstacle course with packing peanuts is a fun and creative way to engage your small pet. It provides mental stimulation, encourages physical activity, and strengthens the bond between you and your furry friend. So, why not gather those packing peanuts and start building an exciting obstacle course today?
13 Fun Activities to Enjoy in Maine During November
You may want to see also
![]()
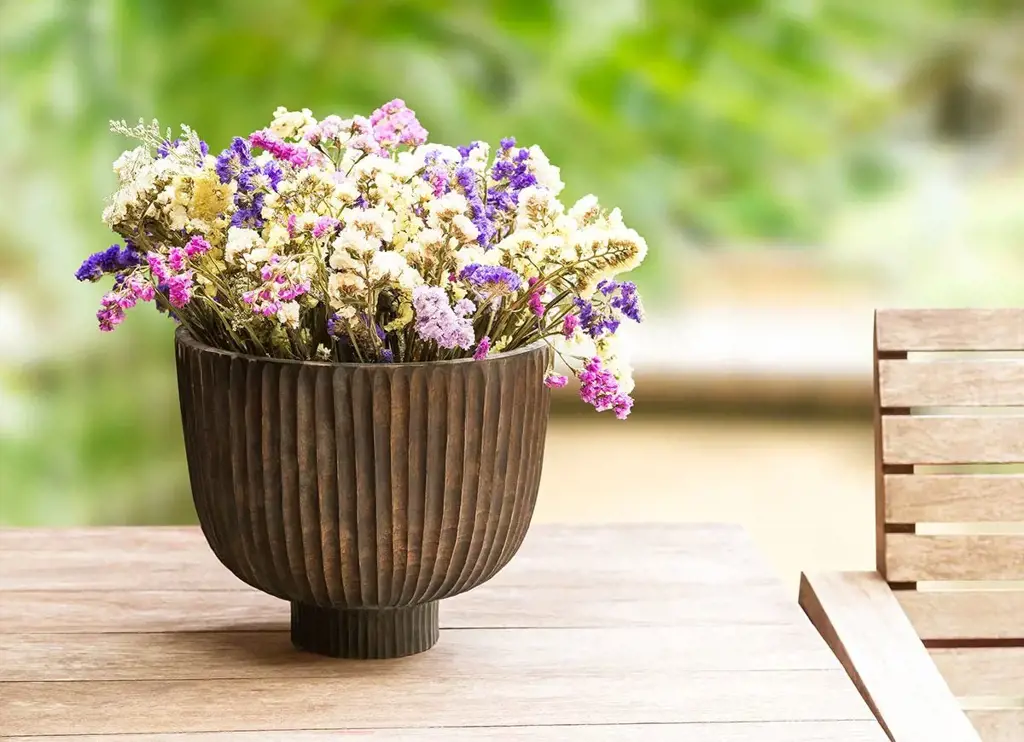
Use as a base for artificial flower arrangements
If you have a lot of packing peanuts lying around and are looking for fun and creative ways to use them, look no further! One great way to utilize these foam peanuts is to use them as a base for artificial flower arrangements. Not only will this save you money on expensive floral foam, but it will also add texture and stability to your arrangements. Here's how to do it:
First, gather your materials. You will need packing peanuts, a container for your arrangement (such as a vase or decorative pot), artificial flowers and greenery of your choice, and any additional materials you want to include in your arrangement (such as decorative stones or moss).
Next, prepare your container. Make sure it is clean and free of any dust or debris. If you are using a clear vase, you may also want to add some decorative stones or moss to the bottom for added visual interest.
Now it's time to create your base with the packing peanuts. Start by pouring a layer of peanuts into the container, making sure to spread them evenly. The depth of the layer will depend on the size and shape of your container, but aim for about 1-2 inches.
Once you have your base layer of packing peanuts, gently press down on them to compress them slightly. This will create a stable surface for your flowers and ensure they stay in place. You can also adjust the level of the peanuts to create different heights for your arrangement.
Now it's time to add your artificial flowers and greenery. Start by inserting the stems of the flowers and greenery into the packing peanuts, arranging them in a pleasing manner. You can play around with different combinations and heights to create the desired look.
As you insert the stems, you may find that the packing peanuts shift or move. If this happens, simply readjust them so that they are securely holding the flowers in place.
If you have any additional materials, such as decorative stones or moss, you can now add them to your arrangement. Simply sprinkle them around the packing peanuts and flowers for added texture and visual appeal.
Once you are satisfied with your arrangement, give it a gentle shake to ensure that the packing peanuts are securely holding everything in place. If any flowers or greenery feel loose, simply adjust their position or add more packing peanuts as needed.
And there you have it! A beautiful and creative flower arrangement using packing peanuts as a base. Not only is this a fun and unique way to repurpose packing peanuts, but it also adds stability and texture to your arrangement. So go ahead, gather your packing peanuts and let your creativity bloom!
14 Fun Things to Do in Hope, Alaska
You may want to see also
Frequently asked questions
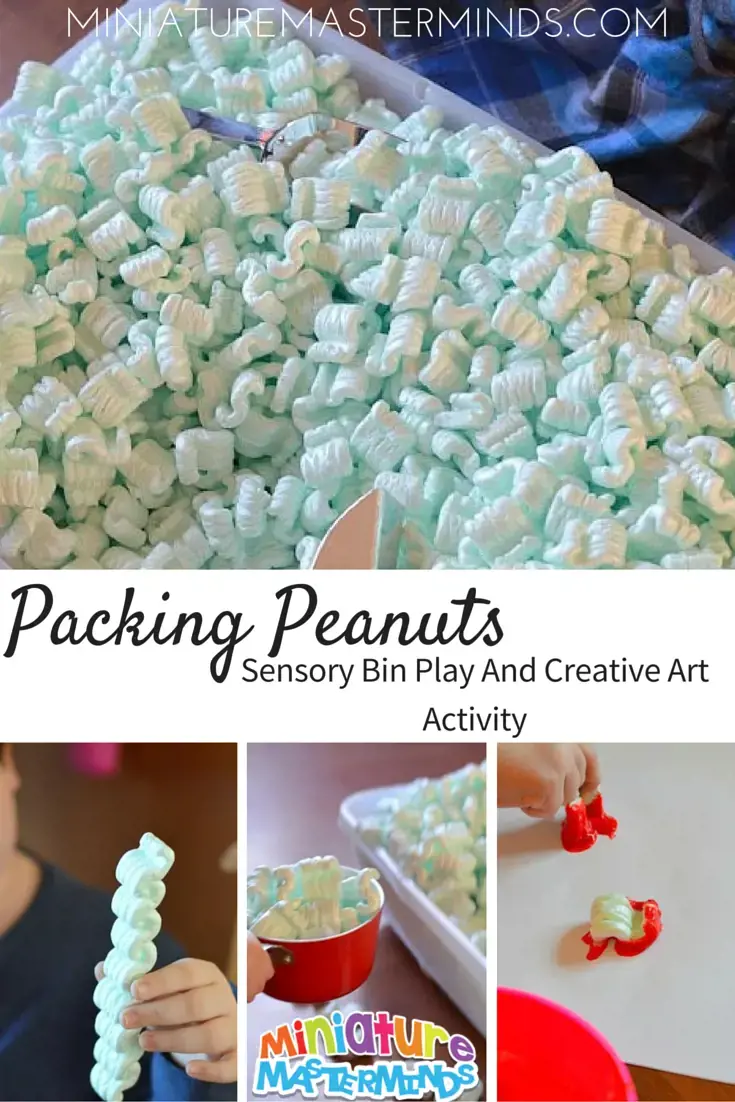
There are plenty of fun activities you can do with packing peanuts! One idea is to create a sensory bin for children. Fill a container with packing peanuts and hide small toys or objects inside. Kids can explore and search through the peanuts to find the hidden treasures.
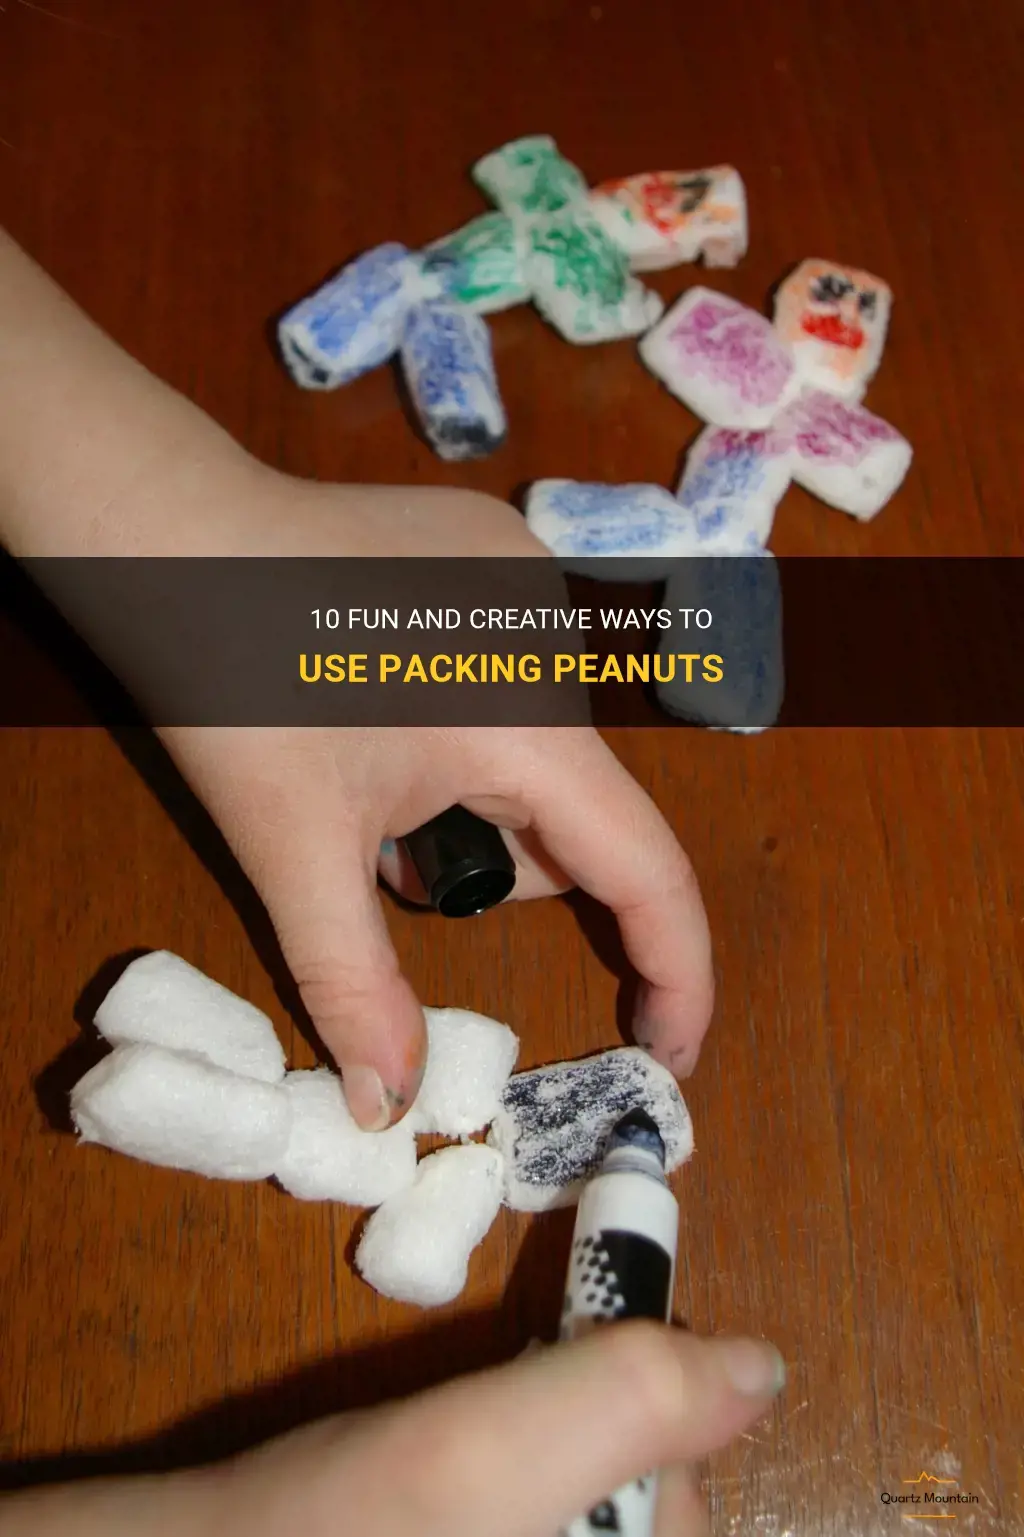
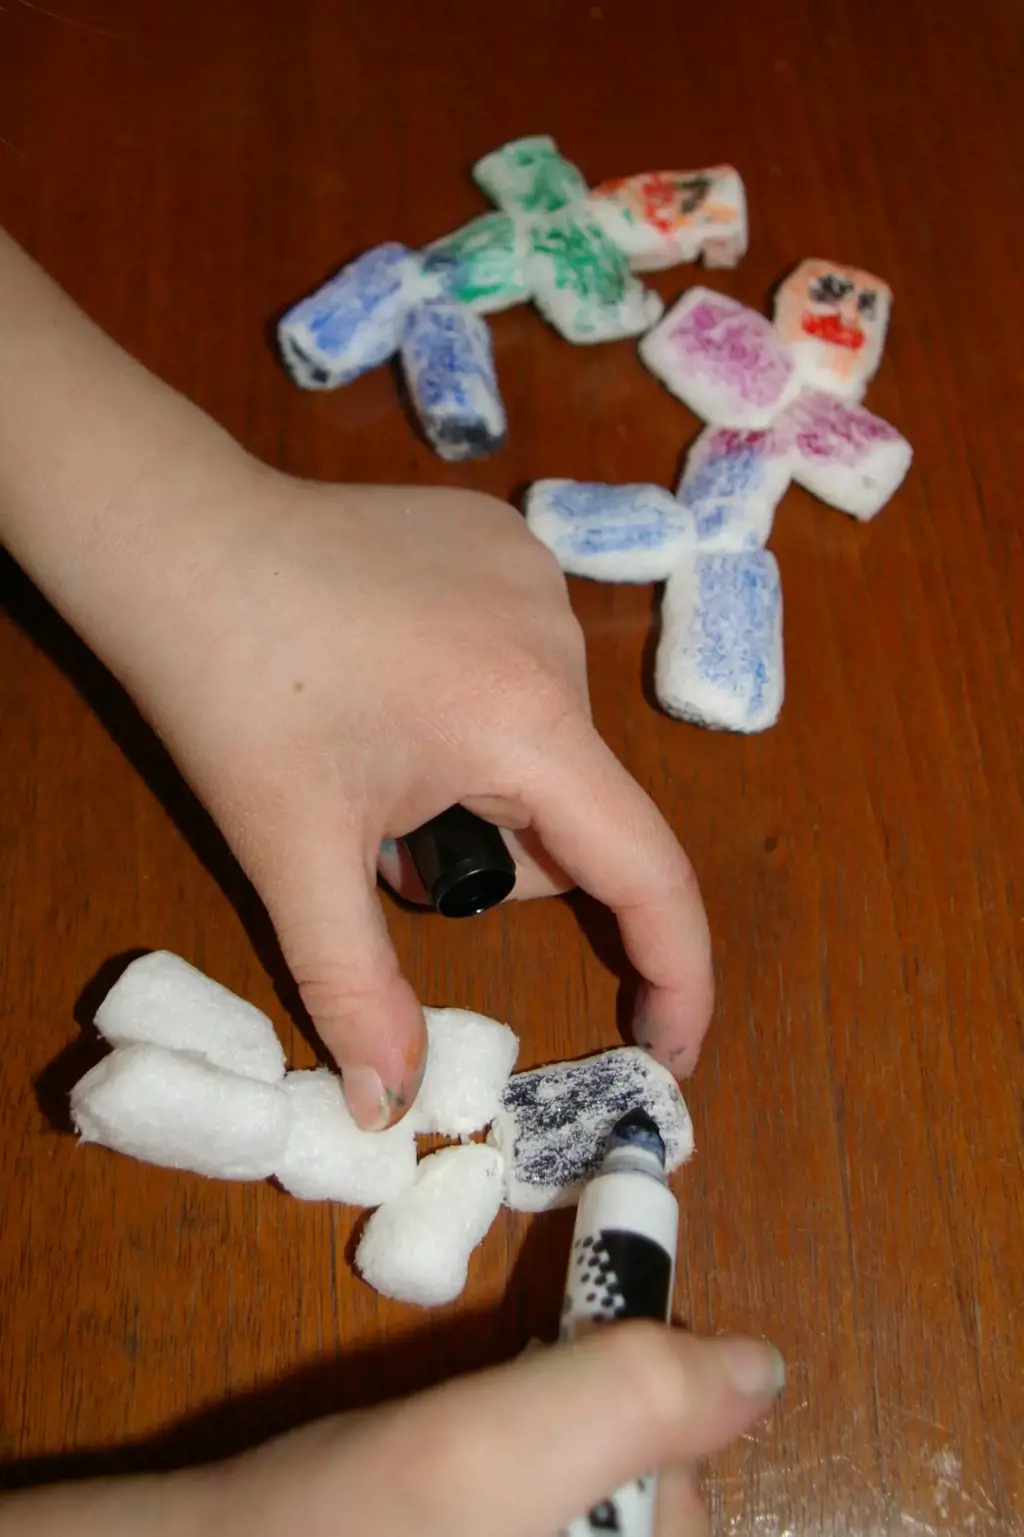
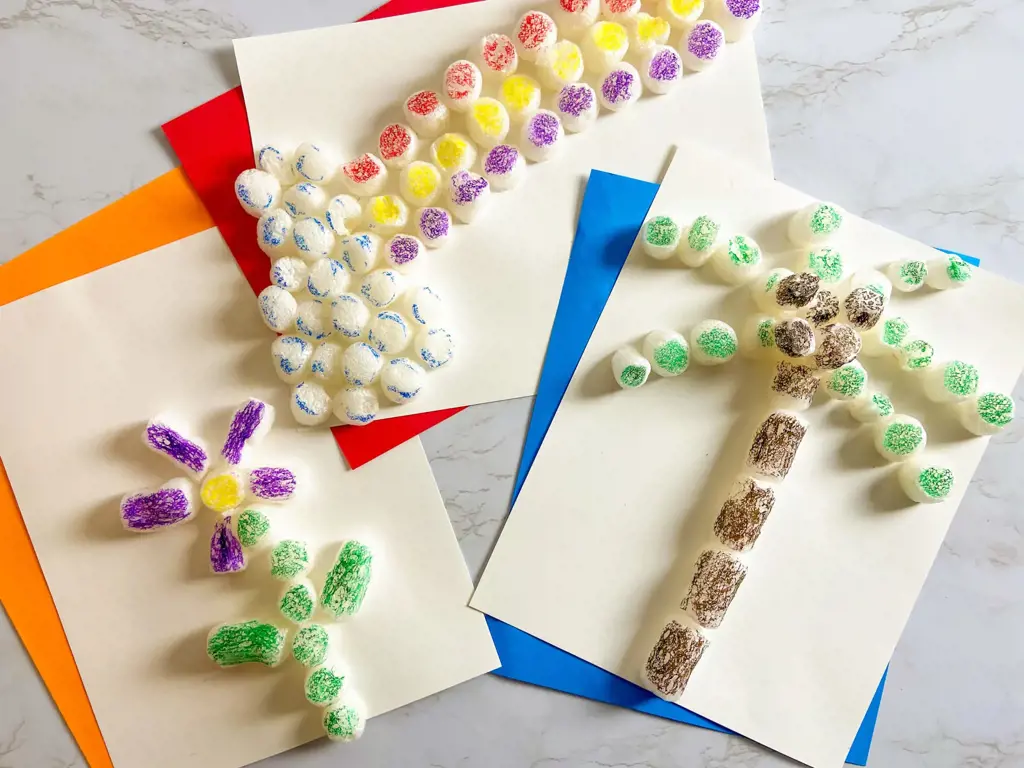
Absolutely! Packing peanuts can be used in various arts and crafts projects. You can glue them together to create sculptures or use them as a base for papier-mâché projects. They can also be painted or colored with markers to create unique textures and patterns. The possibilities are endless!
Yes, packing peanuts can be a great tool for educational activities. You can use them for counting and sorting exercises, as they can be easily manipulated and moved around. You can also use them for science experiments, such as testing their buoyancy or observing how they dissolve in different liquids. They add a fun and tactile element to learning.
Absolutely! Packing peanuts can be used for various games and challenges. One idea is to have a packing peanut toss, where players try to toss packing peanuts into buckets or targets. You can also have a packing peanut relay race, where teams have to transfer packing peanuts from one end to the other using spoons or other utensils. These games can be a fun way to get active and engage with packing peanuts in a playful way.


2 Comments
Ehsan Mcbride
Nina Horton