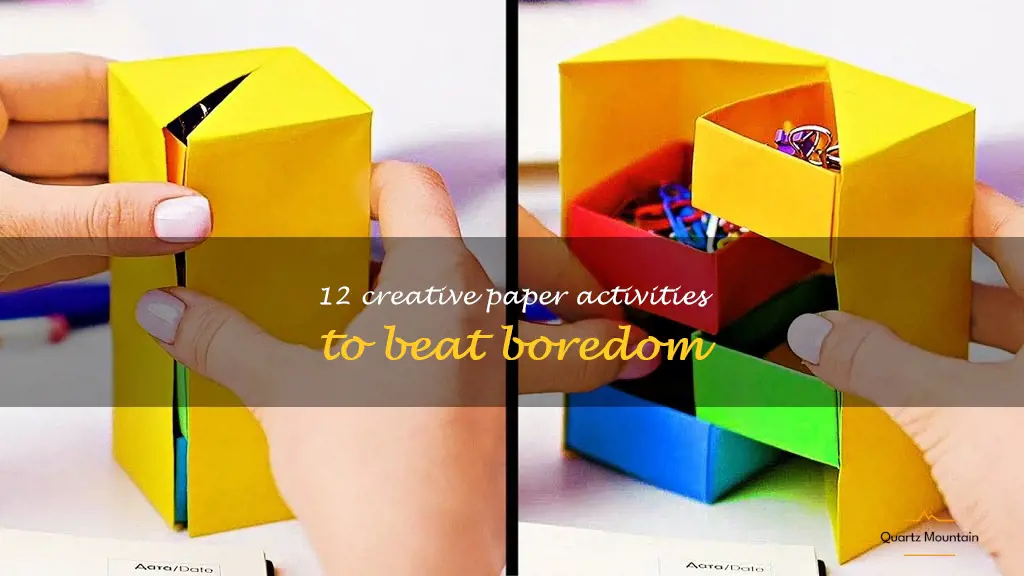
Have you ever found yourself stuck at home with nothing to do and feeling bored out of your mind? Well, fear not my fellow boredom-sufferers, because we have the ultimate solution for you! Get ready to unleash your inner creativity and dive into 12 paper activities that are sure to keep you entertained for hours on end. From origami to paper mache, we've got all the fun and challenging craft ideas you need to beat the boredom blues. So grab some paper, scissors, and glue, and let's get started on your creative journey!
| Activity | Description |
|---|---|
| Doodle | Let your creative side flow and draw whatever comes to mind |
| Origami | Follow tutorials online to fold paper into intricate designs |
| Write Poetry | Put your thoughts and emotions onto paper in the form of a poem |
| Play Hangman | Test your vocabulary and guessing skills with this classic game |
| Crossword Puzzle | Challenge your mind by completing a crossword puzzle |
| Paper Airplanes | Craft paper airplanes and see whose can fly the farthest or highest |
| Word Search | Find words hidden within a grid of letters |
| Tic Tac Toe | Play this timeless game with a simple grid and X/O marks |
| Jigsaw Puzzles | Put together pieces to form a larger image |
| Lists | Make a to-do list, a bucket list, or a list of your favorite things |
What You'll Learn
- Activities to beat boredom with paper:
- Origami - create animals and shapes
- Paper airplane contest - see whose plane flies farthest
- Paper mache - make a mask or vase
- Paper chain garland - decorate a room
- Paper bag puppets - put on a show
- Paper fortune tellers - predict the future
- Paper bookmarks - personalize for your favorite books
- Paper lanterns - light up a space
- Paper beads - make jewelry
- Paper snowflakes - decorate the windows
- Paper dolls - dress up with different outfits
- Paper collage - create an art piece with cut-out images
![]()
Activities to beat boredom with paper:
Boredom getting the best of you? Don’t worry, we’ve got you. All you need is a piece of paper and a little bit of creativity. Here are some activities to keep you busy with just that:
- Origami: Origami is a fun activity that can keep you entertained for hours. It’s the art of paper folding that originated in Japan. You can make anything from paper cranes, frogs, flowers, and even animals. There are a ton of instructional videos and books available online that can walk you through the process, so don’t worry if you’ve never done it before.
- Doodle: Doodling is a great way to occupy your mind. Grab a pen and paper and see where your imagination takes you. You can draw anything from simple shapes to intricate patterns. You can even create your own characters and designs.
- Paper mache: Paper Mache is a fun and messy art form that involves mixing paper with glue and water. You can create anything you want from masks to bowls or even piñatas. It’s a great way to express your creativity and bring your ideas to life.
- Paper Cutting: Paper cutting is another fun activity that involves cutting out shapes and designs from paper. You can create your own stencils or patterns and use them to make unique and intricate designs. You can even create your own greeting cards or wall art.
- Fortune Teller: Remember fortune tellers or “cootie catchers” from your childhood? They are a great way to pass the time and even learn a few things about yourself. Fold a piece of paper into a fortune teller and write different fortunes or predictions in the flaps. Then, have your friends choose a number and see what their fortune holds.
With just a piece of paper and a little bit of imagination, you can create endless possibilities to keep you entertained. These activities can even help you reduce stress and anxiety. So, what are you waiting for? Let’s get creative!
13 Fantastic Things to Do in Charleston SC on Memorial Day Weekend
You may want to see also
![]()
Origami - create animals and shapes
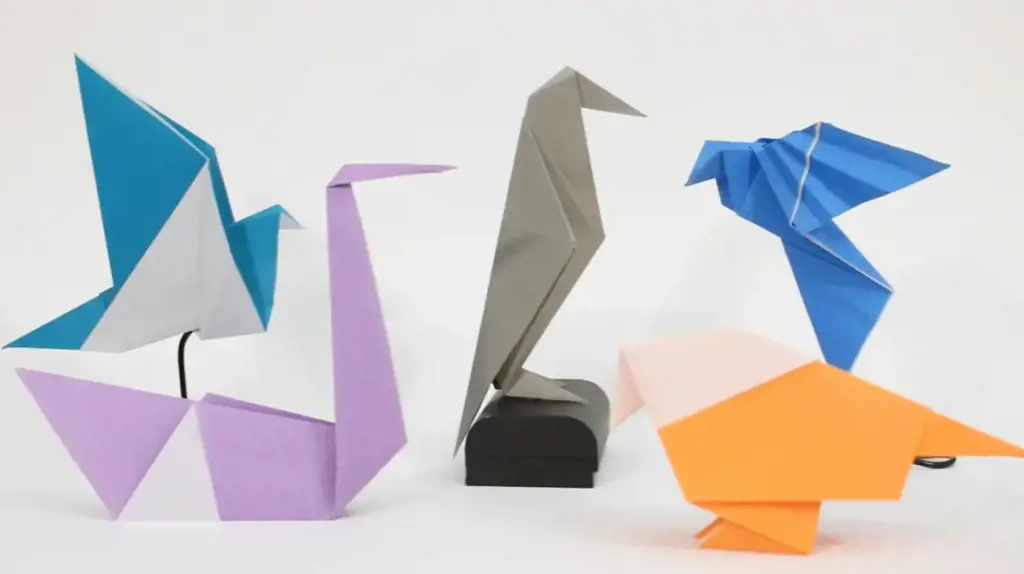
When you're bored and looking for something to do, why not try your hand at origami? All you need is a piece of paper, some patience, and a little bit of creativity. Origami is the traditional Japanese art of paper folding, and it can be a fun and satisfying hobby that anyone can enjoy.
To get started, choose a piece of paper that's the right size and shape for your project. You can use any kind of paper, from traditional origami paper to recycled newspaper or printer paper. The key is to choose a paper that's thin, flexible, and easy to fold.
Once you've got your paper, it's time to start folding. There are hundreds of different origami designs and patterns to choose from, so you're sure to find something that suits your interests and skill level. Here are just a few examples:
- Animals: Origami animals are a staple of the art form, and they can be quite complex and detailed. Some popular animal designs include cranes, swans, birds, dragons, and even dinosaurs. You can use different colors and patterns of paper to customize your animal creations.
- Shapes: If you're not quite ready to tackle a complex animal design, you can start with a simple shape like a box or a star. These designs are still satisfying to fold and can be used as decorative accents or storage containers. You can also experiment with combining different shapes and colors to create more complex pieces.
- Modular origami: This involves folding multiple identical units and then assembling them into a larger structure. For example, you could create a modular origami ball or a starburst by folding dozens of identical triangles and then fitting them together like puzzle pieces. This can be a great group project, as each person can fold several units and then collaborate to assemble the final product.
No matter what kind of origami project you choose, remember that it might take some trial and error to get the folds just right. Be patient, and don't be afraid to start over if you make a mistake. With practice, you'll soon be able to create beautiful and intricate designs that you can be proud of. Happy folding!
10 Fun Things to Do in Beaver Falls, PA
You may want to see also
![]()
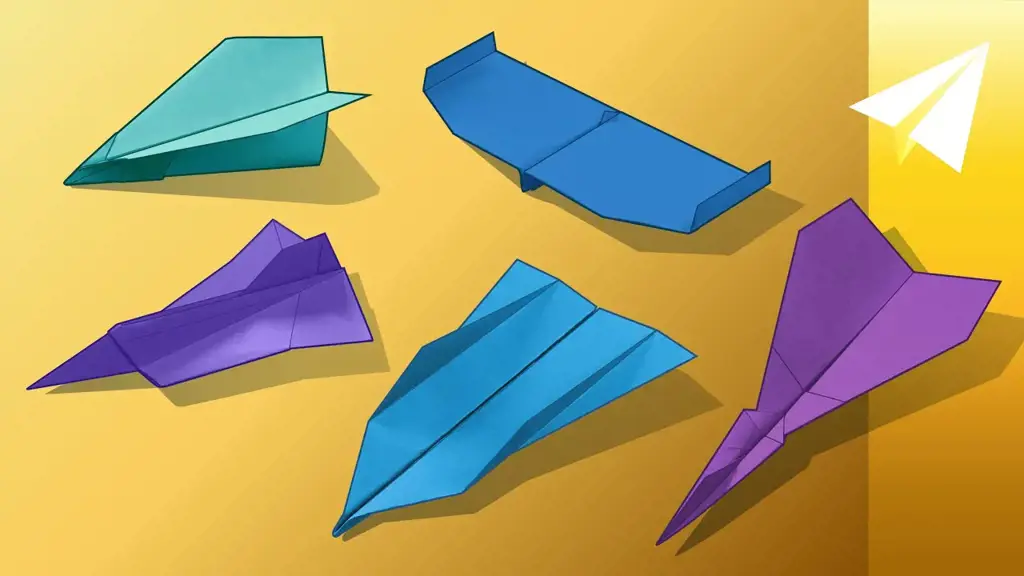
Paper airplane contest - see whose plane flies farthest
Introduction:
Whenever you find yourself bored or in need of a break, one of the easiest things to do is grab a piece of paper and let your creativity run wild. You can fold it, draw on it, or simply use it to create something fun and entertaining. One such activity that can be enjoyed by both kids and adults is a paper airplane contest. In this article, we'll show you how to create the perfect paper airplane and how to organize an exciting contest to determine whose plane flies the farthest.
Step 1: Choose the right type of paper
The quality of paper plays a significant role in how well your paper airplane will perform. Choose a sheet of paper that is lightweight, but sturdy enough to withstand several folds. The standard 8.5 x 11 inches printer paper works great, but you can also use origami paper or colored construction paper for added excitement.
Step 2: Fold the paper
Fold the paper in half lengthwise and crease it tightly. Then, unfold the paper and fold the top corners down to the middle crease. The tips of the corners should touch the center crease, creating two triangles at the top. Next, fold the top edges of each triangle down to the center crease. The top point of the paper should now form a sharp, narrow triangle. Then, fold the paper in half, bringing the pointed end down to the folded edge.
Step 3: Add a tail
To make your paper airplane fly straighter and farther, you can add a tail. Take a small strip of paper and fold it in half lengthwise. Attach the tail to the back of your paper airplane using tape or glue.
Step 4: Test your airplane
Before the contest begins, it's essential to test your airplane to make sure it flies well. Give it a quick launch and see how it performs. If it flies well, congratulations! You're ready for the contest.
Step 5: Organize the contest
Gather your friends, family, or colleagues and organize a paper airplane contest. Ask everyone to create their own paper airplane and decorate it however they like. Create a clear starting line and measure the distance from the line to where each airplane lands.
Step 6: Determine the winner
After everyone has taken their turn, measure the distance each plane flew and determine the winner. You can award prizes for categories like highest flight, furthest flight, or most creative design. It's a fun and easy way to spend some time and bring people together.
Paper airplane contests are a simple, inexpensive, and enjoyable way to spend time when you're feeling bored. Follow these simple steps to create a perfect paper airplane and organize a fun contest with family and friends. With a little bit of creativity and imagination, you'll be amazed at how much fun you can have with just a simple sheet of paper.
13 Fun Things to Do in West Monroe, Louisiana
You may want to see also
![]()
Paper mache - make a mask or vase
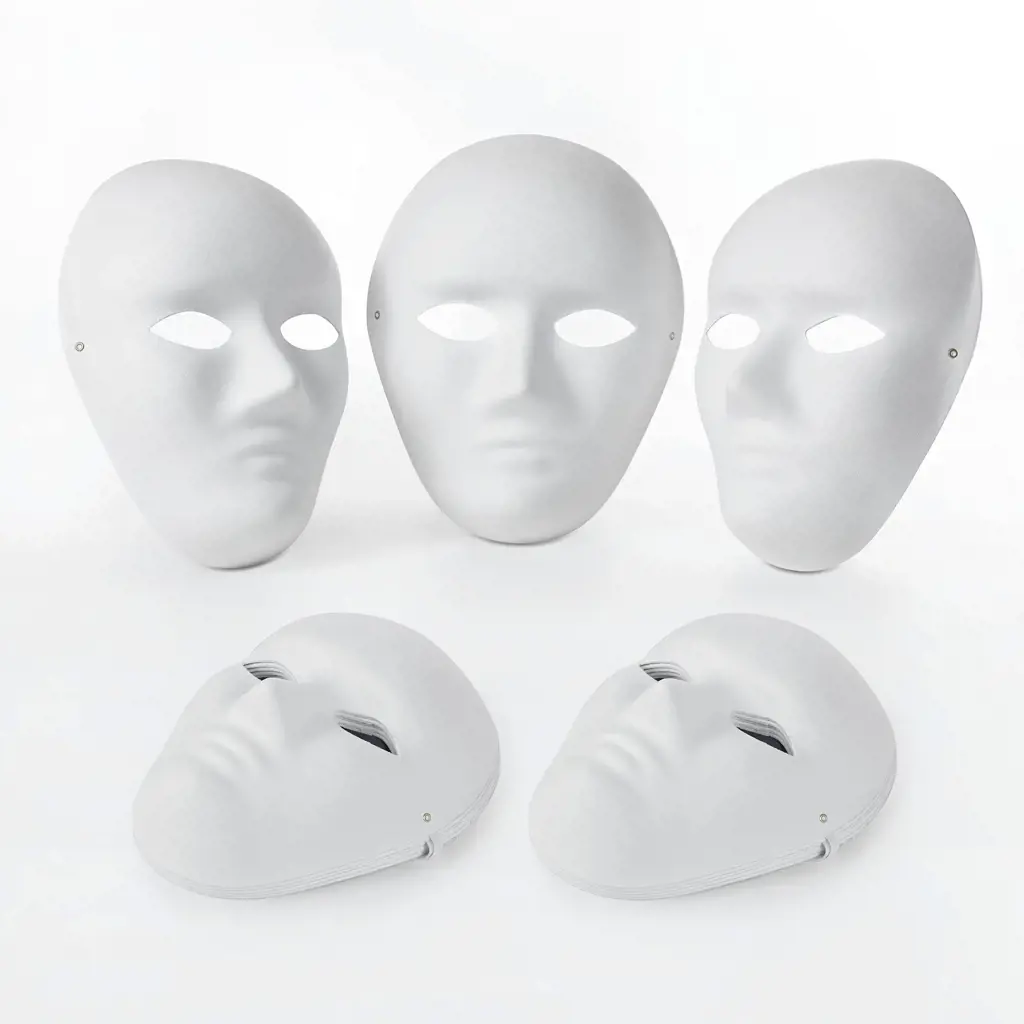
If you're feeling bored and want to do something creative, paper mache is a great activity to try. All you need is some newspaper, glue, water, and an object to decorate. In this article, we'll focus on making a mask or vase using paper mache.
To start, you need to create a base for your mask or vase. For a mask, find a plastic mask or simply mold tin foil into the shape of a face. For a vase, use a balloon or an empty bottle as the base.
Next, tear newspaper into strips and mix equal parts glue and water together in a bowl. Dip the newspaper strips into the glue mixture and lay them onto the base, smoothing out any wrinkles or bubbles. Continue adding layers of newspaper until you have the desired thickness. Let the paper mache dry overnight.
Once your paper mache base is dry, it's time to decorate. For a mask, you can add paint, feathers, sequins, and other decorations to create a unique design. For a vase, you can use acrylic paint to create a beautiful pattern or design.
After your decorations have dried, you can use your paper mache mask to wear for a costume party, or display your paper mache vase as a beautiful piece of home decor.
Paper mache is a great way to express your creativity and try a new hobby. The possibilities are endless, so feel free to experiment with shapes and designs. Who knows - you may discover a new talent for paper mache and create a masterpiece.
12 Fun Activities to Enjoy Near Babcock Ranch
You may want to see also
![]()
Paper chain garland - decorate a room
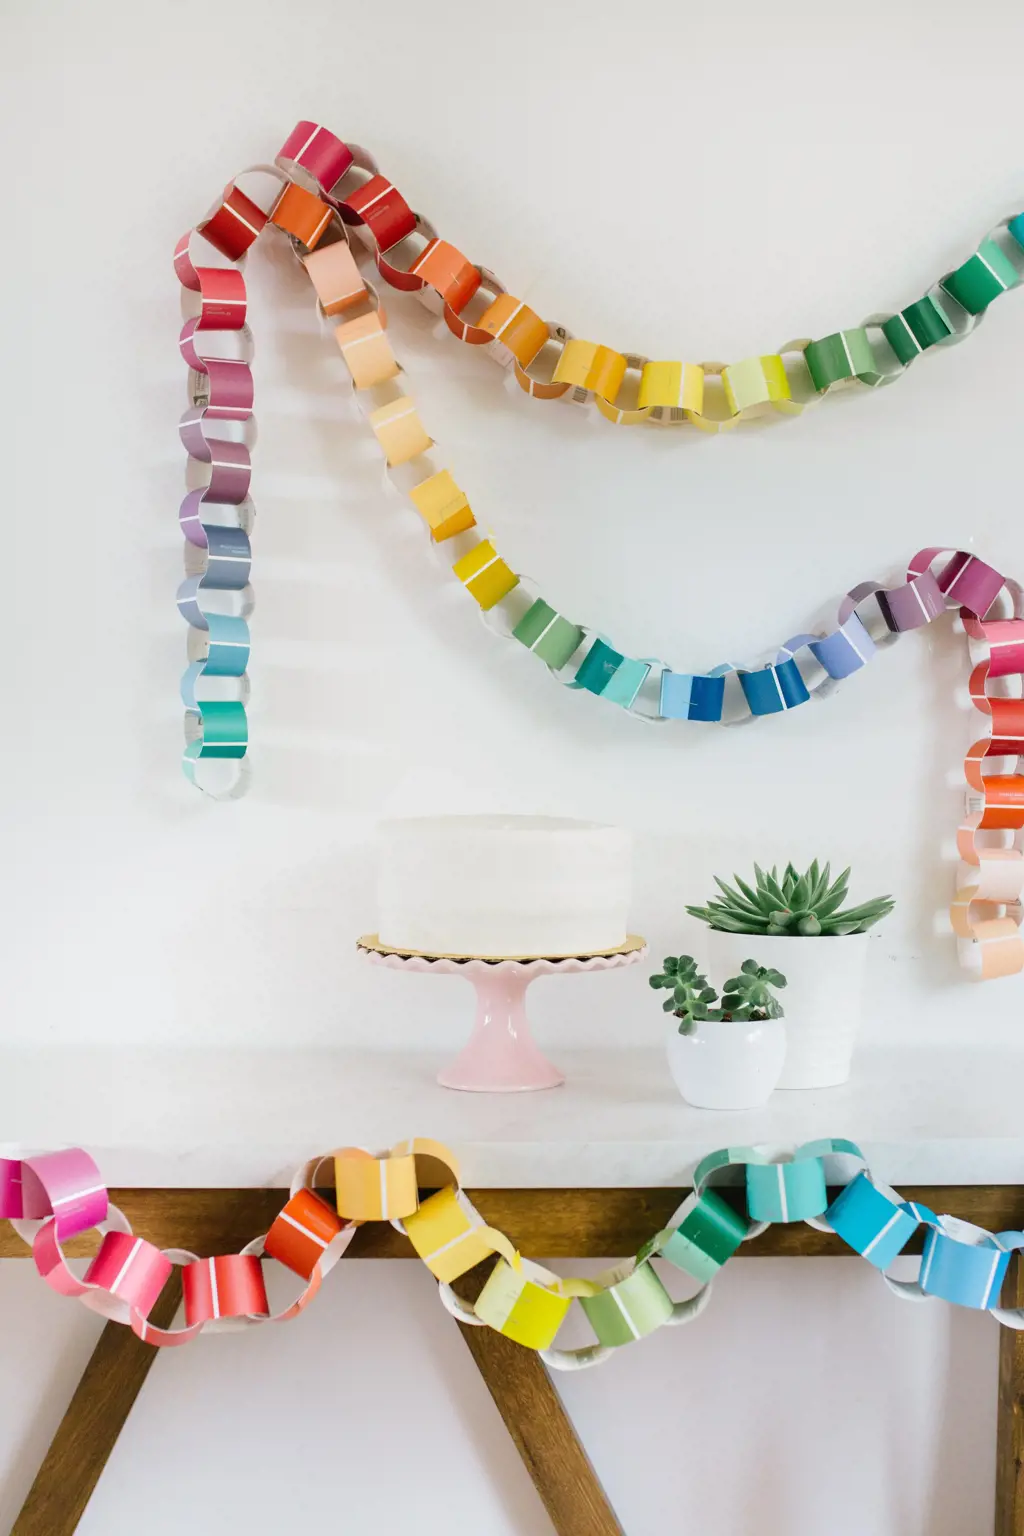
Are you feeling bored at home with nothing to do? Why not try making a paper chain garland to decorate your room? This simple and fun activity is perfect for all ages, and you will only need a few materials to get started.
To make a paper chain garland, you will need some colored paper, scissors, glue or tape, and a ruler (optional). First, measure and cut a long strip of paper, about an inch wide. Fold the strip of paper in half and cut along the fold, so you have two equal-size strips.
Next, take one of the strips and form a loop, overlapping the ends and securing them with glue or tape. Take the second strip and thread it through the first loop, making a second loop. Secure the second loop with glue or tape, and continue making loops until you have a chain of the desired length.
You can use multiple colors of paper to make a colorful garland. You can also add some glitter or stickers to the strips of paper to make them more decorative. Once you have made enough chains to cover the room, simply hang them up using string or tape.
Not only is making a paper chain garland a great way to kill boredom, but it also adds a fun and festive touch to any room. You can use it to decorate your bedroom, living room, or even your office cubicle. Plus, paper chain garlands are affordable and easy to make, so you won't have to spend a lot of money on decorations.
In summary, if you have nothing to do when you're bored at home, try making a paper chain garland. It is quick, easy, and a great way to add some color to your space. Just remember, the possibilities are endless with this craft – so let your creativity run wild!
11 Free Things to Do in Little Rock, Arkansas
You may want to see also
![]()
Paper bag puppets - put on a show
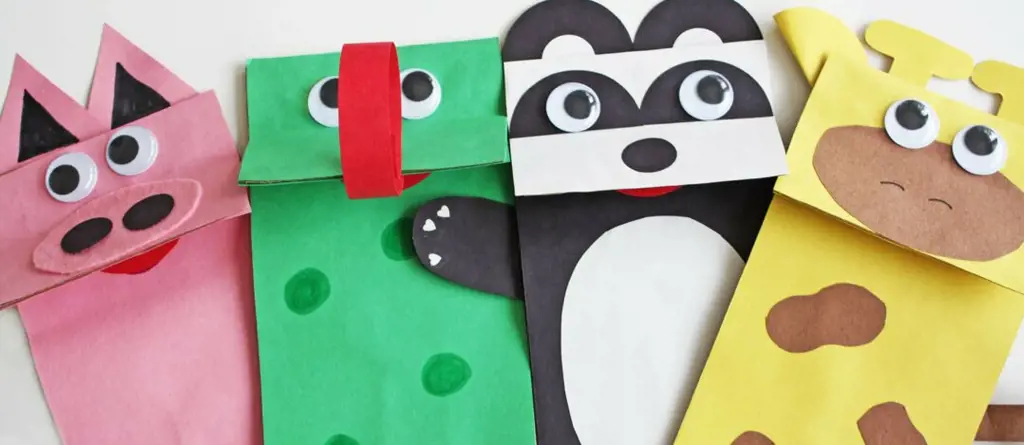
If you find yourself feeling bored and looking for something creative to do, why not try making some paper bag puppets? This easy and fun activity can provide hours of entertainment, from designing and creating the puppets to putting on your own puppet show.
To start, you'll need some paper bags, markers, construction paper, glue, scissors, and any other decorations you want to use (such as yarn, googly eyes, or felt). First, fold the paper bag in half, with the bottom crease facing up. This will become the puppet's mouth, so make sure it's positioned where you want it before you start decorating the rest of the bag.
Next, use the markers and construction paper to create your puppet's features. Let your imagination run wild – your puppet can be a person, animal, creature, or anything else you can come up with. You can also use the scissors to cut out shapes from the construction paper and glue them onto the bag.
Once you've decorated your puppets, it's time to put on a show! If you have multiple puppets, you can enlist a friend or family member to help with the performance. You can come up with your own story or use a script for a classic fairy tale or fable. Don't be afraid to experiment with different voices and personalities for your characters – the more entertaining and engaging your puppet show is, the more fun you'll have with it.
If you're looking for some inspiration, there are plenty of online resources that offer puppet show scripts and ideas, or you can simply use your own creativity to come up with something unique. And if you're feeling extra ambitious, you can even build a set for your puppet show using paper, cardboard, or other materials.
In conclusion, making paper bag puppets and putting on your own puppet show is a fantastic way to pass the time and explore your creativity. So next time you're feeling bored, grab some paper bags and get to work – you never know where your imagination might take you!
10 Romantic Nighttime Activities for Couples in OKC
You may want to see also
![]()
Paper fortune tellers - predict the future
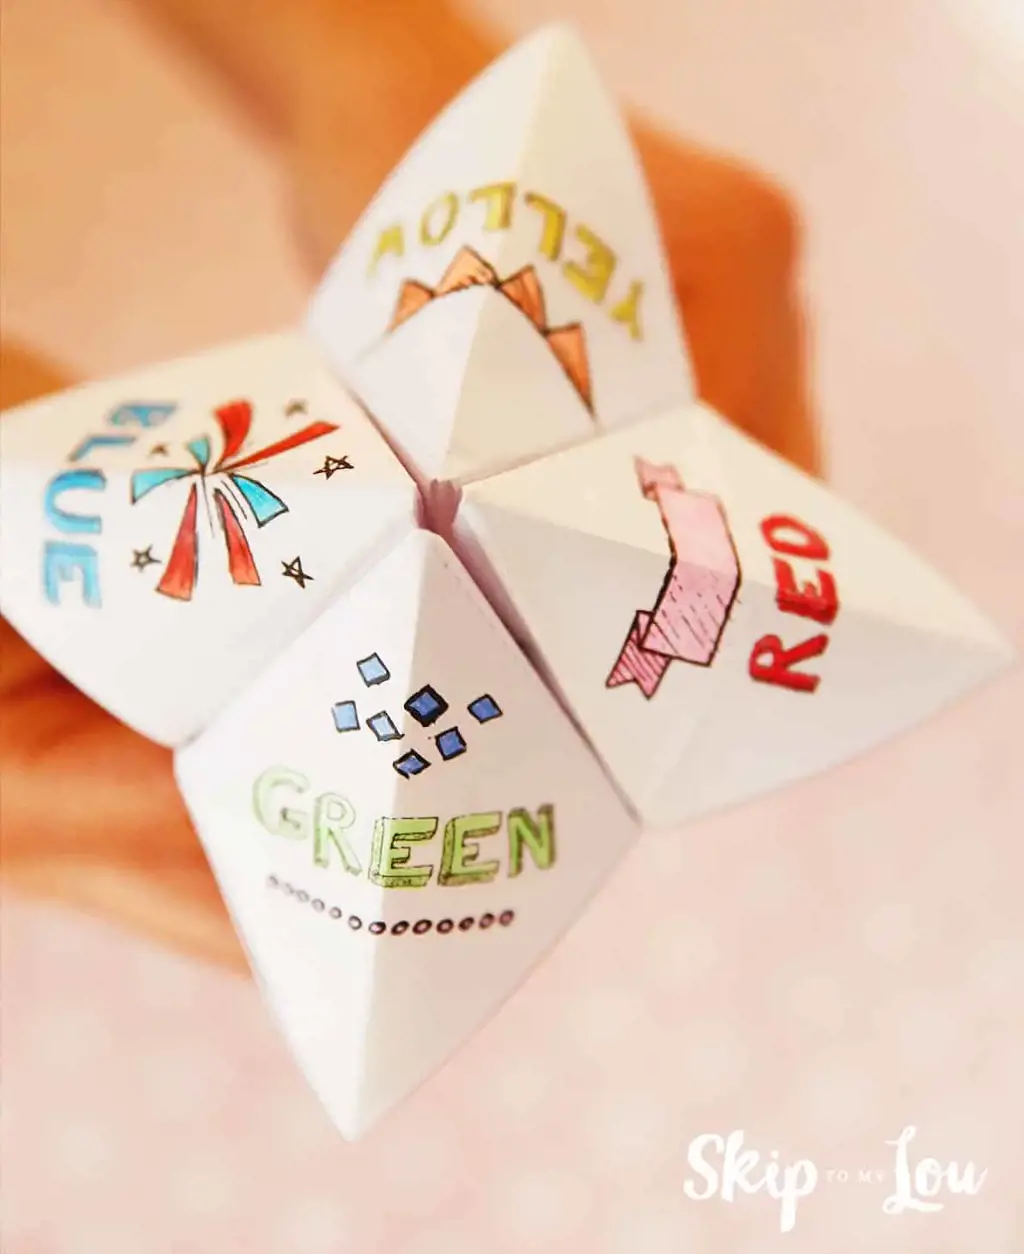
Have you ever found yourself feeling bored or uninspired, unsure of what to do with your time? If so, you might want to consider making a paper fortune teller! This classic childhood pastime is a fun and engaging activity that can be enjoyed by people of all ages.
To start, you will need a square piece of paper. You can use any type of paper you like, but colored or patterned paper can add an extra element of interest to your finished project.
Step 1: Start by folding your paper in half diagonally, then in half again the opposite way.
Step 2: Unfold the paper and fold each corner into the center of the paper. You should end up with a smaller square.
Step 3: Next, fold the paper in half vertically and horizontally to create a crease in the center.
Step 4: Carefully fold each of the four corners into the center of the paper, creating a smaller square again.
Step 5: Flip the paper over and fold each corner into the center again.
Step 6: You should now have a small pocket in the center of the paper. Place your fingers inside the pockets and gently pull them apart to create your fortune teller.
Step 7: On each of the four outer flaps, write a color, number, fortune, or anything else you can think of. For example, one flap could say “Blue”, another could say “7”, and another could say “You will meet a new friend.” The fourth flap could say something like “Tomorrow will be a great day.”
Step 8: Underneath each of the four inner flaps, write a fortune or prediction. You can be as creative as you like!
Step 9: To use your fortune teller, invite a friend to ask you a question (for example, “What will I have for lunch today?”). Then, ask them to pick a number out of the ones you’ve written on the outside of your fortune teller. Move the fortune teller horizontally and vertically that many times (for example, if they choose “7”, move it horizontally seven times and vertically seven times). Then, ask them to pick one of the flaps that they landed on. Lift up the flap and read the fortune or prediction underneath!
Making paper fortune tellers is a fun and easy activity that you can enjoy whenever you’re feeling bored or in need of a creative outlet. So why not give it a try and see what the future holds for you?
14 Fun Things to Do in Fall River, MA
You may want to see also
![]()
Paper bookmarks - personalize for your favorite books
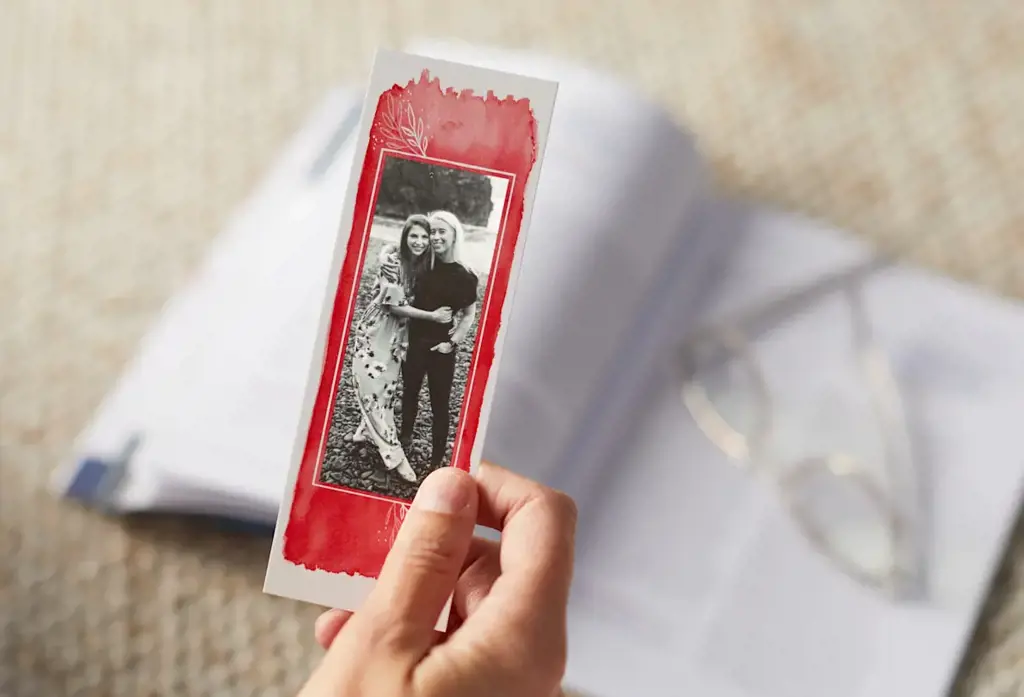
When you're bored and need something fun to do, making your own paper bookmarks can be an enjoyable activity. Not only are they practical to use while reading, but you can also customize them with your favorite colors, patterns, and designs. Here are some simple steps to help you create your own bookmarks on paper:
- Pick your materials: You will need paper, scissors, glue, and decorations such as markers, stickers, or stamps. It's also a good idea to have a ruler or a template to help you measure the bookmarks' size and shape.
- Choose your bookmark's shape: You can either choose to make a rectangular or a triangular bookmark using the paper. Cut out the desired shape using scissors, a ruler, or a template if you wish.
- Decorate your bookmark: Use your favorite colors, patterns, and designs to decorate the bookmark. Whether you want to use markers, stickers, or stamps, be sure to make it personal to your favorite books.
- Laminate your bookmark (optional): If you want your bookmark to be more durable, consider laminating it. You can use self-adhesive laminating sheets or take your bookmark to a local print shop for help.
- Use your new bookmark: Once your new bookmark is complete, use it to mark your place in your favorite books. Using your newly created bookmark will add a touch of personalization to your reading experience.
Making your own paper bookmarks can be a fun and creative way to pass the time when you're feeling bored. Not only will you have a useful tool to help you keep your place in your favorite books, but you'll also have a personalized and unique memento to cherish. Give it a try and enjoy the process of creating something that's both practical and fun!
12 Great Holiday Activities to Enjoy in San Jose
You may want to see also
![]()
Paper lanterns - light up a space
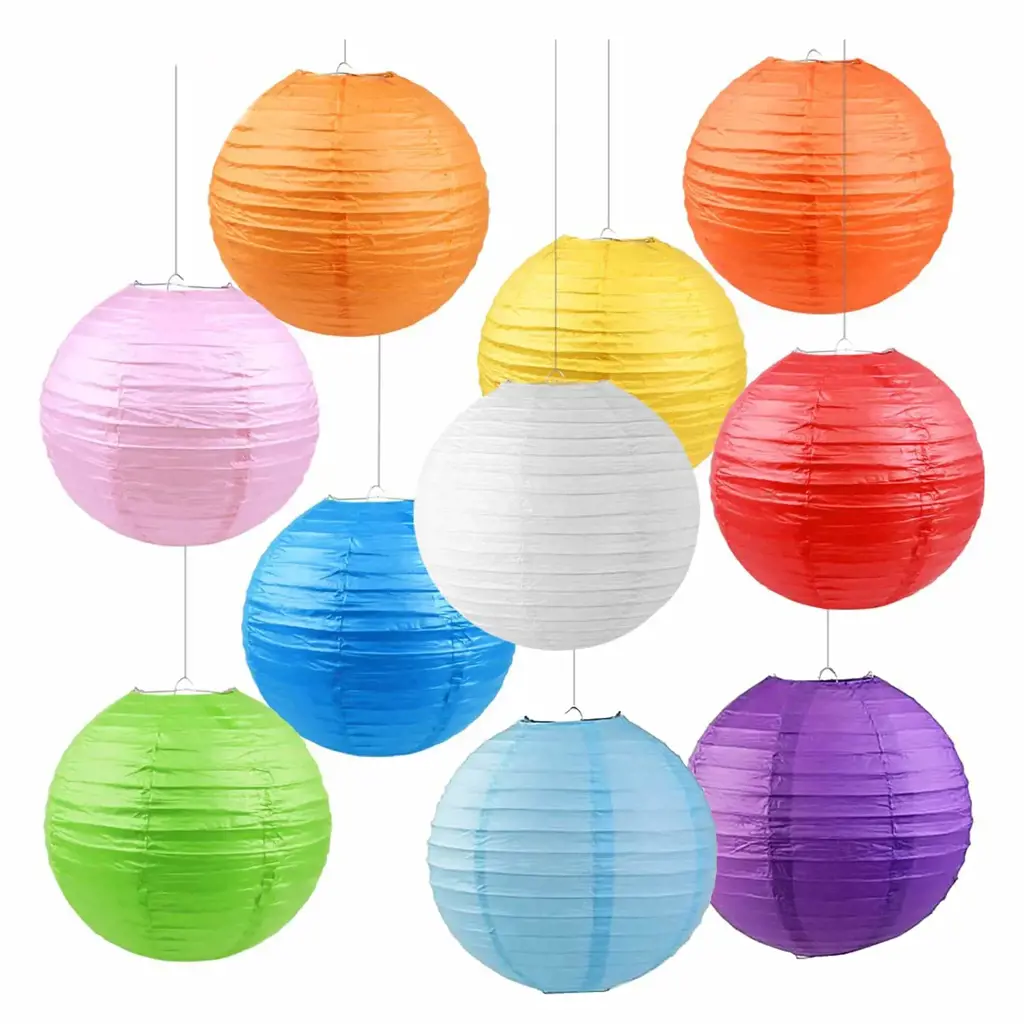
If you're feeling bored and in need of a creative outlet, paper lanterns are a fun and easy activity that can add a pop of color and light to any space. Here's a step-by-step guide to making your own paper lanterns:
Materials:
- Colored paper or cardstock
- Scissors
- Clear tape or glue
- String or ribbon
- LED tea lights (optional)
Instructions:
- Take your sheet of paper or cardstock and fold it in half lengthwise. Crease the fold with your fingers or a bone folder for a neat edge.
- Along the folded edge, use a pair of scissors to cut slits into the paper, leaving about an inch of space between each one. Make sure to stop cutting about an inch from the edge on the opposite side, so that the strips remain attached on one side.
- Unfold the paper and bring the two short edges together, securing with tape or glue to form a cylinder shape. This will create the body of the lantern.
- Cut a strip of paper to use as a handle, and attach it to the top of the lantern with tape or glue.
- Cut another piece of paper to use as the bottom of the lantern. Trace the shape of the cylinder onto the paper and cut it out, then attach it to the bottom of the lantern with tape or glue.
- Tie a piece of string or ribbon to the handle of the lantern to hang it up. If you want to add a glow, place an LED tea light inside the lantern.
And there you have it - a colorful and festive paper lantern, perfect for adding some brightness to a dull day. Try experimenting with different colors and patterns, or even using tissue paper for a more delicate look. Hang several lanterns together for a stunning display, or use them as decorations for a party or event. It's an easy and enjoyable project that's sure to brighten up your day!
14 Fun Things to Do in Vegas for a Bachelorette Party
You may want to see also
![]()
Paper beads - make jewelry
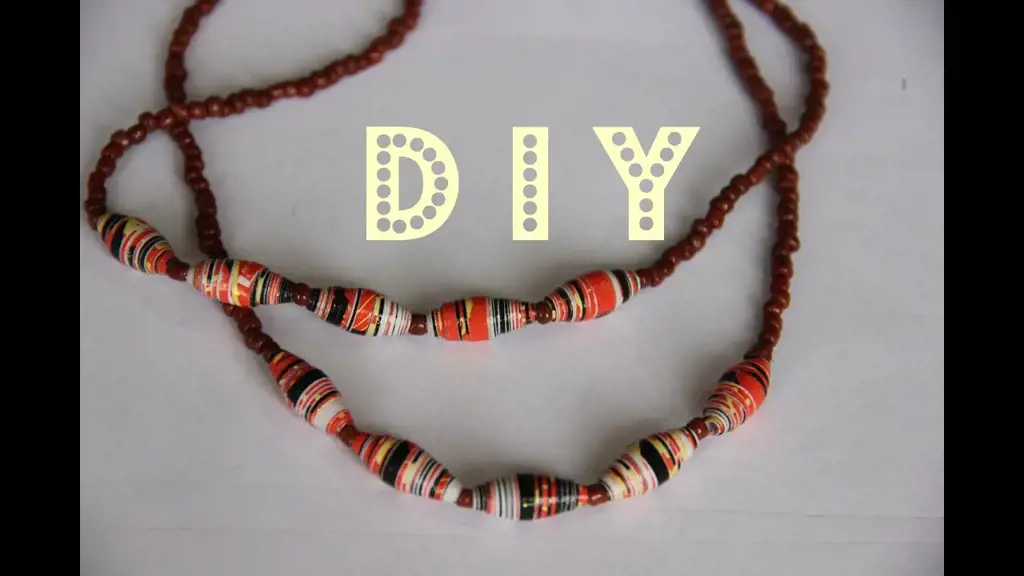
Have you ever found yourself feeling bored with nothing to do? Well, why not try making paper beads to create beautiful and unique jewelry pieces? Here's how you can make them.
Materials needed:
- Paper (magazines, wrapping paper, scrapbook paper, etc.)
- Scissors
- Ruler or measuring tape
- Glue
- Toothpicks or skewers
- String or jewelry wire
Instructions:
- Cut your paper into strips. You can make them any size you want, but typically a width of 1 inch works well.
- Take one strip of paper and place a toothpick or skewer at one end. Begin rolling the paper around the toothpick or skewer until you reach the end.
- Apply glue to the end of the paper to secure it in place.
- Carefully slide the bead off of the toothpick or skewer and set it aside.
- Repeat this process with as many strips of paper as you'd like.
- Once you have a handful of beads, you can start assembling them into a piece of jewelry. You can string them onto a piece of string or jewelry wire, and even mix and match different colors and patterns.
- When you have your desired amount of beads, tie them off to secure them in place and you're done!
Not only is making paper beads a fun and easy way to pass the time, but it's also an eco-friendly and inexpensive way to make your own jewelry. So the next time you're feeling bored, give it a try and see what beautiful creations you can come up with!
12 Fun Things to Do in Carmel, Indiana
You may want to see also
![]()
Paper snowflakes - decorate the windows
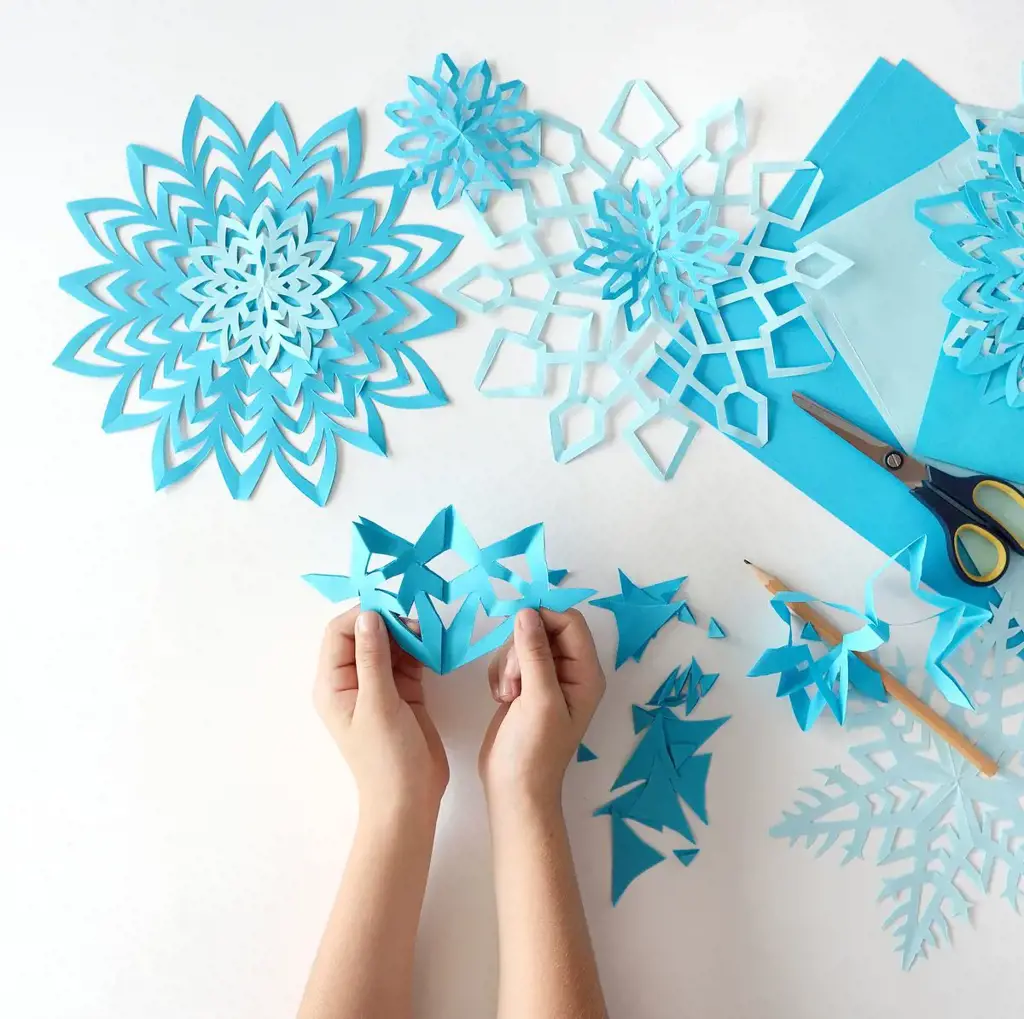
If you are feeling bored and want to spend some time in a creative activity, making beautiful paper snowflakes is a fun and easy activity to do on paper. This activity is perfect for people of all ages and skill levels, and it can take as little or as much time as you want.
The first step to making paper snowflakes is to gather all the necessary materials. You will need some paper, scissors, and a pencil. The paper can be of any color or thickness that you prefer. Standard printer paper works well, but you can also use colored or patterned paper to create more interesting snowflakes.
Next, start by folding the paper in half diagonally to form a triangle. Then, fold the triangle in half again to form a smaller triangle. Repeat the folding process one or two more times, depending on the thickness of your paper and how many layers you want your snowflake to have.
Once your paper is folded, take your pencil and draw a design on the folded paper. The design can be anything you want, but traditional snowflakes often have geometric shapes and patterns. Be creative and experiment with different designs to make your snowflakes unique.
Now comes the fun part- cutting out your snowflake design! Use your scissors to cut along the lines you drew on the folded paper. Be careful not to cut all the way through the folded paper, as you want the snowflake to remain intact when you unfold it.
When you are done cutting, carefully unfold the paper to reveal your beautiful paper snowflake. You can repeat this process to create as many snowflakes as you want.
Once you have created your paper snowflakes, you can use them to decorate your windows. Simply hang them up with some string or tape, and enjoy the beautiful winter scene they create. You can also use them as decorations for a holiday party, or as a fun craft activity to do with children.
In conclusion, making paper snowflakes is a fun and easy activity to do on paper when you are feeling bored. With a few simple materials and some creativity, you can make beautiful snowflakes that will brighten up any room. So, grab some paper and get cutting- you never know what beautiful designs you might create!
14 Sober Things to Do on New Year's Eve
You may want to see also
![]()
Paper dolls - dress up with different outfits
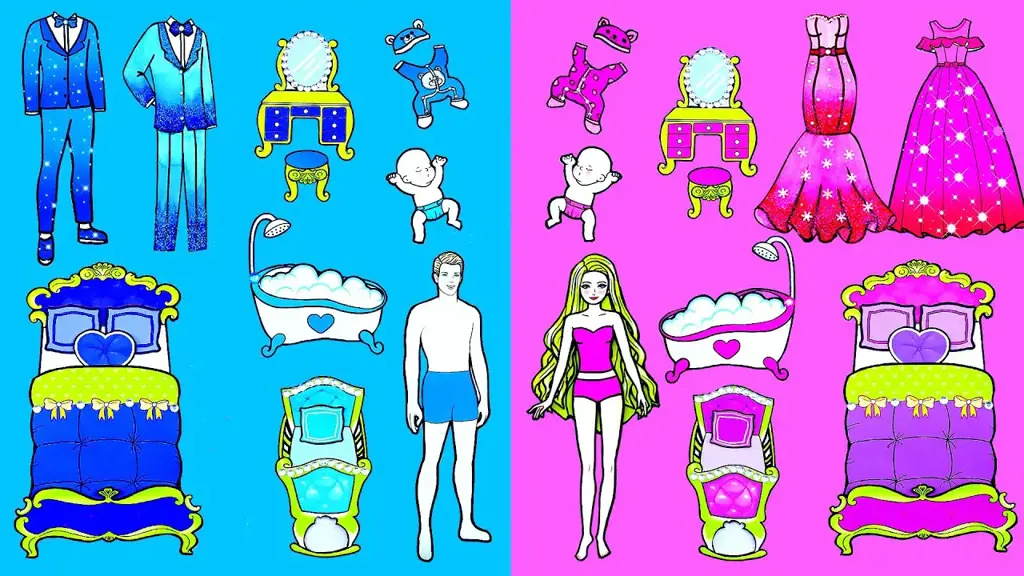
Are you feeling bored and don’t know what to do? Well, why not try making paper dolls and dressing them up with different outfits? It’s a fun activity that doesn’t require much expertise or expensive materials to get started.
The first step is to gather your supplies. All you need is some paper, scissors, and coloring materials. You can also use magazines or catalogues for inspiration. Once you have your tools, it's time to get creative.
Begin by drawing a doll shape on a piece of paper. You can make it as simple or as detailed as you want. Next, cut it out and fold it in half, so it stands up on its own. Then, draw some outfits on separate pieces of paper and cut them out as well.
You can create a variety of outfits, from casual wear to formal dresses. Try to mix and match colors and patterns to make each look unique. You can even add accessories like hats, bags, or jewelry. Once you have your outfits ready, it's time to dress up your paper doll!
Simply slide the outfits onto your paper doll and arrange them however you like. You can make several copies of the same doll or create different ones. You can also decorate the background with elements like trees, houses, or pets.
Making paper dolls and dressing them up can be a fun way to spend your free time. It's a great activity for children or adults and allows you to express your creativity. You can even create a whole collection of outfits and dolls, making it an ongoing project.
In conclusion, making paper dolls is a simple yet entertaining activity that can cure boredom. So, grab your supplies, get creative, and start dressing up your paper dolls with different outfits. Who knows, you might even discover a new hobby!
12 Must-Try Activities for a Day in Shadyside Pittsburgh
You may want to see also
![]()
Paper collage - create an art piece with cut-out images
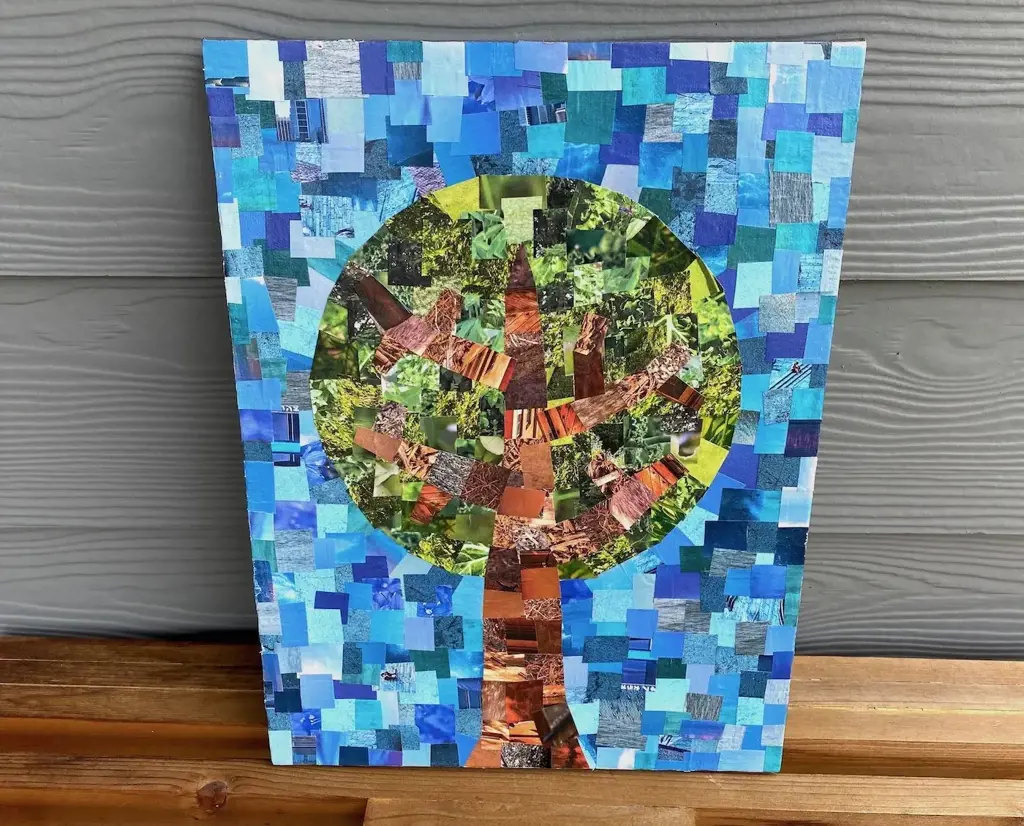
Are you bored and looking for fun things to do on paper? Why not try creating a paper collage! A paper collage is a work of art made by gluing different materials such as cut-out images, photographs, and paper scraps onto a piece of paper or canvas. Here’s how to create your own paper collage art piece:
- Gather materials: Collect magazines, newspapers, photos, wrapping paper, tissue paper, scissors, glue, and a piece of paper or canvas.
- Choose a theme: Think about the mood, color scheme, or topic you want to portray in your art piece. For example, you might want to create a collage around the theme of nature, travel, or music.
- Plan the composition: Sketch out your plan for the collage. Think about the placement of different images and how they will fit together to create an interesting and cohesive composition.
- Cut out images: Use scissors to cut out images from magazines, newspapers, or printed material. You can also draw or paint your own designs on paper and cut them out too.
- Glue images onto paper or canvas: Using a glue stick or liquid glue, apply a thin layer of glue to the back of each image and place them onto your paper or canvas. Be sure to arrange them according to your plan, and press down firmly to ensure they stick.
- Add details: Once you’ve glued down your main images, add smaller details such as lines, shapes, or textures to enhance the piece. You can use pens, markers, or paint to add finishing touches.
Voila! Your paper collage art piece is complete. You can frame it and hang it on your wall, or gift it to a friend or family member. Creating a paper collage is a great way to express your creativity, and it’s also a fun and low-cost activity to do when you're bored. So, grab some paper and a pair of scissors, and get started on your own amazing paper collage art piece!
12 Must-Do Activities Near Madison Square Park
You may want to see also
Frequently asked questions
- Some easy drawing ideas include doodling patterns or shapes, creating a comic strip, sketching a cartoon character, or drawing a still life of objects in your room.
- Some fun games to play on paper include tic-tac-toe, hangman, dots and boxes, and word search puzzles.
- You can practice your handwriting or calligraphy by copying quotes or phrases from a book or online, writing out song lyrics, or even just practicing writing the letters of the alphabet in different fonts.
- Some paper crafts to make include paper airplanes, origami animals or flowers, journaling or scrapbooking pages, or making your own greeting cards.


5 Comments
Richie Adams
Spencer Delgado
Alain Brady
AuthorGordon Suarez
Steffi Montoya
Author