
Microwaves are one of the most commonly used appliances in our homes. However, when they reach the end of their lifespan, we often find ourselves at a loss of what to do with them. Rather than adding to the pile of electronic waste, why not give them a new lease of life? In this article, we will explore 12 creative and innovative ways to reuse your old microwave and turn it into something useful and practical. From homemade nail polish dryers to DIY soil sterilizers, get ready to be inspired to turn your old appliance into something new and exciting.
What You'll Learn
![]()
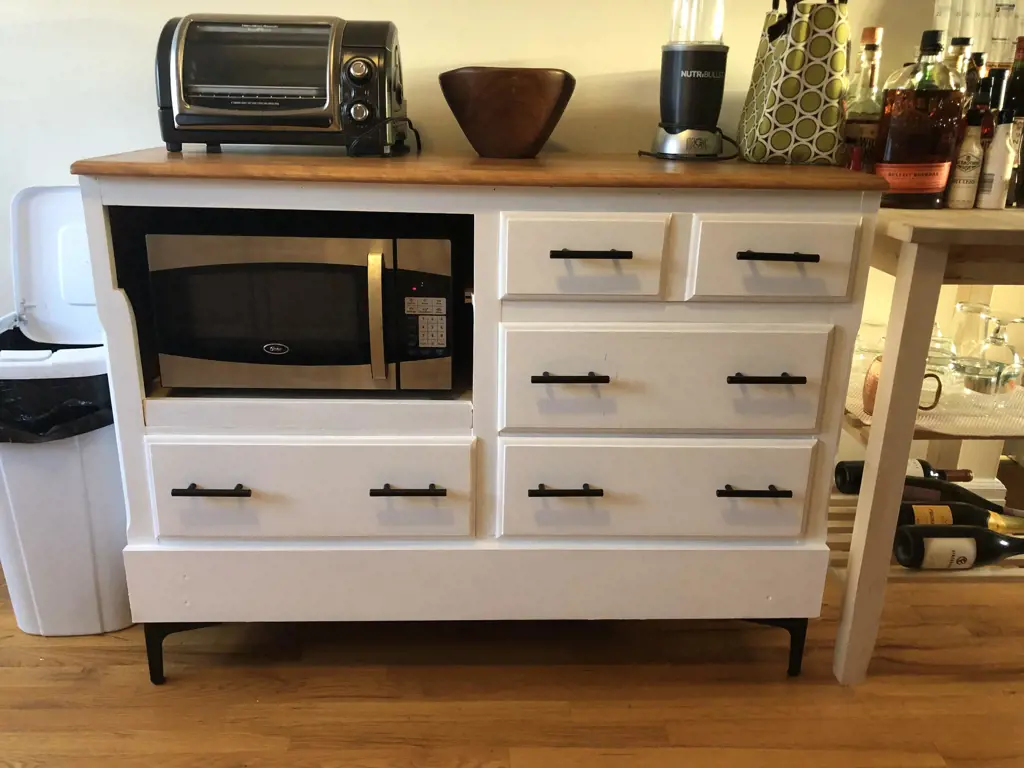
Plant pot holder

If you have an old microwave gathering dust in your garage or storeroom, don't throw it away just yet. There are several creative ways to repurpose it and turn it into something useful, such as a plant pot holder.
First, disassemble the microwave to remove its electronic components, including the magnetron, transformer, and high-voltage capacitor. These parts may still hold an electric charge even if the microwave is unplugged, so it's important to handle them with care or seek professional help.
Next, take the metal chassis of the microwave and drill some holes into it. This will allow water to drain out and prevent rust from building up. You can also spray-paint the metal to give it a new look or add decorative elements like stickers or designs.
Once the metal frame is ready, you can use it to hold plant pots of various sizes. Simply place the pots inside and fill them with soil and plants, making sure not to overcrowd them. You can also place a saucer or tray underneath the pots to catch excess water and prevent staining.
The great thing about using a repurposed microwave as a plant pot holder is that it's sturdy and weather-resistant. You can place it outdoors or indoors, depending on your preference and the needs of your plants. Additionally, it's an eco-friendly way to give new life to an old appliance and reduce waste.
Apart from holding plant pots, you can also use different parts of the microwave to create other DIY projects, such as a jewelry organizer, a bookshelf, or an aquarium stand. The possibilities are endless, and with a little creativity and imagination, you can turn your old microwave into something unique and functional.
In conclusion, repurposing an old microwave as a plant pot holder is an easy and rewarding DIY project. By doing so, you can give your plants a new home, declutter your garage or storeroom, and contribute to a more sustainable lifestyle. So, go ahead and get crafty with this old appliance!
10 Romantic Activities to Experience in Joshua Tree National Park
You may want to see also
![]()
Pet bed
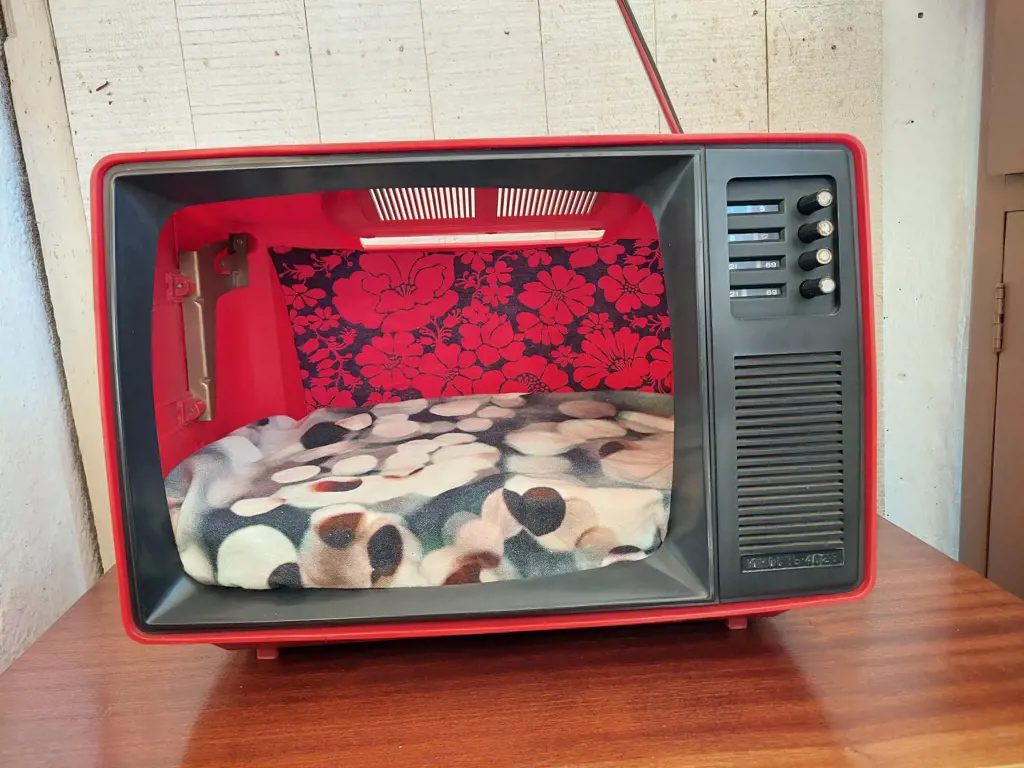
If you have an old microwave that is no longer in use, don't just throw it away. There are plenty of ways to upcycle it and give it a new life. One unique idea is to turn it into a pet bed.
To create a pet bed out of an old microwave, you'll need to start by removing the door and all the inside components. Make sure there are no sharp edges left behind, as these could hurt your pet.
Next, you'll want to create a cushion for your furry friend to lay on. You can use an old pillow or cushion, or you can make your own by sewing together some old fabric and stuffing it with foam or batting.
Once you have your cushion, place it inside the microwave shell. If the shell is too deep, you may need to add some foam or padding to the bottom to raise the cushion up to a comfortable height.
To add a finishing touch to your pet bed, you can decorate the microwave shell with paint or stickers. You could even add some legs to raise the bed up off the ground a bit.
Not only is a microwave pet bed a great way to repurpose an old appliance, it's also an eco-friendly option for your pet's sleeping arrangements. So if you have an old microwave lying around, don't throw it away – give it a new purpose as a comfortable bed for your furry friend.
12 Must-Visit Spots for Fun Activities in Absecon NJ
You may want to see also
![]()
Storage container

If you have an old microwave that's taking up space in your home, don't throw it away just yet! There are plenty of things you can do with it, one of which is turning it into a storage container.
To make a microwave storage container, you'll need to remove the microwave's electronic parts, such as the magnetron and capacitor, to avoid any potential hazards. Once you've safely taken them out, you'll be left with a hollow shell that can be used for storage.
The first thing you can do is turn it into a storage unit for your kitchen. You can store small packets of spices, sugar, and tea bags in it. If you want to make it more organized, you can add small dividers or attach small containers inside to keep everything in place.
You can also use the microwave container to organize your craft supplies. You can keep your paintbrushes, scissors, and pens in it. It can also be used as storage for jewelry-making supplies, such as beads and strings.
If you have kids, the microwave container can be turned into a toy storage unit. You can store small toys like cars, action figures, and building blocks in it. You can also use it as a tool storage unit for your garage or shed. Store screws, nails, and bolts in it.
Don't forget that you can also use it as a planter. Fill it with soil and plant seeds to grow herbs or small plants. Place it on your kitchen windowsill, and you'll have access to fresh herbs at all times.
In conclusion, an old microwave can be turned into an excellent storage container. It can be used for various purposes, such as organizing your kitchen, jewelry supplies, and children's toys. It can also be used as a tool storage unit and even as a planter. With some creativity, you'll find that an old microwave can actually be quite useful!
12 Fun Things to Do in Frenchtown, NJ
You may want to see also
![]()
Mini bookshelf
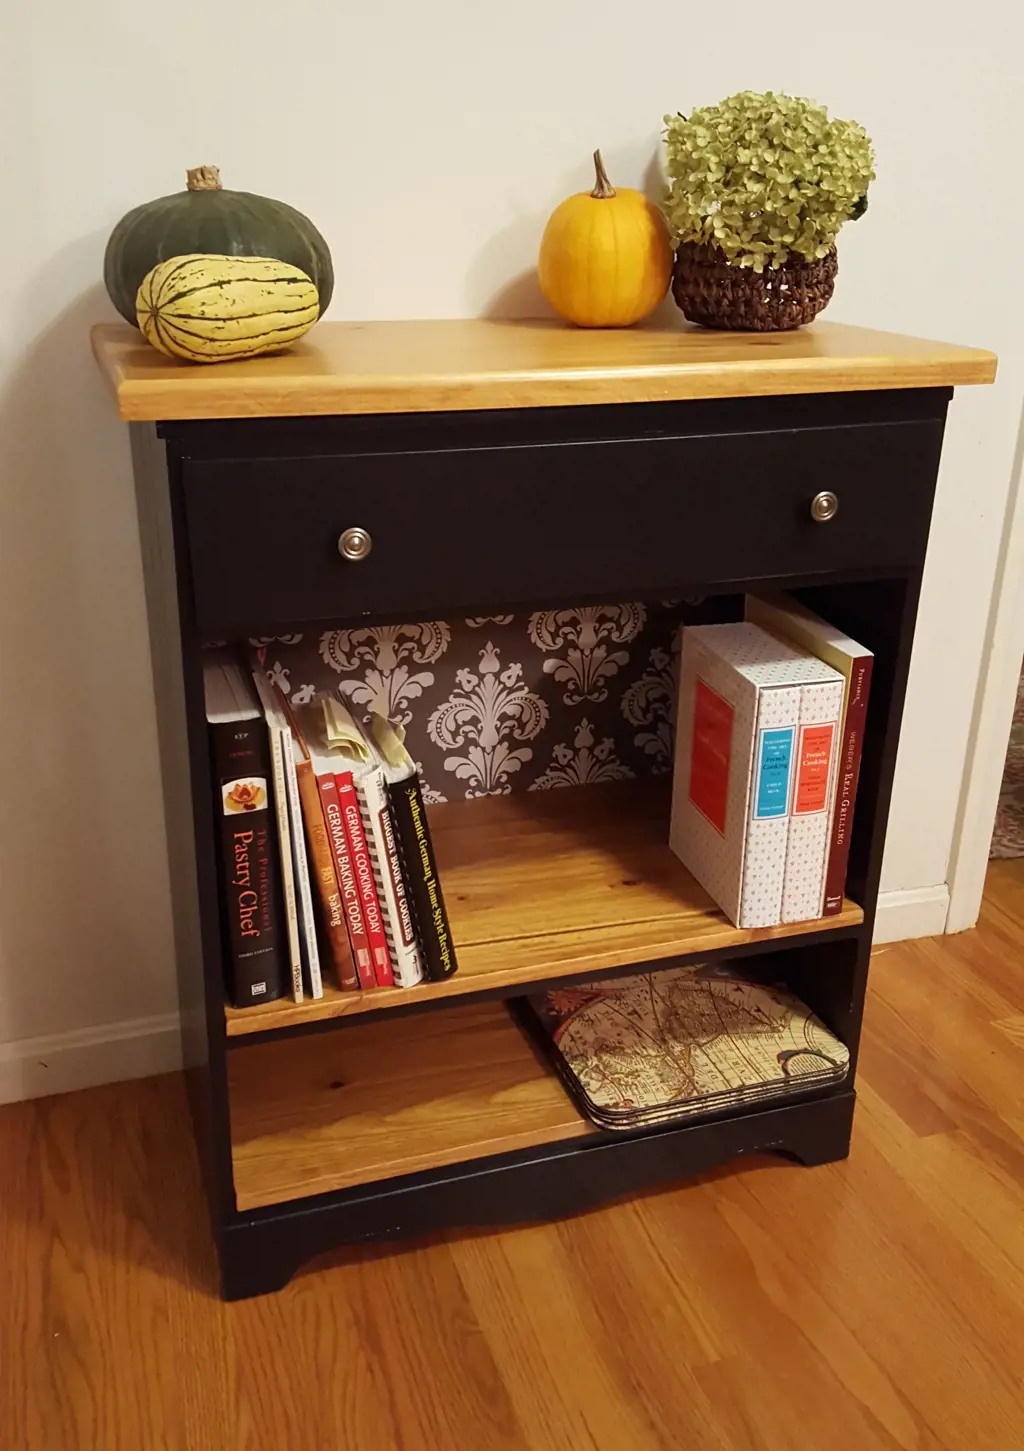
Do you have an old microwave lying around the house that you don't know what to do with? Instead of throwing it away, why not try transforming it into a mini bookshelf? Here are some steps to help you get started:
Step 1: Remove the Microwave Door
Start by removing the microwave door and any internal parts that are no longer needed. Be sure to unplug the microwave and take out the glass plate and any rotating tray.
Step 2: Clean the Microwave
Before you begin transforming your microwave into a bookshelf, be sure to give it a good cleaning. This will help remove any dirt, grime, or old food residue. You can use your regular cleaning supplies or a damp cloth with a mild detergent.
Step 3: Measure the Microwave
Once your microwave is clean and ready to use, measure the inner dimensions of the appliance. This will determine what size books can fit inside and how many shelves you can create.
Step 4: Create Shelves
Using a sturdy piece of wood, cut out shelves that will fit inside the microwave. You can use a jigsaw or a hand saw to do this. You can also sand the edges to create a smoother surface for your books.
Step 5: Paint the Shelves
Paint the shelves in your preferred color or leave them in their natural wood color. This step can be done before or after you place them inside the microwave.
Step 6: Install Shelves in Microwave
Once your shelves are complete, place them inside the microwave. You can use glue or screws to keep them in place.
Step 7: Add Books
Finally, add your favorite books to your new mini bookshelf. You can also add decorative items like succulent plants or figurines.
In conclusion, transforming your old microwave into a mini bookshelf is a great way to repurpose an old item. With a little effort and creativity, you can turn it into a functional and stylish addition to your home. Give it a try today!
14 Fun Things to Do in Land O Lakes, Florida
You may want to see also
![]()
DIY vacuum chamber for science experiments
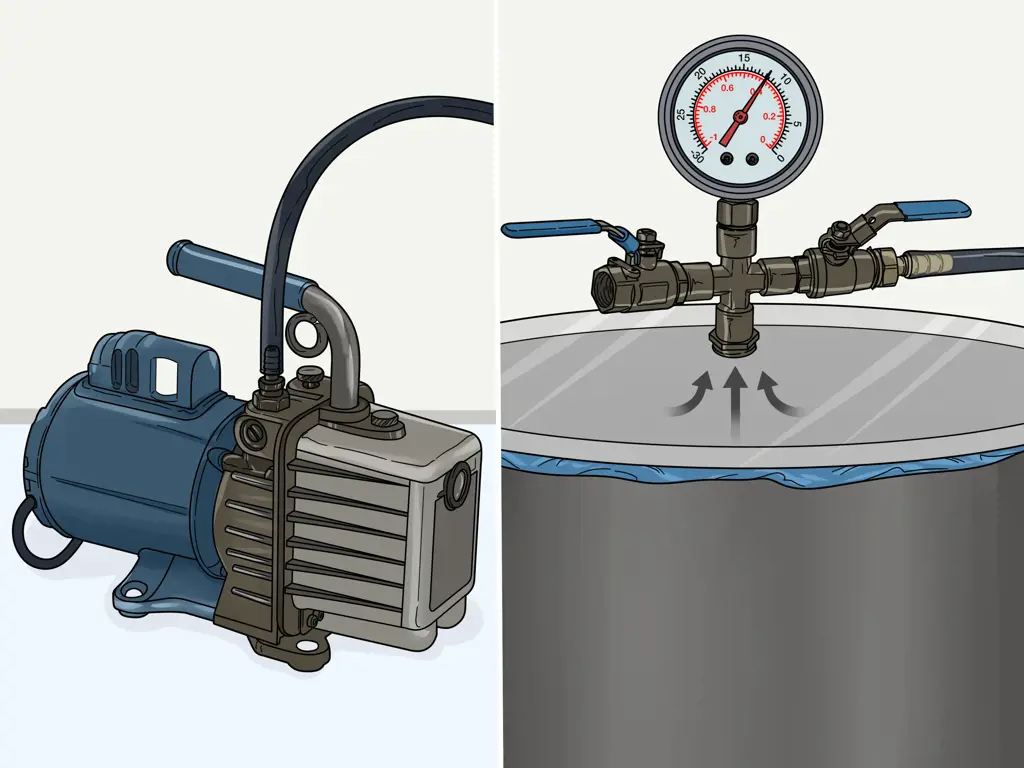
If you have an old microwave sitting around and you're wondering what to do with it, consider turning it into a DIY vacuum chamber for science experiments. A vacuum chamber is a sealed container that removes all air and gas molecules, creating a low-pressure environment for conducting experiments.
To turn your old microwave into a vacuum chamber, you'll need a few supplies. First, remove the door of the microwave. Next, secure a Plexiglas sheet over the opening where the door used to be using silicone adhesive and screws. Make sure the Plexiglas is thick and durable enough to hold a vacuum.
Next, you'll need a vacuum pump. You can purchase a vacuum pump at a local hardware store or online. Attach the vacuum pump to the microwave chamber using a vacuum hose. Make sure the pump is powerful enough to create a strong vacuum.
Once your vacuum chamber is set up, you can start conducting science experiments. Here are a few experiments you can try:
- Experiments with sound: Place a bell or tuning fork inside the vacuum chamber and see how the sound changes as the air pressure drops.
- Watching boiling water: Boil water inside the vacuum chamber and observe how the water boils differently under low pressure.
- Experimenting with air pressure: Fill a balloon with air and place it in the vacuum chamber. As the air pressure drops, the balloon will expand.
- Seeing the effects of radiation: Shine a beam of light or laser inside the chamber and observe how the particles move differently under low pressure.
- Testing materials: Place different materials inside the vacuum chamber and observe how they react under low pressure. This can be useful for testing the durability of materials in extreme environments.
Overall, turning your old microwave into a vacuum chamber is a fun and educational project that can be used for a wide range of science experiments. With a little creativity, there's no limit to what you can discover!
10 Reasons to Explore the Area Surrounding Snoqualmie Falls
You may want to see also
![]()
DIY neon sign

Do you have an old microwave lying around your house that you don't use anymore? Instead of letting it collect dust, how about turning it into a unique DIY neon sign? With a few materials, some creativity, and a little elbow grease, you can turn that old microwave into a cool piece of decor for your home or office.
To begin, remove the microwave's front panel and clean it thoroughly. Then, using a pencil, draw the design you want for your neon sign onto the panel. You can choose any shape or word that you like, but keep in mind that simple designs may work best.
Next, use a handheld rotary tool with a cutting wheel attachment to carefully cut along your pencil lines. Be sure to wear protective gear like goggles and a mask while doing this, as it can produce a lot of dust.
Once your design is cut out, it's time to add the neon element. Purchase flexible LED neon light strips in the color of your choice. These strips are affordable, easy to handle, and give off a cool, glowing effect.
Carefully place the LED neon light strips onto the backside of the microwave panel, following the shape of your design. You can use small pieces of clear tape to hold the strips in place while you work. Once the strips are in place, connect them to a power source using a power adapter.
Finally, reattach the front panel to the microwave and turn on the LED neon light strips. You now have a unique and personalized neon sign made from an old microwave!
Not only is this DIY project a fun way to repurpose old appliances, but it also allows you to express your individual style with a personalized piece of decor. So, grab that old microwave out of storage and get started on your DIY neon sign today!
11 Fun-Filled Activities at Ginnie Springs You Can't Miss
You may want to see also
![]()
Tool storage
If you have an old microwave lying around your home that you don't use anymore, don't throw it away just yet. You can repurpose it and give it a new lease of life by using it for tool storage. Here are some creative ways to store your tools in an old microwave.
Remove the door
The first step to transform your old microwave into a tool storage unit is to remove the door. You can either use a screwdriver or power drill to unscrew the hinges and gently pull off the door. Alternatively, if you're not comfortable doing it yourself, seek the help of a professional who can do it for you. Once you have the door removed, you'll have a wide opening to store your tools.
Create DIY shelving
You can easily create shelving inside the microwave to hold your tools. You can use any materials such as wood, metal or plastic for your shelves, depending on what you have available. Cut the shelves to fit the dimensions of the interior of the microwave and install them using screws or other fasteners. Place your tools on the shelves, and voila! You have a fully functional tool storage unit.
Use magnets
Another creative way of storing your tools within your old microwave is by using magnets. You can attach magnets to your tools and stick them to the inside walls of the microwave. This method is an excellent option for smaller tools such as screwdrivers, pliers, and wrenches. The magnets will hold the tools securely in place, keeping them organised and easy to find when you need them.
Hang tools on the door
If you don't want to remove the door from the microwave, you can still use it for tool storage. You can install hooks on the door and hang your tools on them. This option is ideal for bigger tools such as hammers and saws. Always ensure that the hooks are securely attached to the door so that they don't become dislodged when you are opening and closing it.
In conclusion, your old microwave may have gone past its sell-by date in terms of heating up food, but it can still be a useful tool storage unit. With a bit of creativity and DIY skills, you can transform it into an organised and efficient space for all your tools. So, don't throw away that old microwave, repurpose it and give it a new lease of life!
13 Fun Things to Do in Owasso, Oklahoma
You may want to see also
![]()
Music speaker
If you have an old microwave that you don't use anymore, don't just toss it out. With a little bit of creativity, you can use it to create a unique and functional music speaker. It may seem a bit odd, but bear with me - it's a fun and practical project that can breathe new life into your old appliance.
Here's how to do it:
Remove the microwave's interior.
The first step is to safely remove the interior components of the microwave. This usually involves taking off the outer casing, removing the microwave generator, and disconnecting any electrical connections or wiring. Make sure you unplug the microwave beforehand and wear protective gear like gloves and goggles, as some microwave components can be dangerous.
Install speaker components.
Once the interior is removed, install a speaker in the place of the microwave generator. You can use any type of speaker you prefer, as long as it fits within the space allotted in the microwave. Most speakers can be installed using screws or adhesive. Make sure the wiring is carefully connected with your new speaker. You can also add in a Bluetooth or AUX cord connectivity feature to turn the microwave speaker into a wireless speaker.
Install soundproofing.
To improve the sound quality and reduce any echoes inside the microwave, you can add some soundproofing material to the walls. This can be done by adding foam or cotton batting, which can be cut to size and secured using adhesive or another fastening mechanism. This reduces the overall reverberation and adds to the overall quality of the sound.
Power On and Test.
Once you have completed every step, it is the time to power on the speaker and test it. As the microwave is now a speaker, you can connect any audio device that includes a standard audio jack or wirelessly. The quality of the sound depends on the quality of the speaker installed in the device. Make sure to use quality wiring and fastening mechanisms to ensure the speaker does not suddenly disconnect.
An old microwave can be salvaged to create a unique, functional music speaker. You don't need to be an expert to create one – just a bit of patience, safety gear, and creativity. In the end, you'll have a fun DIY project and a speaker that you can use to blast your favorite tunes.
13 Fun Ideas for Your 6-Month Anniversary
You may want to see also
![]()
Make into a lamp
If you have an old microwave that you no longer use and you are wondering what to do with it, you can turn it into a unique lamp. Making a lamp out of an old microwave is both a fun project and a practical use of an old appliance that would otherwise end up in the landfill. In this article, we will guide you through the process of creating a microwave lamp.
Materials Needed
To create a microwave lamp, the following materials and tools are required:
- An old microwave
- Pliers
- Wire strippers
- Screwdrivers
- Hot glue gun
- Lamp kit
- Lampshade
Step by Step Guide
Disconnect the Microwave
The first step is to unplug the microwave and remove all the screws on its outer shell using the screwdriver. Be careful not to damage any internal parts of the microwave as you remove the outer shell.
Remove the Fixture
Once you have removed the outer shell, locate the light fixture in the microwave and carefully remove it. You can use pliers or a screwdriver to do this.
Drill a Hole
Using a drill, make a hole at the top of the microwave. The hole should be the same size as the metal tube that comes with the lamp kit.
Install the Lamp Kit
Slide the metal tube through the hole you made in the previous step. You should ensure that the tube is securely fitted and that it is straight. Follow the instructions in the lamp kit and attach the cable to the socket.
Attach the Lampshade
Use a hot glue gun to attach the lampshade to the lamp holder. The lampshade should be firmly attached to the lamp holder.
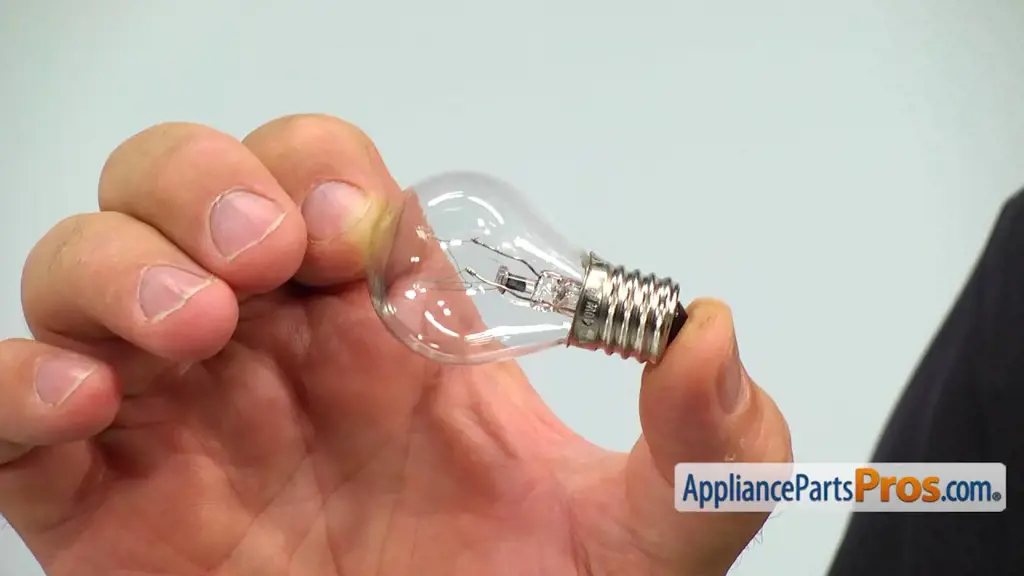
Add a Bulb
Finally, add a light bulb to the lamp. It is essential to use a bulb with the recommended wattage to avoid damage to the lamp.
Creating a lamp out of an old microwave is an excellent way of repurposing a device that would have otherwise been discarded. It is both a fun and practical project that you can do yourself. However, it is essential to take extra caution when working with electrical appliances like microwaves, especially when dismantling and reassembling them. By following this guide carefully, you can make yourself a unique and functional lamp that is sure to make an impressive statement in any room.
10 Fun Fall Activities to Experience in Philly
You may want to see also
![]()
DIY air fryer
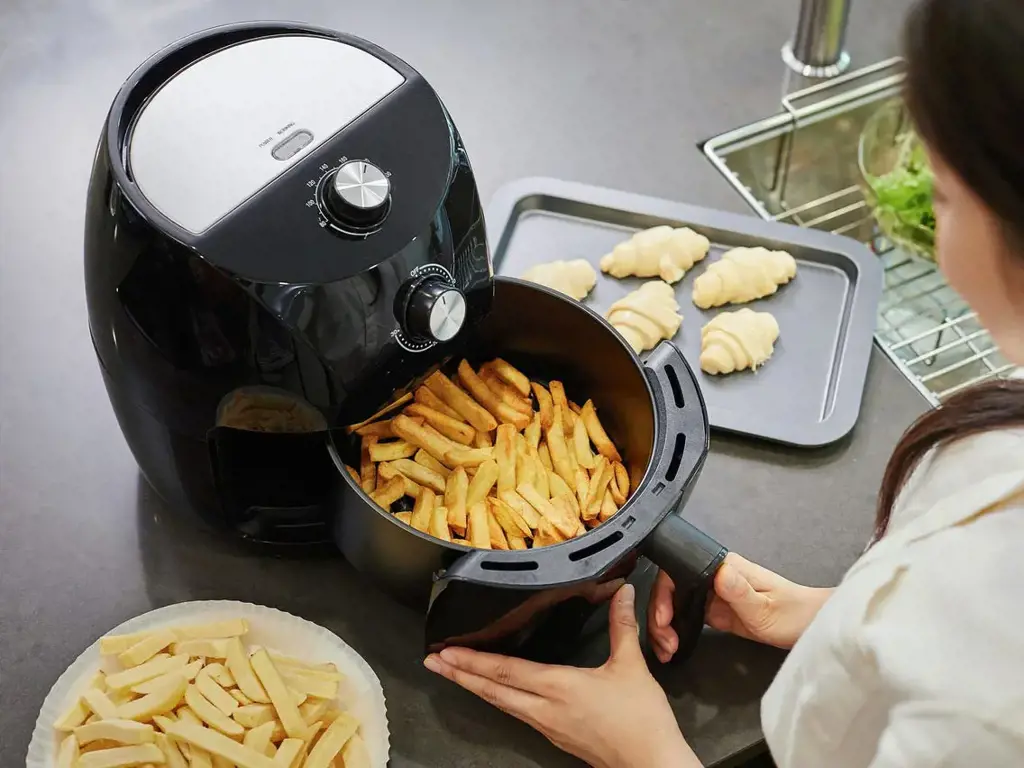
Microwaves are an unmistakable presence in most households. But as times change, many households may find themselves replacing their old microwaves with newer models. But before tossing out that old microwave, consider repurposing it for a DIY air fryer, keeping it out of a landfill and giving it a new lease of life. In this article, we’ll show you how to turn your old microwave into an air fryer.
Air fryers are a new way of cooking that uses hot air to cook food instead of oil. This results in food that is crispy on the outside and moist on the inside. Air fryers can be used for a wide range of foods, including vegetables, meats, and even baked goods.
Repurposing your old microwave into an air fryer is an excellent way to save money. Air fryers can be quite expensive, often costing hundreds of dollars. If you have an old microwave lying around, you can easily turn it into a functional air fryer without spending a lot of money. Additionally, by repurposing your old microwave into an air fryer, you’re not only giving it a new lease of life, you’re also helping to reduce waste.
To repurpose your microwave into an air fryer, you need to follow the following steps:
Step 1: Remove the Microwave's Rotating Plate
The first step in turning your old microwave into an air fryer is to remove the rotating plate that comes with most microwave ovens. This plate can interfere with the air fryer basket's placement and prevent the food from cooking evenly.
Step 2: Choose a Suitable Air Fryer Basket
Next, you need to choose a suitable air fryer basket that fits your microwave. The air fryer basket should be made of metal and have a handle for easy removal from your makeshift air fryer. You can find air fryer baskets online or at your local home goods store.
Step 3: Place the Air Fryer Basket in the Microwave
After choosing an air fryer basket, you need to place it inside the microwave. Ensure that it sits in the center of the microwave and is balanced. If the air fryer basket sits unevenly, it can cause the food to cook unevenly.
Step 4: Preheat the Microwave
Preheat the microwave for two to three minutes on the highest setting. This will ensure that your air fryer is ready to cook.
Step 5: Put the Food in the Air Fryer Basket
Once the microwave is heated, you can put the food in the air fryer basket. Remember to shake the basket occasionally to ensure that the food cooks evenly.
Step 6: Cook the Food
Cook the food for the time and temperature required by the recipe. Since microwaves vary, it is best to monitor the food to prevent it from overcooking or burning. Once the food is done, remove the air fryer basket from the microwave and let it cool before serving.
Repurposing your old microwave into an air fryer is an excellent way to save money and prevent waste. By following the simple steps outlined above, you can easily turn your old microwave into an air fryer that can be used to make a wide range of delicious and healthy dishes. So, don't throw away your old microwave just yet. Give it a new lease of life by turning it into an air fryer.
10 Fun Activities to Experience Phoenix's Exciting Nightlife
You may want to see also
![]()
DIY soldering station
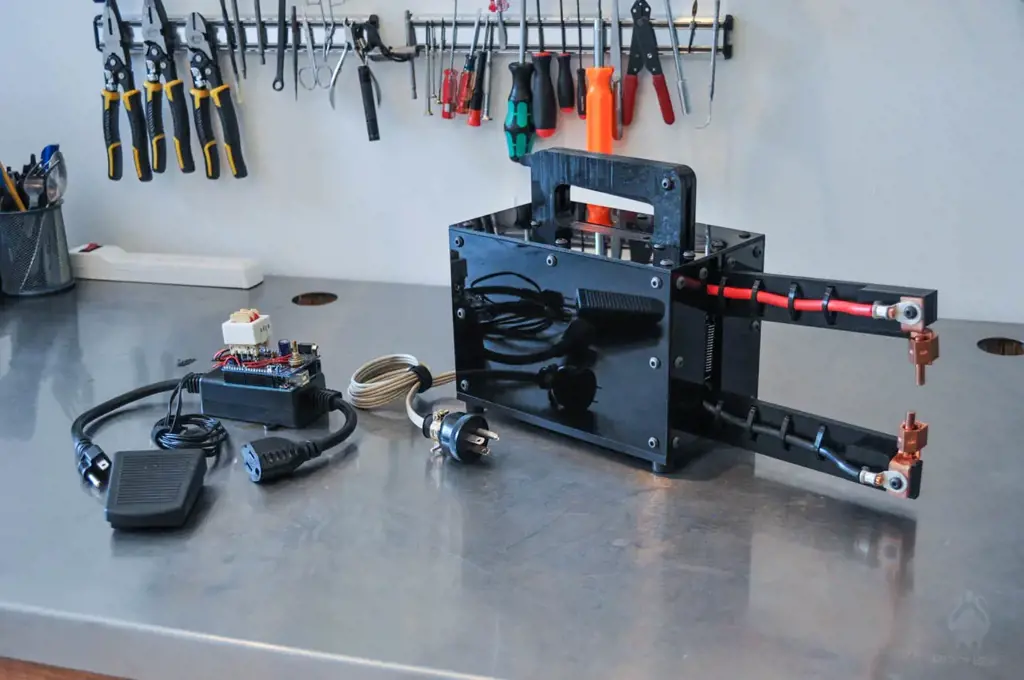
If you have an old microwave that you're looking to repurpose, a great DIY project you can try out is turning it into a soldering station. Not only is this a useful addition to your workspace, but it's also a fun way to breathe new life into an old appliance. Here's how to get started:
- Remove the microwave's inner workings: Begin by unplugging the microwave and removing its outer casing. Then, carefully remove all of the microwave's internal components. Be sure to exercise caution and follow safety precautions, as the microwave's capacitor can store a dangerous charge even after it has been unplugged.
- Install a new power cord: Once the microwave's internal components have been removed, you will need to install a new power cord. You can easily purchase a replacement cord online or from your local hardware store.
- Mount a heat-resistant surface: Next, you'll need to find a heat-resistant surface to use as your soldering station. You can use a heat-resistant tile, a ceramic plate, or a similar material. Once you've chosen your surface, mount it inside the microwave's shell using screws or glue.
- Install a fume extractor: Soldering can produce harmful fumes, so it's important to install a fume extractor to remove these toxins from the air. You can purchase a ready-made fume extractor or build your own using a PC fan and a charcoal filter.
- Attach a soldering iron holder: Lastly, you'll need to attach a holder for your soldering iron. You can use a spring-loaded holder or a simple hook and loop strap. Make sure the holder is heat-resistant and positioned so that your soldering iron can be easily accessed and replaced when necessary.
With these steps completed, your DIY soldering station is now ready to use. Simply plug in the power cord, switch on the fume extractor, and get soldering! Not only is this a great way to put an old microwave to use, but it's also an economical alternative to purchasing a store-bought soldering station.
13 Winter Activities in Tennessee You Can't Miss
You may want to see also
![]()
Make into a mini fridge (requires modification)
_20230503194740.webp)
If you have an old microwave lying around and you're not sure what to do with it, why not turn it into a mini-fridge? The process may require some modification, but it's a fun project that can save you money and give your kitchen an unusual conversation piece.
Before you start, you will need some tools and materials, such as a screwdriver, wire cutters, pliers, and a mini-fridge thermostat. Plus, you will need to take certain safety precautions to avoid any hazards emerging from working with electronic appliances.
First, you need to remove the microwave's electrical components carefully. Cut the wires that connect the transformer, magnetron, and other electrical parts within the microwave. You will have to dispose of these components safely, as they can be hazardous.
Next, you need to insert a mini-fridge thermostat into the refrigerator's control panel. This is essential, as the thermostat controls the temperature of the fridge. You can purchase a mini-fridge thermostat online or at your local home improvement store.
Now, it's time to attach the shelves to the fridge. Measure the inside of the microwave and cut the shelves according to the size. Use sandpaper to smooth the edges and place the shelves on the chassis.
Once you have placed the thermostat and attached the shelves, you can install a small fan to enable the fridge to circulate air. This will help to maintain a consistent temperature in the fridge.
Finally, attach the door handle and seal the door shut. You may need to add a small foam piece to make sure the fridge is fully sealed and condensation is prevented.
Before you plug the fridge in, ensure that all connections are safe and secure. When everything has been checked, plug in the fridge, and allow it to cool for a few hours. Then, enjoy your mini-fridge, either in the kitchen or wherever you choose to place it!
In conclusion, turning an old microwave into a mini-fridge is an innovative and fun way to make use of an appliance that would otherwise just gather dust. It may take some time and effort, but the end product is worth it. Not only will you save some cash, but you'll also have a unique item that will be sure to impress your guests.
12 Exciting Activities Near Grant Park You Won't Want to Miss
You may want to see also
Frequently asked questions
Yes, old microwaves can be recycled. Contact your local recycling center to see if they accept microwaves. Many cities also hold special e-waste recycling events where old electronics like microwaves can be dropped off.
It depends on the condition of the microwave. Old microwaves may have worn electrical connections or malfunctioning components that can pose safety risks. If you’re not sure about the safety of your old microwave, it’s best to dispose of it and invest in a new one.
Yes, an old microwave can be repurposed into a variety of things. For example, the magnetron (the part that generates microwave energy) can be used to create a DIY metal-melting furnace. The turntable can be turned into a lazy Susan for your kitchen table, or the casing can be used as a plant pot holder.
To dispose of your old microwave safely, first, unplug it. If possible, remove any batteries or other power sources. Check with your local waste management authority to see if they have special instructions for disposing of electronic waste. You can also contact a local electronics recycling center to dispose of it safely.


4 Comments
Frances Delacruz
Sofia Jennings
AuthorClaude Alexander
Arjun Yadav
Author