Are you tired of drinking ordinary Kool-Aid? Well, prepare to be amazed because we have compiled a list of 10 creative ways to use Kool-Aid that will certainly add some excitement to your life! From vibrant cocktails to colorful crafts, Kool-Aid can be transformed into various forms of entertainment and enjoyment. So, get ready to dive into a world of tantalizing flavors and endless possibilities – it's time to get creative with Kool-Aid!
| Activity | Description |
|---|---|
| Drink | Enjoy a refreshing glass of Kool-Aid in a variety of flavors |
| Popsicles | Make homemade Kool-Aid popsicles by freezing the drink in ice cube trays |
| Slushies | Blend Kool-Aid with ice to create a delicious slushy treat |
| Hair Dye | Use Kool-Aid as a temporary hair dye for fun and colorful hair |
| Lip Stain | Create a natural lip stain by applying Kool-Aid powder to your lips |
| Playdough | Use Kool-Aid mix to add color and scent to homemade playdough |
| Tie-Dye | Use Kool-Aid to create vibrant tie-dye patterns on fabric |
| Paint | Mix Kool-Aid powder with water to create a natural, edible paint |
| Flavored Water | Add a touch of Kool-Aid to water for a refreshing and flavored drink |
| Jello | Create Kool-Aid flavored Jello for a sweet and fruity dessert |
What You'll Learn
- Cocktail mixer - Use Kool-Aid to blend fruity and colorful cocktails
- Ice pops - Freeze flavored Kool-Aid in popsicle molds for a refreshing treat
- Dye Easter eggs - Create vibrant and unique Easter eggs using Kool-Aid as a natural dye
- Tie-dye shirts - Create fun tie-dye patterns on shirts using different flavors of Kool-Aid
- Lip balm - Make your own flavored lip balm using Kool-Aid for a sweet and colorful touch
- Hair dye - Temporary hair dye can be achieved by mixing Kool-Aid with conditioner
- Jello shots - Add Kool-Aid to gelatin mix for flavorful and fun jello shots
- Playdough - Create homemade playdough with different colors and scents using Kool-Aid
- Scented sachets - Fill small fabric bags with unsweetened Kool-Aid to create scented sachets for drawers or closets
- Watercolor paint - Use Kool-Aid mixed with water to create your own homemade watercolor paints for art projects
![]()
Cocktail mixer - Use Kool-Aid to blend fruity and colorful cocktails
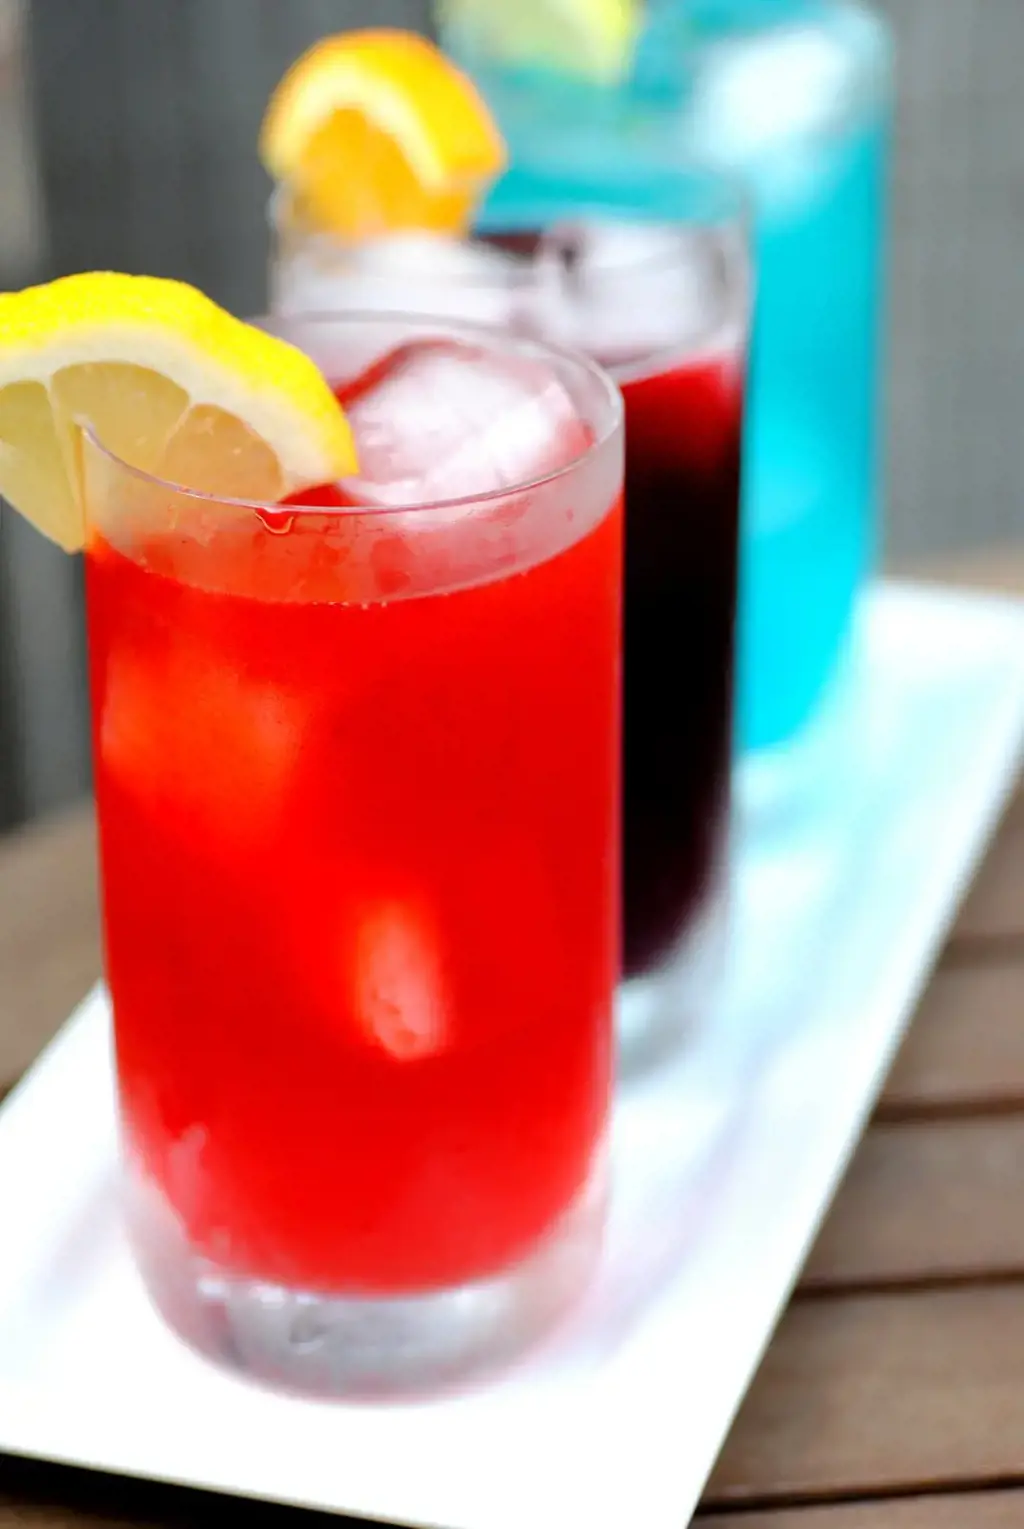
If you're looking to add a fun twist to your next party or gathering, consider using Kool-Aid as a cocktail mixer. With its fruity flavors and vibrant colors, Kool-Aid can add a playful and unique touch to your favorite cocktails. Whether you're a fan of classic drinks or prefer to experiment with new creations, Kool-Aid can take your beverages to the next level.
There are many ways to incorporate Kool-Aid into your cocktails. You can use it as a base for a fruity punch, mix it with various spirits, or even create your own signature cocktail using Kool-Aid as the star ingredient. The possibilities are endless, and you can let your creativity run wild.
One simple and popular way to use Kool-Aid is to make a Kool-Aid Margarita. To do this, mix your preferred flavor of Kool-Aid with tequila, triple sec, and lime juice. Shake it all together with ice and strain it into a margarita glass. You'll have a refreshing and colorful cocktail that will surely impress your guests.
Another fun idea is to make Kool-Aid Jello Shots. Simply prepare a package of your favorite flavor of Kool-Aid, following the instructions on the package. Instead of adding cold water, substitute it with vodka or rum. Pour the mixture into shot glasses and refrigerate until set. You'll have tasty and boozy treats that will be a hit at any party.
If you're feeling adventurous, you can even mix different flavors of Kool-Aid together to create new and exciting cocktails. For example, combine lemonade and strawberry Kool-Aid with vodka and soda water for a refreshing and tangy drink. Or mix orange and pineapple Kool-Aid with rum and coconut milk for a tropical and fruity concoction. The possibilities are only limited by your imagination.
When using Kool-Aid as a cocktail mixer, it's important to remember that it can be quite sweet. To balance out the sweetness, consider adding some citrus juice or soda water to your drinks. This will add a refreshing and bubbly element to your cocktails, making them even more enjoyable.
In conclusion, using Kool-Aid as a cocktail mixer can add a fun and colorful twist to your next gathering. Whether you're a fan of classic drinks or prefer to experiment with new creations, Kool-Aid can take your cocktails to the next level. With its fruity flavors and vibrant colors, Kool-Aid can create refreshing and eye-catching beverages that will surely impress your guests. So, grab a few packets of Kool-Aid and get ready to mix up some delicious and playful cocktails that will be the talk of the party.
11 Fun Things to Do in Ogden, Utah
You may want to see also
![]()
Ice pops - Freeze flavored Kool-Aid in popsicle molds for a refreshing treat
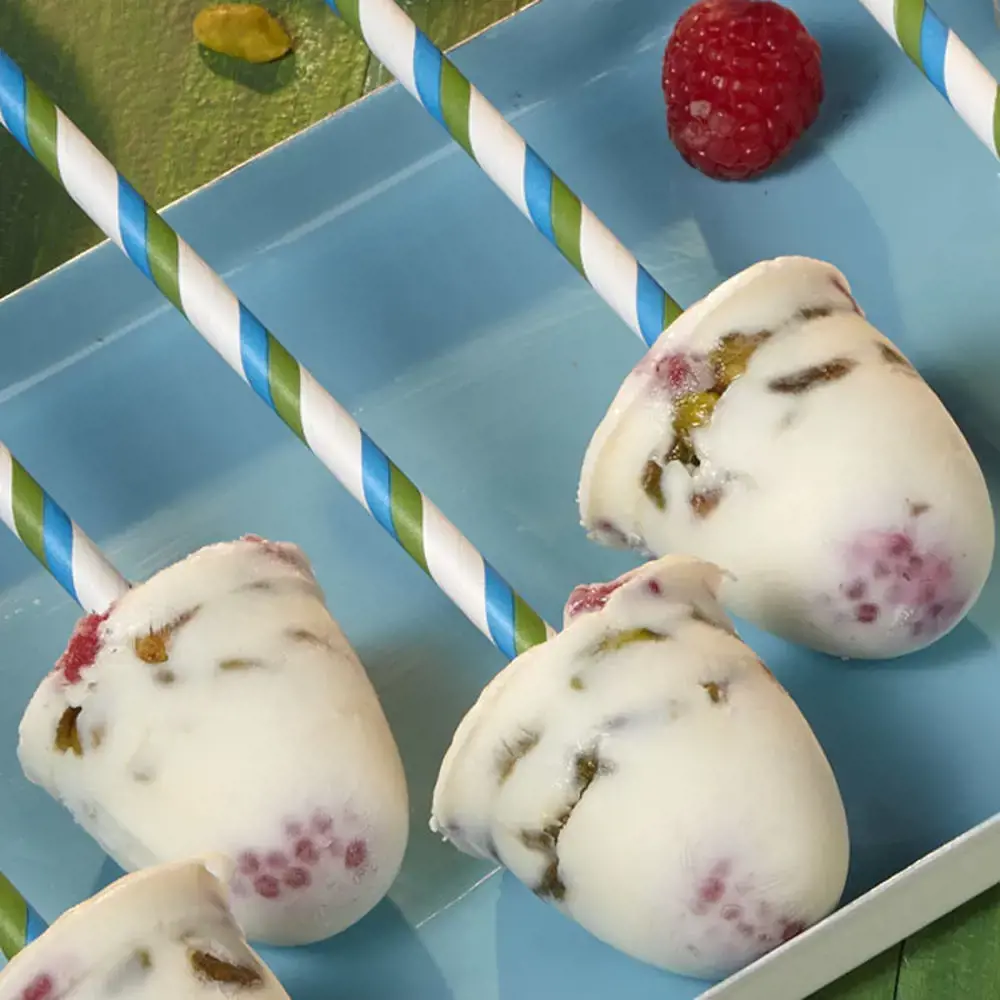
Kool-Aid is a classic powdered drink mix that comes in a variety of fun flavors. It's not only great for making a quick and easy beverage, but it can also be used in a variety of other creative ways. One such way is to make delicious ice pops using flavored Kool-Aid. These frozen treats are perfect for beating the summer heat and are loved by both kids and adults alike.
To make Kool-Aid ice pops, you'll need the following ingredients and supplies:
- Flavored Kool-Aid packets (choose your favorite flavor!)
- Sugar (optional, depending on personal taste)
- Water
- Popsicle molds or small paper cups
- Popsicle sticks or plastic spoons
- Plastic wrap (if using paper cups)
Here's a simple step-by-step guide on how to make Kool-Aid ice pops:
- Prepare the Kool-Aid mixture: In a large pitcher or bowl, empty the contents of a flavored Kool-Aid packet. Add sugar to taste if desired. Gradually add the specified amount of water indicated on the packet while stirring until the Kool-Aid mix is completely dissolved.
- Fill the molds: Carefully pour the prepared Kool-Aid mixture into popsicle molds. If you don't have molds, you can also use small paper cups. Fill each mold or cup about 3/4 of the way full, leaving some room for expansion when freezing.
- Insert the sticks: If using popsicle molds, insert the popsicle sticks into each compartment. If using paper cups, cover the top of each cup with plastic wrap and carefully insert the popsicle sticks or plastic spoons through the plastic wrap. This will help keep the sticks in place while freezing.
- Freeze the pops: Place the filled popsicle molds or cups in the freezer. Allow them to freeze for at least 4-6 hours, or until completely solid.
- Enjoy: Once the ice pops are completely frozen, remove them from the freezer. If using molds, gently run warm water over the bottom of each mold to help loosen the pops. If using paper cups, simply peel off the plastic wrap.
Now, sit back, relax, and enjoy your homemade Kool-Aid ice pops! These fruity frozen treats are perfect for cooling down on a hot summer day or as a refreshing snack any time of the year. Feel free to experiment with different Kool-Aid flavors and mix and match to create your own unique combinations.
Some fun variations to try include layering different flavors in the molds, adding fruit chunks to the mixture before freezing, or even adding a touch of lemon or lime juice for a zesty twist. The possibilities are endless, so get creative and have fun!
So the next time you have a packet of Kool-Aid lying around, don't limit yourself to just making a regular drink. Whip up a batch of delicious and refreshing Kool-Aid ice pops instead. They're easy to make, customizable, and sure to be a hit with everyone. Enjoy!
10 Must-See Attractions in Port of Spain
You may want to see also
![]()
Dye Easter eggs - Create vibrant and unique Easter eggs using Kool-Aid as a natural dye
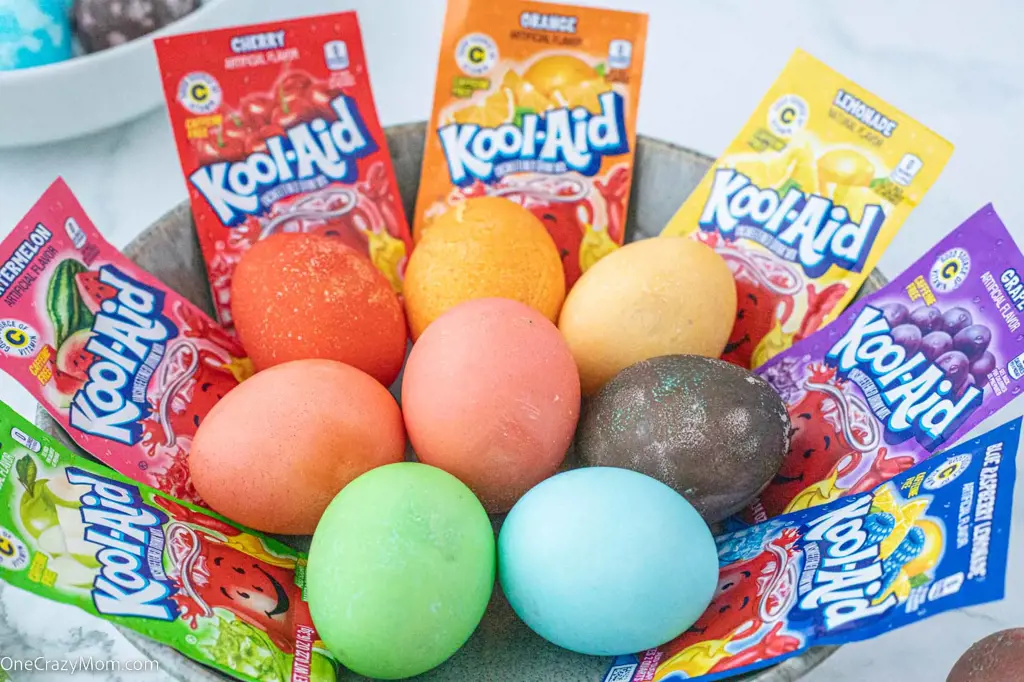
One fun and creative way to use Kool-Aid is to dye Easter eggs. Instead of using traditional store-bought dyes, Kool-Aid can be used as a natural alternative to create vibrant and unique colors. This is a great activity to do with kids or as a fun project for adults.
To dye Easter eggs with Kool-Aid, you will need the following materials:
- Hard-boiled eggs
- Various flavors of Kool-Aid
- Small bowls or cups
- Water
- Vinegar
- Spoons
- Paper towels or egg cartons for drying
Here are the steps to dye Easter eggs with Kool-Aid:
- Prepare your Kool-Aid dye solution by mixing one packet of Kool-Aid with 2/3 cup of water in a small bowl or cup. You can use whichever flavors/colors of Kool-Aid you prefer. Feel free to mix and match flavors to create different shades.
- Add 1 tablespoon of vinegar to the Kool-Aid mixture. The vinegar helps the dye adhere to the eggshell and creates more vibrant colors.
- Submerge a hard-boiled egg into the Kool-Aid mixture, ensuring it is fully covered. If needed, you can use a spoon to rotate the egg for even coverage.
- Let the egg sit in the dye solution for about 5-10 minutes, depending on how intense you want the color to be. Keep in mind that the longer the egg sits, the stronger the color will be.
- Carefully remove the egg from the dye solution using a spoon and place it on a paper towel or egg carton to dry. Make sure to handle the eggs gently to avoid smudging the dye.
- Repeat the above steps with different flavors of Kool-Aid and additional eggs to create a variety of colored Easter eggs.
- Allow the eggs to dry completely before handling or decorating them further. This usually takes about 15-20 minutes.
Once the eggs are completely dry, you can display them as is or get creative with further decorations. You can use markers, stickers, or even edible glitter to design unique patterns and add extra flair to your Kool-Aid dyed Easter eggs.
Dyeing Easter eggs with Kool-Aid is a fun and easy way to get creative this Easter. The vibrant colors and unique flavors will make your eggs stand out and add a special touch to your holiday celebrations. So gather your materials and get ready to enjoy a fun-filled day of dyeing eggs with Kool-Aid!
12 Fun Things to Do in Portsmouth, Ohio
You may want to see also
![]()
Tie-dye shirts - Create fun tie-dye patterns on shirts using different flavors of Kool-Aid
Tie-dye shirts have been a popular fashion trend for decades. They are vibrant, colorful, and add a unique touch to any outfit. While there are plenty of dyes available on the market, using Kool-Aid to tie-dye shirts is a fun and easy alternative. Not only does it give you the opportunity to experiment with different flavors, but it also leaves your shirts smelling fruity and delicious!
Here's a step-by-step guide on how to create tie-dye shirts using Kool-Aid:
Gather your materials:
- Plain white shirts
- Rubber bands
- Kool-Aid packets (varying flavors)
- Spray bottles
- Plastic wrap or ziplock bags
- Gloves (optional)
Prepare your workspace:
Lay down a plastic tablecloth or garbage bags to protect your work surface from any potential stains.
Prepare your shirts:
Dampen your shirts with water. You can either dip them in a bucket of water or spray them with a water bottle.
Decide on your design:
There are several tie-dye patterns you can choose from, such as the classic spiral, crumple, or bullseye. You can find tutorials and inspiration online to help you decide.
Create your design:
Start by pinching your shirt in the center and twisting it clockwise or counterclockwise to create a spiral or crumple effect. Use rubber bands to secure the shirt in place, making sure they are tight and evenly spaced.
Make your Kool-Aid dye:
Prepare your Kool-Aid packets by mixing them with warm water, according to the instructions on the package. You can use one flavor for the entire shirt or experiment with different flavors for a more vibrant and colorful result.
Apply the dye:
Fill your spray bottles with the Kool-Aid mixture. Start spraying the dye onto your shirt, making sure to saturate all the sections. Use a separate spray bottle for each color if you're using different flavors.
Let it set:
Once you've finished applying the dye, wrap your shirt in plastic wrap or place it in a Ziplock bag to prevent the colors from bleeding. Let it sit for at least 6-8 hours, or overnight, to allow the dye to set.
Rinse and wash:
After the setting time has passed, rinse the shirt under cold water until the water runs clear. Remove the rubber bands and continue rinsing until no dye remains. Finally, wash the shirt separately in cold water using a mild detergent.
Dry and enjoy:
Hang your tie-dyed shirt to dry, either outside or indoors. Once it's completely dry, you can proudly wear your homemade masterpiece!
Tie-dyeing shirts with Kool-Aid is a fun, budget-friendly activity that allows you to express your creativity and create unique designs. So gather your friends or family members and start creating your own vibrant tie-dye shirts using different flavors of Kool-Aid. Have fun experimenting, and don't be afraid to mix and match colors to create bold and eye-catching designs!
Discover the Best Free Activities in Alpharetta for an Unforgettable Experience
You may want to see also
![]()
Lip balm - Make your own flavored lip balm using Kool-Aid for a sweet and colorful touch

Kool-Aid is a versatile powdered drink mix that can be used to make a variety of tasty treats. One fun and creative way to use Kool-Aid is to make your own flavored lip balm. Not only is this a fun DIY project, but it also allows you to create a personalized lip balm with your favorite Kool-Aid flavors.
To make your own flavored lip balm using Kool-Aid, you will need a few simple ingredients and supplies. Here's a step-by-step guide to help you get started:
- Gather your supplies: You will need Kool-Aid powder (choose your favorite flavor/s), beeswax pellets, coconut oil, sweet almond oil, a microwave-safe bowl, a spatula, lip balm tubes or small containers, and labels (optional).
- Measure out the ingredients: In a microwave-safe bowl, combine 2 tablespoons of beeswax pellets, 2 tablespoons of coconut oil, and 1 tablespoon of sweet almond oil. The beeswax pellets can be adjusted depending on your desired lip balm consistency.
- Microwave and melt: Heat the bowl in the microwave for 30-second intervals, stirring well between each interval, until the mixture is completely melted and well combined. Be careful not to overheat the mixture, as the beeswax can burn.
- Add Kool-Aid powder: Once the mixture is melted, add about 1 teaspoon of Kool-Aid powder to the bowl. You can add more or less depending on how strong you want the flavor and color to be. Stir well to combine the Kool-Aid powder with the melted mixture.
- Pour into lip balm tubes or containers: Carefully pour the mixture into lip balm tubes or small containers. You can use a small funnel or a dropper to make this process easier and less messy.
- Let it cool and solidify: Allow the lip balm to cool and solidify for about 30 minutes to an hour. You can also put it in the refrigerator to speed up the process.
- Label and decorate (optional): Once the lip balm has solidified, you can add labels or decorate the containers to personalize them. This step is completely optional, but it can add a nice finishing touch to your homemade lip balm.
Now you have your very own flavored lip balm made with Kool-Aid! Simply apply it to your lips whenever you need a little extra hydration or a burst of flavor. This DIY project also makes for a fun and unique gift idea, as you can create custom lip balms for your friends and loved ones.
Keep in mind that the color of the Kool-Aid may temporarily stain your lips, especially if you choose a darker shade. If this happens, simply wipe off the excess color with a tissue or cotton pad. As with any homemade product, it's always a good idea to do a patch test before applying the lip balm to ensure you don't have any allergic reactions to the ingredients.
So, get creative and have fun making your own flavored lip balm using Kool-Aid. You'll not only have a delicious and colorful addition to your beauty routine, but you'll also have a fun and unique DIY project to enjoy.
11 Fun Things to Do in Flowery Branch, GA
You may want to see also
![]()
Hair dye - Temporary hair dye can be achieved by mixing Kool-Aid with conditioner
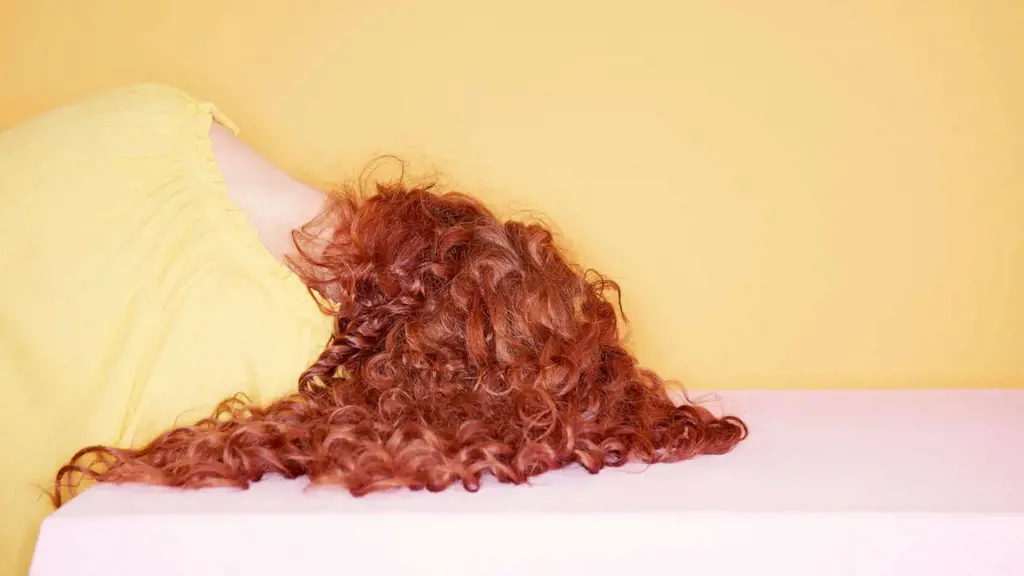
Kool-Aid is not just a delicious drink but can also be used for some fun and creative purposes. One of the most popular uses of Kool-Aid is as a temporary hair dye. This DIY hair dye method is easy, affordable, and allows you to experiment with different colors without the commitment of permanent hair dye. Here's how you can use Kool-Aid to give your hair a temporary vibrant color.
Firstly, gather your supplies. You will need Kool-Aid powder packets in your desired colors, a bowl, conditioner, gloves, a brush or comb, and aluminum foil or plastic wrap to wrap your hair.
Start by washing your hair with shampoo to remove any dirt or oil buildup. Make sure your hair is completely dry before you proceed.
Next, prepare the Kool-Aid mixture. In a bowl, mix a few tablespoons of conditioner with a packet of Kool-Aid powder. The amount of Kool-Aid powder you use will depend on the length and thickness of your hair, as well as how vibrant you want the color to be. For a more intense color, add additional Kool-Aid powder.
Once the mixture is well combined, put on your gloves to protect your hands from staining. Use a brush or comb to apply the Kool-Aid mixture evenly throughout your hair. Make sure to saturate your hair from roots to ends, ensuring all strands are coated.
After you've applied the Kool-Aid mixture, cover your hair with aluminum foil or plastic wrap. This will help seal in the color and prevent any staining. Leave the mixture on your hair for about 1-2 hours. The longer you leave it on, the more vibrant the color will be. It's best to do this process in a well-ventilated area or with a towel around your shoulders to protect your clothing from any potential staining.
After the desired time has passed, rinse your hair with cold water until the water runs clear. Avoid using hot water, as this can cause the color to fade faster. Skip the shampoo and only condition your hair to help lock in the color and keep your hair moisturized.
Once your hair is rinsed and conditioned, gently towel dry it and style as usual. If you're not satisfied with the intensity of the color after one application, you can repeat the process until you achieve your desired shade.
It's important to keep in mind that Kool-Aid hair dye is temporary and will gradually fade with each wash. The duration of the color will vary depending on your hair type, but it typically lasts for a few weeks. If you're ready to change the color or if the color doesn't fade as quickly as desired, you can remove the Kool-Aid dye by washing your hair with a clarifying shampoo or applying a mixture of baking soda and water.
In conclusion, using Kool-Aid as a temporary hair dye is a fun and cost-effective way to experiment with vibrant colors. It's a great option for anyone who wants to change their hair color without the commitment or damage of permanent dye. Just remember to test a small strand before applying to your entire head, as some hair types may react differently to the Kool-Aid dye. Happy coloring!
13 Fun Dad-Daughter Things to Do Together
You may want to see also
![]()
Jello shots - Add Kool-Aid to gelatin mix for flavorful and fun jello shots
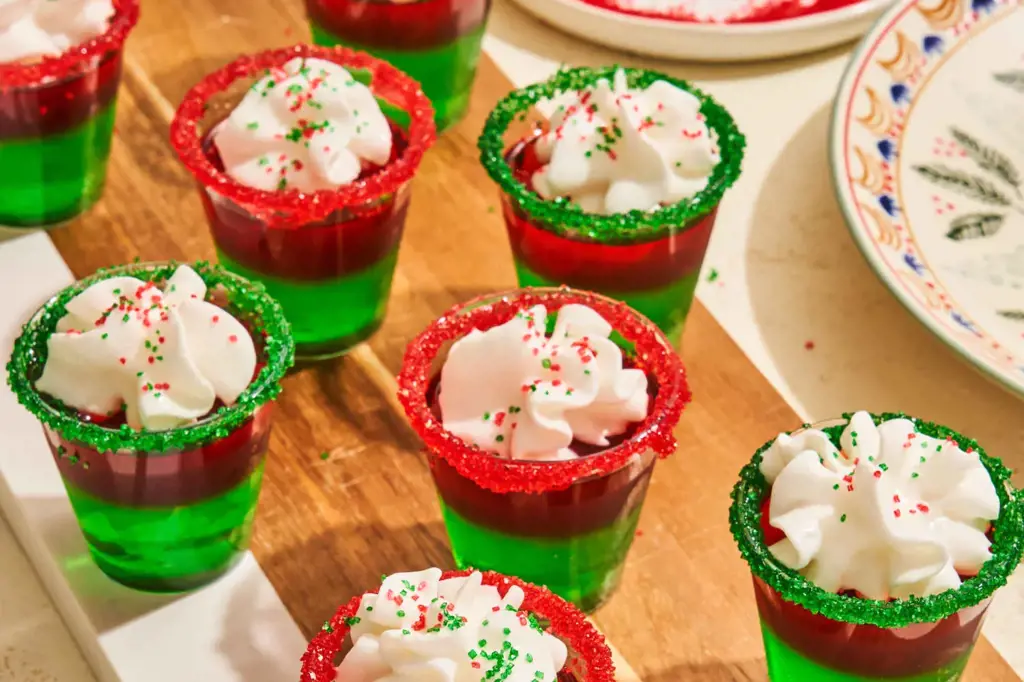
Kool-Aid is not just for kids anymore! This classic powdered drink mix can be used in a variety of creative ways, from refreshing beverages to tasty treats. One fun and flavorful way to incorporate Kool-Aid into your next gathering is by making Kool-Aid Jello Shots. These colorful and delicious treats are sure to be a hit with your adult friends!
To make Kool-Aid Jello Shots, you will first need to gather your ingredients. You will need one packet of your favorite Kool-Aid flavor, one cup of boiling water, 1/2 cup of cold water, one packet of unflavored gelatin, and 3/4 cup of your choice of alcohol, such as vodka or rum. You will also need plastic shot cups or molds to pour your jello shots into.
To start, dissolve the Kool-Aid mix and unflavored gelatin in the boiling water. Stir the mixture until everything is well combined and the powders are fully dissolved. Next, add the cold water and alcohol to the mixture and stir well.
Now it's time to pour your jello mixture into your shot cups or molds. If you are using shot cups, fill each cup about 1/4 to 1/2 full with the liquid. If you are using molds, spray them with non-stick cooking spray before pouring in the jello mixture. Place your cups or molds in the refrigerator and let them set for at least four hours, or until the jello is firm.
Once your Kool-Aid jello shots are set, they are ready to be enjoyed! To remove jello shots from molds, simply pop them out by gently pushing on the bottom. If you used shot cups, you can serve them as is or top them off with whipped cream or fruit for an extra special touch.
When serving Kool-Aid jello shots, always remember to drink responsibly and keep them out of reach of children. These colorful and fun treats are a great addition to adult parties or gatherings, but they should be enjoyed in moderation.
In addition to Kool-Aid jello shots, there are many other creative things you can do with Kool-Aid. You can use it to flavor homemade popsicles, create colorful milkshakes, or even make Kool-Aid infused cocktails. The possibilities are endless!
So the next time you find yourself with a packet of Kool-Aid, think beyond the traditional drink and get creative. Whether you're hosting a party or just looking for a fun treat, Kool-Aid is a versatile ingredient that can add a burst of flavor and color to any occasion. Cheers!
12 Affordable Activities to Enjoy in Freeport, Bahamas
You may want to see also
![]()
Playdough - Create homemade playdough with different colors and scents using Kool-Aid
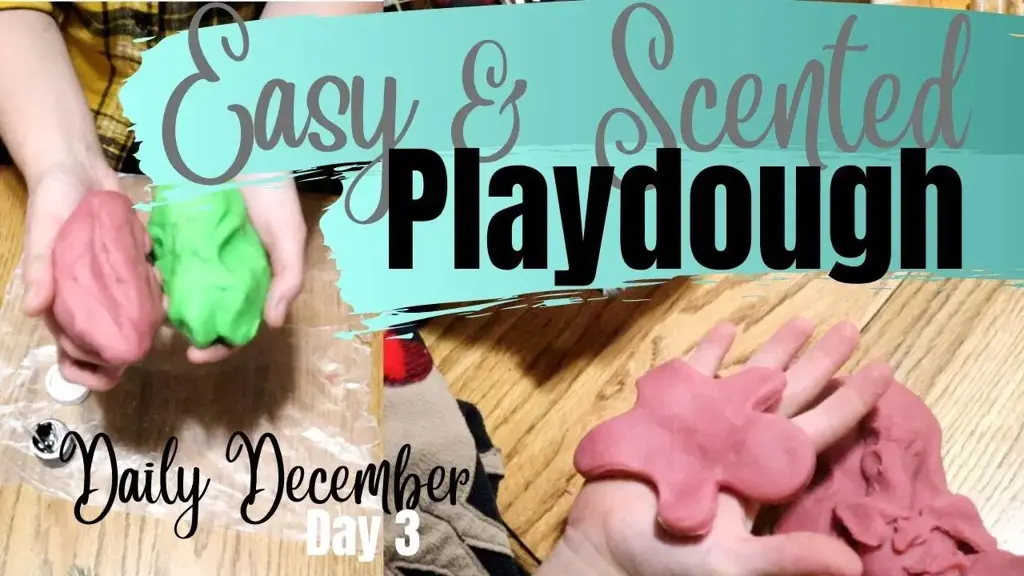
Kool-Aid is not only a delicious drink, but it can also be used in a variety of other ways, including creating fun activities for kids. One such activity is making homemade playdough using different colors and scents of Kool-Aid. This simple and easy-to-make playdough recipe will provide hours of entertainment for children of all ages.
Here's what you'll need to get started:
- 2 cups all-purpose flour
- ¾ cup salt
- 4 teaspoons cream of tartar
- 2 cups boiling water
- 2 tablespoons vegetable oil
- 1 package of Kool-Aid (any flavor)
- Optional: additional scented extracts or food coloring
To begin, gather all of your ingredients and set up a clean, spacious workspace. In a large mixing bowl, combine the flour, salt, and cream of tartar. Mix them together until well combined.
Next, boil 2 cups of water. Carefully pour the boiling water into a measuring cup and add the vegetable oil. Stir the liquid mixture into the dry ingredients until a sticky dough forms.
Allow the dough to cool for a few minutes until it is safe to handle. Once cooled, knead the dough until it becomes soft and pliable. This may take a few minutes, but it's an excellent way to build strength in those little hands!
Now it's time to add the Kool-Aid! Open the package of Kool-Aid and sprinkle the powder evenly over the surface of the dough. Knead the dough once again until the color is fully incorporated.
If you want to add additional scents or colors, you can do so at this stage. A few drops of scented extracts like vanilla or peppermint can provide a pleasant aroma. Likewise, a few drops of food coloring can add vibrancy to the dough.
Once you're satisfied with the color and scent, your homemade Kool-Aid playdough is ready to use! Children can use their imagination to mold and shape the dough into various creations, from animals to vehicles to buildings. The possibilities are endless!
To store the playdough, place it in an airtight container or sealable bag. This will help keep it fresh and prevent it from drying out. With proper storage, the playdough can last for several weeks, providing countless hours of entertainment.
Not only is making homemade playdough with Kool-Aid a fun activity, but it also offers sensory benefits for children. The soft texture of the dough, combined with the vibrant colors and pleasant scents, can stimulate their senses and foster creativity.
So, the next time you're looking for something to do with Kool-Aid, why not try making homemade playdough? It's a simple and enjoyable activity that will keep children entertained for hours. Plus, they'll have a blast creating their own colorful and scented masterpieces!
10 Fun Things to Do in St George, Maine.
You may want to see also
![]()
Scented sachets - Fill small fabric bags with unsweetened Kool-Aid to create scented sachets for drawers or closets
Kool-Aid is not just for drinking anymore! This versatile powdered drink mix can be used in a variety of creative ways, including making scented sachets for your drawers or closets. By filling small fabric bags with unsweetened Kool-Aid, you can create an inexpensive and unique way to freshen up your living spaces.
To make scented sachets with Kool-Aid, you will need a few basic materials. First, gather some small fabric bags or pouches. These can be made from leftover fabric scraps or purchased from a craft store. You will also need unsweetened Kool-Aid packets in your desired scents. Kool-Aid comes in a wide range of flavors, so feel free to mix and match to create your own custom scent. Lastly, you will need some basic sewing supplies such as a needle and thread or a sewing machine.
Begin by selecting your fabric for the sachets. Cut out two identical pieces of fabric in the desired shape and size for your sachets. It's a good idea to make them small enough to easily fit inside drawers or hang in closets. Place the two fabric pieces together, with the right sides facing each other.
Next, sew around the edges of the fabric, leaving a small opening at the top or bottom of the sachet for filling. You can choose to sew the sachet by hand using a needle and thread or use a sewing machine for a quicker result. Be sure to backstitch at the beginning and end of your sewing to secure the stitches. Leave a small opening, about 1-2 inches, in one of the sides.
Once you have sewn around the edges, turn the sachet right side out. You can use a pencil or your finger to gently push the corners out to create a crisp shape. Now it's time to fill the sachets with Kool-Aid.
Open a packet of unsweetened Kool-Aid and carefully pour the powder into a small bowl. Use a small spoon or funnel to transfer the powder into the sachet through the opening you left. Fill it to your desired scent level, but be careful not to overfill as it may become messy when sealed. You can choose to use a single scent or mix different flavors for a unique combination.
Once the sachet is filled with Kool-Aid, carefully hand-sew the opening closed using a needle and thread. Make sure the stitches are secure to prevent the powder from escaping. Alternatively, you can use a sewing machine to quickly stitch up the opening. Trim any excess threads or fabric to ensure a neat finish.
Now, your scented sachet is ready to be used. Place it in a drawer to freshen up your clothes or hang it in a closet to keep your clothes smelling delightful. The Kool-Aid powder will release a pleasant scent, and its vibrant colors can also add a pop of color to your living spaces.
With just a few simple steps, you can create scented sachets using unsweetened Kool-Aid. Experiment with different scents and fabric patterns to create your own unique sachets. Not only will they freshen up your drawers and closets, but they also make great inexpensive gifts for friends and family. Give Kool-Aid sachets a try and enjoy the sweet scent it brings to your home.
12 Must-Try Activities in Husavik for a Memorable Trip
You may want to see also
![]()
Watercolor paint - Use Kool-Aid mixed with water to create your own homemade watercolor paints for art projects
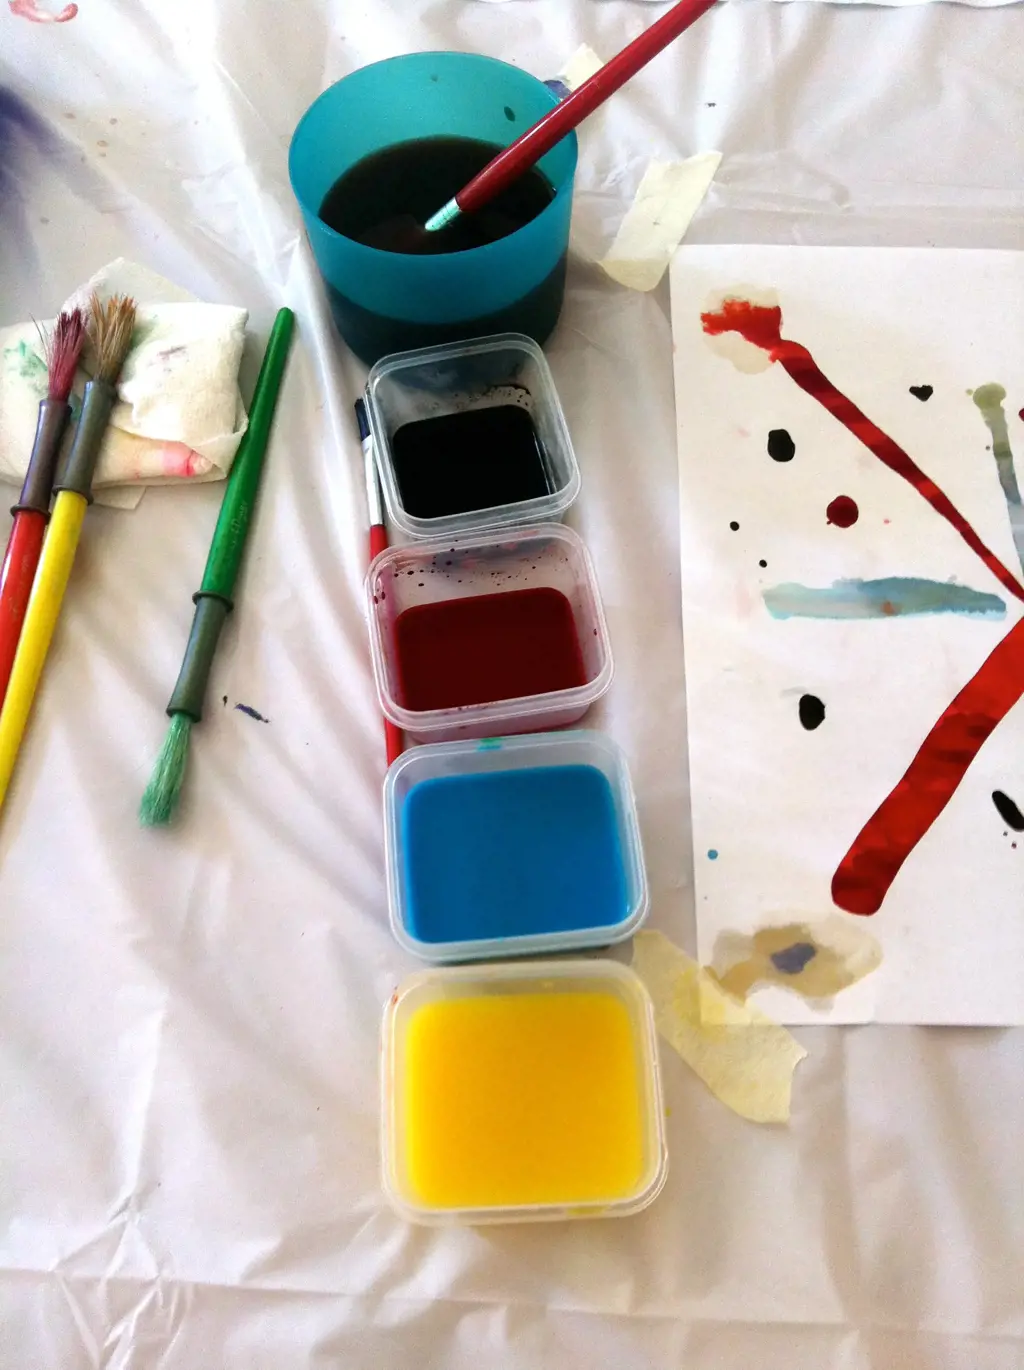
Are you looking for a fun and creative way to use Kool-Aid? Look no further! One exciting activity that you can do with Kool-Aid is to make your own watercolor paints. This homemade art project is not only easy and inexpensive but also a great way to engage your creativity and have some fun.
To start, gather the following materials:
- Kool-Aid packets (different flavors for a variety of colors)
- Water
- Paintbrushes
- Small containers or palette
- White paper
Here's a step-by-step guide on how to make your own Kool-Aid watercolor paints:
- Prepare your workspace: Cover your table or work area with old newspapers or a plastic tablecloth to prevent any staining.
- Mix the watercolors: In separate small containers or a palette, mix one packet of Kool-Aid with a few drops of water. The amount of water you use will depend on how vibrant or diluted you want your colors to be. Experiment with different ratios to achieve the desired shades.
- Stir well: Using a paintbrush or a toothpick, stir the Kool-Aid and water mixture until the color is evenly distributed and free of lumps. You can add more water or Kool-Aid to adjust the consistency and color intensity.
- Test the colors: Dip a paintbrush into your Kool-Aid watercolor and test it on a piece of scrap paper. You can mix different colors together to create new shades. Play around and have fun with the process!
- Paint: Once you are satisfied with the colors, you can start painting. Use your Kool-Aid watercolors on regular white paper or try different textures like watercolor paper or thick cardstock. Let your imagination run wild and create beautiful artwork.
Now that you have your homemade Kool-Aid watercolor paints, here are some ideas for what you can do with them:
- Create artwork: Paint landscapes, portraits, or abstract designs using your Kool-Aid watercolors. Explore different brush strokes and techniques to add depth and texture to your paintings.
- Make greeting cards: Use your Kool-Aid watercolors to paint unique designs on blank greeting cards. Personalize them for birthdays, holidays, or any special occasion.
- DIY bookmarks: Paint small designs on cardboard or thick paper to create custom bookmarks. These make great gifts for fellow book lovers.
- Decorate gift wrap: Use your Kool-Aid watercolors to paint patterns or designs on plain gift wrap or gift bags. This will add a personalized touch to your presents.
Remember, Kool-Aid watercolor paints might not be as permanent or long-lasting as store-bought watercolors, but they are just as fun and vibrant. Be sure to label your artwork as made with Kool-Aid so others are aware of the medium used.
So, the next time you're looking for a creative and exciting activity, grab some Kool-Aid packets and get ready to paint with homemade watercolors. Unleash your imagination and enjoy the colorful and fruity world of Kool-Aid art!
Exploring the Best Activities and Attractions in the Northwest Suburbs: A Guide to Fun and Adventure
You may want to see also
Frequently asked questions
To make Kool-Aid, simply pour one packet of Kool-Aid mix into a pitcher, add sugar (usually one cup) and stir until the sugar is dissolved. Then, add cold water to reach the desired strength and taste. For a fun twist, experiment with adding different fruits or fruit juices to create unique flavors.
Absolutely! Kool-Aid can be used for a variety of creative projects. You can use it as a dye for coloring fabrics or yarn, by mixing the desired color of Kool-Aid with hot water and then soaking the item in the mixture. It can also be used as a mix-in for baking, such as adding Kool-Aid to cake or cookie batter for a burst of flavor and color.
Kool-Aid is the perfect base for homemade popsicles! After preparing the Kool-Aid following the instructions on the packet, simply pour the mixture into popsicle molds or small disposable cups. Insert popsicle sticks or plastic spoons into the center of each cup and freeze until solid. Once frozen, you will have delicious and refreshing Kool-Aid popsicles!
If you accidentally spill Kool-Aid on your clothing, don't panic! First, blot the stain with a clean cloth or paper towel to remove any excess liquid. Then, mix a solution of equal parts white vinegar and water, and gently blot the stain with the mixture using a cloth or sponge. Rinse the area with cold water and repeat as necessary until the stain is gone. For stubborn or older stains, applying a pre-wash stain remover before laundering can also be effective.
Yes, Kool-Aid can be used as a temporary and non-toxic hair dye option. To use Kool-Aid as a hair dye, mix the desired color of Kool-Aid with a small amount of water to create a paste. Apply the paste to clean, dry hair and cover with a shower cap or plastic wrap. Leave the Kool-Aid dye in the hair for at least one hour, or overnight for a more vibrant color. Rinse the hair thoroughly and enjoy your temporary colorful hair!