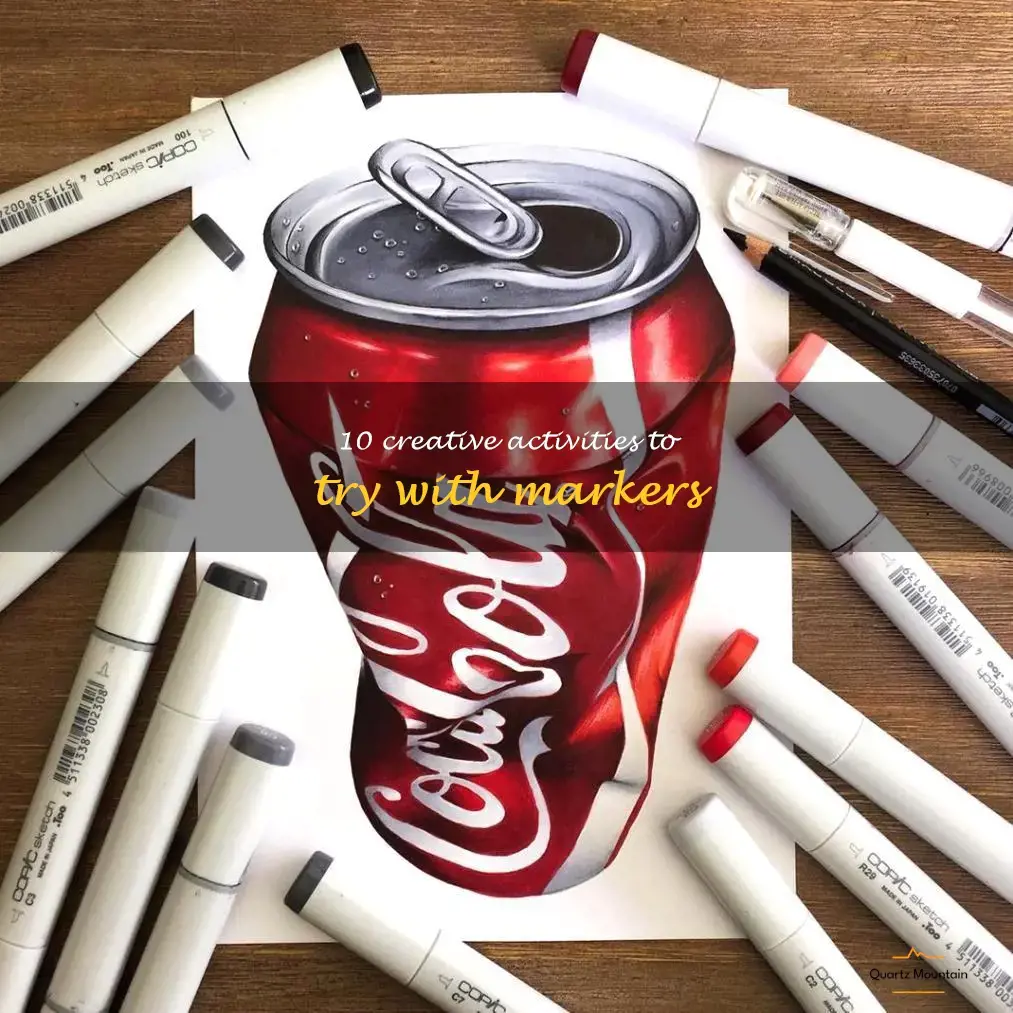
There's nothing quite like the feeling of opening up a brand new pack of markers, with their vibrant colors and possibilities. Whether you're an experienced artist or just looking for new ways to express yourself creatively, there are countless ways to use markers in fun and inventive ways. From turning plain white sneakers into personalized works of art to creating intricately detailed mandalas, these 10 creative activities will have you reaching for your markers in no time. So pull up a blank canvas (or notebook, or shoe), grab your favorite set of markers, and get ready to unleash your inner artist!
| Thing to do with markers | Description |
|---|---|
| Drawing | Use markers to create colorful illustrations and designs on paper or other surfaces. |
| Coloring | Fill in pre-drawn images with markers, or use them to add detail and shading to a larger piece of artwork. |
| Labeling | Write on items such as folders, jars, and containers with markers to clearly identify their contents. |
| Highlighting | Use markers to draw attention to important information in notes or textbooks by highlighting key phrases or words. |
| Decorating | Add a personal touch to items such as notebooks, phone cases, and mugs by doodling or writing on them with markers. |
| Organizing | Use different colored markers to categorize and organize notes or to-do lists in a visually appealing way. |
| Teaching | Teachers can use markers to write on whiteboards or create visual aids for lectures and presentations. |
| Calligraphy | Use brush markers or calligraphy markers to develop and practice your handwriting and lettering skills. |
What You'll Learn
![]()
Decorate a tote bag

Markers are incredibly versatile tools that can be used for a wide range of creative projects. One fun and practical project to try with markers is to decorate a tote bag! Tote bags are a popular and useful accessory that can be customized to match your personal style. From bold and bright patterns to intricate designs, there are countless ways to personalize a tote bag with markers. Here are some tips on how to create your own unique and stylish tote bag using markers.
Materials Needed:
- A plain canvas tote bag
- Fabric markers in various colors
- Pencil
- Stencils (optional)
- Masking tape (optional)
- Iron (optional)
Step 1: Plan your design
Before you start decorating your tote bag, it's helpful to have a rough idea of what you want it to look like. Sketch out your design on paper or use stencils to create a basic outline of the pattern you want to achieve. You can also use masking tape to create clean and straight lines on your bag.
Step 2: Start decorating
Once you have your design planned out, it's time to start decorating your tote bag with markers. Begin by filling in the larger areas with your desired colors, using a gentle and steady hand. You can then move on to adding smaller details and accents, such as outlining shapes or adding text.
Step 3: Use shading and blending techniques
For a more dynamic and realistic look, try using shading and blending techniques with your markers. You can achieve this by layering different colors or by using lighter and darker shades of the same color. You can also blend colors together with a light touch and a bit of practice.
Step 4: Set the ink
Once you've finished decorating your tote bag, you'll want to set the ink so that it doesn't fade or wash out over time. You can do this by using an iron to heat set the ink according to the manufacturer's instructions.
Step 5: Enjoy your new tote bag!
Now that you've decorated your tote bag with markers, it's time to show it off! Your custom-designed tote bag is perfect for carrying books, groceries, or any other items you may need. Plus, it's a fun and creative way to express your personal style and stand out from the crowd.
In conclusion, decorating a tote bag with markers is an easy and enjoyable project that can yield amazing results. With a bit of planning, creativity, and patience, you can create a one-of-a-kind bag that you can use and enjoy for years to come. So, grab your markers and a plain tote bag, and let your imagination run wild!
13 Fun Things to Do Outdoors in Tampa
You may want to see also
![]()
Marker painting on canvas
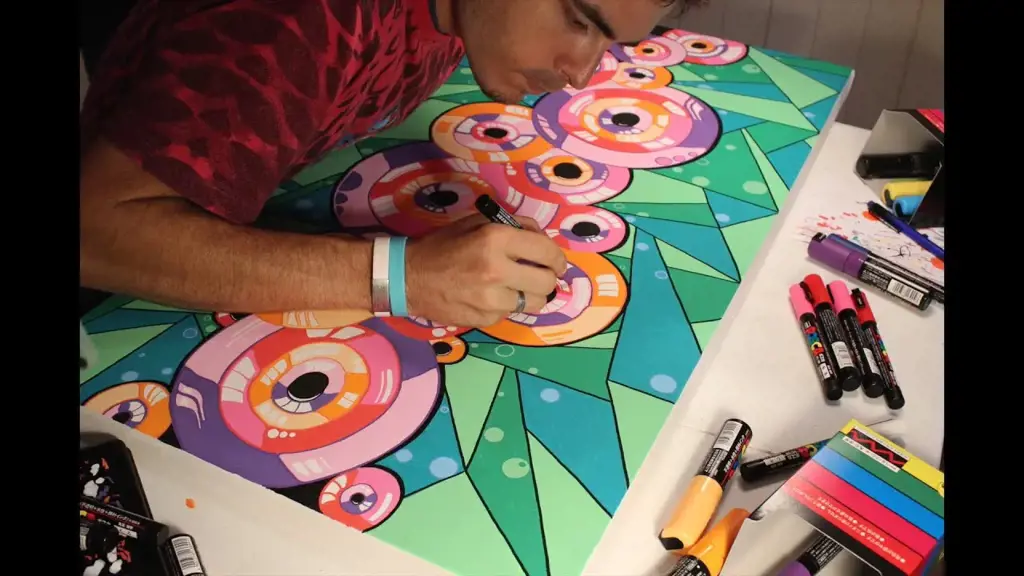
Firstly, selecting the right type of marker is crucial. There are various kinds of markers available in the market, including water-based, alcohol-based, and oil-based markers. Each type of marker provides a distinct effect and texture that impacts the final outcome. Experiment with different types of markers to discover which one is best suited for your style of painting.
Secondly, before beginning the painting process, make sure to prepare the canvas correctly. It helps to draw a rough sketch of your painting on the canvas, outlining key elements and areas where you will use specific colours. A pre-planned sketch provides a better understanding of the artwork's composition and helps you avoid mistakes.
Thirdly, start filling in the sketch with colour. Begin with light colours and gradually proceed to darker shades. Use multiple layers of colours to create a more dynamic effect. It's important to work from large to small areas to avoid smudging colour.
Fourthly, blend colours carefully to create a gradient effect. Lightly brush the colours together to create a smooth transition. Be wary not to blend too much and lose the original vibrancy of the colours.
Lastly, add finishing touches to the painting, like highlights and small details. These minor additions bring life and depth to the painting. After completing the artwork, let it dry and use an art sealant to protect it from damage.
In conclusion, marker painting on canvas is a fun and expressive form of art that anyone can enjoy. With practice and experimentation, anyone can master this technique and create some stunning artworks.
12 Fun Things to Do in Chambersburg, Pennsylvania
You may want to see also
![]()
Create personalized greeting cards
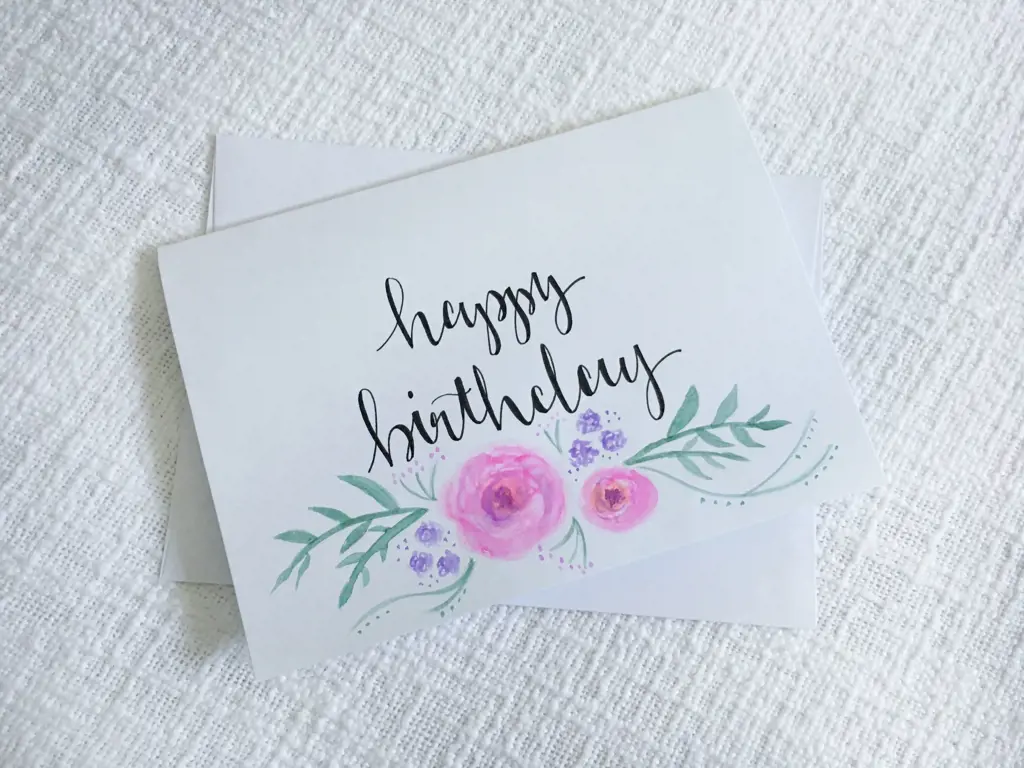
One of the most fun and creative ways to use markers is to create personalized greeting cards. It's a great way to add a personal touch to a gift or let someone know that you're thinking about them. Here are some tips to get you started:
- Choose your markers wisely. While any markers will work, you'll get the best results with high-quality ones that won't bleed or smudge. Look for those meant specifically for card making, such as Copic markers or Tombow Dual Brush pens.
- Choose the right paper. The type of paper you use will impact the overall outcome of your cards. Look for high-quality cardstock or watercolor paper, which will absorb the ink better and prevent smudging.
- Plan out your design. Consider the occasion and the recipient of the card when planning your design. Simple designs work well for birthdays and holidays, while more intricate designs might be better for weddings or anniversaries. Look online for inspiration or create something that's completely unique to you.
- Practice your lettering. A well-written message is just as important as the design. Don't be afraid to experiment with different lettering styles and practice a few times before committing to the final version.
- Add embellishments. To take your cards to the next level, consider adding some embellishments such as stickers, ribbon, or sequins. This will give your cards some extra sparkle and make them truly unique.
In conclusion, creating personalized greeting cards with markers is a fun and creative activity that anyone can enjoy. With a bit of planning and attention to detail, you can create cards that are sure to impress and delight your loved ones. So next time you're looking for a fun craft activity, grab your markers and some paper and get started on your next set of greeting cards.
12 Fun Things to Do Near Kinzua Bridge in Pennsylvania
You may want to see also
![]()
Design your own t-shirt
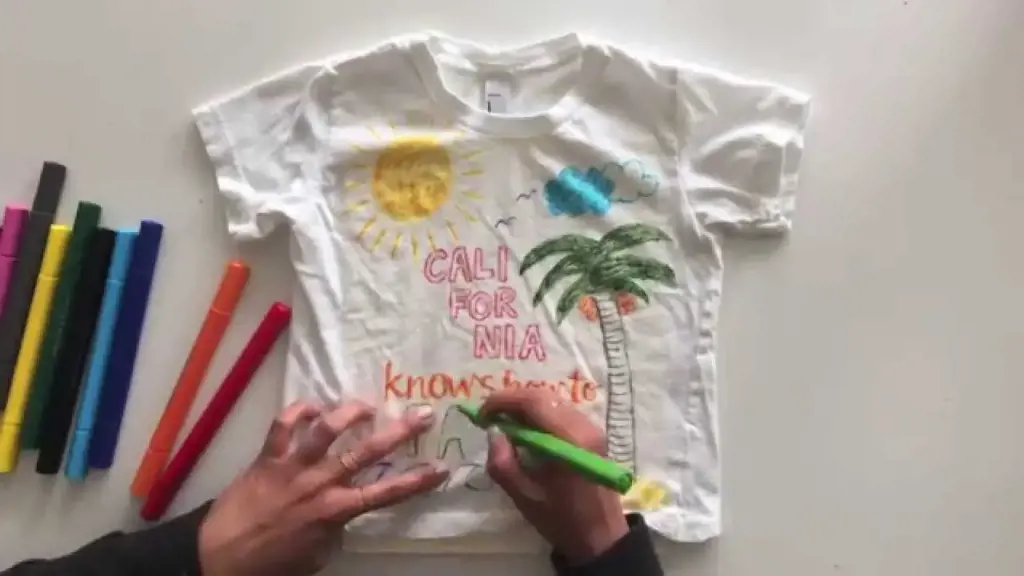
Markers are a versatile tool that can be used for various artistic crafts and design projects. One of the fun and creative things you can do with markers is designing your own t-shirt. This activity not only allows you to show off your artistic skills but also provides you with a unique and personalized piece of clothing.
Here are some steps to guide you through the process of designing your own t-shirt with markers:
- Choose the right t-shirt: The first step is to choose a plain t-shirt that serves as a blank canvas for your designs. You can choose any color or style depending on your preference. White or light-colored t-shirts work best for bright and vivid designs.
- Plan your design: Draw your design on a piece of paper before you start drawing on the t-shirt. Decide on the style, color scheme, and placement of the design on the t-shirt. You can also research online for some inspiration and ideas.
- Gather your materials: You will need high-quality markers that will not smudge or fade quickly. Fabric markers or permanent markers are ideal for this project. Make sure you have a variety of colors to choose from.
- Start drawing: Once you have planned out your design, it's time to start drawing on the t-shirt. Use a light pencil to sketch out the design before you start coloring with markers. Start with the lighter colors first and then move to the darker shades. Make sure you allow each color to dry before adding the next.
- Add finishing touches: Once you have finished adding color, you can add finishing touches like outlines or shadows to give your design more depth. You can also use glitter markers or metallic markers to add some extra sparkle to your t-shirt.
- Heat set the design: Once you have finished designing your t-shirt, it's time to heat set the design to ensure it is permanent and will not wash out. Place a cloth over your design and iron it for about 4-5 minutes on high heat.
Your personalized t-shirt is now ready to wear, and you can show off your creativity to everyone around you. In conclusion, designing your own t-shirt with markers is an exciting and fun activity that anyone can do. With a little planning, the right materials, and plenty of imagination, you can create a one-of-a-kind fashion piece that will make a lasting impression.
10 Awesome Activities to Experience in Bloomfield, NJ
You may want to see also
![]()
Marker tie-dye
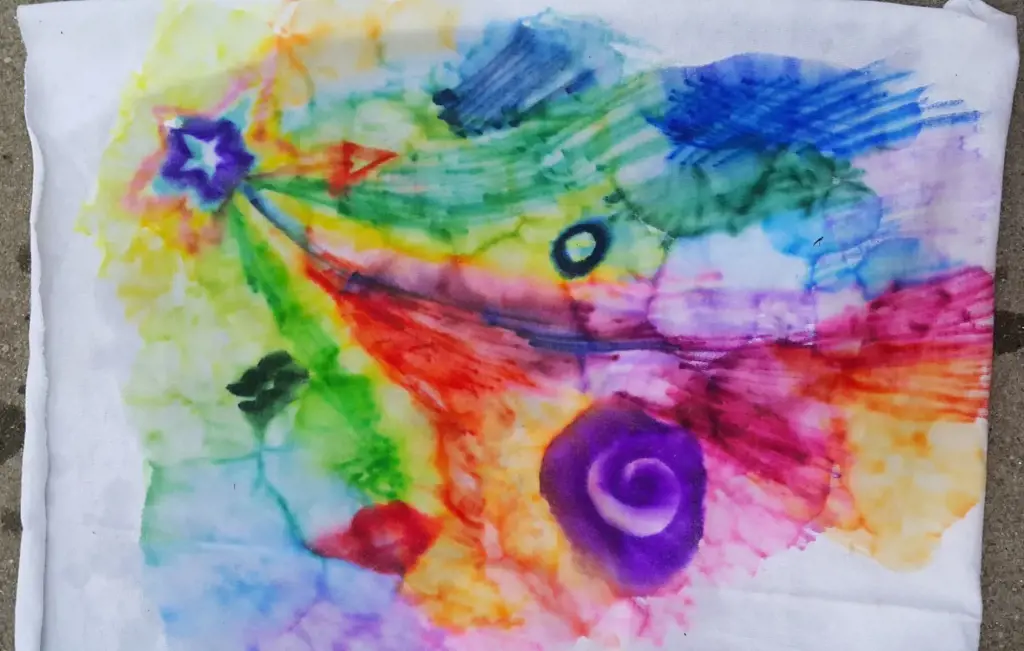
Looking for a fun and easy DIY project to try out with markers? Look no further than Marker Tie-Dye! This fun DIY project is suitable for all ages and can be done in just a few easy steps using basic materials found at home.
What you'll need:
- White cotton t-shirt or any other cotton material you would like to dye
- Water-based markers in various colours (Sharpies and highlighters won't work)
- Isopropyl alcohol (at least 70% purity)
- Dropper or spray bottle
- Plastic wrap
- Rubber bands
Step 1: Get your cotton material ready
Start by pre-washing your cotton material to remove any sizing or impurities. Next, lay it flat and fold it in half to determine the center of the material. Use rubber bands to mark, divide and design the pattern you want to create. It could be a swirl, stripes, or any other design that you find interesting. The rubber-banding will ensure that the dye is applied only to certain areas, creating a unique look.
Step 2: Add markers
Using the water-based markers, colour the partitioned sections of the cotton material with the desired colours. Add as many colours as you like, making sure to apply the marker generously.
Step 3: Add Isopropyl alcohol
Once you've added your markers, spray the Isopropyl alcohol onto the cotton material. You can use a dropper or spray bottle to apply the alcohol. The alcohol will help to blur the edges of the marker colours and integrate them with each other.
Step 4: Wrap the cotton material and let it dry
Once you've applied the alcohol, cover the cotton material with plastic wrap or a grocery bag. Let the marker tie-dye set for at least two hours, or overnight if possible. This will give the alcohol time to work its magic.
Step 5: Rinse and wash the cotton material
After letting the marker tie-dye set, rinse the cotton material in cold water until it runs clear of any excess marker dye. Then, wash the cotton material in hot water on its own to prevent the dye from bleeding onto any other clothes. You can add white vinegar to the wash to further set the dye.
Voila! You now have your own custom-designed marker tie-dye material. Whether you choose to make a t-shirt, a scarf, or any other cotton material that you want, this fun and easy DIY project is sure to brighten up your wardrobe and add some color to your life!
14 Amazing Things To Do In Goleta, California
You may want to see also
![]()
Coloring book for adults
Markers are a fantastic medium for artists and hobbyists alike, as they offer unparalleled versatility and control when it comes to creating colorful, detailed pieces of artwork. One popular way to put markers to use is through coloring books, which offer a fun and relaxing pastime that's accessible to people of all skill levels. Whether you're looking to unwind after a long day or explore your artistic side, a coloring book for adults can be a great option for maximizing your marker collection.
First and foremost, the key to a successful coloring book experience is choosing the right book. There are a wealth of options out there, from intricate mandalas to whimsical nature scenes to pop culture tie-ins. Consider your preferences as well as your skill level when selecting a book - if you're a beginner, you may want to start with simpler designs that allow for more room to experiment and practice different techniques.
Once you've chosen your coloring book, it's time to break out your markers and get to work! One of the biggest advantages of using markers is their ability to blend and layer colors, creating rich, dynamic effects that can bring a black-and-white illustration to life. Experiment with different shading techniques, such as crosshatching or stippling, to add depth and dimension to your coloring.
Another fun way to play around with markers is by combining different colors in unexpected ways. Try creating a gradient effect by using lighter and darker shades of the same color, or mix complementary colors (like red and green or blue and orange) to make your artwork really pop. You can also experiment with metallic or glitter markers for a bit of extra sparkle and shine.
In addition to using markers to color within the lines, don't be afraid to try out some creative techniques that go beyond the usual coloring book fare. For example, you might try outlining some of the shapes in your design with a black marker to make them stand out, or using white ink to add highlights and contrast to your work. You can even incorporate other materials, like colored pencils or watercolor paints, to add even more texture and depth to your artwork.
Ultimately, the key to a successful coloring book experience with markers is to have fun and let your creativity guide you. Don't be afraid to try new things and experiment with different techniques - after all, that's where some of the most interesting and beautiful artwork comes from. So grab your markers, crack open that coloring book, and let your imagination run wild!
13 Fun Things to Do in Fort Wayne for an Unforgettable Date
You may want to see also
![]()
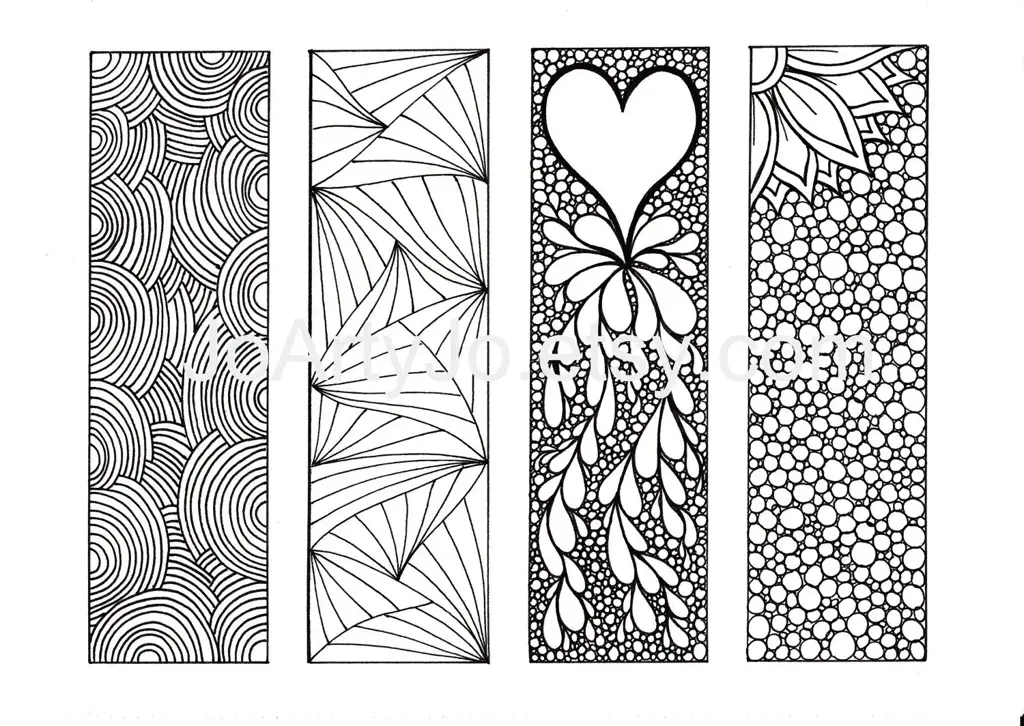
DIY bookmarks
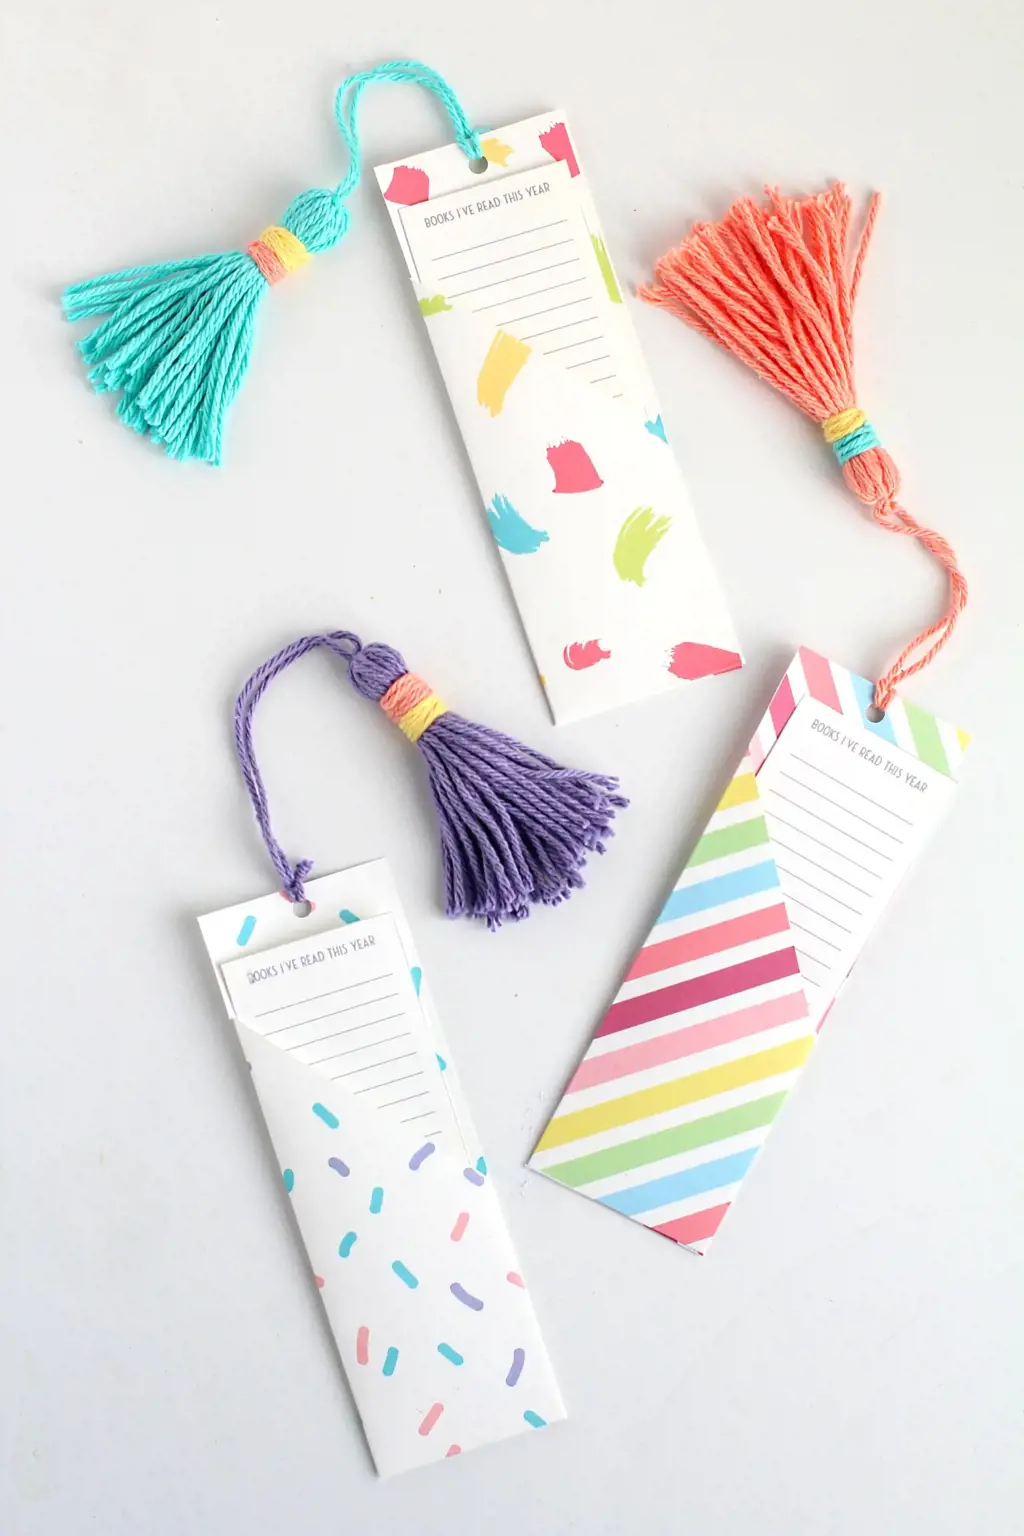
As book lovers, we understand the importance of having a bookmark. It saves you time, making it easier for you to pick up from where you left off on your reading journey. With markers, you can create some awesome bookmarks that are unique, vibrant, and personal. Here are some DIY bookmark ideas to get you inspired.
Colored Pencil Bookmarks:
Do you have some colored pencils lying around? Bring them to life by turning them into a bookmark. Pick your favorite colors and layer them on top of each other. Cut out your desired bookmark shape and use a hole-punch to create a hole at the top. Thread a ribbon or string through the hole and you got yourself a colorful and elegant bookmark.
Washi Tape Bookmarks:
Washi tape is a colorful and versatile adhesive tape that comes in different colors and patterns. Choose your favorite washi tape designs and stick strips onto a strip of paper. Cut out the shape of a bookmark and you now have a funky and artsy reading companion.
Calligraphy Bookmarks:
If you have great penmanship skills, try putting them to use by creating a bookmark with calligraphy. Using a marker with a finer tip, write your favorite quote or a passage from your favorite book on a strip of paper. Use additional markers to add designs around the text, and voila! A personalized bookmark that's perfect for your every reading need.
Colorful Feather Bookmarks:
Feather bookmarks are an easy and stylish way of putting together a bookmark. Using a marker, color the tips of each feather, ensuring that the colors complement one another. Attach them to a ribbon or string and tie a knot at the top to complete the look.
Name Initial Bookmarks:
Create a unique and personalized bookmark by using your name initial. Using thick paper or card, cut out the shape of your initial. Using markers, add some fun and colorful designs to the borders. Punch a hole at the top and thread a ribbon through it and you have a bookmark that you can flaunt with pride.
There you have it; five DIY bookmark ideas to get you started with using your markers differently. With endless possibilities and easy-to-find materials, creating bookmarks has never been more fun and rewarding. Get creative and happy crafting!
12 Fun Things To Do In O'Fallon, IL
You may want to see also
![]()
Marker illustrations in a bullet journal
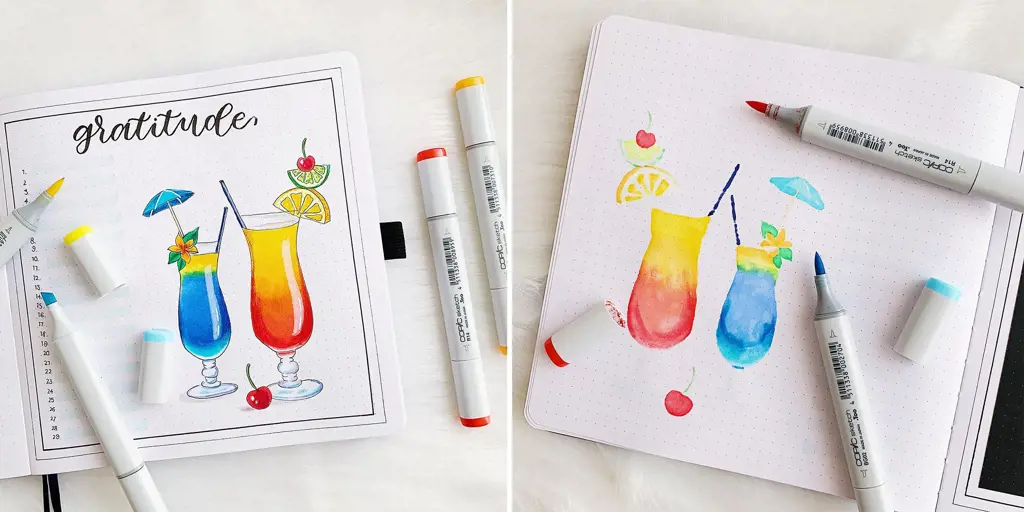
Are you looking for new ways to express your creativity? Do you enjoy keeping track of your life in a fun and organized way? If so, then bullet journaling with markers might be the perfect activity for you!
Bullet journaling is a popular method of organizing and tracking your daily life, goals, and tasks. It’s an excellent way to stay focused and productive, and it can also serve as a creative outlet for your inner artist. Adding marker illustrations to your bullet journal is a great way to enhance the look and feel of your pages, and to make your journal even more personalized and unique.
Here are some creative marker illustration ideas to consider when bullet journaling:
- Doodles and Sketches: Adding small drawings and sketches to your bullet journal is a great way to add a personal touch. As you go about your day, jot down little sketches and doodles that capture your mood or the moment. This can be anything from a quick sketch of a flower to a cute little cartoon character.
- Coloring Pages: Coloring pages are relaxing and fun, which is why many bullet journalers incorporate them into their journals. They’re a great way to de-stress and get your creative juices flowing. There are many free coloring pages online that you can print out and color, or you can create your own using markers.
- Hand Lettering: Add some pizzazz to your bullet journal by incorporating custom lettering. Hand lettering is a fun way to add personality and character to your pages. Experiment with different fonts and styles until you find something that speaks to you.
- Highlighting: If you’re a visual person, highlighting important tasks and dates can help them stand out on the page. Use different colors of markers to create a color-coding system that makes sense to you.
- Quotes and Sayings: Adding inspiring quotes or sayings to your bullet journal can give you a boost of motivation throughout the day. Use markers to draw decorative accents or to make the quote stand out.
Using markers in your bullet journal can be a fun and creative way to express yourself. Let your imagination run wild, and don’t be afraid to experiment with different techniques and styles. Whether you’re aiming for a minimalist design or a vibrant explosion of color, marker illustrations can add that extra flair to make your bullet journal truly unique. So grab your markers, and start creating!
12 Romantic Things to Do on Valentine's Day in Vegas
You may want to see also
![]()
Customize a phone case

Markers are versatile and fun tools that can be used to create custom designs on a variety of surfaces, including phone cases. Whether you want to spruce up an old case or give a new one a unique twist, here are some tips for customizing a phone case with markers.
Choose the right markers
When it comes to markers, not all are created equal. Some may not adhere well to the surface of your phone case, while others may bleed or fade over time. To avoid these problems, opt for quality markers that are designed specifically for use on plastic or similar materials. Some popular brands for this purpose include Sharpie, Posca, and Copic.
Plan your design
Before you start drawing on your phone case, it can be helpful to sketch out your design on paper first. This will give you an idea of what you want to create and how it will look on the case. You can also experiment with different color combinations at this stage to see what works best.
Clean the case
Before getting started, make sure that your phone case is clean and free of any dust, dirt, or residue. Use a gentle soap and warm water to clean the surface, then let it dry completely before proceeding.
Start drawing
Once your phone case is prepped and your design is ready, it's time to start drawing. Begin with light strokes to create a rough outline of your design, then fill in the details as you go. If you make a mistake, simply wipe it away with a damp cloth before the ink dries.
Set the ink
To ensure that your design stays put and doesn't smudge or fade, it's important to set the ink properly. Depending on the type of markers you used, this may involve heat setting, air drying, or using a fixative spray. Follow the instructions on your markers to determine the best way to set the ink for your particular case.
With these tips in mind, you can create a one-of-a-kind phone case that reflects your personal style and creativity. So grab your markers and get designing – the possibilities are endless!
12 Amazing Things to Do in San Francisco in April
You may want to see also
![]()
Draw on a white mug with markers for a personalized gift
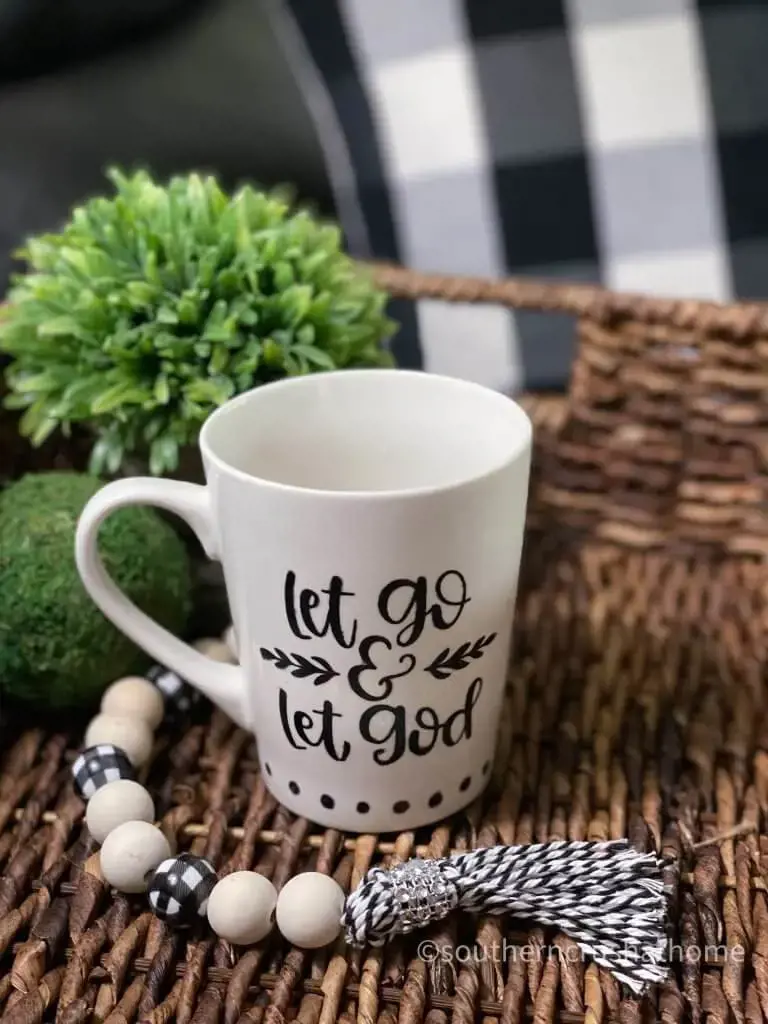
Markers are a great tool for adding color to various surfaces and materials. One interesting way to utilize markers is to draw on a white mug for a personalized gift. This amazing DIY project is simple, fun, and allows you to showcase your creativity while giving a heartfelt gift to someone special.
To create a personalized mug using markers, you will need the following supplies:
Materials:
- A plain white mug
- Permanent markers (such as Sharpies)
- Alcohol wipes
- Oven
- Your creativity
Steps:
- Clean the mug – Using alcohol wipes or rubbing alcohol, clean the surface of the mug to remove any dirt or oils. This will ensure that the marker ink will adhere properly.
- Choose your design – Think of a design or message you want to create on the mug. You could go with a simple quote, a graphic pattern, or a more complex illustration. Plan your design by sketching it on a piece of paper or directly on the mug with a pencil if you’re confident.
- Draw the design – Use the permanent markers to create the chosen design on the mug. Use a steady hand to make the lines neat and don’t worry about small mistakes, you can wipe them clean with alcohol wipes.
- Set the designs – Once you’re happy with the design, let the ink dry completely for about an hour or so before moving on. If you need to correct any mistakes, use the alcohol wipes. Now it's time to set the ink, do so carefully by placing the mug in the oven and setting the temperature to 350 degrees Fahrenheit. Bake for 30 minutes, turn off the oven and let the mug cool there before handling.
- Wrap or gift – With the designs set, your mug is ready for wrapping and gifting. You can add some more personal touches by filling the mug with a mix of some other things like candy, flowers, small items, etc.
The possibilities are endless when it comes to designing a personalized mug with markers. The process is simple, and the results are amazing as it will make someone feel special and appreciated. Personalize your mug with your creativity!
13 Fun and Exciting Things to Do in Chicago in January
You may want to see also
Frequently asked questions
There are several types of markers such as permanent markers, water-based markers, dry-erase markers, highlighters, and fabric markers.
Yes, there are certain types of markers that can be used on non-porous surfaces such as glass, plastic, or metal. Permanent markers are suitable for these surfaces.
The lifespan of a marker depends on the brand, quality, usage, and storage. Generally, markers can last up to two years if they are stored properly and not dried out.
To remove marker stains from fabric, use rubbing alcohol or a mix of vinegar and baking soda. Apply the solution onto the stain, let it sit for a few minutes, and then wash the fabric with a mild detergent.
Yes, some markers can be refilled with ink or fluid. Refilling markers can save money and reduce waste. However, not all markers are refillable, so it's important to check the product label or manufacturer's instructions.


3 Comments
Shauna Nixon
Liyana Campbell
Pop Panupong
Author