Do you have a stash of old, worn-out cookie sheets piled up in the back of your cupboard, taking up valuable kitchen space? Before tossing them out, consider repurposing them for some creative and unexpected uses. From DIY home decor projects to handy gardening tools, these little metal sheets can work wonders around the house. In this article, we'll explore 11 creative ways to breathe new life into your old cookie sheets and give them a purpose beyond the kitchen. Get ready to be inspired!
What You'll Learn
- Magnetic board for notes and pictures
- DIY magnetic spice rack in kitchen
- Organize sewing pins and needles
- Catch-all tray for loose items in drawers
- Gardening seed organizer
- Make shift BBQ tray
- Jewelry organizer
- Paint palette for arts and crafts
- DIY serving tray for entertaining
- Prop up a cookbook while cooking
- Car organizer for snacks and small items
![]()
Magnetic board for notes and pictures
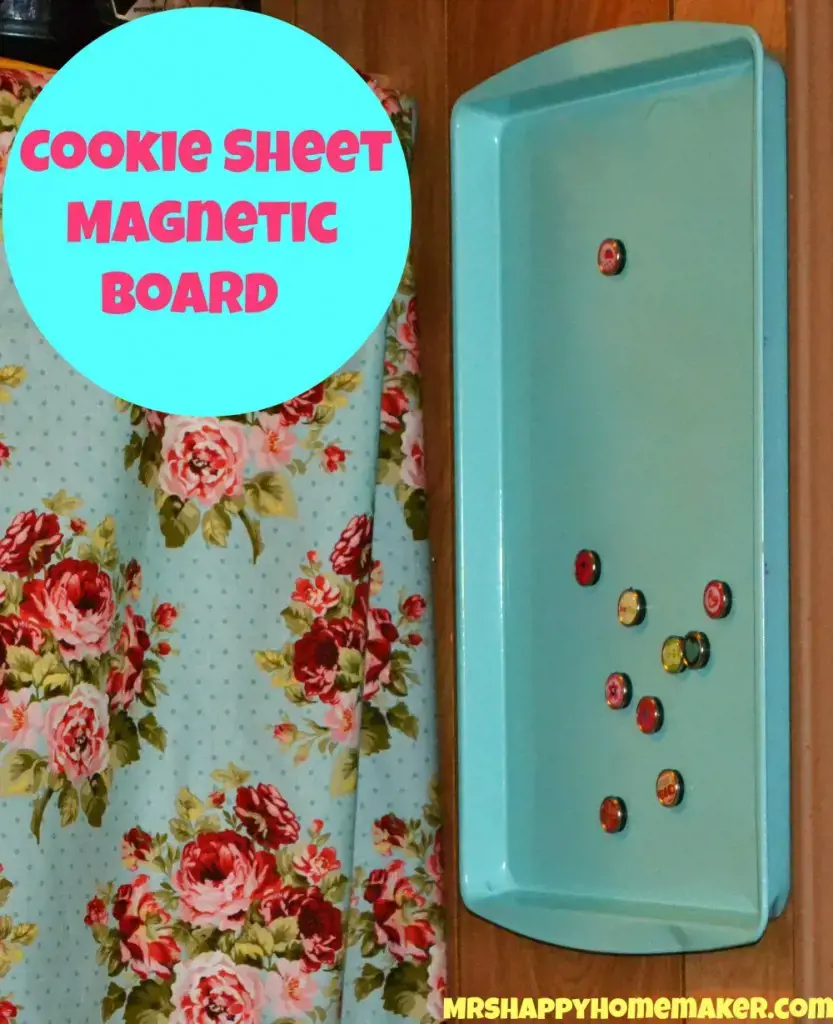
Old cookie sheets are great for repurposing in a variety of ways, and one fun idea is to turn them into a magnetic board for notes and pictures.
To create your magnetic board, start by cleaning your old cookie sheet thoroughly. Once your cookie sheet is clean and dry, you can prime and paint it to give it a fresh look. You can use spray paint or any other type of paint that’s appropriate for metal. Be sure to let your paint dry according to the instructions on the label.
After your paint is dry, you can add your magnetic elements. One option is to use adhesive magnetic strips or squares, which can be easily cut to size and attached to the back of your pictures or notes. Another option is to use small magnets, which can be glued directly to your notes or pictures using a strong adhesive like super glue.
Once your magnets are in place, your magnetic board is ready to use! Hang it up in a convenient location, such as your kitchen or home office, and start using it to display pictures, notes, reminders, and more.
Overall, repurposing an old cookie sheet into a magnetic board is a fun and creative way to upcycle an item that might otherwise end up in the trash. By giving your cookie sheet a new life, you can create a fun and functional piece of decor that’s perfect for displaying all sorts of items around your home.
11 Fun Things to Do in Liberty Lake, WA
You may want to see also
![]()
DIY magnetic spice rack in kitchen
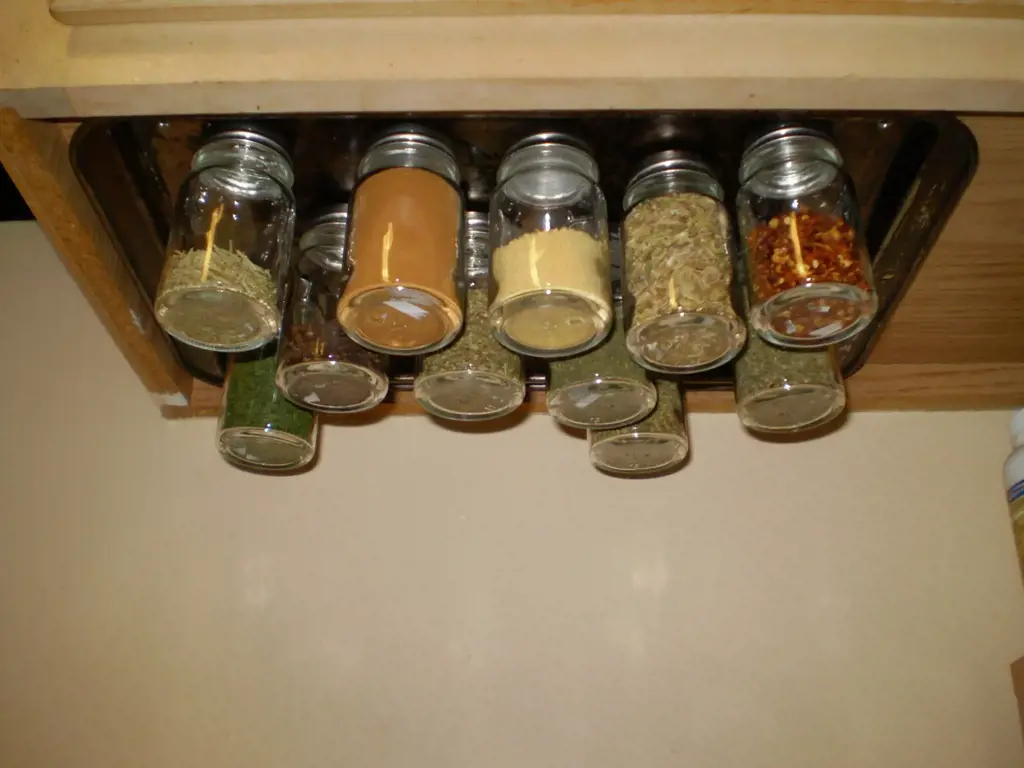
If you have old cookie sheets lying around your kitchen that you no longer use, don't throw them away just yet! You can actually repurpose them into something useful and practical, such as a DIY magnetic spice rack for your kitchen.
Here's how you can turn your old cookie sheets into a functional and stylish spice rack:
Clean the cookie sheets
The first step is to ensure that the old cookie sheets are clean and free from any food residue or grease. Wash them thoroughly with soap and water, followed by a wipe down with a household cleaner.
Cut magnetic sheets
Next, cut magnetic sheets into small strips or squares that can fit onto the back of your spice containers. You can find magnetic sheets at any craft store or online retailer.
Attach magnets
Using a strong adhesive, attach the magnetic strips to the back of your spice containers. Be sure to press them firmly and let them dry completely.
Arrange containers on cookie sheet
Once your spice containers are magnetized, arrange them onto the cookie sheet in a way that looks visually appealing to you. Be creative and mix and match the different container sizes and shapes.
Hang the spice rack
Now that your spice containers are securely attached to the cookie sheet, you can hang the entire rack on a kitchen wall or the inside of a pantry door using heavy-duty adhesive strips or screws.
There you have it - a simple DIY project that can transform your old cookie sheets into a functional and stylish spice rack. Not only will this save you money, but it's also an eco-friendly alternative to throwing away old kitchen items. Plus, having all your spices in one place will make cooking and meal prep a lot easier!
12 Fun Things to Do in Commerce, GA
You may want to see also
![]()
Organize sewing pins and needles
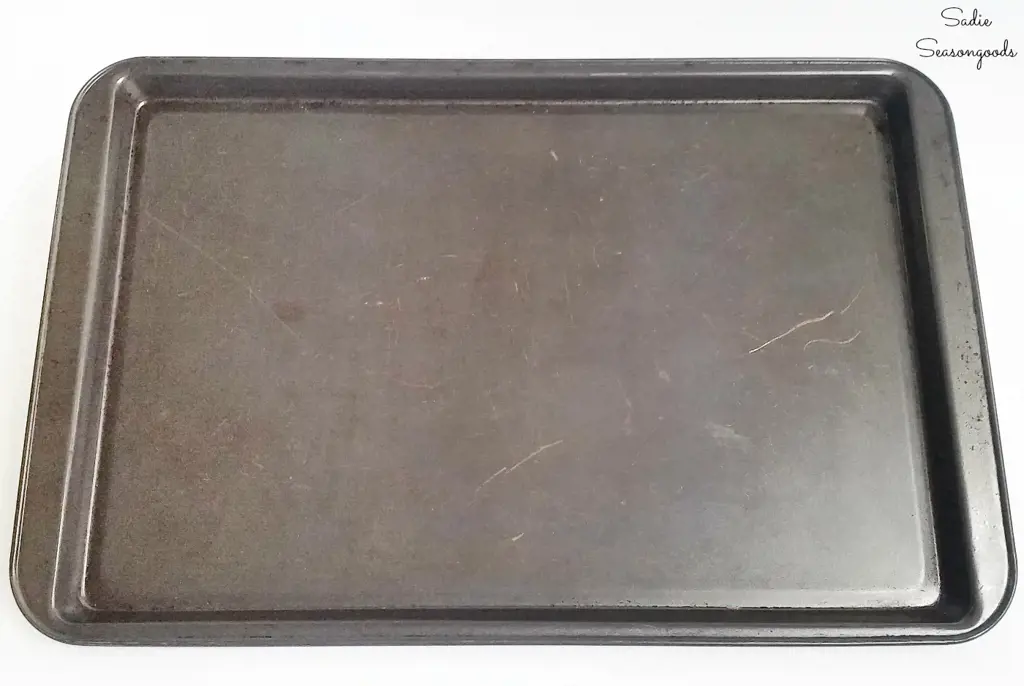
If you have old cookie sheets lying around that have seen better days, don't toss them out just yet. With a little creativity, they can be transformed into useful and practical items. One creative way to reuse old cookie sheets is to turn them into a tool for organizing sewing pins and needles.
Pins and needles are small and can be easily misplaced or lost in a sewing kit. By organizing them onto an old cookie sheet, you can easily keep track of them and reduce the risk of them going missing.
To get started, gather your materials. You will need an old cookie sheet, some magnets, a hot glue gun, and a pair of scissors. You can purchase magnets at any craft store or online.
The first step is to cut the magnets into small pieces that will fit on the back of your pins and needles. A good size is about 3/4 inch. Use the hot glue gun to attach the magnets to the back of your pins and needles. Be careful not to melt the plastic coating on the needles.
Next, turn the cookie sheet over and use the hot glue gun to attach the magnets to the back. Space them out evenly and leave enough room for your pins and needles to be placed in between them.
Once you have attached all of your magnets, test them out by placing your pins and needles on the cookie sheet. If they are all staying in place, you are done! You now have a simple and effective way to organize your sewing pins and needles.
This method can also be expanded to include other small sewing tools, such as threaders and thimbles. Just attach magnets to the back of these items and add them to the cookie sheet as needed.
In conclusion, an old cookie sheet can be transformed into a practical and useful tool for organizing sewing pins and needles. With a few magnets and some hot glue, you can create a simple and efficient way to keep your sewing tools organized and easy to access. So don't toss out those old cookie sheets yet - give them a new purpose and keep your sewing tools in check!
12 Fun Activities to Try in Denver This March
You may want to see also
![]()
Catch-all tray for loose items in drawers
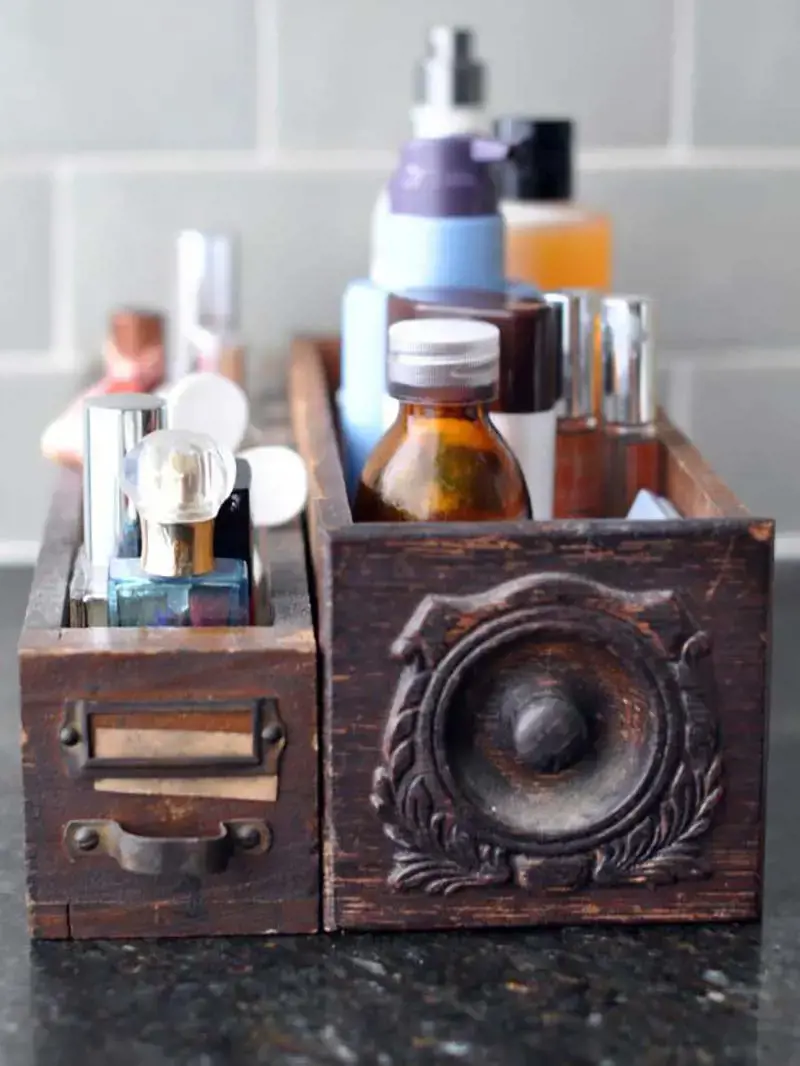
Are you tired of searching through drawers filled with clutter, looking for items that seem to have gone missing? Look no further than your old cookie sheets! These versatile kitchen tools can be repurposed as catch-all trays to keep small loose items organized and easily accessible.
To create a catch-all tray, start by cleaning your old cookie sheet thoroughly. You can use dish soap and a scrub brush to remove any dirt or debris that may have accumulated on the surface. Once the tray is clean, you can add a layer of adhesive shelf liner to the bottom of the tray. The liner will not only prevent items from sliding around but is also easy to clean if any spills occur.
Now it's time to organize! Empty the contents of the drawer you want to use the tray in and start sorting items into categories. Some common categories include office supplies like pens, scissors, and paper clips, craft materials such as buttons, beads, and needles, and small kitchen gadgets like measuring spoons, tongs, and vegetable peelers.
Once you have sorted everything, place each category of items into its own section of the tray. You can use small containers or dividers to help keep similar items together. Labeling each section with a small piece of tape or a sticky note can also help you quickly find what you need.
Using an old cookie sheet as a catch-all tray not only makes your drawers neater and more organized but can also save you time and frustration when searching for that missing item. Plus, repurposing something that may have otherwise ended up in the trash is just good for the environment! So, next time you're wondering what to do with an old cookie sheet, remember the catch-all tray idea and get organized.
14 Fun Things to Do Near Fort Leonard Wood
You may want to see also
![]()
Gardening seed organizer
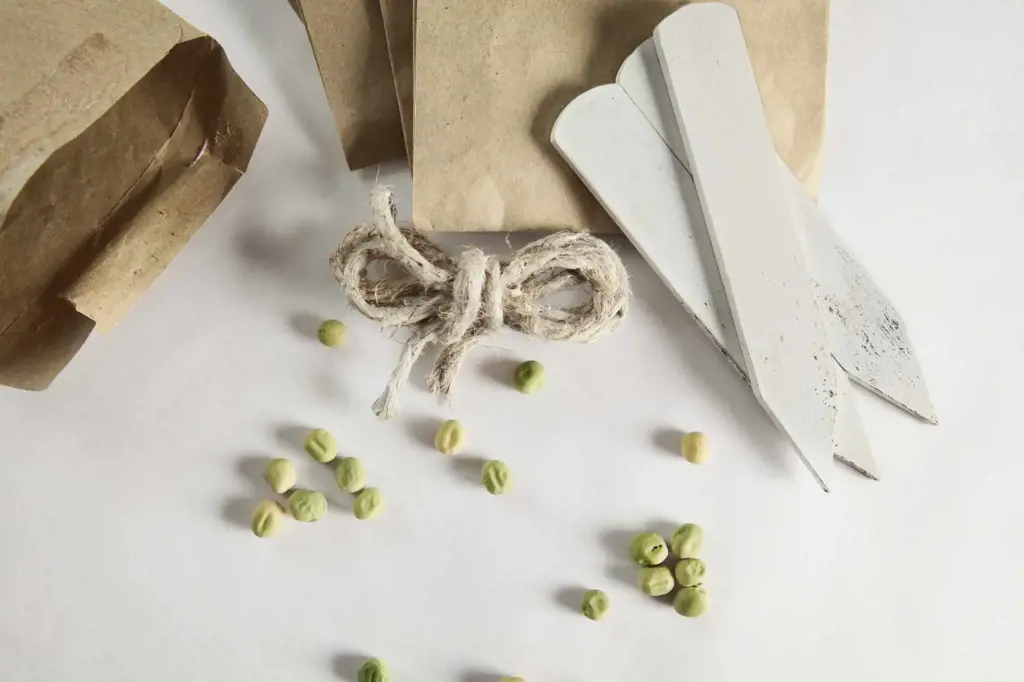
If you're looking for a fun and useful project to do with old cookie sheets, consider creating a gardening seed organizer. This easy project transforms an old baking sheet into a practical and stylish way to keep your gardening seeds organized and easily accessible.
To get started, gather up old cookie sheets that you no longer use or that need an update. You'll also need some paint in your preferred color, paintbrushes, magnets, and labels.
First, thoroughly clean the cookie sheet to remove any grease or dirt. Next, apply a coat of paint to both sides of the sheet, allowing it to dry completely before applying a second coat if needed.
Once the paint has dried, you can start attaching magnets to the back of the sheet. You can use adhesive magnets or hot glue to attach the magnets to the back of the cookie sheet. Be sure to space the magnets out evenly so that they can support the weight of the seeds.
Next, use the labels to organize your gardening seeds. You can alphabetize them, group them by type, or organize them by planting season. Cut out the labels and attach them to the front of the sheet using tape or glue.
Now you're ready to start filling the organizer with your gardening seeds. Simply stick the packets to the front of the sheet, using the magnets to hold them in place. You can easily reposition the packets if needed, making it easy to add new seeds or move them around as your garden grows.
In addition to keeping your seeds organized, a gardening seed organizer also adds a touch of charm to your gardening area. You can even personalize the organizer by adding some decorative elements, such as stencils or embellishments.
In conclusion, repurposing old cookie sheets is an easy way to create a gardening seed organizer that is both practical and attractive. With a little creativity and some basic supplies, you can turn a simple baking sheet into a stylish and functional addition to your gardening toolbox.
13 Fun and Exciting Things to Do in Liberia, Costa Rica
You may want to see also
![]()
Make shift BBQ tray
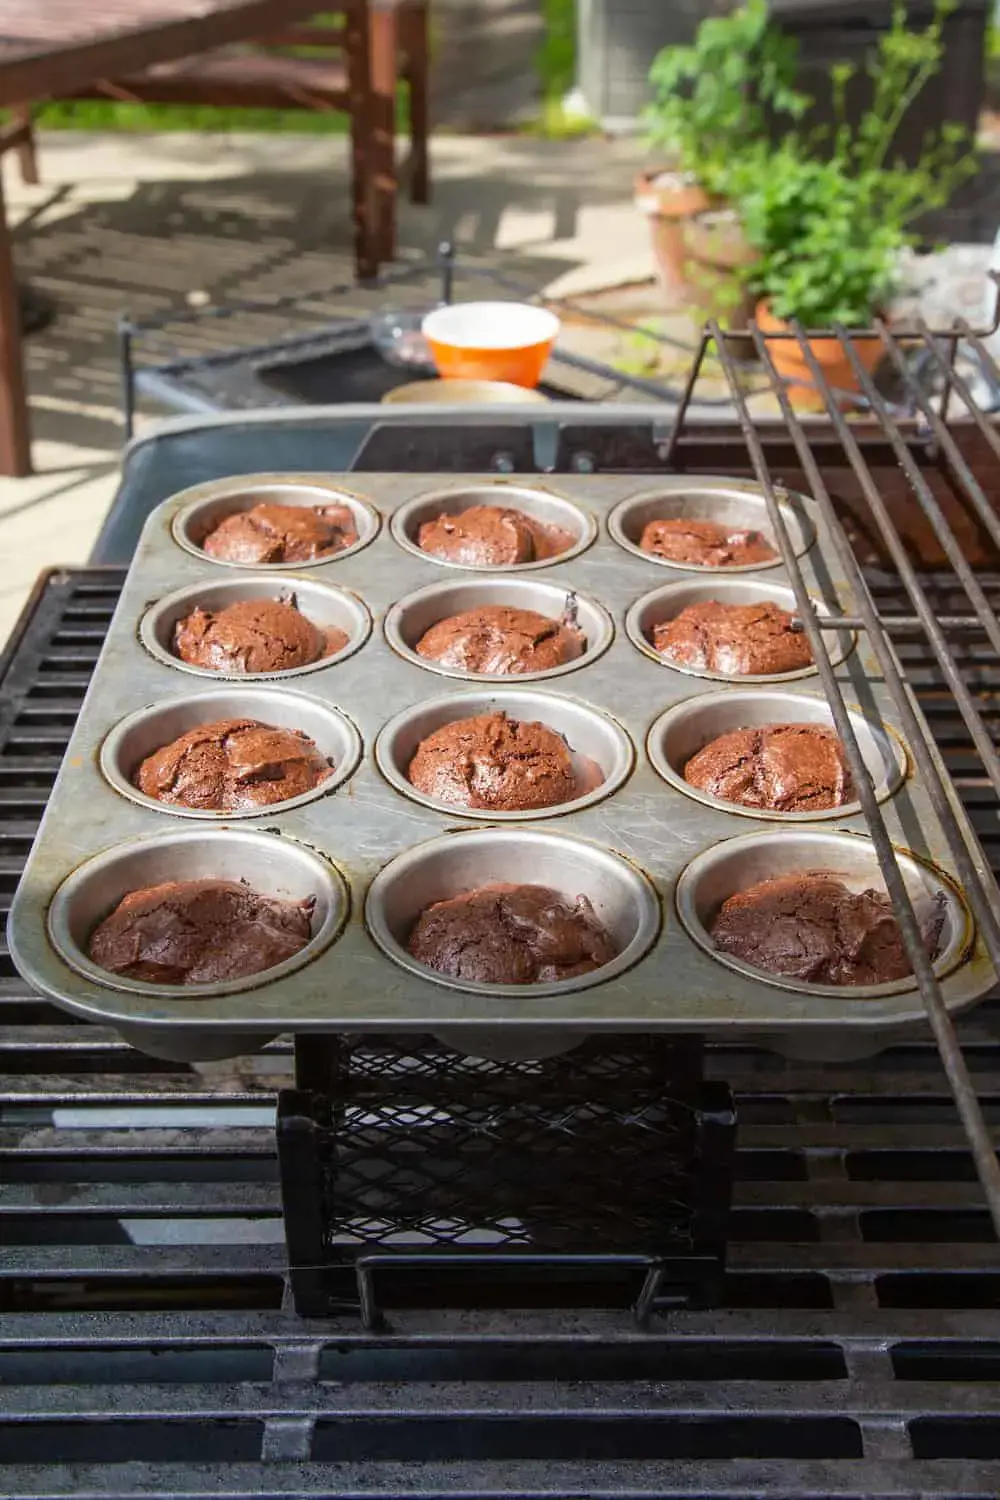
If you have an old cookie sheet lying around your kitchen, don't throw it away just yet! There are plenty of creative ways to repurpose it and give it a new life. In this article, we'll be exploring one of the exciting things you can do with old cookie sheets - making a makeshift BBQ tray.
A BBQ tray is a serving dish that's commonly used to hold and transport hot food items from the grill to the serving area. Instead of buying an expensive BBQ tray, you can make one with just a few simple steps using your old cookie sheet.
Here are the items you'll need:
- Old cookie sheet
- Aluminum foil
- Scissors
- Oven mitts
- Heat-resistant paint (optional)
Follow these steps:
Step 1: Clean the cookie sheet
Begin by cleaning the old cookie sheet thoroughly. Remove any stuck-on food and debris and wash it with soap and water. Dry it well with a towel.
Step 2: Cover with Aluminum foil
Next, cover the cookie sheet with aluminum foil. Cut the foil to size and press it over the entire surface of the cookie sheet. Make sure the shiny side of the foil is facing up.
Step 3: Shape the tray
Using oven mitts, lift the cookie sheet and gently mold it into the shape of a tray. You can adjust the edges to create a lip to prevent food from falling off. Ensure that the corners of the foil are well pressed and sealed.
Step 4: Warm it up
Before using your makeshift BBQ tray, warm it up to ensure that it's ready for use. Preheat your grill or stove to your desired temperature and then place the tray on the grates for about 10 minutes.
Step 5: Paint the tray (optional)
If you want to personalize your makeshift BBQ tray, paint it with heat-resistant paint once the tray has cooled. You can use stencils or free-hand designs to create a unique look.
With these simple steps, you can create your makeshift BBQ tray and impress guests at your next cookout. It's an affordable and easy-to-make solution that will upgrade your outdoor cooking experience. So, don't let those old cookie sheets go to waste; try this DIY project today!
12 Exciting Things to Do in Mission City California
You may want to see also
![]()
Jewelry organizer
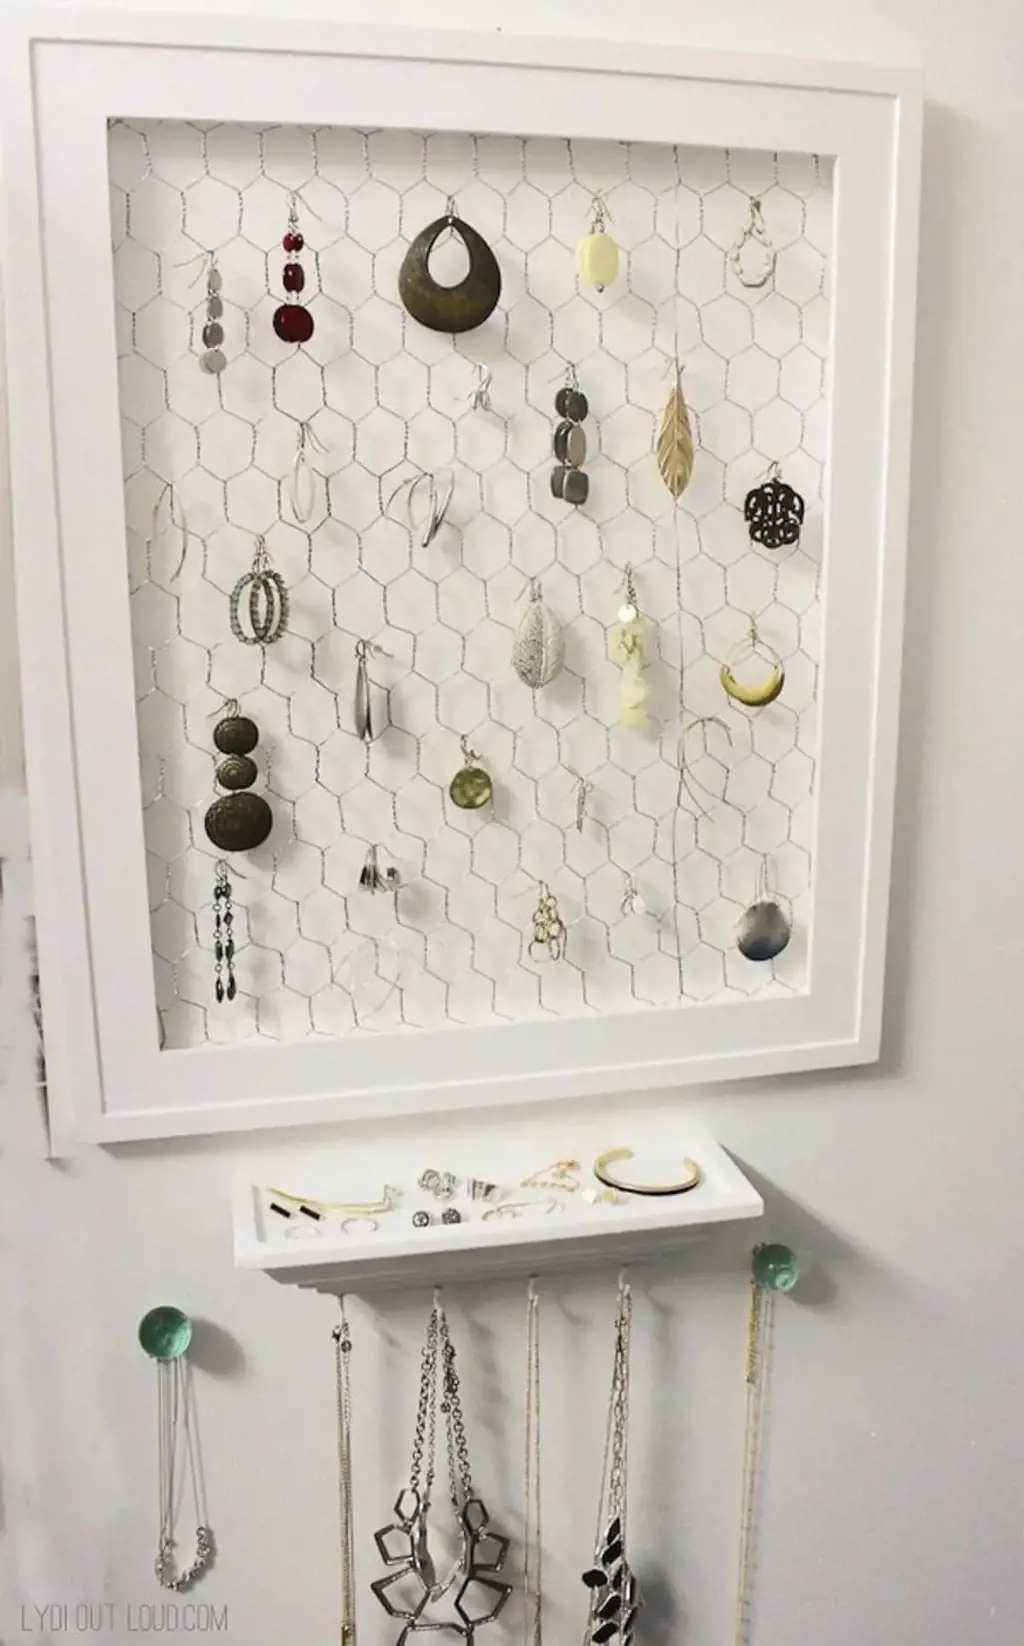
Do you have old and worn-out cookie sheets that you are thinking of throwing away? Don't do that just yet! With a little bit of creativity, you can transform these old baking sheets into something useful and beautiful. In this article, we will show you how to turn your old cookie sheets into a functional and stylish jewelry organizer.
Materials needed:
- Old cookie sheet
- Sandpaper
- Spray paint (color of your choice)
- Fabric or patterned paper
- Glue gun
- Scissors
- Hooks
- Pegboard hooks or adhesive picture hangers
Instructions:
- Start by cleaning your old cookie sheet thoroughly and sanding it lightly with sandpaper to remove any rust or rough edges.
- Choose a spray paint color that complements your decor and paint the cookie sheet. Allow it to dry according to the manufacturer's instructions.
- Once the paint is dry, cut a piece of fabric or patterned paper to size and glue it to the bottom of the cookie sheet. This will give your organizer a nice soft base for your jewelry.
- Next, attach hooks to the top and bottom of the cookie sheet. You can find hooks in any hardware store, and they come in various sizes and styles. Make sure to position the hooks evenly to give a neat look to your organizer.
- Finally, attach pegboard hooks or adhesive picture hangers to the backside of the cookie sheet so you can hang it on your wall.
Your jewelry organizer is now ready to use! Simply hang your necklaces, bracelets, and earrings on the hooks, and you can easily see and access your jewelry collection.
Using old cookie sheets for DIY projects not only helps the environment but also saves you money. With a little creativity and effort, you can turn an old object into a beautiful and useful item. Give this project a try and see how you can transform your old baking sheets into something new and unique.
12 Romantic Activities to Experience in Texas on Valentine's Day
You may want to see also
![]()
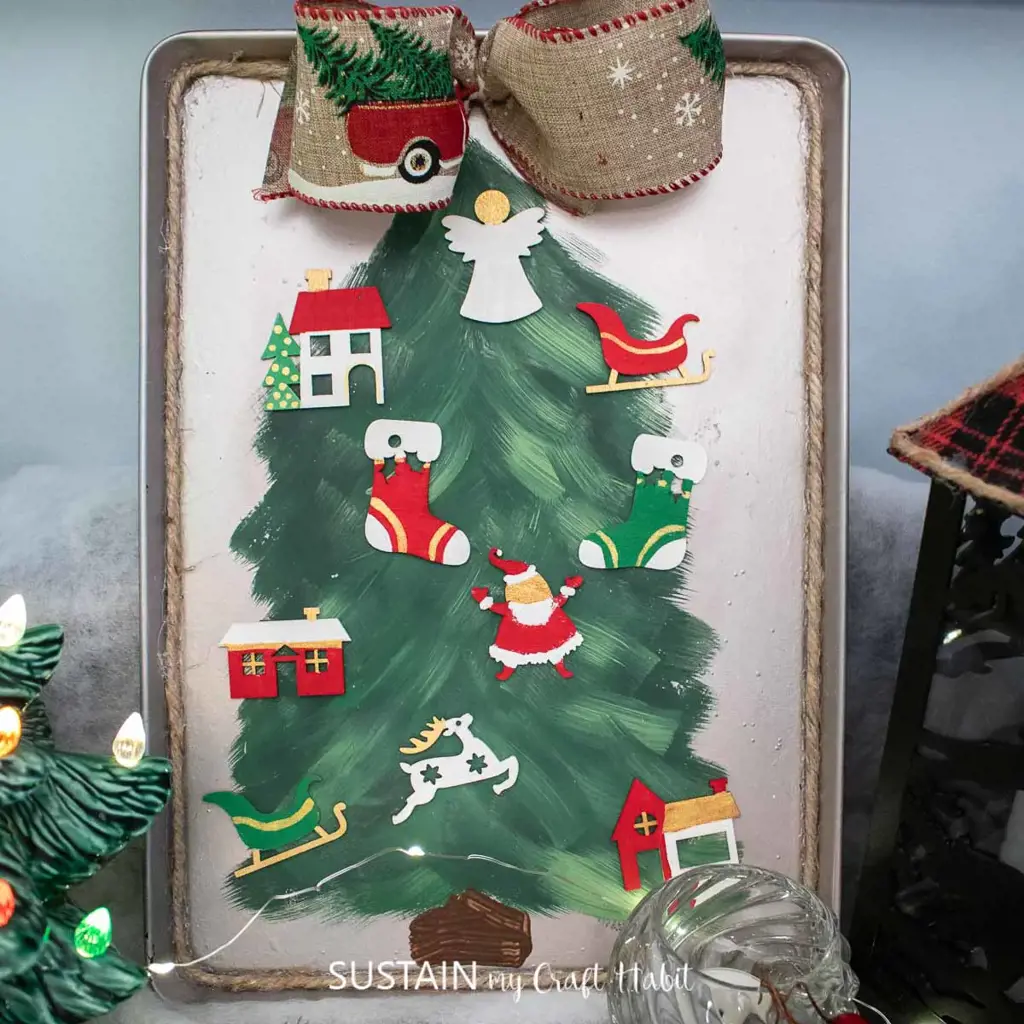
Paint palette for arts and crafts
One creative use for old cookie sheets is to repurpose them as paint palettes for arts and crafts. Not only is it an eco-friendly way to upcycle an otherwise unused item, but it also provides a sturdy and versatile surface for mixing and applying paints.
To transform an old cookie sheet into a paint palette, start by thoroughly cleaning it with soap and water and letting it dry completely. Then, consider adding some extra flair to the palette by painting the surface with acrylic paint or covering it with patterned scrapbook paper.
Next, it's time to begin using the palette for art projects. Simply squeeze small dollops of paint onto the surface and mix them together with a paintbrush or palette knife. The smooth surface of a cookie sheet makes it easy to blend colors and experiment with different techniques.
When you're finished using the palette, clean it off with a damp cloth or sponge and store it in a dry place until the next painting session. While cookie sheets may not be the most traditional choice for a paint palette, their durability and versatility make them the perfect tool for arts and crafts enthusiasts of all ages.
Overall, repurposing old cookie sheets as paint palettes is a fun and easy way to blend creativity with sustainability. So next time you're searching for a new paint palette, give your old baking sheet a second life and see where your imagination takes you.
12 Fun and Affordable Things to Do in Carbondale, IL
You may want to see also
![]()
DIY serving tray for entertaining
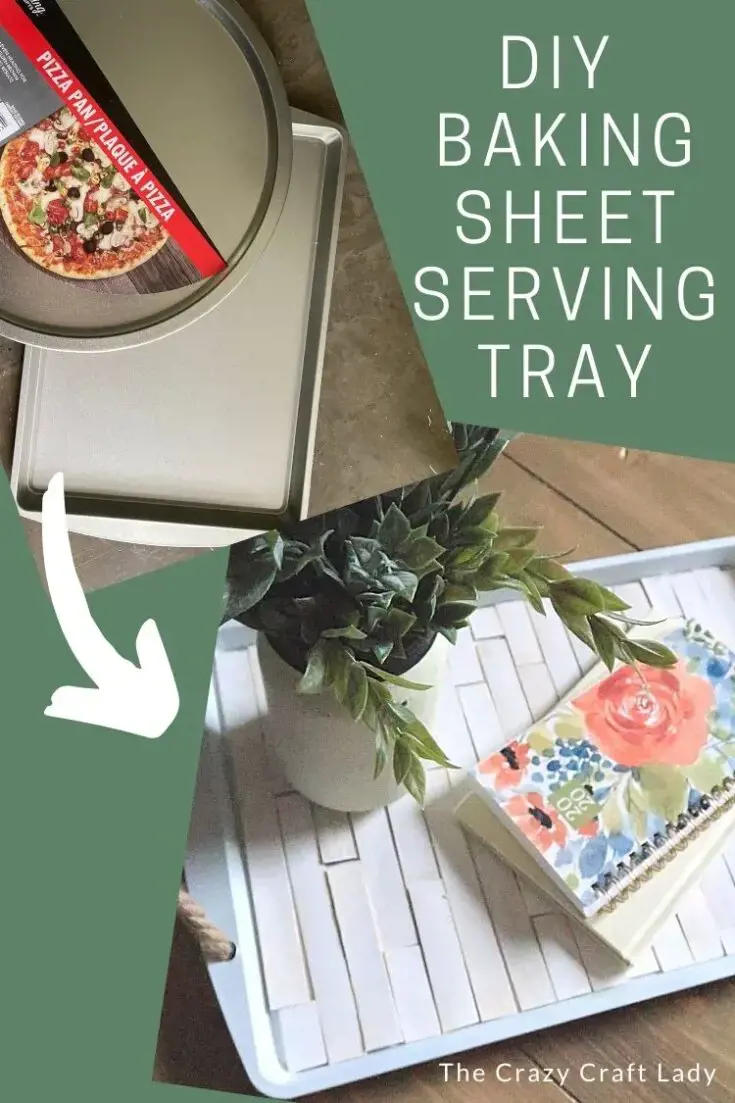
Are you tired of your old, rusty cookie sheets taking up space in your kitchen? Don't throw them away just yet! With a bit of creativity, those old cookie sheets can be transformed into trendy and stylish DIY serving trays that are perfect for entertaining guests.
Here are some simple steps to help you create your own DIY serving tray:
- Gather materials: You'll need an old cookie sheet, some decorative paper, scissors, glue, and drawer handles.
- Cut the paper to size: Cut the decorative paper to the dimensions of your cookie sheet. Make sure the paper is big enough to cover the entire surface of the sheet.
- Glue paper to the cookie sheet: Using glue, attach the decorative paper onto the cookie sheet. Make sure the paper is securely fastened to the sheet.
- Attach drawer handles: Attach the drawer handles to the two short sides of the cookie sheet. Use screws to secure them in place.
- Let it dry: Allow the glue to dry completely before using your new DIY serving tray.
Once your tray is complete, you can use it for serving drinks, appetizers, or desserts at your next gathering. It's a fun and unique way to show off your DIY skills and add some personality to your entertaining decor.
Not only is this project environmentally friendly by repurposing old items, but it also adds a personal touch to your home entertainment. So don't throw away those old cookie sheets, get creative and make something useful and stylish out of it!
13 Amazing Things to Do in Cefalù: Exploring Sicily's Hidden Gem
You may want to see also
![]()
Prop up a cookbook while cooking
If you have old cookie sheets that have seen better days, don't throw them out just yet. There are many creative ways to repurpose them, and one simple yet useful idea is to use them as a cookbook holder.
Cooking from a recipe can be tricky, especially if you're using a cookbook that doesn't want to stay open. A cookie sheet can solve this problem by propping up your cookbook while you cook. Here's how to do it:
- Choose a cookie sheet that is large enough to hold your cookbook. The size of the cookbook will determine the size of the cookie sheet you'll need.
- Place the cookie sheet on your kitchen counter or table, and open your cookbook to the recipe you want to use.
- Stand the opened cookbook up against the back of the cookie sheet, and adjust it until it is at the desired angle.
- Depending on the weight of the cookbook, you may need to place something heavy on the cookie sheet to keep it from tipping over. A can of beans or a bag of flour will do the trick.
Using a cookie sheet as a cookbook holder has many benefits. It keeps your cookbook clean and protected from spills and splatters, and makes it easier to read the recipe without having to pick up the book. It also frees up counter space and keeps your hands free to do important tasks, like stirring and seasoning your dishes.
If you're feeling crafty, you can even paint or decorate your cookie sheet to match your kitchen decor. Try using chalkboard paint to create a reusable surface where you can write notes or reminders about your recipe.
In conclusion, don't let old and worn-out cookie sheets go to waste. Put them to good use by repurposing them as helpful tools in your kitchen. Using them as cookbook holders is just one way to get creative and make the most of your resources. Happy cooking!
15 Fun-Filled Activities to Experience in Iceland in May
You may want to see also
![]()
Car organizer for snacks and small items
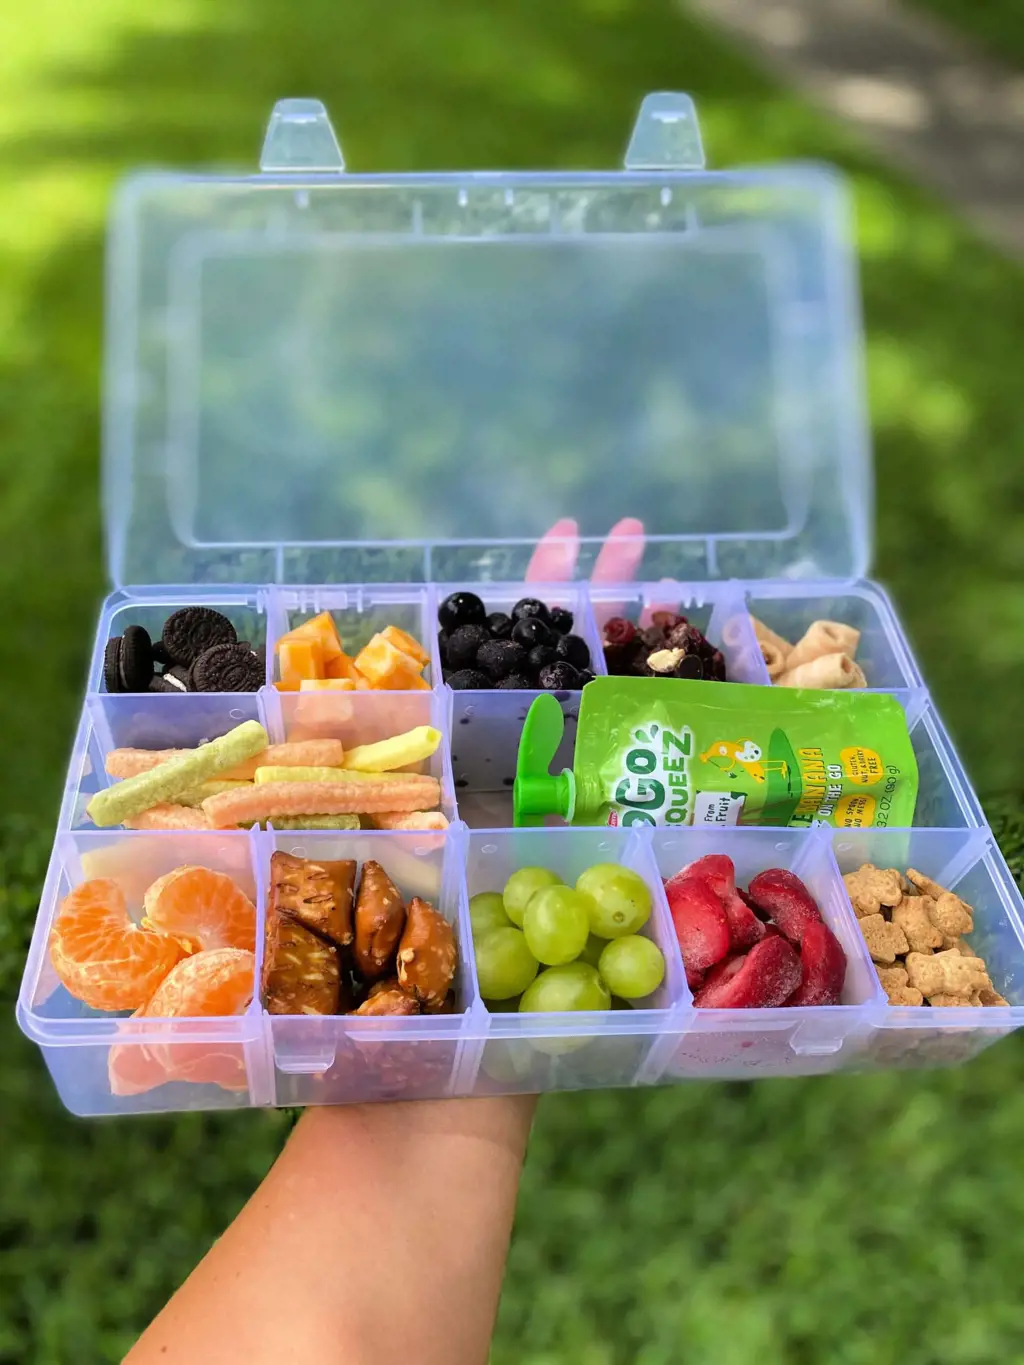
If you have old cookie sheets lying around your house, you don't have to throw them away just yet. With a little creativity, you can repurpose them into practical and useful items, such as a car organizer for snacks and small items. This DIY project is simple and can be done in no time, so why not give it a try?
Here's what you'll need to create a car organizer from an old cookie sheet:
- An old cookie sheet
- Decorative duct tape or any patterned tape of your choice
- Glue gun
- Scissors
- Small plastic containers
- Wire mesh or netting
- Magnets or magnetic strips
- Small fabric pouches (optional)
Steps:
Step 1 - Clean the Cookie Sheet
First, you need to clean the old cookie sheet thoroughly to remove any dirt or debris.
Step 2 - Add Tape
Next, use the decorative duct tape or any patterned tape of your choice to cover the visible parts of the cookie sheet to give it a new and fresh appearance.
Step 3 - Attach Containers
Using the glue gun, glue small plastic containers to the cookie sheet. These containers can be used to store small items such as snacks, keys, and pens.
Step 4 - Wire Mesh
Cut the wire mesh or netting, then hot glue it to the cookie sheet to create a space for hanging items like sunglasses, iPhones, or notepads.
Step 5 - Magnets or Magnetic Strips
Attach magnets or magnetic strips to the cookie sheet. These will be used to attach the organizer onto a metal surface in your car and to hold any additional items.
Step 6 - Fabric Pouches (Optional)
If you have extra fabric lying around, you can create small fabric pouches and attach them onto the wire mesh to store items that may fall out of the containers like tissues or feminine products.
Now that you have finished your DIY car organizer, it's time to use it and keep your car neat and tidy. With this organizer, you can easily store and access all of your essential items while on the go. So next time you're about to throw away that old cookie sheet, think again and get crafty with these simple steps.
13 Fun Things to Do With Kids in Fort Wayne
You may want to see also


4 Comments
Angela Wood
Leki Bora
AuthorSabrina Pace
Melissa Carey
Author