Looking for some fun and affordable ways to bring your DIY ideas to life? Look no further than poster board! This versatile material is not only easy to work with, but it also opens up a world of creative possibilities. From colorful wall art to custom party decorations, in this article, we’ll share 10 creative ways to use poster board for your next DIY project. So, grab your glue gun, scissors, and a stack of poster board, and let’s get crafting!
What You'll Learn
- Create custom party banners and decorations at home
- Cut out letters and shapes to make unique signs for your business or event
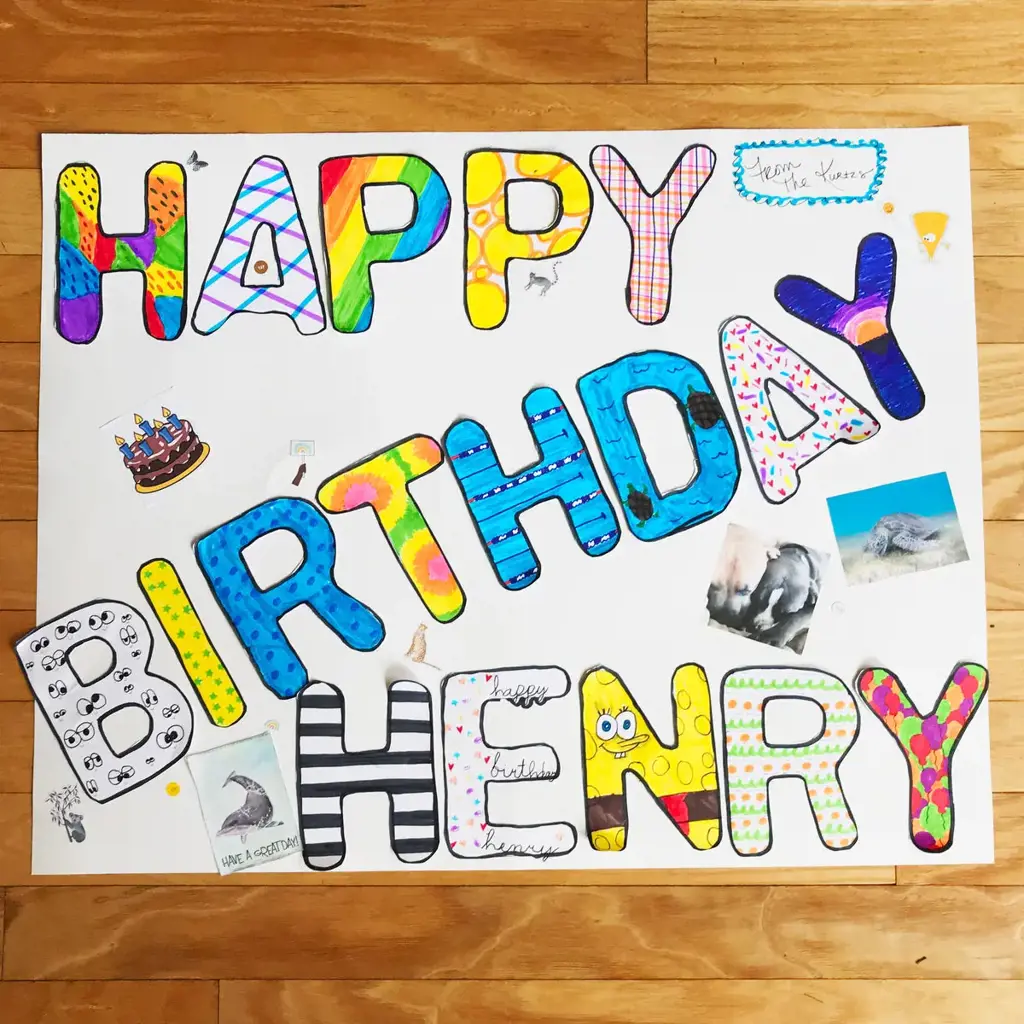
- Make picture frames with decorative paper and embellishments
- Create DIY vision boards for inspiration and goal setting
- Design and build your own custom board game
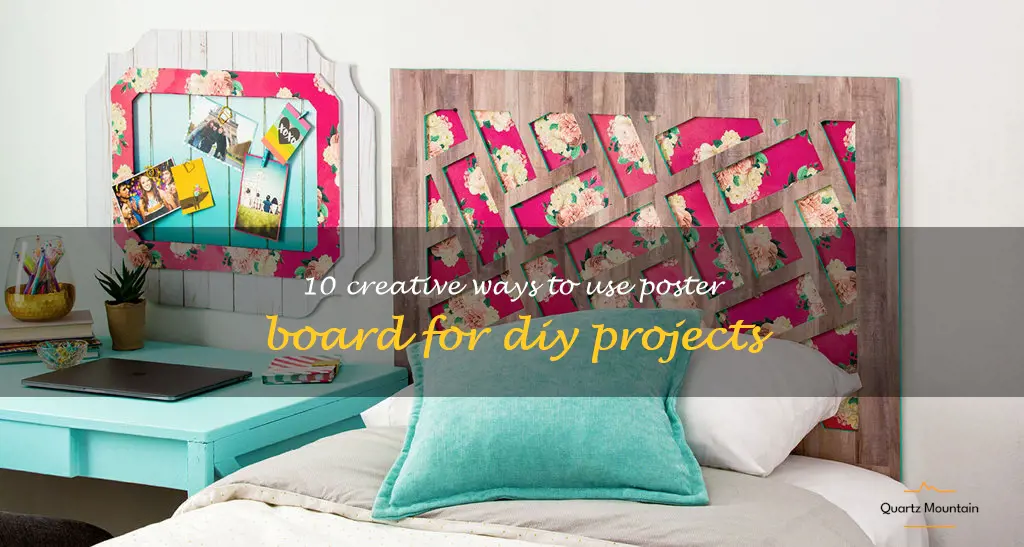
- Create a unique photo booth backdrop for special events
- Build a themed display board for school projects or presentations
- Design and build a homemade puppet theater
- Create custom holiday decorations for your home
- Use as a canvas for painting or drawing projects
![]()
Create custom party banners and decorations at home
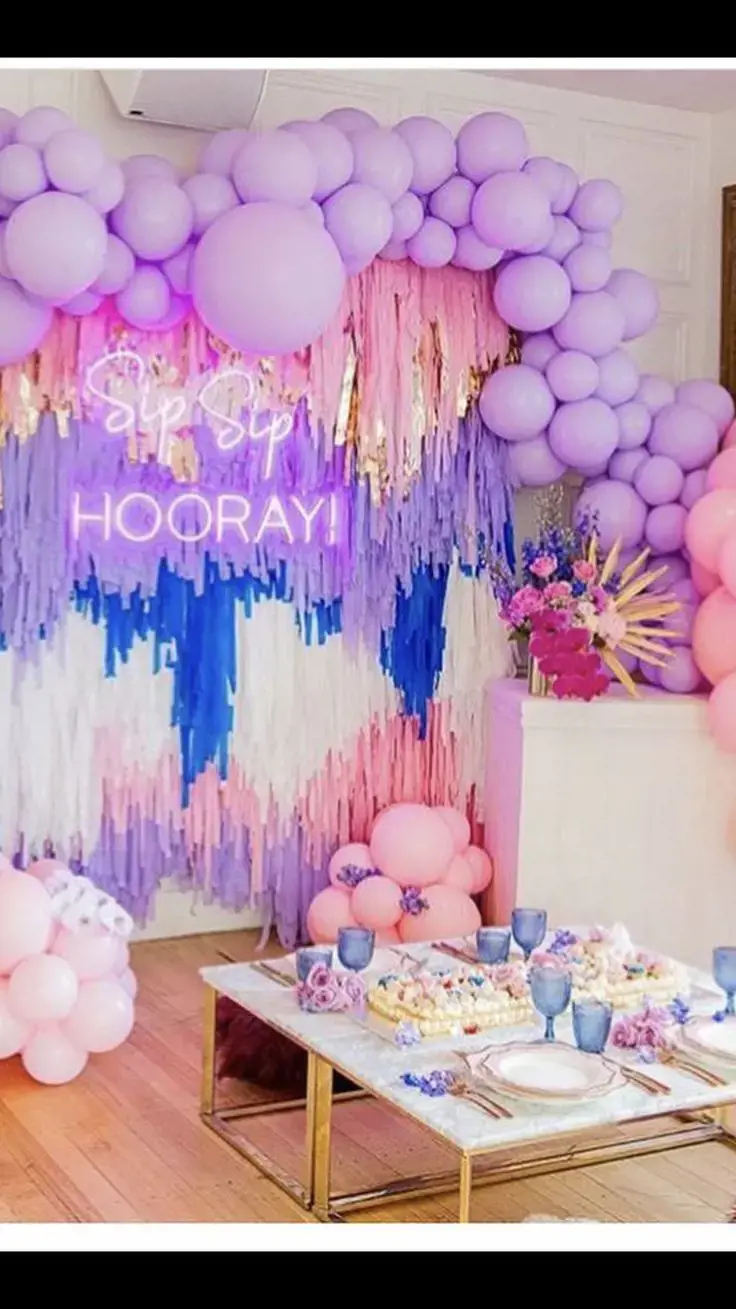
When it comes to throwing a party, decorating is half the fun. However, buying pre-made decorations from the store can quickly become expensive. Poster board is an affordable option that can be used to create custom party banners and decorations right at home. Here are a few ideas to get you started.
- Banners: Cut poster board into triangles and string them together to create a festive banner. Use stencils or freehand letters to spell out a celebratory message. You can also create a photo banner by printing out pictures of the guest of honor and attaching them to the poster board triangles.
- Centerpieces: Cut a piece of poster board into a circle and decorate it with paint, markers, or glitter to create a custom centerpiece. You can also use poster board to create a cardstock vase to hold flowers or balloons.
- Photo booth props: Cut out speech bubbles, mustaches, hats, and other props to add some fun to your party photo booth. Prop them up on sticks and let guests strike a pose.
- Table runners: Create a custom table runner by cutting a piece of poster board to fit your table and covering it with wrapping paper or fabric. Then, decorate it to fit your party's theme.
- Name tags: Cut poster board into fun shapes and write each guest's name on them. Attach a safety pin to the back and use them as name tags or seating cards.
With a little creativity, poster board can be transformed into unique and personalized party decorations that will make your event stand out. So next time you're planning a party, skip the expensive store-bought decorations and try making your own using poster board.
12 Essential Things to Do in Champagne, France
You may want to see also
![]()
Cut out letters and shapes to make unique signs for your business or event
Poster board is an incredibly versatile tool that can be used for a variety of projects. One of the most popular uses is to create unique signs for your business or event. So, if you're wondering what you can do with poster board, we've got you covered!
One of the first things you should consider is creating custom lettering and shapes for your sign. This is something that can make a big difference in the impact of your signage and can help you stand out from the crowd. You can either purchase pre-cut letters and shapes from a craft store or make your own using a stencil and a craft knife.
Once you have your letters and shapes ready, it's time to start piecing together your sign. You can arrange your letters and shapes in any way you like to create a unique design. Consider using different colors and textures of poster board to create a visually appealing sign.
Some tips to keep in mind when creating a sign with poster board:
- Use a ruler to make sure your letters and shapes are evenly spaced
- Choose a font that is easy to read from a distance
- Use double-sided tape or glue to secure your letters and shapes to the poster board
So, whether you're creating a sign for your business, advertising an event, or simply looking to make a statement, poster board is the perfect tool to help you achieve your vision. With a little bit of creativity and some patience, you can create a unique and eye-catching sign that will help you stand out from the crowd.
12 Fun Things to Do in Baton Rouge This Weekend
You may want to see also
![]()
Make picture frames with decorative paper and embellishments
Poster boards are a versatile and inexpensive medium that can be used for a wide range of creative projects. If you're looking for inspiration for a new project, here's an idea: Make picture frames with decorative paper and embellishments! This is a fun and easy way to add a personal touch to your home decor.
To get started, you will need:
- A poster board
- Ruler and pencil
- Craft knife or scissors
- Decorative paper
- Glue stick or double-sided tape
- Embellishments (such as stickers, sequins, or ribbon)
- Optional: Paint or markers to decorate the edges of the poster board
Instructions:
- Cut your poster board into the desired size of your picture frame. Typically, you'll want to add about an inch or two around the edges of your photo to create a border. Use a ruler and pencil to mark where you want to cut, and use a craft knife or scissors to carefully cut out your frame.
- Once you have your poster board frame, it's time to decorate it! The easiest way to do this is to use decorative paper. Cut a piece of paper that is slightly larger than your frame, and use your glue stick or double-sided tape to attach it to the front of your frame. Make sure to smooth out any wrinkles or air bubbles.
- Now it's time to add your embellishments! This is where the fun really begins. You can use stickers, sequins, ribbon, or anything else you like to create a personalized look. Add your embellishments to your frame using glue or tape, making sure to arrange them in a way that complements your photo.
- Optional: If you want to add an extra pop of color or design, you can decorate the edges of your poster board frame using paint or markers. This is a great way to tie in the color scheme of your photo or decor.
- Once your frame is fully decorated, you can add your photo. Use glue or tape to attach your photo to the back of your frame. If you want to hang it on the wall, you can attach a small piece of ribbon or string to the back of the frame.
There you have it - a simple and fun way to create personalized picture frames using poster board, decorative paper, and embellishments. This is a great project for kids, teens, or anyone who loves to get creative! Give it a try and see what beautiful frames you can create.
13 Fun Things to Do in Caye Caulker, Belize
You may want to see also
![]()
Create DIY vision boards for inspiration and goal setting
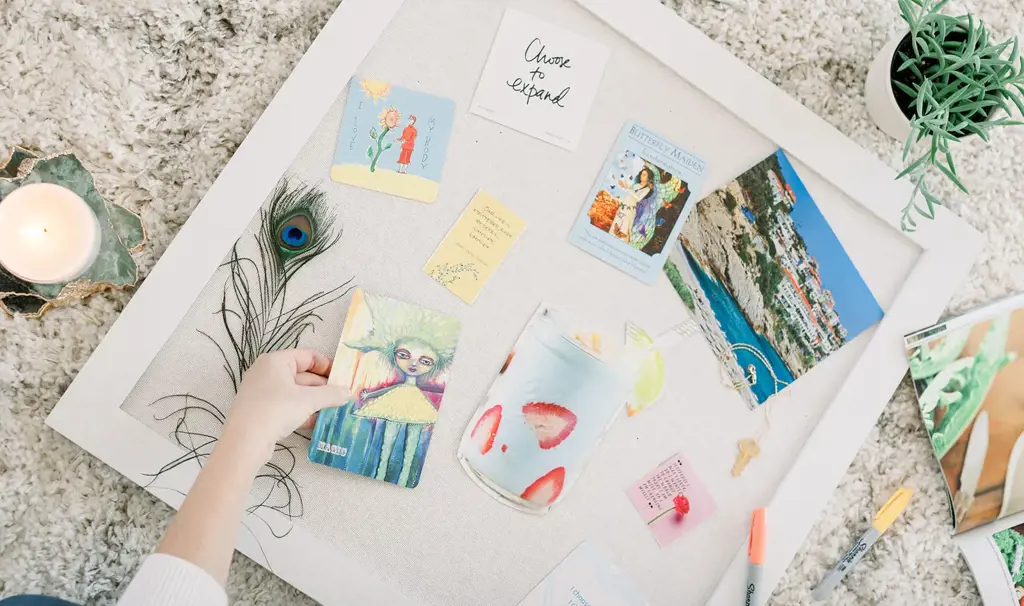
If you're looking for a creative and inspiring way to set and achieve your goals, then creating a DIY vision board using a poster board is the perfect way to go. A vision board is a visual representation of your goals and dreams, and it should help you to stay motivated, focused, and inspired as you work towards achieving them. In this article, we'll take a look at how to create your very own personalized vision board using only a poster board, some magazine cutouts, and a couple of other basic materials.
To begin, it's important to define what you want to achieve with your vision board. Grab a pen and paper, and write down your goals and dreams. Be specific, and don't be afraid to think big! Once you've written down everything that comes to mind, take a few minutes to prioritize your goals and put them in order of importance.
Next, gather your materials. You'll need a poster board (any size will do), some magazines or newspapers with interesting imagery, a pair of scissors, glue, and any additional decorative items, like stickers or colored markers.
Now it's time to start creating your vision board! Start by cutting out images from the magazines that represent your goals and dreams. For example, if your goal is to get fit, you might choose images of people running or exercising, or healthy foods like fruits and vegetables. If you want to travel, look for images of beautiful destinations or places you'd like to visit. Be creative and have fun with this step!
Once you've gathered a pile of images, start arranging them on your poster board. Play around with different layouts until you find something that feels right. You might want to organize your images by theme (such as fitness, travel, career, etc.), or you might prefer a more random and eclectic approach.
As you begin to glue your images onto the board, take some time to reflect on the goals and dreams that they represent. Visualize yourself achieving each one, and feel the excitement and energy that comes with making progress towards them. Add any additional decorative elements that feel inspiring or motivational, such as quotes or uplifting phrases.
Finally, display your completed vision board in a prominent place where you'll see it every day. This might be in your bedroom, office, or another space where you spend a lot of time. As you work towards achieving your goals, revisit your vision board regularly to stay motivated and inspired.
In conclusion, creating a DIY vision board using a poster board and some magazine cutouts can be an incredibly empowering and inspiring experience. By visualizing your goals and dreams in a creative, tangible way, you'll be more likely to stay motivated and focused as you work towards achieving them. Give it a try!
14 Fun Things to Do in Oakhurst, California
You may want to see also
![]()
Design and build your own custom board game
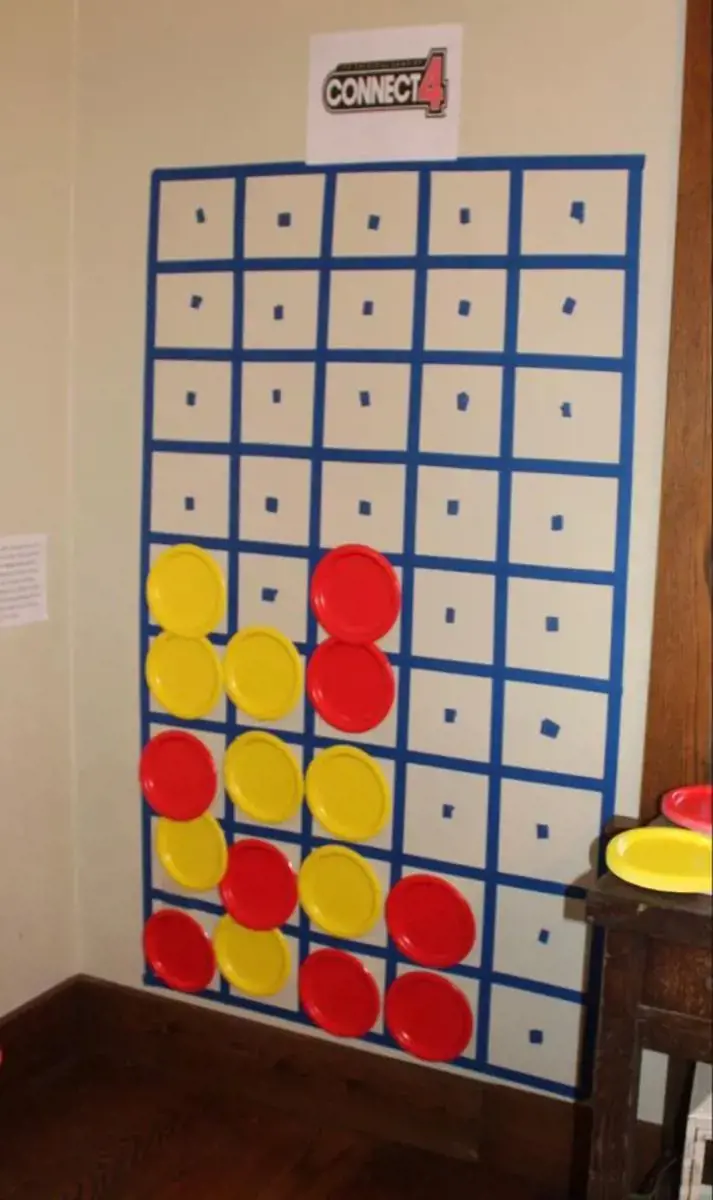
Poster board is a versatile material that can be used for many different purposes. One fun and creative project that you can do with poster board is to design and build your own custom board game. Whether you want to create a game for yourself or to share with others, here are some tips to help you get started:
Step 1: Choose a Theme
The first step in designing your own board game is to choose a theme. This will help you determine the look and feel of the game, as well as the types of elements that you will need to include. Some popular themes for board games include fantasy, adventure, sci-fi, and historical.
Step 2: Determine the Rules
Once you have a theme in mind, it's time to determine the rules of the game. This will involve deciding how the game is played, how players move around the board, how points are scored, and how the game is won.
Step 3: Create the Board
The next step is to create the board itself. You can use poster board to make a large, colorful board that matches your chosen theme. Use markers, paints, or other materials to create different areas on the board, and add any necessary illustrations or text to help players understand the rules of the game.
Step 4: Add Cards and Pieces
To make your board game more interesting, you can add cards and game pieces that players can use throughout the game. You can create these from the poster board as well, using scissors and other crafting tools to cut out the various shapes and designs that you need.
Step 5: Test and Refine Your Game
Once you have created your board game, it's time to test it out. Play it with friends and family members to see how well it works and to identify any areas that need improvement. Make changes as needed until you have a fun, engaging game that others will love to play.
Designing and building your own custom board game can be a fun and rewarding project. With some creativity, a bit of planning, and some poster board, you can create a game that you and your friends will enjoy for years to come.
13 Fun Things to Do in Auburn, Maine
You may want to see also
![]()
Create a unique photo booth backdrop for special events
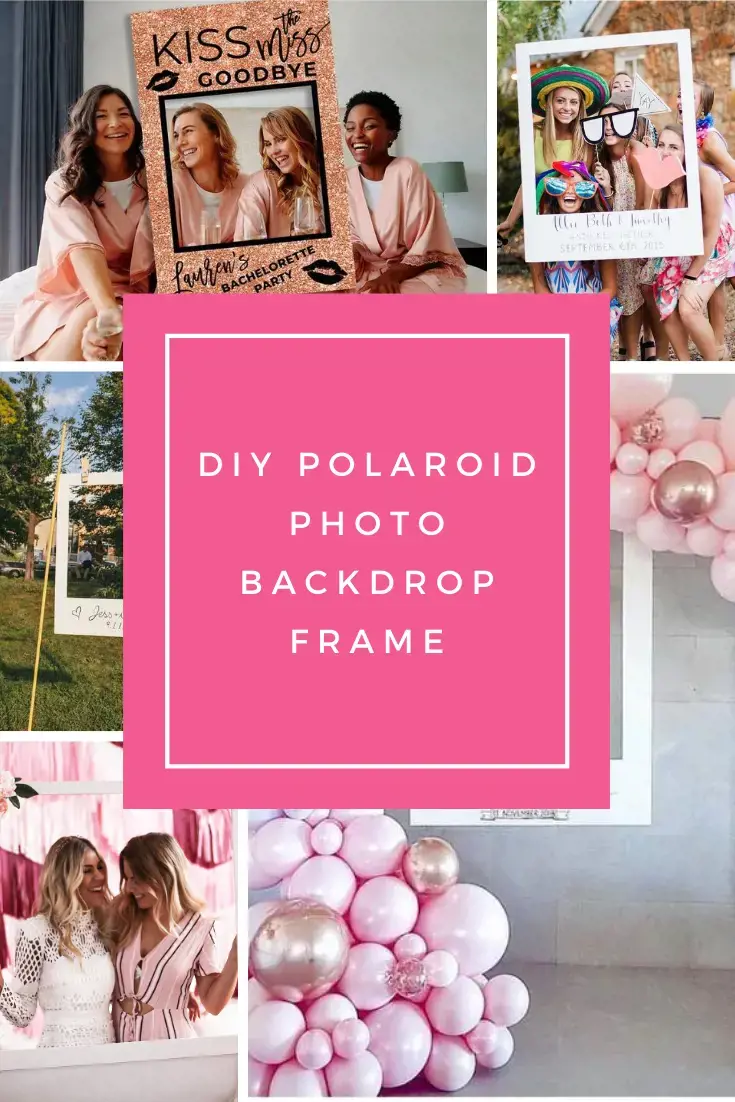
Posters boards are very versatile and affordable material to create various DIY projects for home decorations, concept boards, and even for some unique backdrops for special events like photo booths. They can add a personalized and creative touch to your party, and their versatility makes them an excellent choice for DIY projects. In this article, we will show you how to create a unique photo booth backdrop for your special events with a poster board.
Step 1: Choose your design
First, pick your desired design for the photo booth backdrop. Depending on the occasion, you can choose different patterns or colors. For instance, if it is a wedding celebration, you might want something in a more romantic or classic style, while for a kid's birthday party, you might want something more colorful and vibrant. You can mix and match colors, stripes, polka dots, stars, or draw anything you like, as your imagination is the limit.
Step 2: Measure and Cut
Next, measure and cut your poster boards based on the size of the photo booth backdrop you intend to create. The standard photo booth size is around 6 - 8 feet by 6 - 8 feet, so make sure you measure it correctly. If possible, it is better to use larger poster boards, as they are easier to handle and provide you with more space for your design. It is recommended to have at least 3 - 4 poster boards to create a complete backdrop for your photo booth.
Step 3: Tape and Connect
Now, tape the poster boards together using a double-sided tape or any strong adhesive tape, making sure that they align properly. Be careful not to leave any gaps or spaces between the poster boards, as it can ruin the visual effect of your design. You can also use a glue gun or paperclips to connect them, depending on the material you are working with.
Step 4: Decorate and Embellish
Once you have your poster boards connected, it's time to add some embellishments and decorations to your design. You can use paper flowers, balloons, ribbons, or anything else that matches your theme and adds some texture and depth to your photo booth backdrop. Be creative and experiment with different materials, shapes, and colors, and make sure they fit perfectly with your backdrop design.
Step 5: Display and Enjoy!
Finally, display your photo booth backdrop in your preferred location, and add some fun props and accessories to make your photoshoot even more entertaining and enjoyable. Your guests will love the personalized and unique touch that your poster board photo backdrop brings to your special event.
In conclusion, poster board can be an excellent material for creating unique photo booth backdrops for your special events. With a little bit of creativity and DIY skills, you can design a perfect and personalized backdrop that suits your party theme and impresses your guests. So, grab some poster boards, unleash your inner artist, and create a memorable and fun photo booth experience for everyone!
12 Must-Do Activities in Sullivan County PA
You may want to see also
![]()
Build a themed display board for school projects or presentations
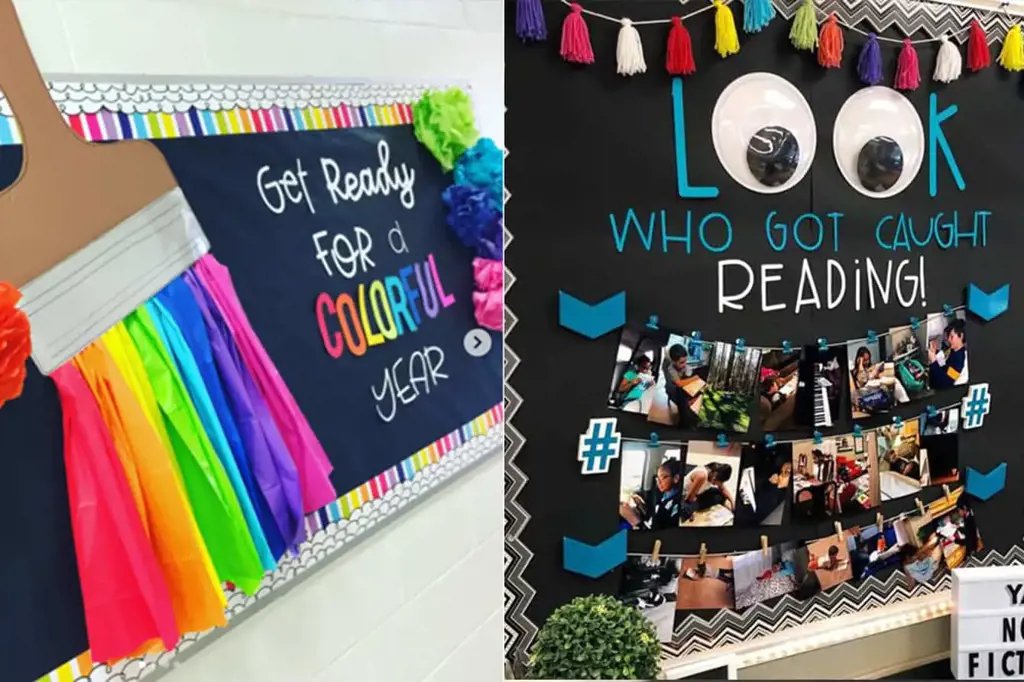
Poster board is one of the most versatile supplies in the crafting world. You can use it for different activities and projects, but one of the best things you can do with it is to build a themed display board. This type of board is perfect for school projects or presentations, and it can help you organize your ideas, showcase your creativity, and engage your audience. Here are some tips to get started on building your own themed display board.
Choose a theme. The first step to creating a successful display board is to choose a theme that is relevant to your topic. For example, if you're presenting about the solar system, you can choose a space theme. If you're doing a history project, you can choose a timeline theme. Think about what visuals, colors, and textures can support your theme. You can also use a pre-designed template or create your own design.
Gather your materials. Once you have a theme in mind, it's time to gather your materials. Depending on your design, you may need poster board, construction paper, colored pencils, markers, stickers, photos, graphs, charts, and other art supplies. Consider the size of your board and how you can fit everything in it. You may also want to consider how you will display your board, such as using a stand or hanging it.
Organize your ideas. Before you start assembling your board, organize your ideas and information first. Use a draft or sketch to plan your layout, including headings, subheadings, and supporting details. Consider the flow of your content and how you can make it easy to read and understand. You can use bullet points, numbering, or other organizing tools to make your display board look neat and professional.
Assemble your board. Once you have your materials and ideas, it's time to assemble your board. Use a glue stick or double-sided tape to attach your visuals, text, and decorations. Be careful not to overcrowd your board, and leave some space for your audience to read and digest your information. You can also experiment with different shapes and sizes, such as adding cutouts, outlines, or folded sections.
Add finishing touches. To make your display board stand out, add some finishing touches. These may include labels, captions, borders, or embellishments. You can also use 3D elements, such as layers or pop-up cards, to create a sense of depth and motion. Don't forget to proofread your content and make any necessary corrections before presenting your board.
In summary, building a themed display board is a fun and engaging way to present your school projects or presentations. With some creativity, organization, and attention to detail, you can make your board informative, attractive, and memorable. So grab your poster board and start building your masterpiece today!
13 Productive Things to Do Over Winter Break
You may want to see also
![]()
Design and build a homemade puppet theater
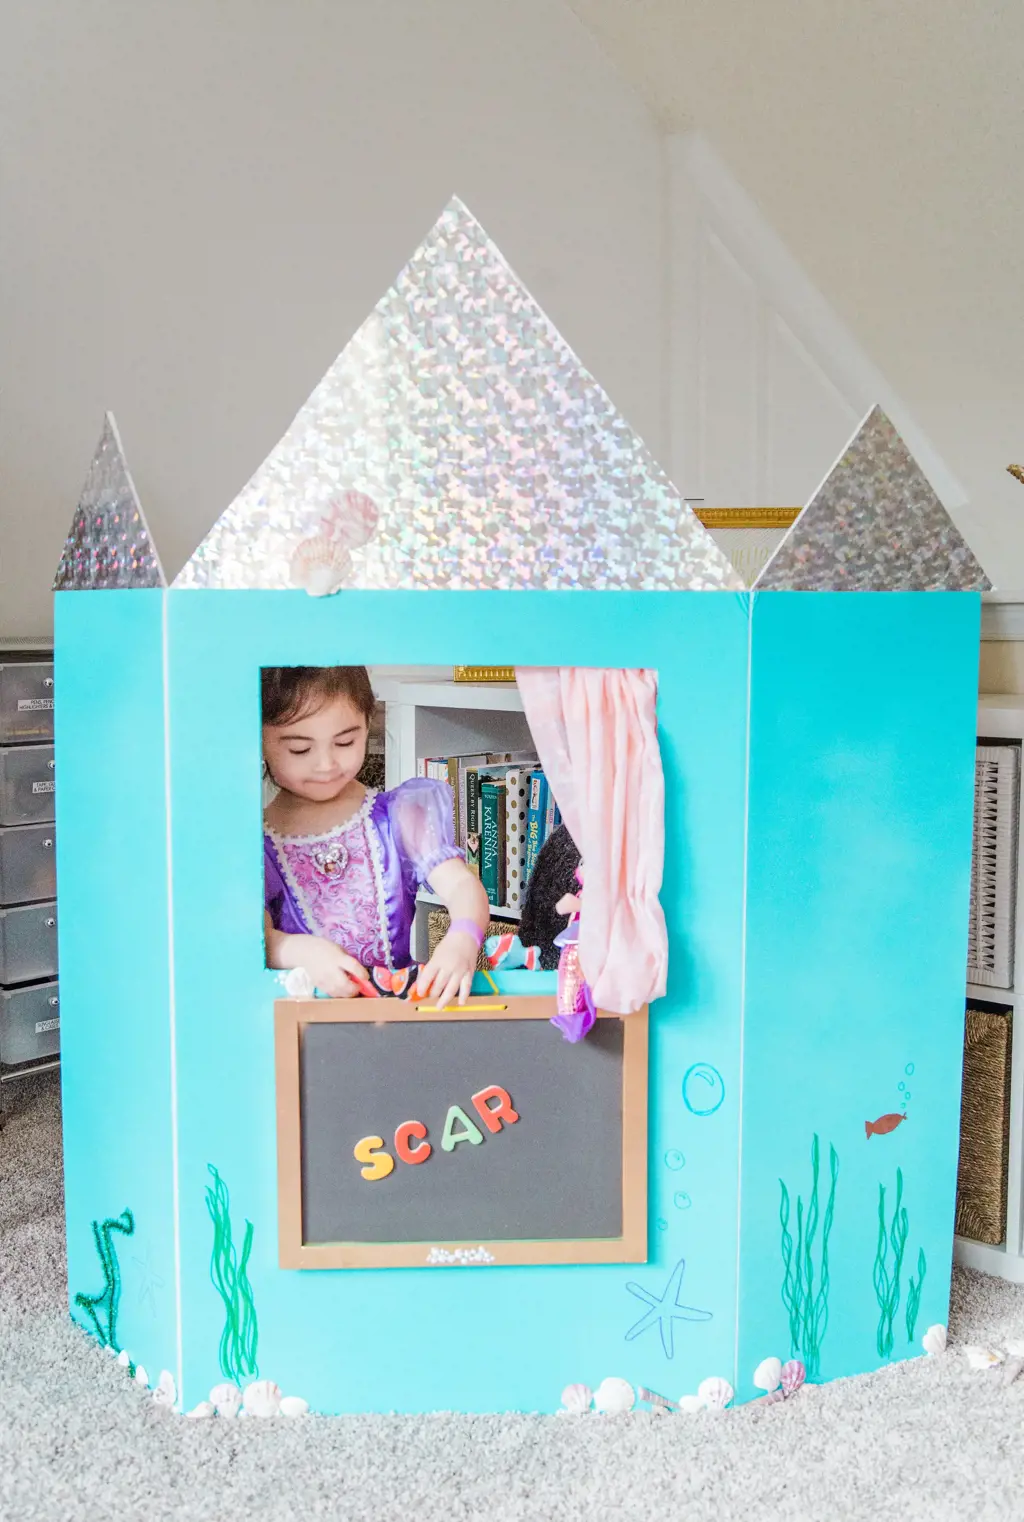
Poster board is one of the most versatile materials when it comes to crafting and DIY creativity. You can make various things out of it, including a puppet theater that can easily be built to create beautiful stories for children.
Designing a homemade puppet theater is a fun and affordable way to create a stage for your children's playful imaginations. With a few supplies and a bit of creativity, you and your kids can build a puppet theater that will provide endless entertainment.
Here are the supplies and steps you need to create your homemade puppet theater.
Supplies
- Poster board
- Box cutter
- Ruler
- Glue
- Scissors
- Markers or crayons
- Sticks
- Construction paper
Steps
- Start by cutting a large rectangular piece of poster board to form the base of your puppet theater. Your poster board should be twice as wide as it is tall.
- Next, draw a line down the center of your poster board, dividing it into two even halves.
- On the right half of the poster board, measure and mark six inches from each edge at the top to create a roof.
- Draw two diagonal lines from each of the 6-inch marks to the center of the poster board to form a triangle. These triangles will become the roof of the puppet theater.
- Using a box cutter, carefully cut out the triangles and fold them upward. Once you have created the roof, secure it with glue.
- Cut a rectangle in the center of the left half of the poster board to create the stage. You can make the rectangle as big or small as you want, depending on the size of your puppets.
- For the backdrop, use construction paper or decorate a poster board to act as a backdrop on your stage. You can draw your scenery or create a collage of images to set the scene for your story.
- Finally, attach sticks to the bottom of your puppets using glue or tape. You can use popsicle sticks, skewer sticks, or anything sturdy enough to hold your puppet up.
Your homemade puppet theater is now ready for play. Using your newfound creation, you can entertain your kids or other children during parties or events.
In conclusion, making a puppet theater out of poster board is a super easy task that can be done by anyone. With a bit of imagination and creative zest, you can create an enjoyable and entertaining way to weave fun stories using puppets. Try building your own puppet theater today, and you'll be amazed at the results you'll achieve.
12 Fun Things to Do in Skaneateles, New York
You may want to see also
![]()
Create custom holiday decorations for your home
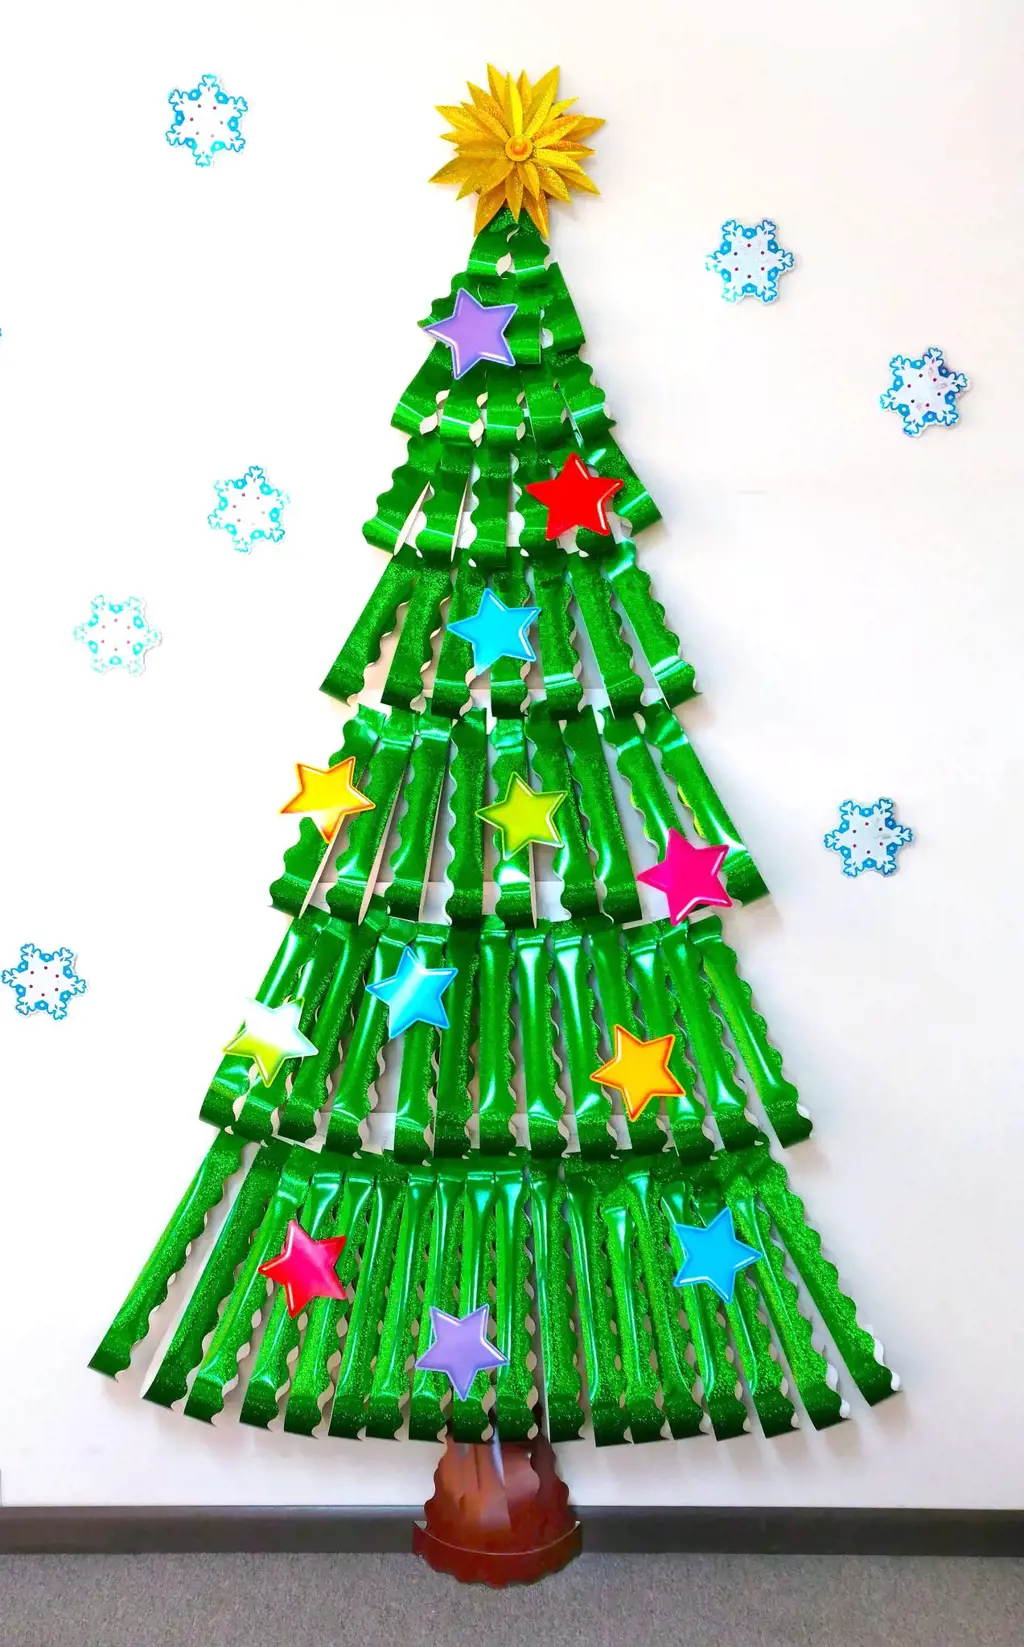
With the holiday season fast approaching, it's time to start thinking about decorating your home. Instead of spending a ton of money on store-bought decorations, why not get creative and make your own? With just a few sheets of poster board and some basic crafting supplies, you can create custom holiday decorations that will add a personal touch to your home. Here are some ideas to get you started:
- Christmas tree ornaments: Cut out various shapes from your poster board (stars, snowflakes, gingerbread men, etc.) and decorate them with markers, glitter, and other embellishments. Punch a hole at the top and string some ribbon through it to hang them on your tree.
- Holiday banners: Cut a long strip of poster board and decorate it with messages like "Merry Christmas" or "Happy Holidays." Hang it up in your doorway or over your fireplace for a festive touch.
- Gift tags: Cut out small squares of poster board and decorate them with festive designs. Punch a hole in one end and tie them to your presents with some ribbon. This is a great way to add a personalized touch to your gifts.
- Wreaths: Cut out a large circle from your poster board and decorate it with greenery, ribbons, and other festive items. Hang it on your front door or above your fireplace for a cozy holiday look.
- Photo booth props: Cut out various shapes like Santa hats, reindeer antlers, and elf ears. Decorate them with markers and glitter, then glue them to sticks or straws. Use them as fun props for holiday photos with friends and family.
With these ideas and a little bit of creativity, you can create custom holiday decorations that will make your home feel cozy and festive. So break out that poster board and start crafting!
12 Fun Things to Do in Winthrop, WA
You may want to see also
![]()
Use as a canvas for painting or drawing projects
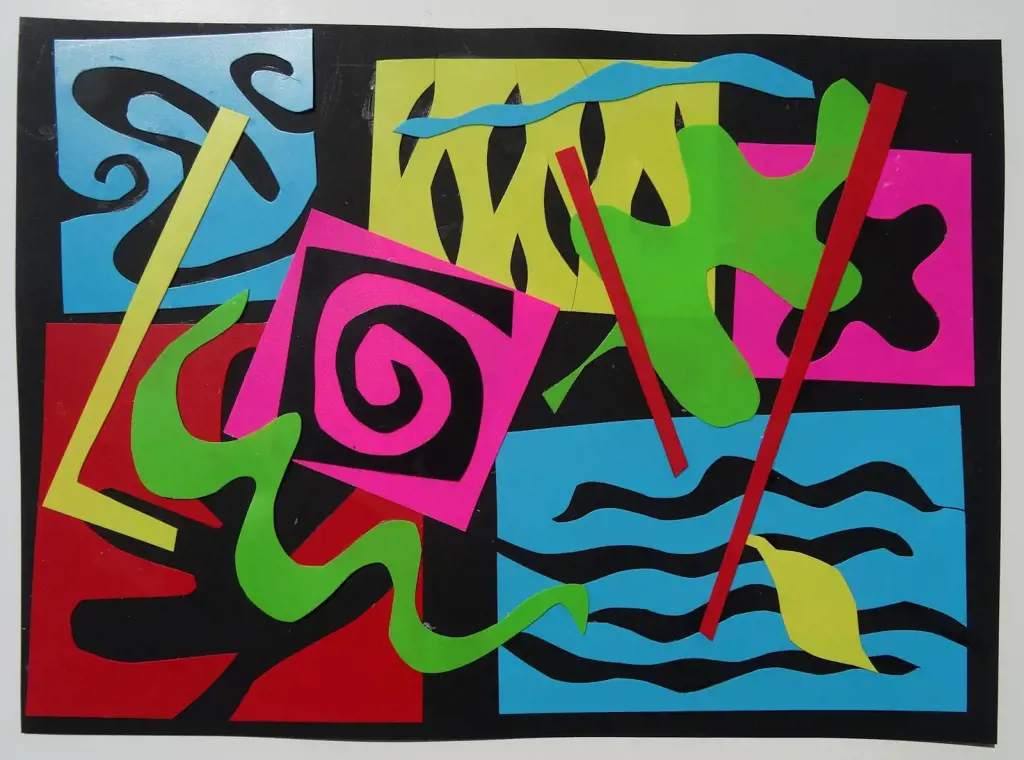
Looking for a canvas for your next painting or drawing project? Look no further than poster board! This versatile material is not just great for creating signs and presentations – it’s also a fantastic surface for unleashing your creativity and producing beautiful works of art. Here are some tips on how to use poster board as a canvas for your next masterpiece.
First, select your materials. You’ll need poster board, of course, as well as whatever paint or drawing materials you prefer. For painting, you can use acrylic, oil, or even watercolors, although the latter may warp the poster board slightly. For drawing, choose from pencils, pens, markers, or charcoal.
Once you’ve got your materials together, you’re ready to get started. Begin by laying out your poster board and deciding on your subject matter. Some ideas might include landscapes, portraits, or abstract designs. You can even create mixed media pieces by incorporating cut-out shapes or collaged materials.
Once you’ve decided on your subject matter, it’s time to begin painting or drawing. Depending on your style, you might prefer to begin with an underpainting or drawing, or to dive right in with your bold strokes. Remember, poster board may not hold up as well to repeated washes of paint or heavy layers, so plan accordingly.
As you work, consider the texture of the poster board. This material is slightly more absorbent than traditional canvases, so you may need to apply more layers of paint or charcoal than you’re used to. Alternatively, you can experiment with different techniques, like scratching or wiping away layers to reveal the white of the poster board beneath.
Once you’re finished with your piece, allow it to dry completely before mounting it or framing it as desired. Poster board is lightweight and easy to transport, making it a great choice for art shows and exhibitions. Best of all, it’s an inexpensive and eco-friendly alternative to traditional canvases, making it a great choice for artists of all skill levels.
In conclusion, poster board is a fantastic option for those looking to create beautiful paintings or drawings without the expense or heft of traditional canvases. With just a few materials and some creativity, you can transform this humble material into a stunning work of art. So go ahead – get painting!
11 Fun Activities to Explore at Bally's Las Vegas
You may want to see also
Frequently asked questions
Poster board is a thick and sturdy paperboard material that is used to make posters or display boards. It is typically made from a variety of materials including cardboard paper, foam board or vinyl material.
To prevent poster board from fraying when you cut it, try using a sharp pair of scissors or a paper trimmer. You can also create a guideline with a pencil on the backside of the poster board before cutting to ensure a straight and clean cut.
Yes, you can print on poster board using a printer that is compatible with thicker paper materials. It is recommended to adjust the printer settings to a thicker paper option and to feed the poster board into the printer carefully and slowly.
Poster board can be used for a variety of creative projects such as making signs for events or protests, creating vision boards or mood boards, making personalized photo backdrops or photo booth props, creating DIY wall art, or even making custom game boards for party games.


3 Comments
Santiago Cherry
Duke Trotter
AuthorRafferty Stewart