
As we all know, toilet paper rolls are a household essential, but did you know they can also be transformed into delightful and useful crafts? Who knew that a simple cardboard tube from your bathroom could be the basis for 14 unique and creative craft projects only taking five minutes to make? From home décor to fun activities for kids, these crafts will inspire you to think twice before throwing away those empty toilet paper rolls. Get ready to upcycle and impress with these 14 Creative 5-Minute Crafts: Things to Do with Toilet Paper Rolls!
What You'll Learn
![]()
Miniature planters
If you're someone who appreciates both DIY projects and home decor, then you're going to love this idea. With just a few simple items, you can easily create your own miniature planters using toilet paper rolls that will transform your space into a lush garden escape.
First, gather your materials. You'll need toilet paper rolls, scissors, spray paint (optional), hot glue gun, and soil.
Begin by cutting the toilet paper rolls in half, creating two separate pieces. If desired, you can spray paint the rolls for a more colorful look. Once the paint is dry, turn the rolls upside down and fold them in half, making two equal flaps. Use the hot glue gun to seal the flaps together, creating the base of your planter.
Next, fill the planter with soil and plant any variety of small plants or flowers you desire. Some great options to consider are succulents, cacti or herbs such as basil or mint. Be sure to water your new plants regularly and watch as they begin to flourish in your miniature planter garden.
These miniature planters can be placed in any room of your home and make for an exciting conversation piece. They're perfect for small spaces such as studio apartments, dorm rooms, or even your office cubicle.
Not only do these planters add a touch of greenery to your space, but they also offer an eco-friendly alternative to traditional planters. By using recycled toilet paper rolls, you're reducing your carbon footprint and finding a new purpose for items that would have otherwise been discarded.
So take some time to get crafty and transform those everyday toilet paper rolls into something beautiful and useful - miniature planters that you'll be proud to display.
13 Free Things to Do in Toledo That You Can't Miss
You may want to see also
![]()
Desk organizer
Looking for crafty and useful ways to repurpose toilet paper rolls? Look no further! In this article, we're going to show you how to make a desk organizer using nothing but toilet paper rolls.
To start, gather up a few toilet paper rolls and some scissors. You'll also want to grab some glue, a ruler, and a piece of cardboard or cardstock for the base of your organizer.
Begin by cutting your cardboard or cardstock to the desired size and shape for your base. This will serve as the foundation for your organizer. Once you've got your base ready to go, take your toilet paper rolls and cut them into equal sized pieces, roughly 1-2 inches in length.
Next, lay out your cardboard or cardstock base and arrange your toilet paper roll pieces into whatever pattern or design you'd like. You can make a straight line of rolls, a circular arrangement, or even create staggered tiers for a multi-level organizer. Once you've got your rolls arranged, grab your glue and begin attaching them to the base.
Apply a small amount of glue to the bottom of each roll, then press it into place on the cardboard or cardstock base. Be sure to press down firmly to ensure a secure bond. Continue this process until all your rolls are attached to the base.
Once your glue has dried, your desk organizer is ready to use! Fill each section with whatever office supplies you'd like. You can store pens and pencils, paperclips and push pins, or even small notepads and sticky notes.
In just a few minutes, you've transformed a few toilet paper rolls into a useful and customized desk organizer, all while helping to reduce waste and repurpose commonly discarded materials. Get creative and see what other fun and functional projects you can create with everyday household items like toilet paper rolls!
12 Fun Things to Do in Garden City, Kansas
You may want to see also
![]()
Wall art
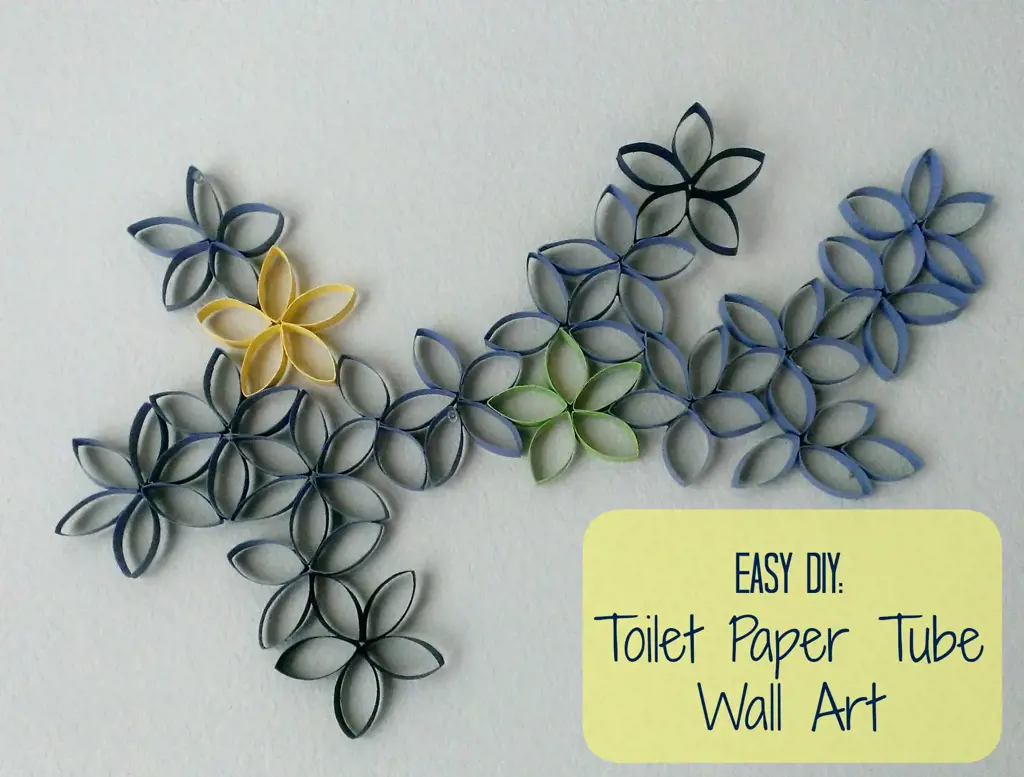
If you're looking for a fun and easy way to add some DIY decor to your walls, try making some wall art out of toilet paper rolls! These 5-minute crafts are a great way to upcycle something you would typically throw away and turn it into a unique piece of art that will impress your friends and family.
Here's how you can get started:
Materials needed:
- Toilet paper rolls
- Scissors
- Glue
- Paint or markers
- Any additional decorations you want to use (such as beads, sequins or stickers)
Instructions:
- Flatten your toilet paper roll: Begin by flattening your toilet paper roll. You can do this by pressing it down with your hands or using scissors to make a cut lengthways and then pressing it down.
- Cut strips: With your scissors, cut the flattened roll into strips. You can make the strips as wide or narrow as you like, depending on the design you have in mind.
- Shape the strips: Take each strip and shape it into a petal, leaf or any other shape you like. To make a petal shape, simply fold over one end of the strip and press it down.
- Glue the pieces together: Once you've shaped all the strips, start layering them together with glue to create your design. You can make a flower, sunburst, or any other pattern you like.
- Add some color: If you want to add some color, you can use paint or markers to decorate your wall art. You could paint each petal or leaf a different color, or create an ombre effect by starting with one color and gradually blending into another.
- Add some decorations: To make your wall art even more unique, you can decorate it with beads, sequins or stickers. Use glue to attach the decorations to your wall art.
- Hang it up: Once you're finished, hang your wall art on your wall using double-sided tape or a picture hanger.
There you have it - a fun and easy way to upcycle your toilet paper rolls and create some unique wall art for your home. So why not give it a go and see what you can create!
12 Exciting Activities for Memorial Day Weekend 2022 in NYC
You may want to see also
![]()
Gift wrapping paper holder
If you’re a fan of recycling and upcycling, then you might have a collection of empty toilet paper rolls lying around your house. Instead of tossing them in the bin, why not turn them into a practical and stylish gift wrapping paper holder? In this article, we’ll show you how to make one in just a few simple steps.
Materials you’ll need:
- Empty toilet paper rolls (around 3-4)
- Scissors
- Ruler
- Pencil
- Glue
Instructions:
- Start by measuring the width of your gift wrapping paper roll. Then, cut your empty toilet paper rolls to the same length as the wrapping paper roll. You’ll need about 3-4 of these cut pieces.
- Take one of the cut pieces and flatten it out. Apply some glue on one end, then stick it onto another cut piece of the same length. Repeat the process until you have a long, straight line of glued toilet paper rolls.
- Once you have your straight line, make sure it’s long enough to fit the entire length of your wrapping paper roll.
- Place your straight line of toilet paper rolls along the edge of a flat surface, such as a table or countertop.
- Apply some glue on one of the toilet paper rolls in the line, then press it firmly against the flat surface. Hold it in place for a few seconds to ensure the glue sticks.
- Gradually work your way down the line, attaching each toilet paper roll to the flat surface using glue.
- Once you’ve glued all the toilet paper rolls onto the flat surface, leave it to dry for a few minutes.
- Once the glue has dried, you can mount your new gift wrapping paper holder onto a wall using some double-sided tape, adhesive hooks or screws. Alternatively, you can also place it on a desk or shelf.
- To use your new gift wrapping paper holder, simply place your wrapping paper roll inside the toilet paper rolls that are now securely attached to the flat surface. The toilet paper rolls will act as a guide and hold the wrapping paper in place as you cut it.
In just a few minutes, you’ve created a practical and eco-friendly gift wrapping paper holder using toilet paper rolls. Not only is it a great way to keep your wrapping paper organized, but it’s also a fun and creative DIY project that you can customize to suit your own personal style.
12 Fun Activities to Experience at Lake Berryessa
You may want to see also
![]()
Fire starter
If you're looking for a quick and easy way to start a fire, then it's time to think outside of the box (or in this case, the toilet paper roll!). With just a few simple materials, you can create a DIY fire starter that will help get your campfire, fireplace or grill going in no time.
Here's what you'll need:
- Empty toilet paper rolls
- Dryer lint or cotton balls
- Wax or petroleum jelly (optional)
Step 1: Gather your materials
First, start by collecting empty toilet paper rolls, which can be found in most households. Scour your dryer's lint trap or use cotton balls to gather kindling for your fire. If desired, you can also collect wax or petroleum jelly to help ignite the fire starter.
Step 2: Stuff your roll
Next, take your empty toilet paper roll and fill it with the dryer lint or cotton balls. You'll want to pack in as much material as you can, ensuring that the roll is nice and full.
Step 3: Add wax or petroleum jelly
If you're having trouble getting your fire starter to catch, consider adding a coat of wax or petroleum jelly to the outside of the roll. This will help the material inside catch on fire more quickly.
Step 4: Light it up!
Finally, it's time to light your homemade fire starter. Simply place it under your kindling and watch as it ignites the rest of your fire.
By repurposing everyday household items like toilet paper rolls and dryer lint, you can create a useful fire starting tool that costs next to nothing. So next time you're in need of a quick and easy fire starter, stop throwing those empty toilet paper rolls away and put them to good use!
12 Must-Do Activities for Your Senior Year
You may want to see also
![]()
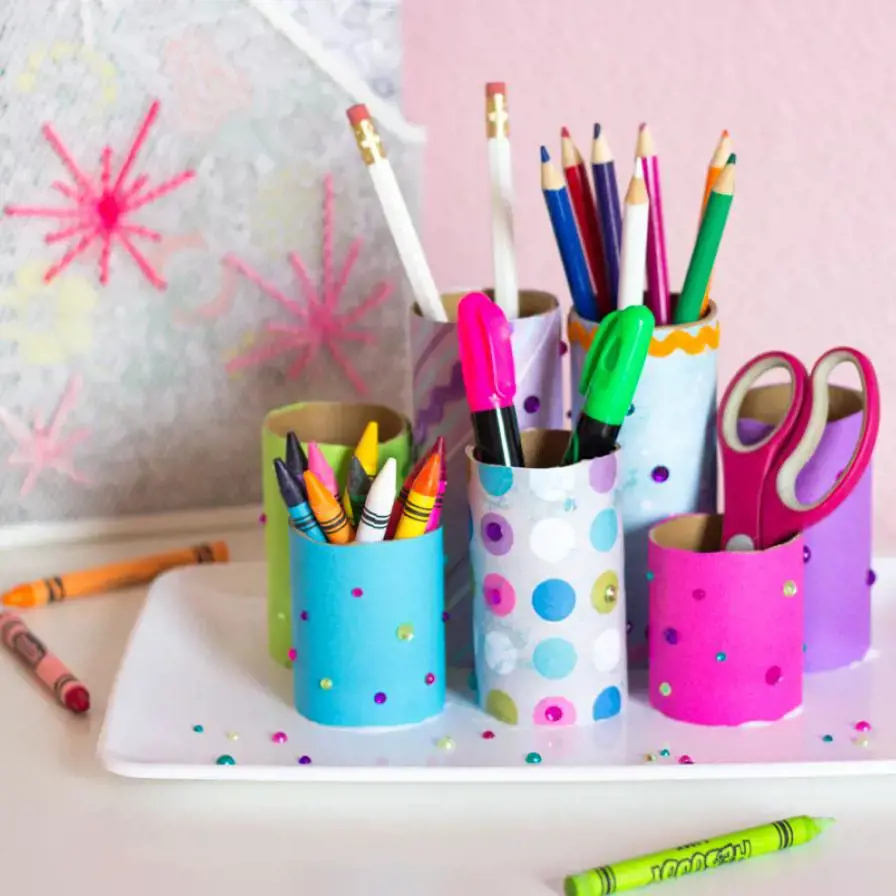
Pen holder
Toilet paper rolls can be used in a multitude of ways, and one such way is to make a pen holder. It is a fun and easy DIY project that even kids can indulge in. In this article, we will guide you through the steps to make a simple and cute pen holder using a toilet paper roll.
Materials required:
- Toilet paper roll
- Scissors or paper cutter
- Decorative paper or wrapping paper
- Glue or double-sided tape
Step 1: Cut the toilet paper roll
Take the toilet paper roll and measure it according to the size you want for your pen holder. Use scissors or a paper cutter to cut it to size. If you want a taller pen holder, use two rolls and glue them together.
Step 2: Cover with decorative paper
Take the decorative paper or wrapping paper and wrap it around the toilet paper roll. Cut the paper to size and glue it to the roll. Make sure to cover the entire roll with the paper. You can use different colors and patterns to create a unique pen holder.
Step 3: Seal the edges
Seal the edges of the paper using glue or double-sided tape. This will ensure that the paper does not come off when you insert your pens or pencils into the holder.
Step 4: Decorate
Add some flair to your pen holder by decorating it with stickers, ribbons, or any other craft items you have. You can also use markers or paint to draw designs on the paper.
Your homemade pen holder is now ready! Insert your pens or pencils into the holder and display it on your desk. You can make multiple pen holders in different sizes and colors to create a fun and colorful desk accessory.
In conclusion, making a pen holder using a toilet paper roll is an easy and creative way to upcycle and reuse household items. This five-minute craft is a fun activity to do with kids, and the end result is a functional and cute desk accessory. Try it out and let your creativity shine!
12 Fun Activities to Enjoy in the Poconos on Thanksgiving Weekend
You may want to see also
![]()
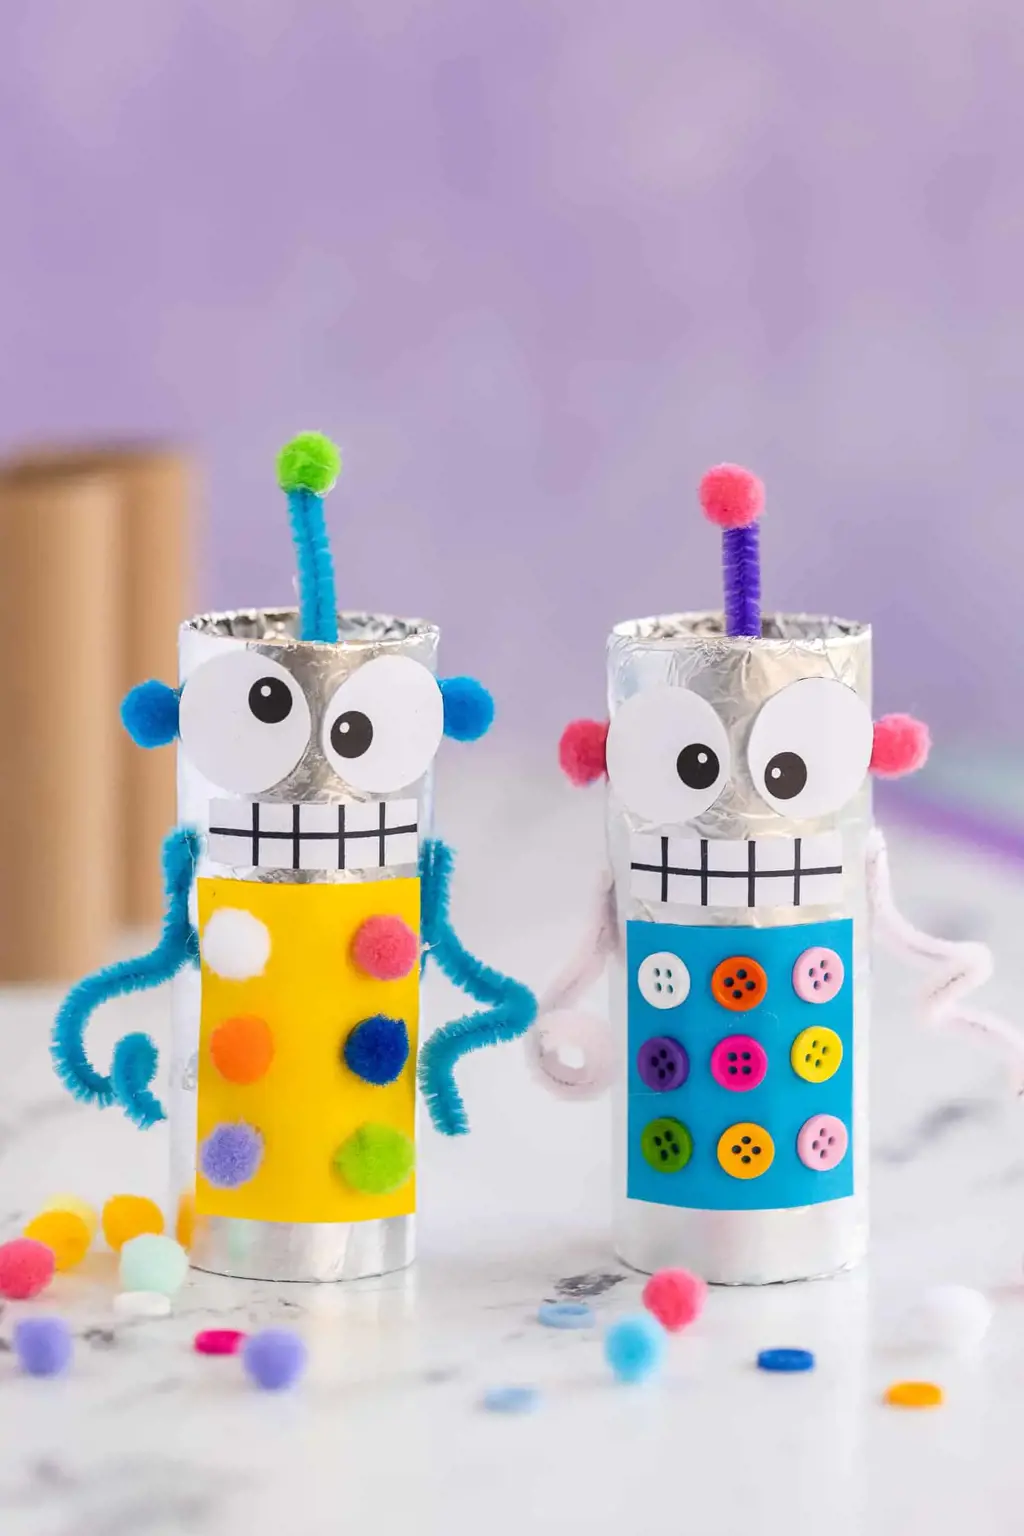
Kids' puppet show
Are you looking for a fun and easy craft activity to do with your kids? Why not create your very own puppet show using toilet paper rolls? Not only is it a great way to keep your children entertained, but it also enhances their creativity and imagination.
Here are the steps to make your own kids puppet show using toilet paper rolls:
Step 1: Gather Materials
The first step to creating your toilet paper roll puppet is to gather all the materials that you will need. You will need toilet paper rolls (as many as there are puppet characters), colored paper, markers, scissors, and glue.
Step 2: Cut Out the Characters
Using the colored paper, cut out the parts you need for the character's body, clothes, and facial features. For example, for a classic puppet, cut out a circle for the face, a rectangle for the body, and triangles for the arms.
Step 3: Decorate the Characters
After you have the basic shape and structure of the characters, it is time to decorate them with markers, glitter, or even yarn. Let your child's imagination run wild, and have them create unique and colorful characters for their puppet show.
Step 4: Glue the Characters
Once you are satisfied with your puppet characters, it's time to attach them to the toilet paper rolls. Apply glue to the paper parts and carefully attach them to the roll. If you'd like, you can add some decorative elements to the rolls themselves, like stickers or glitter.
Step 5: Put on the Show
Congratulations! You've made your very own puppets. Now, it's time to put on a show. Encourage your kids to create their own skits or storylines, or you can create a script together. Consider adding a backdrop or props to make the performance even more engaging.
In conclusion, creating a puppet show using toilet paper rolls is a fantastic way to entertain your kids while also promoting their creativity and imagination. Have fun and enjoy the show!
14 Fun Things to Do in Eagle River, Wisconsin
You may want to see also
![]()
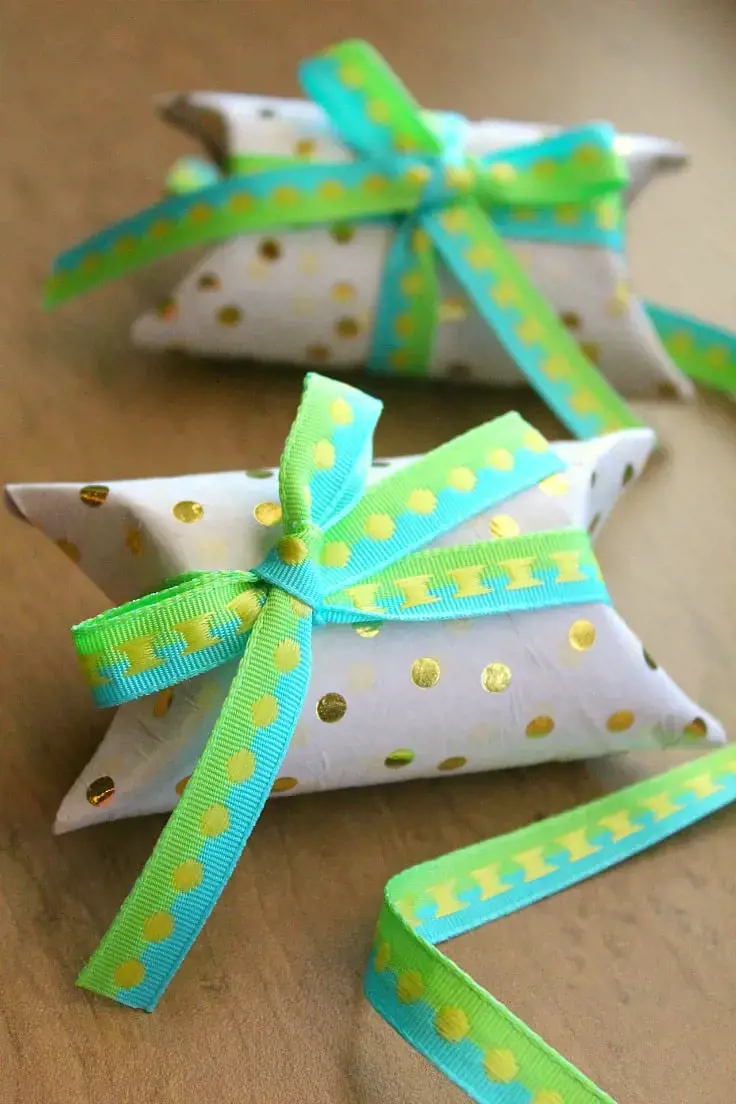
Gift boxes
Are you tired of throwing away toilet paper rolls every time you finish a roll? Why not repurpose them into adorable and functional gift boxes? In this article, we'll show you how to turn those empty rolls into a unique and eco-friendly gift-wrapping solution in just a few minutes.
Materials needed:
- Toilet paper rolls
- Scissors
- Ruler or measuring tape
- Wrapping paper or tissue paper
- Tape or glue
- Ribbon or twine
- Decorative embellishments (optional)
Instructions:
- Flatten the toilet paper roll by pressing it down with your hand.
- Use a ruler or measuring tape to mark sections of the roll that are equal in width. You can choose how long you want your box to be, but we recommend making it about 3-4 inches.
- Use scissors to cut along the marked sections, creating rectangular pieces of cardboard.
- Place your gift in the center of the cardboard and fold the sides up to form a box shape. Use tape or glue to secure the edges in place.
- Cover the box with wrapping paper or tissue paper, folding the ends over the edges and securing with tape or glue.
- Tie a piece of ribbon or twine around the middle of the box to create a bow or add a decorative element. You can also use stickers or other embellishments to decorate the box further.
- Repeat the process with as many toilet paper rolls as you need to make enough gift boxes for your presents.
Not only is this a cost-effective way to create unique gift boxes, but it's also environmentally friendly as it reduces waste. Plus, you can customize the boxes however you'd like to match the occasion or recipient.
Next time you finish a roll of toilet paper, don't throw it away! Repurpose it into a beautiful gift box and make your present even more special.
12 Fun Things To Do In Myrtle Beach During The Winter
You may want to see also
![]()
Bird feeder
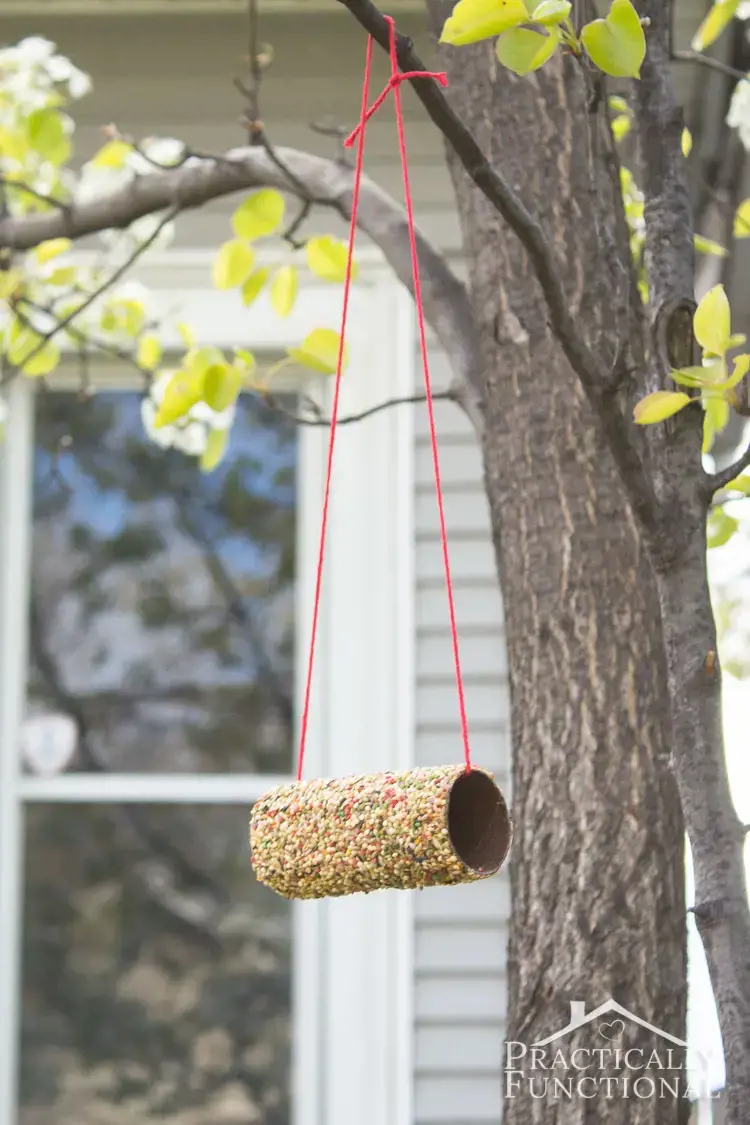
Toilet paper rolls are a great craft material, and there are countless things that you can do with them. From quirky organizers to beautiful home decor, you can make a lot of useful and creative things with the help of toilet paper rolls. If you're looking for a project to do in just five minutes, how about making a bird feeder? This fun and simple craft idea is perfect for anyone who loves birds and wants to give them a treat.
To make a bird feeder out of a toilet paper roll, you'll need some basic supplies such as the following:
- A toilet paper roll
- Peanut butter
- Birdseed
- String or ribbon
First, coat the exterior of the toilet paper roll with peanut butter. This will serve as a glue for the birdseed, as well as provide a protein-rich snack for the birds. Then, roll the toilet paper roll in birdseed until it's coated all over. You can use any type of birdseed, but black oil sunflower seeds are a favorite of most birds.
Next, make a hole in one end of the toilet paper roll using a sharp object. Thread a piece of string or ribbon through the hole, and tie a knot at the end. This will allow you to hang the bird feeder on a tree branch or a hook outside.
Finally, hang the bird feeder outside and wait for the birds to come! You might want to clean up any spilled birdseed underneath the feeder, as this can attract unwanted pests. To refill the bird feeder, simply peel off the old toilet paper roll and replace it with a new one.
Making a bird feeder out of a toilet paper roll is a great way to attract birds to your garden or outdoor space, while also repurposing an everyday item that might otherwise end up in the trash. It's fun, easy, and a perfect project for anyone who loves nature and crafting.
12 Creative Ways to Celebrate Mother's Day in Tampa
You may want to see also
![]()
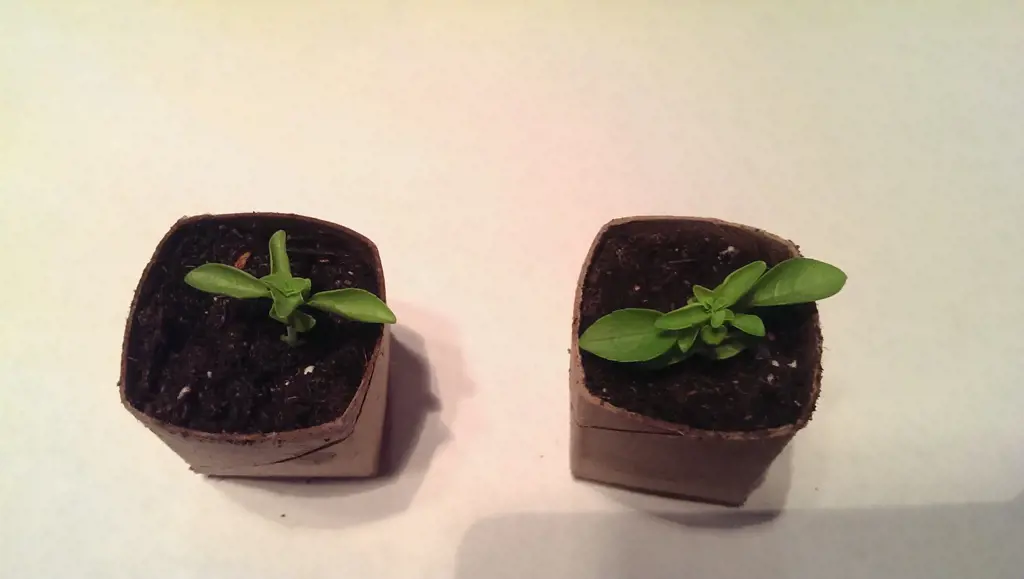
Seed-starting pots
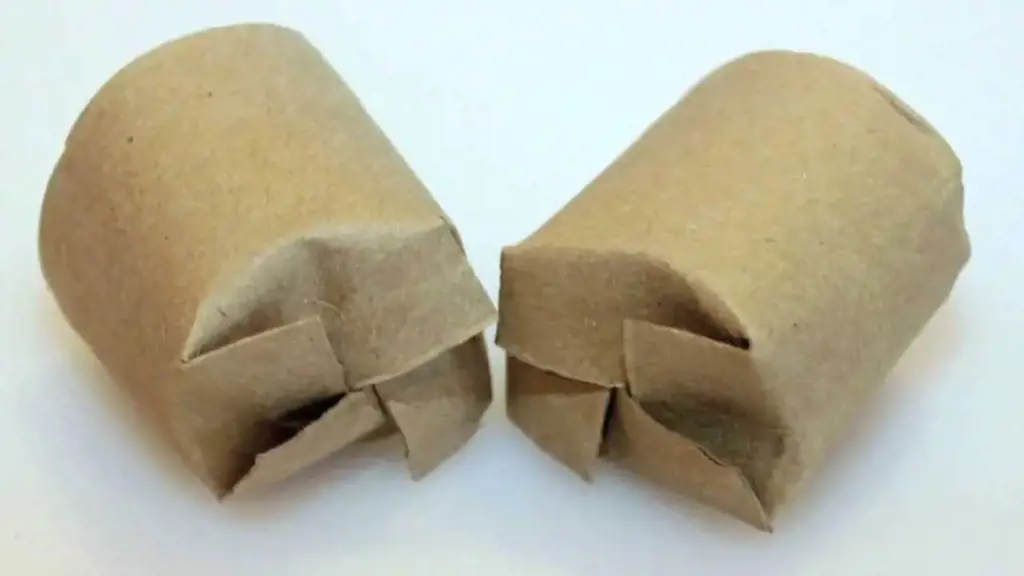
Toilet paper rolls are not just an essential household item, they can also be reused and repurposed into a variety of craft projects. One creative use for toilet paper rolls is to turn them into seed-starting pots.
This project is simple and perfect for those who want to start their own garden but don't want to spend too much money on pots. Moreover, using toilet paper rolls is an eco-friendly way to grow seeds, as they can be composted once the plants are transplanted.
Here's a quick tutorial on how to create seed-starting pots with toilet paper rolls:
Materials:
- Toilet paper rolls
- Scissors
- Soil
- Seeds
- Small tray or container
Instructions:
- Cut the toilet paper rolls into approximately 2 to 3-inch pieces.
- Make four equally spaced cuts around one end of the roll, about 1 inch in length.
- Fold the cut sections inward, creating a base for the pot.
- Fill the pot with soil, making sure it is firmly packed.
- Place one or two seeds in the soil and gently pat them down.
- Water the soil and place the pot in a small tray or container.
- Keep the soil moist and place the tray in a warm, well-lit area for the seeds to germinate.
Once the seeds have sprouted and the plants have grown a few inches tall, it's time to transplant them into a larger pot or directly into the soil. To do this, simply plant the whole toilet paper roll directly into the ground or a larger pot, and let the plant grow. The paper roll will biodegrade over time, providing nutrients for the plant.
In conclusion, repurposing toilet paper rolls into seed-starting pots is a fun and eco-friendly way to start your own garden. With just a few supplies and a little bit of creativity, you can turn something as simple as a toilet paper roll into a useful and practical gardening tool. Give it a try and watch your seeds grow!
10 Unusual Adventures to Experience in Death Valley
You may want to see also
![]()
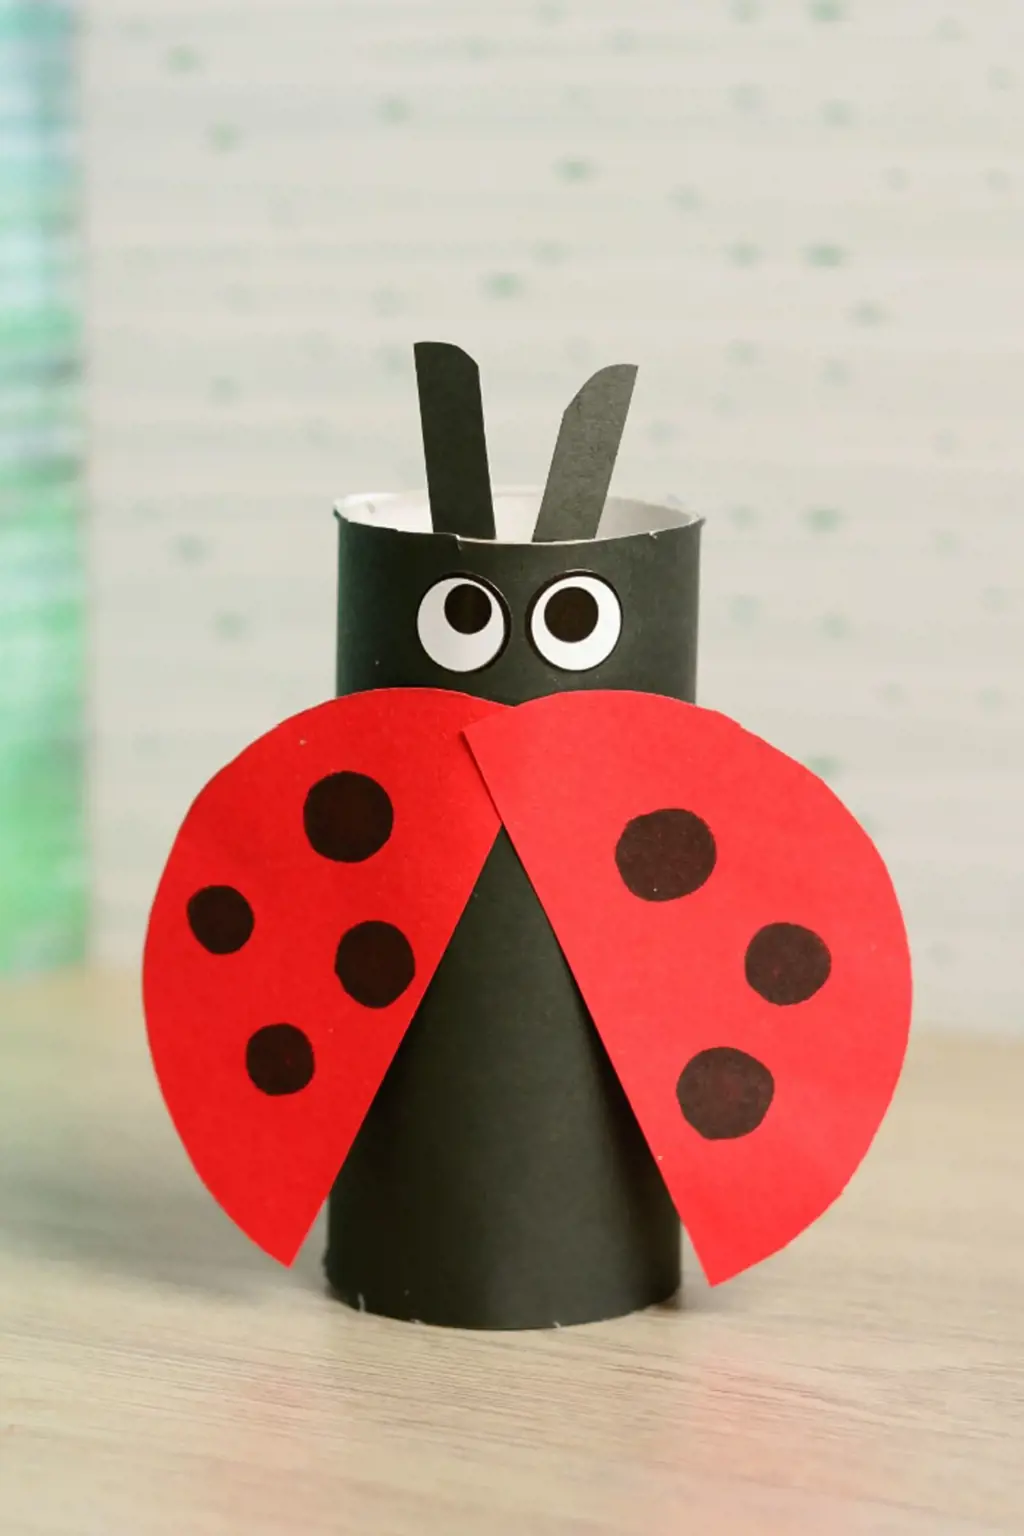
Wall decorations
If you're looking for a quick and easy way to add a bit of personality to your walls, toilet paper rolls can be a great and budget-friendly solution. Don't throw them out! Rather, put them to use with these fun and creative wall decorations.
- Flower wall art: Make some cute flowers by cutting the toilet paper roll into spiral shapes and forming the petals. You can paint them to add a pop of color and adhere them to your walls with adhesive putty.
- Picture frames: Cut the toilet paper roll so that it's as long as your picture's longest side, then fold it in half so the two ends meet and glue on your favorite picture. You can use colorful paper to wrap around the roll or leave them as is.
- Woven wall hangings: Cut toilet paper rolls into skinny, quarter-inch sections. Paint them various colors to add a unique layered effect. Cut six pieces of string, and tie each end to a small dowel. Weave and attach the painted rolls onto the strings to create a woven art piece.
- Wall organizers: Cut the toilet paper rolls lengthwise and fold them in half several times until the top layers of cardboard form a small pocket. Use double sided-tape to stick the rolls on your wall. Now you can organize important papers, mail, and even pencils and scissors.
- Decorative mirrors: Cut toilet paper rolls into thin sections and glue them around the edge of a mirror with hot glue. You can cut them at different lengths and paint them different colors for a more whimsical look.
Try these simple and creative 5-minute crafts that will elevate your home's style using everyday toilet paper rolls. With their low cost and eco-friendliness, you can experiment and create multiple variations of wall decorations for a fun and personalized look.
13 Fun Things to Do in North Adams MA
You may want to see also
![]()
Cord organizer

Toilet paper rolls are often overlooked as useless trash, but they can actually be repurposed for a variety of creative projects. One useful application for toilet paper rolls is to create a cord organizer. In just a few minutes, you can transform your cluttered cords into an organized and tidy bundle.
To create the cord organizer, you will need a few supplies. Gather up some toilet paper rolls, scissors, and some patterned duct tape. Choose duct tape that matches your decor or personality to add your own personal touch.
First, cut the toilet paper rolls into small sections, each about 1-2 inches long. You can adjust the size as needed depending on your cords. Be sure to cut the rolls as straight as possible to ensure they stand on their own.
Next, wrap the toilet paper rolls in the patterned duct tape. Use enough tape to cover the entire roll and secure it in place. You can choose to use the same pattern for each roll or mix and match different designs to create a fun and eclectic look.
Once your rolls are wrapped in tape, you can start organizing your cords. Simply gather up your cords and place each one inside a roll. Label each roll with the corresponding device or cord to make it easy to find what you need.
With this simple project, you can transform messy cords into a neat and organized bundle. Plus, the colorful patterns on the duct tape add a fun touch of personality to any space. Give it a try and see how much easier it is to manage your cords!
10 Fun Things to Do in Port Orange, Florida
You may want to see also
![]()
Mini bookshelf
Are you tired of throwing away empty toilet paper rolls? Well, here's a crafty solution for you - a mini bookshelf made from toilet paper rolls! This simple and easy-to-make project is a great way to recycle old toilet paper rolls and create a cute and functional piece of decor for your home.
To make a mini bookshelf, you'll need the following materials:
- Empty toilet paper rolls
- Scissors
- Glue or double-sided tape
- Ruler or measuring tape
- Paint or wrapping paper (optional)
Here's how to make a mini bookshelf in just a few steps:
Step 1: Cut your empty toilet paper rolls to the desired height of your bookshelf.
Step 2: Measure the width of your bookshelf by placing the cut rolls side by side. Make sure to leave a little bit of space between each roll, so you can easily slide in your books.
Step 3: Once you know the width of your bookshelf, use scissors to make equal-sized slits on the top and bottom of each roll. The slits should be the same width as the width of the toilet paper roll.
Step 4: Carefully slide the rolls together to create your bookshelf. Use glue or double-sided tape to secure each roll in place.
Step 5 (optional): If you want to add some color or pattern to your bookshelf, you can paint or wrap each roll with your favorite wrapping paper. This will give your bookshelf a unique and personalized look.
And there you have it - a mini bookshelf made entirely out of recycled toilet paper rolls! This craft is not only eco-friendly, but it's also a fun and creative project to do with your family or friends. Plus, it's a great way to add some organization to your book collection. You can use this mini bookshelf to store your favorite books, small plants, or other decorative items. So start saving up those empty toilet paper rolls and get crafting!
12 Fun Things to Do in Union City, TN
You may want to see also
![]()
Hanging ornaments
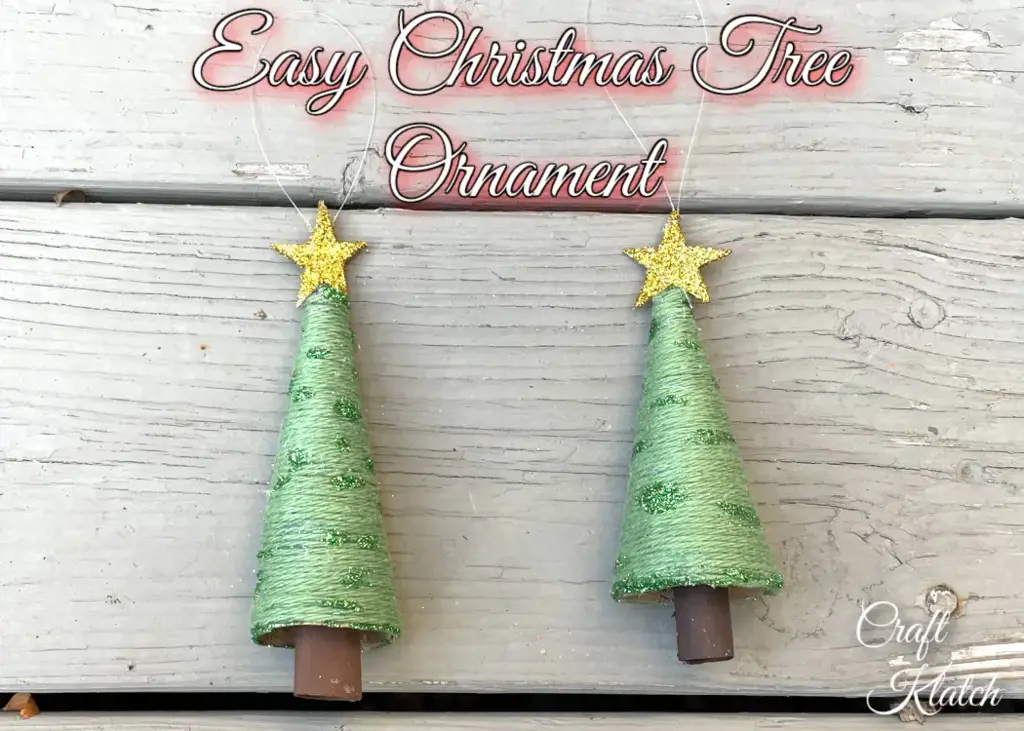
Are you looking for a quick and easy way to create fun and festive hanging ornaments? Look no further than your trusty toilet paper rolls! With just a few simple materials and five minutes, you can embellish these rolls to create beautiful and eye-catching ornaments that will add a touch of charm to any room.
To get started, gather your materials. You will need toilet paper rolls (as many as you want to make ornaments), paint (in any colors you prefer), a paintbrush, ribbon or string, and any additional decorations that you desire - such as glitter, stickers, or small beads.
Begin by flattening the toilet paper roll and then cutting it into sections that are approximately 1 inch in length. You can make several ornaments from one roll, depending on how many sections you cut. Then, begin painting the sections with your chosen colors. You can use one color for each section, or create a fun pattern by alternating colors or painting stripes.
Once the paint has dried, it is time to add any decorations that you desire. You can paint on additional details or glue on glitter or stickers. You could even use a hot glue gun to attach small beads or pom poms for added texture and dimension.
Finally, it's time to add the ribbon or string that will be used to hang your ornaments. Cut a length of ribbon or string that is approximately eight inches long. Tie one end securely around the ornament, making a loop at the other end that will be used to hang it. Repeat until all of your ornaments are complete!
These toilet paper roll ornaments make a fun and unique decoration for any occasion. Hang them on a Christmas tree, string them up in your bedroom, or use them to decorate a party or special event. The possibilities are endless! Try making these simple yet charming ornaments the next time you're looking for a quick and easy craft project.
13 Fun Things to Do in Lewistown, PA
You may want to see also
Frequently asked questions
There are many 5-minute craft ideas for using empty toilet paper rolls including making a bird feeder, creating a pen holder, making card holders, making cute Christmas ornaments, creating a unique wall art piece, or even using them as fire starters.
To make a toilet paper roll organizer, simply collect a few empty rolls and glue them together to create a box shape. Decorate the outside as you wish and use it to store pens, pencils, or other small items.
Yes! To make a DIY napkin holder out of toilet paper rolls, simply cover them in decorative paper or paint, and then glue or tape them together to create a cylindrical shape. Finally, insert napkins into the holder and it's ready to go!
Other creative uses for toilet paper rolls include making a cute advent calendar, creating DIY gift boxes, making beautiful floral wall decor or even using them for garden seedlings. The possibilities are endless!


3 Comments
Sapphire Steele
Matteo Giordani
AuthorOrlando Escobar