Planning and organizing for a trip can be a daunting task, with a never-ending list of things to remember and pack. But fear not, because Google Docs is here to save the day! In this complete guide, we will show you how to use Google Docs as a packing planner to stay organized, efficient, and stress-free while preparing for your next adventure. Say goodbye to the chaos of last-minute packing and hello to a seamless and well-prepared travel experience. So grab your suitcase and let's dive into the world of Google Docs as your ultimate packing companion!
| Characteristics | Values |
|---|---|
| Name | What To Pack Planner Google Docs |
| Function | Planning and organizing what to pack for various occasions |
| Platform | Google Docs |
| Accessibility | Requires internet connection |
| Collaboration | Multiple users can edit and view the planner simultaneously |
| Templates available | Yes, pre-designed templates are available for different types of packing lists |
| Customization options | Users can customize the planner according to their needs |
| Sharing options | Users can share the planner with others and collaborate in real-time |
| Offline availability | The planner can be accessed offline if downloaded or saved as a local file |
| Sync across devices | Changes made on one device are automatically synced and reflected on other devices |
| Cost | Free to use with a Google account |
| Integration with other tools | Can be integrated with other Google apps like Google Calendar and Google Sheets for seamless planning |
| Storage capacity | Depends on the user's Google Drive storage |
| Security | Data is stored on Google servers with Google's security measures |
| Mobile app | Google Docs app is available for mobile devices for on-the-go access to the planner |
| Updates | Regular updates and bug fixes by Google |
What You'll Learn
- Can I use Google Docs to create a packing planner for my upcoming trip?
- How can I use Google Docs to customize my packing planner?
- Are there any templates available for creating a packing planner in Google Docs?
- Can I collaborate with others on my packing planner in Google Docs?
- Is it possible to access my packing planner in Google Docs offline?
![]()
Can I use Google Docs to create a packing planner for my upcoming trip?
Traveling can be an exciting experience, but one of the most daunting tasks is packing for the trip. It is essential to be organized and efficient when it comes to packing, to ensure you have everything you need without overpacking. One useful tool that can assist you in creating a packing planner is Google Docs. This online word processing platform offers various features that make it convenient and accessible for creating and managing your packing list.
Scientifically speaking, being organized and making a packing list can reduce stress and increase efficiency when preparing for a trip. According to a study published in the Journal of Marketing Research, creating a list helps individuals remember items they need to pack and reduces the likelihood of forgetting essential items. By using Google Docs to create a packing planner, you can easily access and update your list from any device with internet access, ensuring nothing is left behind.
To create a packing planner using Google Docs, follow these step-by-step instructions:
Step 1: Open Google Docs
Go to the Google Docs website (docs.google.com) and sign in to your Google account. If you don't have an account, you can create one for free.
Step 2: Create a new document
Click on the "New" button, then select "Google Docs" from the drop-down menu to create a new document.
Step 3: Set up your packing planner layout
Start by giving your document a title, such as "Packing Planner for [Destination and Date]." Then, create sections for different categories, such as clothing, toiletries, documents, electronics, etc. You can use headings, bullet points, or tables to organize your list effectively.
Step 4: Add items to your packing list
Under each category, add the items you need to pack. You can simply type them out or create checkboxes to mark off items as you pack them. You can also include notes or reminders next to each item.
Step 5: Customize and format your packing planner
Google Docs offers various formatting options to make your packing planner visually appealing and easy to read. You can change fonts and colors, adjust spacing, and add images or icons to enhance the visual aspect of your checklist.
Step 6: Share and collaborate (optional)
If you are traveling with others or want to share your packing planner for feedback or suggestions, you can easily share the document with others by clicking on the "Share" button and entering their email addresses. Collaborators can view, edit, or comment on the packing list, making it a collaborative and efficient process.
Example:
Here is an example of how your packing planner on Google Docs could look like:
Packing Planner for Europe Trip
Category: Clothing
- Shirts
- Pants
- Jacket
- Underwear
- Socks
Category: Toiletries
- Toothbrush
- Toothpaste
- Shampoo
- Conditioner
- Soap
Category: Electronics
- Phone
- Charger
- Power bank
- Camera
- Adapter
By creating a packing planner using Google Docs, you can easily stay organized and ensure a stress-free packing experience. The convenience of accessing your list from any device and the ability to collaborate make Google Docs an excellent tool for planning your upcoming trip. Happy packing!
Essential Items to Include in a Go Bag for Fire Evacuation
You may want to see also
![]()
How can I use Google Docs to customize my packing planner?
Packing for a trip can be a stressful and time-consuming task. However, with the help of Google Docs, you can easily customize and streamline your packing planner to ensure that nothing is forgotten. Here's how you can use Google Docs to create a personalized packing planner.
Step 1: Start by opening Google Docs and creating a new document. Give your document a name, such as "Packing Planner."
Step 2: Decide on the different categories you want to include in your packing planner. Some common categories include clothing, toiletries, electronics, documents, and miscellaneous items. You can also create subcategories within each category, such as tops, bottoms, and accessories within the clothing category.
Step 3: Create a table in Google Docs to organize your packing list. You can do this by clicking on "Table" in the toolbar and selecting the number of rows and columns you want. Each row can represent an item, and each column can represent a category or subcategory.
Step 4: Fill in the table with the items you need to pack. Start by listing the essentials and then add any additional items that are specific to your trip. You can also include a checkbox next to each item to mark it as packed once it's been added to your luggage.
Step 5: Customize your packing planner by adding additional information or formatting. For example, you can add a column for quantity or notes if needed. You can also change the font size or color to make your packing list more visually appealing.
Step 6: Share your packing planner with others if you're traveling with a group. You can do this by clicking on the "Share" button in the top right corner of the Google Docs interface and entering the email addresses of the people you want to share it with. This allows everyone to collaborate on the packing list and make updates as needed.
Step 7: Print out your packing planner or save it as a PDF to easily reference it while packing. You can do this by clicking on "File" in the toolbar and selecting "Print" or "Download" to save it as a PDF file.
Example:
Let's say you're packing for a beach vacation. Your packing planner might look something like this:
Clothing:
- Tops (5)
- Bottoms (4)
- Swimsuits (2)
- Cover-ups (2)
- Hats (1)
- Sunglasses (1)
- Sandals (2)
Toiletries:
- Shampoo
- Conditioner
- Body wash
- Toothbrush
- Toothpaste
- Sunscreen
- Moisturizer
- Razor
- Deodorant
Electronics:
- Phone
- Charger
- Camera
- Batteries
- Portable speaker
Documents:
- Passport
- Driver's license
- Credit cards
- Travel insurance
Miscellaneous:
- Beach towel
- Snorkel gear
- Book
- Portable umbrella
By using Google Docs to customize your packing planner, you can ensure that you're well-prepared for your trip without forgetting any essentials. The flexibility and collaborative features of Google Docs make it a convenient tool for creating and organizing your packing list. Give it a try before your next trip and see how it simplifies the packing process.
Essentials to Pack for a Comfortable Airplane Journey
You may want to see also
![]()
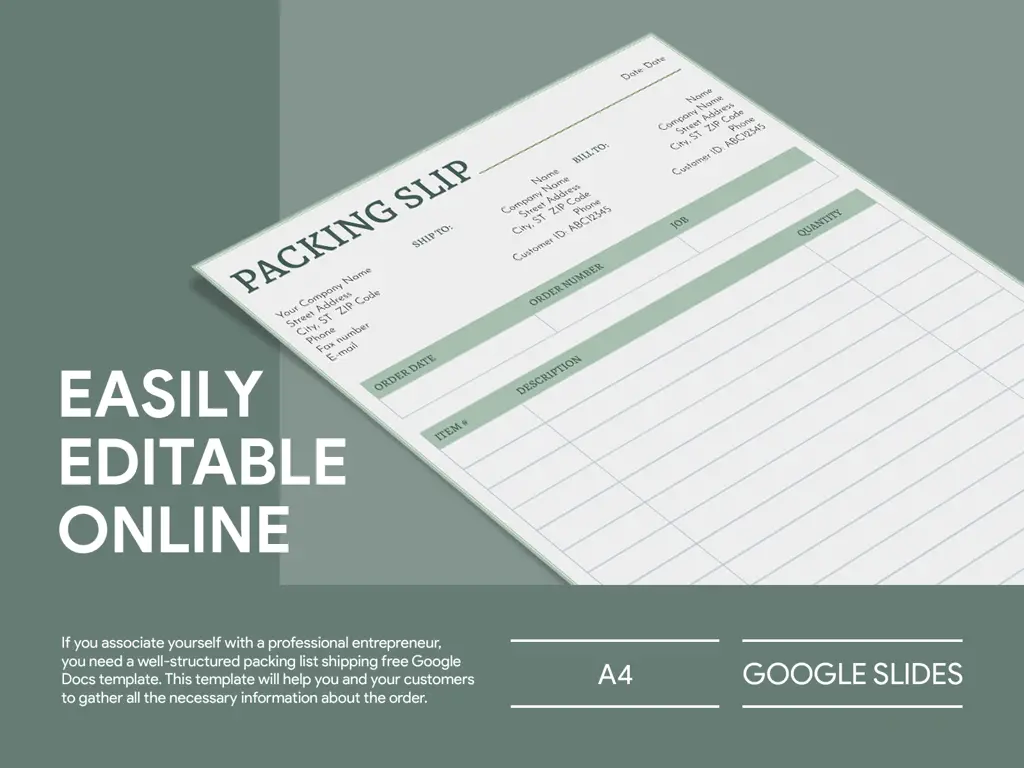
Are there any templates available for creating a packing planner in Google Docs?
Creating a packing planner before travelling can save you a lot of time and stress. By having a well-organized list of all the items you need to pack, you can ensure that you don't forget anything important and make the most out of your trip. Luckily, Google Docs provides several templates that you can use to create a packing planner easily and efficiently.
Here's how you can create a packing planner using a template in Google Docs:
Step 1: Sign in to your Google account and open Google Docs.
Step 2: Click on the "Template Gallery" button located at the top right corner of the page. This will open a new tab with a wide range of templates for different purposes.
Step 3: In the search bar at the top of the page, type "Packing Planner" and hit enter. This will filter the templates specifically related to packing planning.
Step 4: Browse through the available templates and select the one that suits your needs. Google Docs provides various packing planner templates with different layouts and designs, so choose the one that you find most visually appealing and user-friendly.
Step 5: Click on the template to open it in Google Docs. You can now edit the template according to your requirements. For example, you can add or remove sections, rename categories, and customize the checklist items.
Step 6: Start adding items to your packing planner by categorizing them. Common categories include clothing, electronics, toiletries, documents, and accessories. The template may already have some pre-defined categories that you can modify as needed.
Step 7: Once you have listed down all the items you need to pack, you can further organize them within each category. For example, under the clothing category, you can list items like shirts, pants, socks, and so on.
Step 8: To make your packing planner more comprehensive, you can also add a column for the quantity of each item required. This will help you keep track of how many items you need, especially if you are packing for multiple people.
Step 9: As you start packing your items, you can check them off in your planner. Google Docs allows you to mark the checklist items as completed, which will help you visually track your progress.
Step 10: You can also add additional notes or reminders in the template to ensure that nothing is overlooked. For example, you can jot down specific instructions for delicate items or highlight important documents and their locations.
By using a packing planner template in Google Docs, you can streamline your packing process and ensure that you have everything you need for your trip. It not only saves you time and effort but also minimizes the chances of forgetting essential items. Furthermore, since Google Docs is a cloud-based platform, you can access your packing planner from anywhere, making it convenient for last-minute changes or additions.
In conclusion, Google Docs offers a variety of templates that can be used to create a packing planner. By following the steps above, you can utilize these templates to create a personalized planner that will help you stay organized and stress-free during your travels. So why not take advantage of this convenient tool and start planning your next trip with ease and efficiency?
Essential Cartoonish Items to Pack for a Memorable Trip to Scotland
You may want to see also
![]()
Can I collaborate with others on my packing planner in Google Docs?
Yes, you can collaborate with others on your packing planner in Google Docs. Google Docs is a powerful online tool that allows multiple users to work together on the same document in real-time. This makes it an ideal platform for collaborating on tasks such as creating a packing planner.
To get started, you will need to create a Google Docs document to serve as your packing planner. Once you have created the document, you can invite others to collaborate by sharing the document with them. To do this, click on the "Share" button in the top-right corner of the screen.
In the "Share with others" window that appears, you can enter the email addresses of the people you want to collaborate with. You can also choose whether you want them to have editing, commenting, or viewing access to the document. Editing access allows them to make changes to the document, commenting access allows them to leave comments, and viewing access allows them to only view the document without making any changes.
After you have selected the appropriate access levels for your collaborators, click on the "Send" button to invite them to collaborate on your packing planner. They will receive an email invitation with a link to the document.
Once your collaborators have accepted the invitation and opened the document, you can all work on the packing planner at the same time. Any changes made by one person will be immediately visible to others, allowing for seamless collaboration. You can see the edits and comments made by your collaborators by clicking on the "Comments" button in the top-right corner of the screen.
Not only can you collaborate in real-time on your packing planner, but you can also communicate with your collaborators using the built-in chat feature in Google Docs. The chat feature allows you to have discussions, ask questions, and provide feedback without leaving the document.
Another useful feature of Google Docs is the ability to track changes made by different collaborators. This allows you to see who made which changes and when, making it easier to keep track of the progress of your packing planner.
In summary, Google Docs provides a convenient and efficient platform for collaborating with others on your packing planner. With its real-time editing, commenting, and chat features, you can easily work together with your collaborators to create a comprehensive and well-organized packing planner.
Essential Packing Tips for Exploring Patagonia in South America
You may want to see also
![]()
Is it possible to access my packing planner in Google Docs offline?
In today's digital age, many people rely on various online tools to assist with their daily tasks, including planning for trips and vacations. Google Docs is a popular platform that offers a range of features to help users organize their documents and collaborate with others. However, one common concern among users is whether it is possible to access their packing planner in Google Docs offline.
The good news is that Google Docs does provide an option for offline access, allowing users to view, edit, and create documents even without an internet connection. This can be particularly helpful when planning for a trip, as it allows users to access their packing planner even when they are not connected to the internet.
To enable offline access for Google Docs, users need to follow a few simple steps:
- Install the Google Docs offline extension: Before users can access their packing planner offline, they need to ensure that they have the Google Docs offline extension installed on their device. This extension is available for free on the Chrome Web Store and can be easily downloaded and installed.
- Activate offline access: Once the extension is installed, users can activate offline access by following these steps:
- Open Google Docs in their web browser.
- Click on the gear icon in the top-right corner of the screen to open the Settings menu.
- Select "Settings" from the drop-down menu.
- In the Settings menu, navigate to the "Offline" tab.
- Enable offline access by clicking on the toggle switch next to "Offline" under the "Offline Docs" section.
Sync documents for offline use: After enabling offline access, users can choose which documents they want to sync for offline use. To do this, they need to:
- Open the Google Docs document they want to access offline.
- Click on the "More" option in the top-right corner of the screen.
- From the drop-down menu, select "Available offline."
This will download a copy of the document to the user's device, allowing them to access it even without an internet connection.
With offline access enabled, users can now access their packing planner in Google Docs even when they are offline. They can view, edit, and create new documents, making it convenient to make last-minute changes or additions to their packing list.
For example, imagine a traveler who is planning a backpacking trip through Europe. They have created a detailed packing planner in Google Docs but are concerned about not having internet access during their travels. By enabling offline access and syncing the packing planner document, they can easily access and update their packing list wherever they are, ensuring they have everything they need for their journey.
In conclusion, it is indeed possible to access your packing planner in Google Docs offline. By installing the necessary extension and enabling offline access, users can sync their documents and have them readily available even without an internet connection. This feature provides convenience and peace of mind for travelers who rely on digital tools to plan and organize their trips. Whether it's for a weekend getaway or an extended vacation, having offline access to your packing planner in Google Docs can be a game-changer.
Essential Items to Pack for a Flight Attendant: Your Ultimate Checklist
You may want to see also
Frequently asked questions
To use Google Docs for packing planning, start by creating a new document and title it "Packing Planner". From there, you can create different sections or headings to organize your packing list, such as "Clothing", "Toiletries", and "Miscellaneous". Under each section, create a bulleted list of items you need to pack. You can also add checkboxes next to each item to mark them as packed. This way, you can easily keep track of what you need to bring and what has already been packed.
Yes, one of the great features of Google Docs is that you can access your documents from multiple devices as long as you have internet access. This means that you can create and update your packing planner on your computer, and then access it on your phone or tablet while you're on the go. This makes it convenient to add or modify items on your packing list as you think of them, no matter where you are.
Absolutely! Google Docs allows you to easily share your packing planner with others. To share your document, click on the "Share" button in the top right corner. This will bring up a window where you can enter the email addresses of the people you want to share with. You can choose whether to give them editing, commenting, or viewing access to your packing planner. This is especially useful if you're planning a trip with others and want to collaborate on the packing list together.