Fiber glass is a versatile material that can be found in a wide range of applications, from boats and cars to furniture and household items. However, one common issue that arises with fiber glass is the presence of unsightly screw holes. If you've ever struggled with filling and hiding these holes, then this guide is for you. In this article, we will walk you through the step-by-step process of properly packing screw holes in fiber glass, ensuring a seamless and professional finish. So whether you're a DIY enthusiast or a professional looking to perfect your craft, read on to learn the techniques and tips for effectively concealing screw holes in fiber glass.
| Characteristics | Values |
|---|---|
| Material | Fiber glass |
| Screw hole size | Varies depending on screw size |
| Screw hole shape | Typically round or oval |
| Screw hole depth | Varies depending on application |
| Screw hole location | Determined by application |
| Screw hole spacing | Determined by application |
| Screw hole reinforcement | Optional, depending on strength needed |
| Method to pack screw holes | Epoxy, polyester resin, putty, plastic filler |
| Drying/curing time | Varies depending on material used |
| Sanding and finishing | May be necessary after filling |
| Paint or sealant application | Optional, depending on desired finish |
| Weight capacity of filled hole | Strong and durable with proper filling and reinforcement |
What You'll Learn
- What materials can be used to fill screw holes in fiberglass?
- Are there specific steps or techniques for filling screw holes in fiberglass?
- How long does it typically take for the filler to dry or cure?
- Can the filled screw holes be sanded and painted over?
- Are there any specific products or brands that are recommended for filling screw holes in fiberglass?
![]()
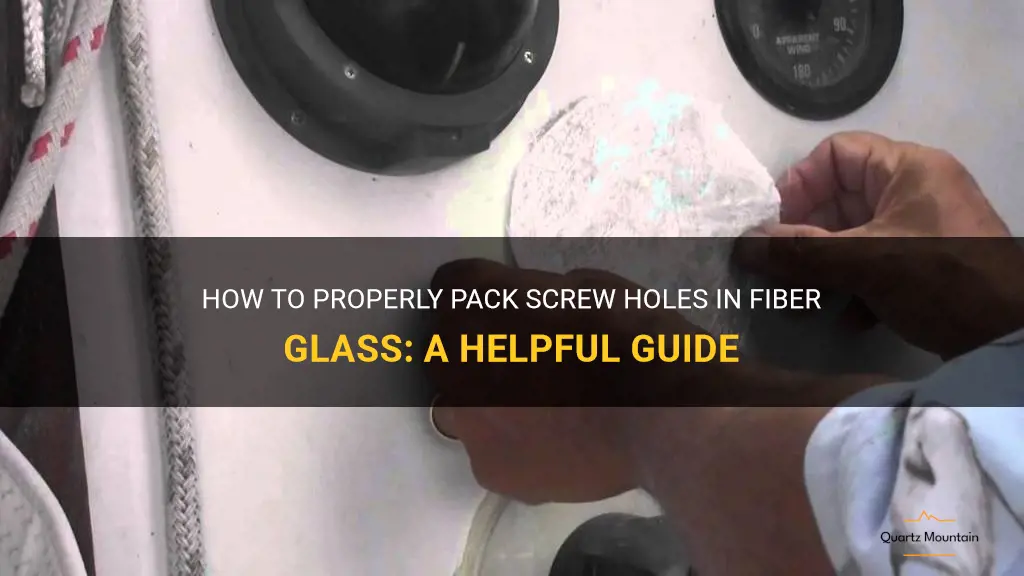
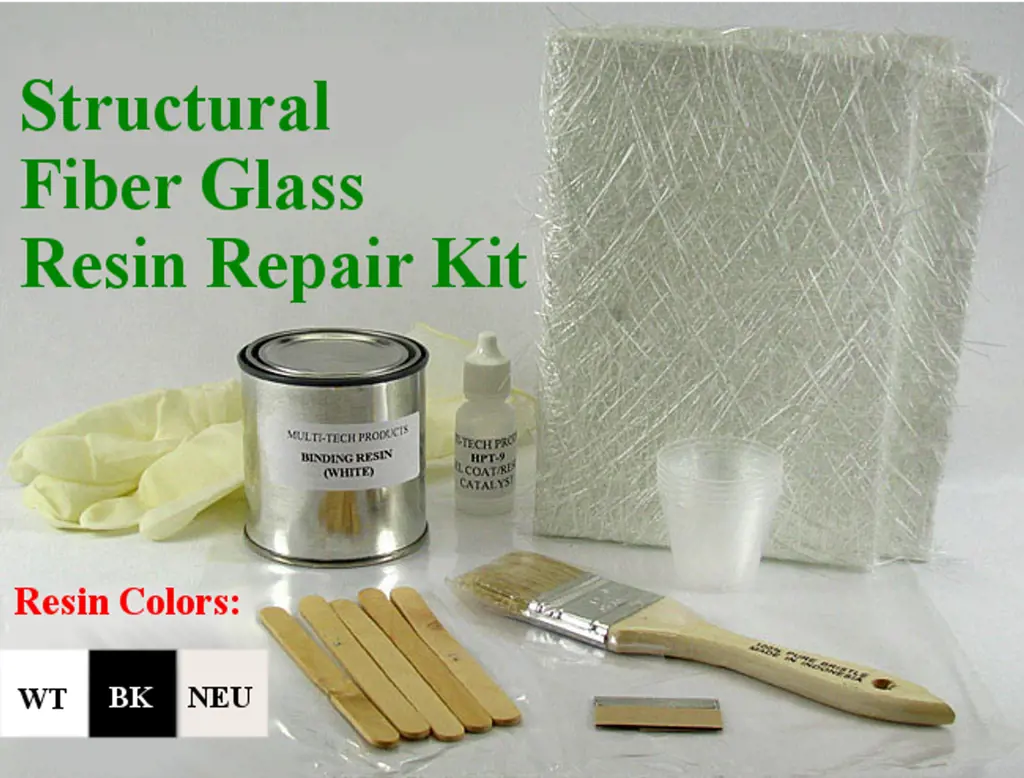
What materials can be used to fill screw holes in fiberglass?
When working with fiberglass, it is common to have to deal with screw holes. Whether you are repairing a fiberglass structure or working on a DIY project, you may need to fill these holes. Fortunately, there are several materials that can be used to effectively fill screw holes in fiberglass.
One of the most popular and commonly used materials for filling screw holes in fiberglass is epoxy resin. Epoxy resin is a two-part compound that, when mixed together, creates a strong and durable adhesive. It adheres well to fiberglass, and its thick consistency allows it to fill in the hole completely. Additionally, epoxy resin can be sanded down once it has cured to create a smooth finish.
Another material that can be used to fill screw holes in fiberglass is polyester resin. Polyester resin is similar to epoxy resin but is typically less expensive and more readily available. It also adheres well to fiberglass and can be sanded down for a smooth finish. However, it is important to note that polyester resin may not be as strong or durable as epoxy resin.
For smaller screw holes, a common material used is a fiberglass filler or putty. These fillers are specially formulated to bond with fiberglass and harden into a durable finish. They are typically available in tubs or tubes and can be easily applied with a putty knife or spatula. Fiberglass fillers are a popular choice for filling screw holes because they are easy to use and require minimal preparation.
In addition to these materials, there are a few other options that can be used to fill screw holes in fiberglass. Automotive body fillers, such as Bondo, can be used if the screw hole is relatively small. These fillers are typically made with polyester resin and fiberglass strands and are designed to be used on automotive surfaces. They can be easily applied and sanded down for a smooth finish.
Alternatively, marine epoxy putty can be used to fill screw holes in fiberglass. This putty is specifically formulated for marine applications and is designed to adhere well to fiberglass and other materials commonly found on boats. It can be molded and shaped to fit the hole, making it a convenient option for irregularly shaped screw holes.
Whichever material you choose to fill screw holes in fiberglass, it is important to properly prepare the surface before applying the filler. Make sure the area surrounding the screw hole is clean and free from any debris or loose fiberglass. If necessary, roughen the surface of the hole to ensure better adhesion of the filler.
In conclusion, there are several materials available for filling screw holes in fiberglass. Epoxy resin, polyester resin, fiberglass fillers, automotive body fillers, and marine epoxy putty are all viable options. It is important to choose a material that is compatible with the fiberglass and meets your specific needs. Proper preparation of the surface is also essential for a successful repair. With the right materials and techniques, you can effectively fill screw holes in fiberglass and restore the integrity of your project or structure.
Essential Items to Pack for Your Trip to Loreto, Mexico
You may want to see also
![]()
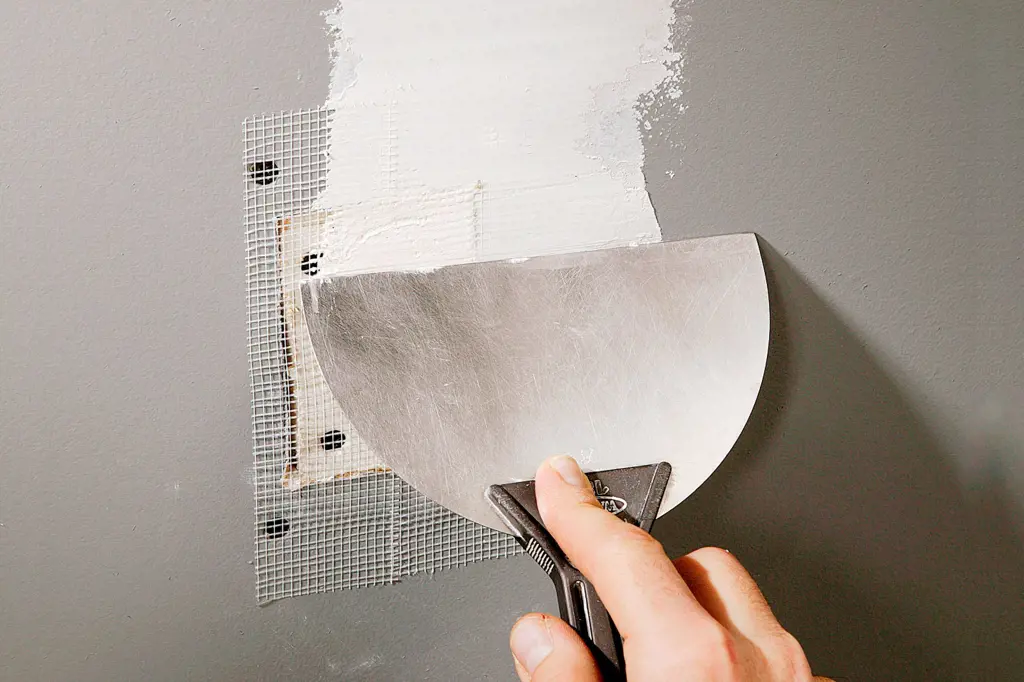
Are there specific steps or techniques for filling screw holes in fiberglass?
Fiberglass is a popular material due to its strength, durability, and lightweight properties. It is commonly used in the construction of boats, automotive parts, and even in household applications. However, when working with fiberglass, it is not uncommon to encounter screw holes that need to be filled. In this article, we will explore the specific steps and techniques for filling screw holes in fiberglass.
Step 1: Prepare the Surface
Before filling the screw holes, it is crucial to prepare the surface properly. Start by cleaning the area around the holes with a solvent to remove any dirt, dust, or debris. Next, lightly sand the surface around the holes using fine-grit sandpaper. This will create a rough surface for the filler to adhere to.
Step 2: Select the Filler
There are several types of fillers available for filling screw holes in fiberglass. The two most commonly used fillers are polyester resin and epoxy resin. Polyester resin is less expensive and dries faster, making it a popular choice for filling smaller holes. On the other hand, epoxy resin is more durable and has a better adhesion to fiberglass, making it suitable for larger or high-stress areas.
Step 3: Mix the Filler
If you are using polyester resin, mix it with the supplied catalyst according to the manufacturer's instructions. Stir it thoroughly until the catalyst is fully incorporated. For epoxy resin, follow the manufacturer's instructions for the correct mixing ratio and mix the two components together until they are well-blended.
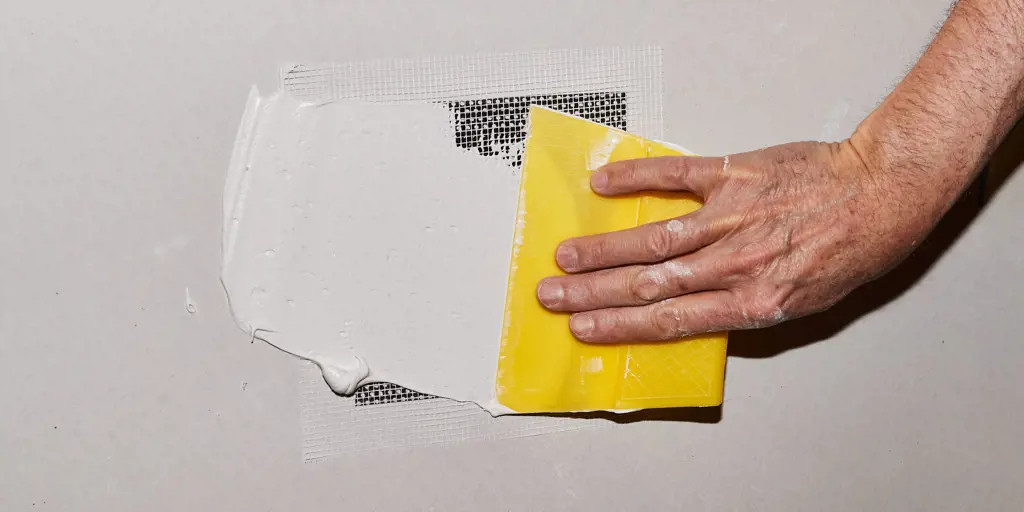
Step 4: Apply the Filler
Using a putty knife or a plastic spreader, apply the mixed filler to the screw holes. Make sure to fill the holes completely, but avoid overfilling as it will require more sanding to achieve a smooth finish. Smooth out the surface of the filler with the putty knife or spreader, ensuring it is level with the surrounding fiberglass.
Step 5: Allow the Filler to Cure
Once the filler is applied, allow it to cure according to the manufacturer's instructions. It is essential to follow the recommended curing time to ensure proper bonding and strength.
Step 6: Sand and Finish
After the filler has cured, use fine-grit sandpaper to sand down the filled holes until they are flush with the surrounding fiberglass. The goal is to create a smooth and seamless surface. Once the desired smoothness is achieved, the filled holes can be finished with a gel coat or paint to match the surrounding fiberglass.
Example:
Imagine you have a small fiberglass boat with multiple screw holes that need to be filled. Start by cleaning the areas around the screw holes with a solvent and sand them lightly. Then, mix polyester resin with the catalyst according to the manufacturer's instructions and apply it to the holes using a putty knife. Allow the filler to cure, and then sand it down until it is flush with the fiberglass. Finally, apply a gel coat or paint to finish the filled holes, giving your boat a professional, seamless appearance.
Essential Items to Pack for a Memorable Trip to Joshua Tree
You may want to see also
![]()
How long does it typically take for the filler to dry or cure?
When it comes to using fillers for various purposes such as repairing cracks or filling holes, one common question that arises is how long it takes for the filler to dry or cure. The drying or curing time of a filler largely depends on the type of filler used and the conditions in which it is applied.
Understanding the Types of Fillers:
There are different types of fillers available in the market, each with its own unique properties and drying or curing time. Some common types of fillers include:
- Spackling paste: Typically used for repairing small holes or cracks in drywall, spackling paste usually dries within 30 minutes to 1 hour.
- Wood filler: Used for repairing wood surfaces, the drying time for wood fillers can vary depending on the brand and formulation. On average, wood fillers can take anywhere from 2 to 6 hours to dry.
- Polyester filler: Polyester fillers, commonly used for automotive repairs, usually have a curing time of 20-30 minutes, depending on the temperature and humidity.
- Epoxy filler: Epoxy fillers, known for their durability and strength, have a longer curing time compared to other fillers. The curing time for epoxy fillers can range from several hours to several days.
Factors Affecting Drying or Curing Time:
Apart from the type of filler used, there are several factors that can affect the drying or curing time. These factors include:
- Temperature: Higher temperatures generally accelerate the drying or curing process, while lower temperatures can slow it down. It is important to check the recommended temperature range for the filler being used.
- Humidity: High humidity can prolong the drying or curing time, as moisture in the air can interfere with the process. In humid conditions, it is advisable to provide additional ventilation or use a dehumidifier to speed up the drying or curing.
- Thickness of the filler: Thicker layers of filler will take longer to dry or cure compared to thinner layers. It is essential to follow the manufacturer's guidelines regarding the maximum recommended thickness of the filler application.
Step-by-Step Process:
To ensure the proper drying or curing of the filler, it is important to follow these general steps:
- Prepare the surface: Clean the area to be filled, removing any loose debris or old filler.
- Apply the filler: Use a putty knife or appropriate tool to apply the filler evenly over the damaged area, following the manufacturer's instructions.
- Remove excess filler: Scrape off any excess filler using a putty knife or sandpaper, ensuring a smooth finish.
- Wait for drying or curing: Allow the filler to dry or cure according to the recommended time provided by the manufacturer. Avoid touching or applying any pressure on the surface during this time.
- Sand and finish: Once the filler is fully dry or cured, sand it down to achieve a smooth and even surface. Proceed to paint or finish the surface as desired.
Examples:
For example, if you are using a spackling paste to fill nail holes in a drywall, it may take around 30 minutes to 1 hour for the filler to dry. However, if you are using an epoxy filler to repair a crack in a concrete floor, it may take several hours or even a day for the filler to fully cure, especially if the temperature and humidity are not optimal.
In another scenario, if you are using a wood filler to repair a wooden table, the drying time can range from 2 to 6 hours, depending on the specific brand and conditions. It is always recommended to refer to the manufacturer's instructions for accurate drying or curing times.
In conclusion, the drying or curing time of a filler depends on the type of filler used, the environmental conditions, and the thickness of the application. It is essential to follow the manufacturer's recommendations and allow the filler to dry or cure completely before proceeding with any further steps. Patience and adherence to the proper drying or curing times will ensure a successful and long-lasting repair.
Essential Items to Pack for a Memorable Week in Japan
You may want to see also
![]()
Can the filled screw holes be sanded and painted over?
When it comes to DIY projects or simple home repairs, filling screw holes may be necessary. Whether you are repairing an old piece of furniture, fixing a damaged wall, or making improvements around the house, knowing how to fill and conceal screw holes properly is essential.
One common question that arises after filling screw holes is whether they can be sanded and painted over. The answer to this question depends on the material you are working with and the type of filler used. Let's explore the various scenarios and find out.
Wood Surfaces:
If you are working with a wooden surface, filling screw holes can often be done using wood filler or putty. Once the filler has dried, it can be sanded down to create a smooth and even surface. Start with a coarse sandpaper to remove any excess filler and blend it with the surrounding wood. Then, switch to a finer sandpaper to achieve a polished finish. Once the surface is smooth, it can be painted over with a matching wood stain or paint.
Drywall:
When it comes to filling screw holes in drywall, using spackle or joint compound is the go-to option. After applying the filler, it needs to be smoothed out using a putty knife. Once the filler is dry, sanding is required to achieve a seamless finish. Start with a fine-grit sandpaper and gradually work your way to finer grits until the surface is smooth. After sanding, the area can be primed and painted to match the existing wall.
Metal and Plastic:
Filling screw holes in metal or plastic surfaces requires slightly different techniques. For metal, a two-part epoxy or automotive body filler can be used. Once the filler has hardened, it can be sanded down using sandpaper or a metal file. For plastic surfaces, a plastic filler or epoxy putty can be applied, followed by sanding using fine-grit sandpaper. In both cases, the filled holes can then be painted over using the appropriate paint for the material.
It is important to note that proper preparation and priming of the filled screw holes are essential before painting over them. This ensures that the paint adheres properly and provides a uniform finish. Additionally, choosing the right type of filler and paint for the specific material is crucial for long-lasting results.
In conclusion, whether you are working with wood, drywall, metal, or plastic, filled screw holes can be sanded and painted over. However, it is important to follow the appropriate techniques and use the right materials for each surface. By doing so, you can achieve seamless repairs and a professional-looking finish. So, go ahead and tackle those unsightly screw holes with confidence!
Essential Items to Pack for a Memorable Trip to Cuba in February
You may want to see also
![]()
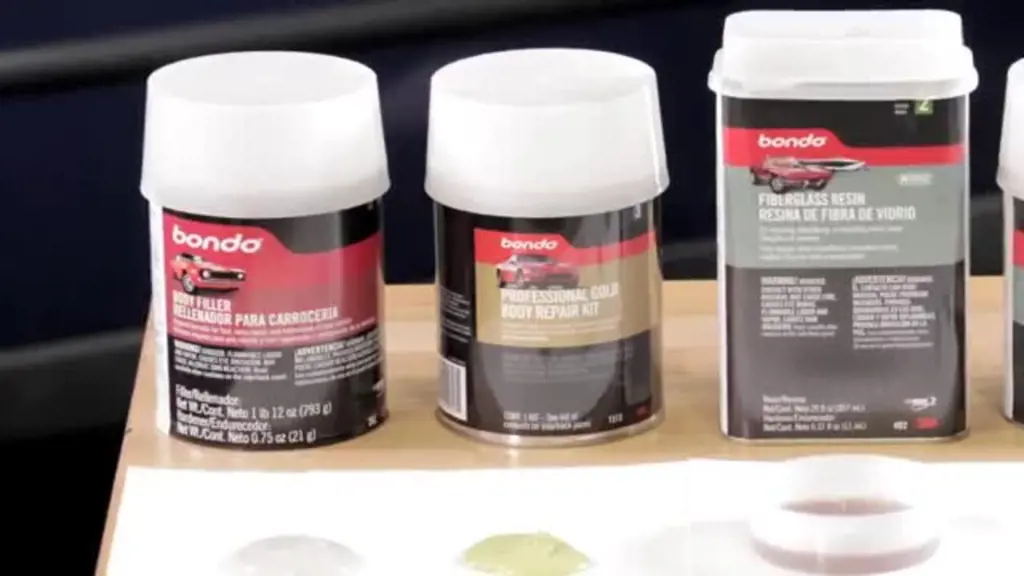
Are there any specific products or brands that are recommended for filling screw holes in fiberglass?
When it comes to filling screw holes in fiberglass, there are a few specific products and brands that are highly recommended. These products are designed specifically for repairing and filling holes in fiberglass, ensuring a strong and durable result. In this article, we will explore some of these recommended products and brands, as well as provide a step-by-step guide on how to use them effectively.
One popular product for filling screw holes in fiberglass is a marine-grade epoxy filler. Brands such as West System and MAS Epoxies offer excellent options for this type of repair. These epoxy fillers are designed to adhere well to fiberglass and provide a strong, waterproof seal. They can be easily mixed and applied to the screw hole using a putty knife or similar tool.
To begin the repair process, start by cleaning the screw hole and the surrounding area thoroughly. Use a mild detergent or soap to remove any dirt, grease, or debris from the surface. Once the area is clean, allow it to dry completely before proceeding with the repair.
Next, mix the epoxy filler according to the manufacturer's instructions. This usually involves combining a resin and a hardener in a specific ratio. Be sure to follow the instructions carefully to ensure the best results.
Once the epoxy filler is properly mixed, use a putty knife or similar tool to apply a thin layer of the filler to the screw hole. Press the filler firmly into the hole, ensuring that it completely covers the area. Remove any excess filler from the surface using the putty knife, taking care to create a smooth and even finish.
After applying the filler, allow it to cure according to the manufacturer's instructions. This typically involves allowing the epoxy to harden for a specific amount of time, usually overnight or longer. During this curing period, it is important to protect the repair area from moisture and other contaminants.
Once the epoxy filler has cured, sand the repaired area gently with fine-grit sandpaper to create a smooth finish. Start with a lower grit sandpaper and gradually work your way up to a higher grit for the best results. Take care to avoid sanding too aggressively, as this can damage the surrounding fiberglass.
Finally, clean the repaired area once again to remove any dust or debris from the sanding process. You can use a damp cloth or sponge for this purpose. Once the area is clean, you can proceed with painting or refinishing the fiberglass surface as desired.
In conclusion, when it comes to filling screw holes in fiberglass, it is recommended to use a marine-grade epoxy filler from reputable brands such as West System or MAS Epoxies. By following the step-by-step guide outlined above, you can effectively repair and fill screw holes in fiberglass, ensuring a strong and durable result.
What Essentials to Pack for a Memorable Sleepover at Your Grandma's Place
You may want to see also
Frequently asked questions
To pack screw holes in fiberglass, you will need to begin by removing any loose debris or fragments from the hole. Next, use a putty knife to apply a small amount of epoxy or fiberglass repair putty to the hole, ensuring that it is completely filled. Smooth down the surface of the putty with the putty knife, and allow it to dry completely before sanding and painting over it.
While caulk or silicone can be used to fill small screw holes in fiberglass, it is not the most durable or long-lasting solution. Over time, caulk or silicone may shrink or crack, leading to the need for further repairs. It is best to use epoxy or fiberglass repair putty specifically designed for filling holes in fiberglass, as these materials provide a stronger and more permanent seal.
Yes, it is recommended to patch screw holes in fiberglass before painting to ensure a smooth and seamless finish. If screw holes are left unfilled, they may be visible even after painting, detracting from the overall appearance. By properly patching and filling the screw holes, you can create a surface that is ready for painting and will result in a professional-looking finish.