Do you have a pile of old hard drives collecting dust in a forgotten corner of your home or office? Well, don't toss them out just yet! With a little creativity, those seemingly obsolete devices can be transformed into something cool and useful. In this article, we've compiled 12 awesome ideas for using old hard drives in ways that might surprise you. From transforming them into clocks to turning them into mini arcade games, these ideas will give your old hard drives new life and purpose. So, dust off those old drives and get ready to be inspired!
What You'll Learn
![]()
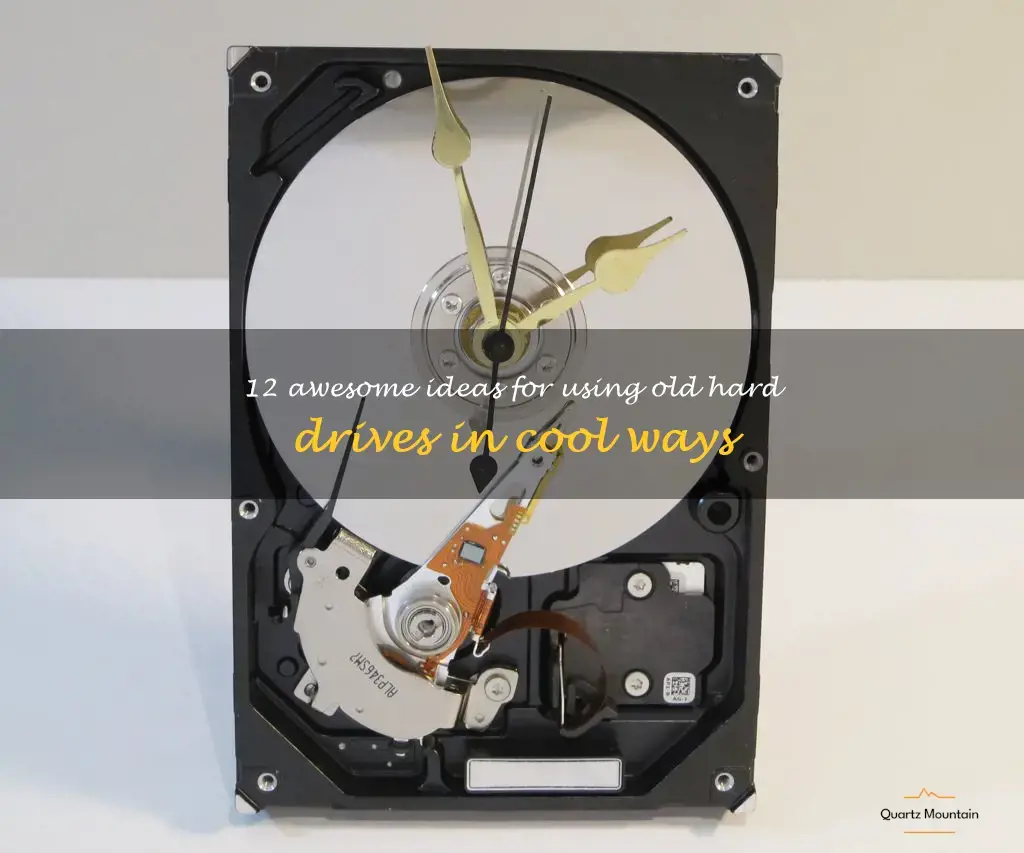
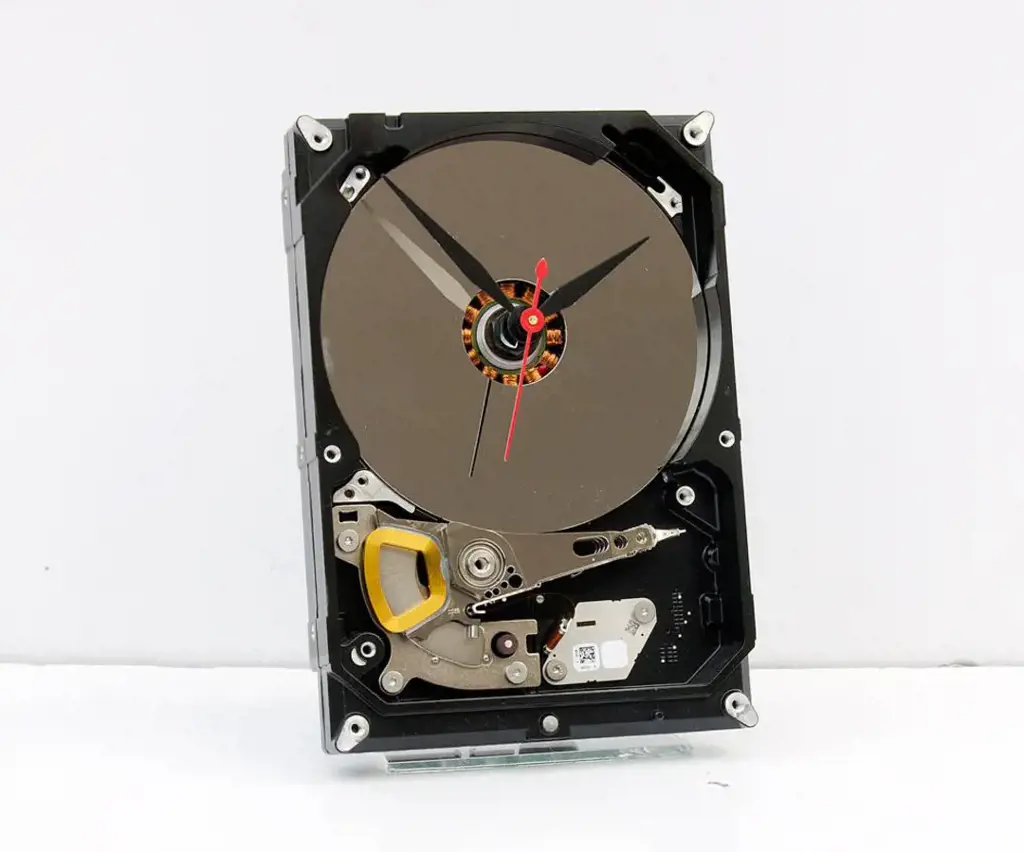
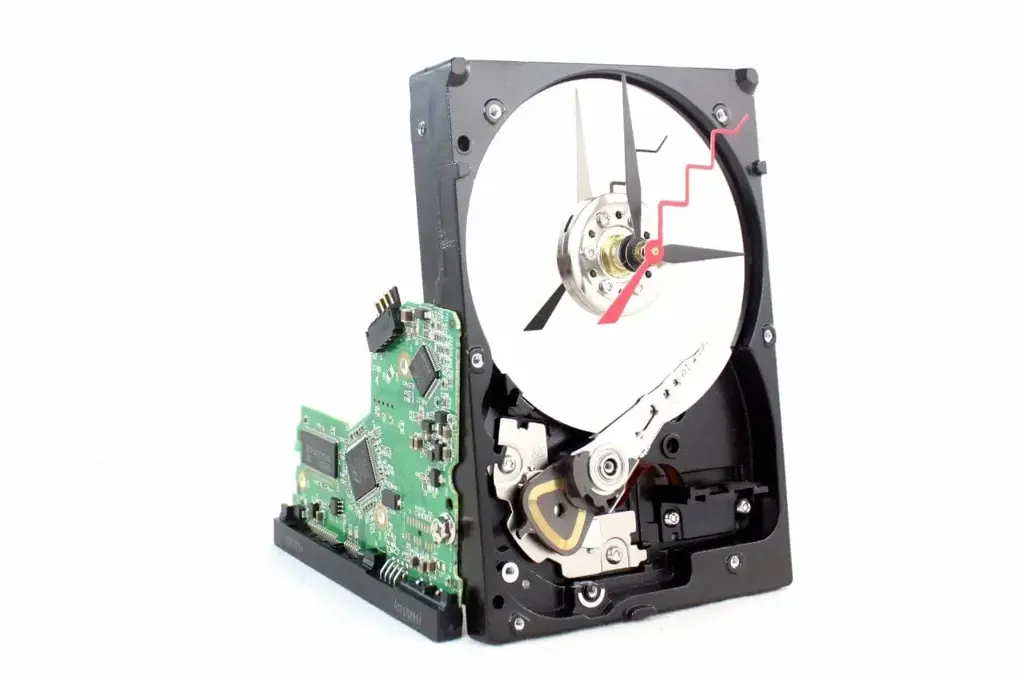
Turn them into desk clocks

With a few simple tools and some creativity, you can transform your old hard drives into stylish and functional desk clocks that will impress your friends and colleagues. Here are some easy steps to follow to turn your old hard drives into cool clocks:
Step 1: Gather your supplies: You will need an old hard drive, clock mechanism (available at most craft stores), a drill, metal cutting saw, screwdriver, and some glue.
Step 2: Prep the hard drive: Open up the hard drive by unscrewing the screws and removing the cover. Carefully remove the internal components, being mindful not to damage any of the delicate parts.
Step 3: Drill a hole in the center of the hard drive: Using a drill, make a small hole in the center of the hard drive. This will allow the clock mechanism to be attached to the hard drive.
Step 4: Attach the clock mechanism: Thread the clock mechanism through the hole and attach it to the back of the hard drive using the screws provided.
Step 5: Decorate the hard drive: This is the fun part! Using your imagination, you can decorate the front of the hard drive with anything from stickers and decals to paint and glitter.
Step 6: Add the numbers: If you want to be able to tell time, you will need to add numbers to the clock. You can buy small adhesive numbers at most craft stores or you can print out your own numbers and attach them to the clock.
Step 7: Add a stand: To finish off your clock, you can add a stand to the back of the hard drive using glue or double-sided tape.
Your cool, new desk clock is now ready to be used and admired. Not only is it a practical way to keep track of time, but it’s also a unique and eye-catching piece of decor that will add some personality to your workspace. So, before you toss out those old hard drives, consider turning them into something cool, like a desk clock!
13 Fun Indoor Activities to Beat the Rainy Day Blues in CT
You may want to see also
![]()
Create a portable hard drive
Do you have a few old hard drives lying around the house? Don't let them go to waste - there are plenty of cool things you can do with them! One of the most practical things you can do is to create a portable hard drive. Here's everything you need to know to get started.
What You'll Need
To turn your old hard drive into a portable storage solution, you'll need a few things:
- A SATA to USB adapter: This will allow you to connect your hard drive to your computer using a USB port.
- A small container or enclosure: This will protect your hard drive and allow you to take it on the go.
- A screwdriver: You'll need this to open up your old hard drive casing and remove the hard drive itself.
- Some basic knowledge of computer hardware: You don't need to be a computer expert to do this, but it helps to have a general understanding of how hard drives work.
Step 1: Remove the Hard Drive
The first step is to remove the hard drive from its casing. This is usually pretty easy - just unscrew the casing and carefully lift out the hard drive. Be sure to take note of any screws or connectors that you might need to detach, as you'll need to reattach them later.
Step 2: Connect the SATA to USB Adapter
Next, you'll need to connect the SATA to USB adapter to your hard drive. This is as simple as plugging the adapter into the hard drive's SATA port and connecting the USB cable to your computer.
Step 3: Mount the Hard Drive
Now that your hard drive is connected, you'll need to mount it in its new container or enclosure. You may need to attach some screws or connectors to hold the hard drive in place. Follow the instructions that came with your enclosure to make sure everything is secure.
Step 4: Format the Hard Drive
Before you can start using your new portable hard drive, you'll need to format it. This will erase any old data and prepare the drive for use with your computer. This process varies depending on whether you're using a Mac or Windows computer, so be sure to follow the instructions for your specific operating system.
Step 5: Transfer Your Files
Once your hard drive is formatted, you're ready to start using it! You can transfer files to and from your hard drive just like you would with any other external storage device. This is a great way to keep your important files with you at all times, whether you're working from home or on the go.
Creating a portable hard drive from an old hard drive is a fun and practical project that anyone can do. With just a few pieces of hardware and some basic computer know-how, you can turn your old hard drives into useful portable storage devices. Who knew that old technology could be so cool?
14 Free Things to Do on Jekyll Island
You may want to see also
![]()
Use as a door stop

If you're anything like most people, then you probably have a few old hard drives lying around collecting dust. Rather than letting them sit there and take up space, why not get creative and use them for something cool? One unique option is to use them as door stops.
Why use a boring old door stop when you could have a unique one that doubles as a conversation starter? Here are a few steps to take to turn your unused hard drive into the perfect door stop:
- Select your hard drive: Depending on the size of the door you want to use it for, you may want to choose a larger or smaller hard drive. Either way, be sure to select one that is no longer functional, so that you aren't losing any important data.
- Clean and prep: Before you start using your hard drive, clean and wipe it down thoroughly. You want it to look good and function well as a door stop.
- Attach a base: In order to stabilize the hard drive and keep it from sliding around, consider attaching it to a base or platform. You can use anything from a small wooden block to a piece of metal. Get creative and make it your own.
- Position and use: Once your hard drive is attached to a sturdy base, it's ready to use as a door stop. Position it against the door to keep it open, or to keep it from slamming shut in the wind.
Overall, using old hard drives as door stops is a fun and creative way to repurpose something that would otherwise be taking up space in your home. Give it a try and see how it adds a unique flair to your decor.
12 Fun Things to Do in Cottonwood, Arizona
You may want to see also
![]()
Convert into a USB hub
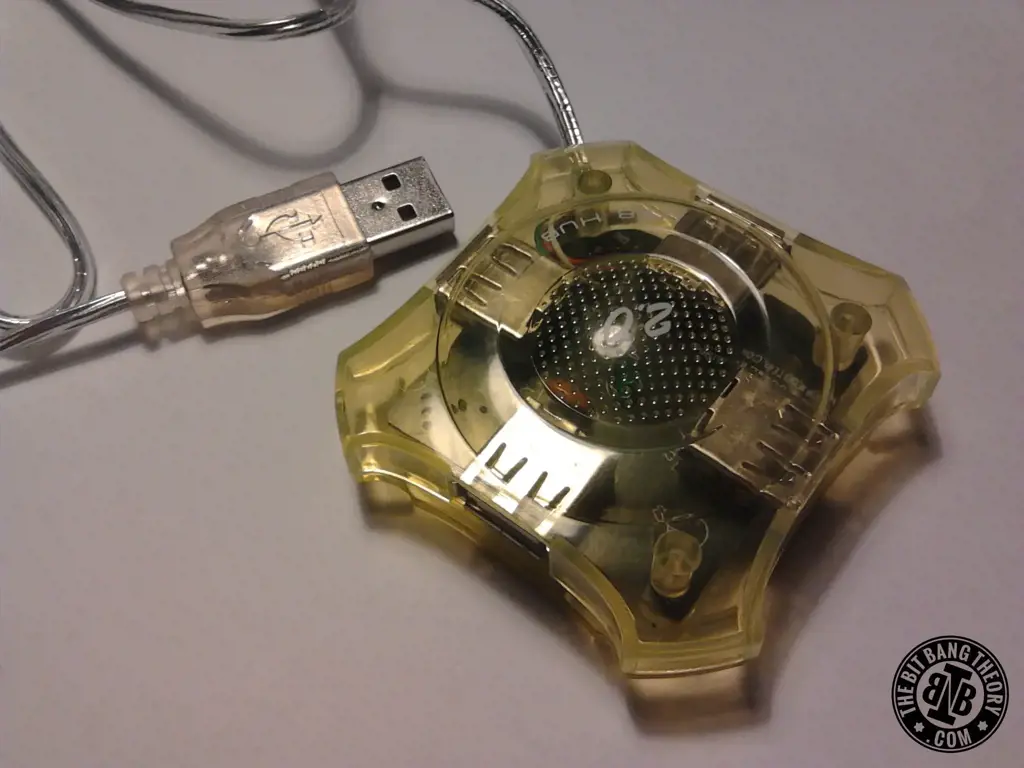
Are you tired of hoarding old hard drives that are no longer useful, but don't want to throw them away either? Don't worry, there are plenty of creative ways to repurpose those old hard drives and turn them into something cool and useful. One such way is to convert them into a USB hub.
Here's how you can do it:
What you'll need:
- Old hard drive
- Universal Serial Bus (USB) hub
- Screwdriver
- Adhesive tape
- Wirecutters
- Soldering iron and solder
Step-by-step guide:
- First, you need to remove the casing of the old hard drive. This can be done by unscrewing the screws on the sides of the casing with a screwdriver.
- Once the casing is removed, you will see the circuit board of the hard drive.
- Locate the USB port on the circuit board. This port will be used to connect the USB hub.
- Using wirecutters, cut the wires that connect the hard drive's power source to the circuit board. This will prevent any voltage surges that could occur while converting the hard drive into a USB hub.
- Connect the USB hub to the USB port on the circuit board using a soldering iron and solder.
- Secure the USB hub to the circuit board using adhesive tape.
- Replace the hard drive casing and screw it back in place.
And there you have it – a cool and useful USB hub made from an old hard drive.
Not only is repurposing your old hard drive into a USB hub environmentally friendly, but it's also a fun and interesting project to undertake. Plus, you'll have a handy tool for transferring files and charging your gadgets. So, give it a go and enjoy!
12 Must-Do Activities in Shrewsbury for a Memorable Experience
You may want to see also
![]()
Make a birdhouse
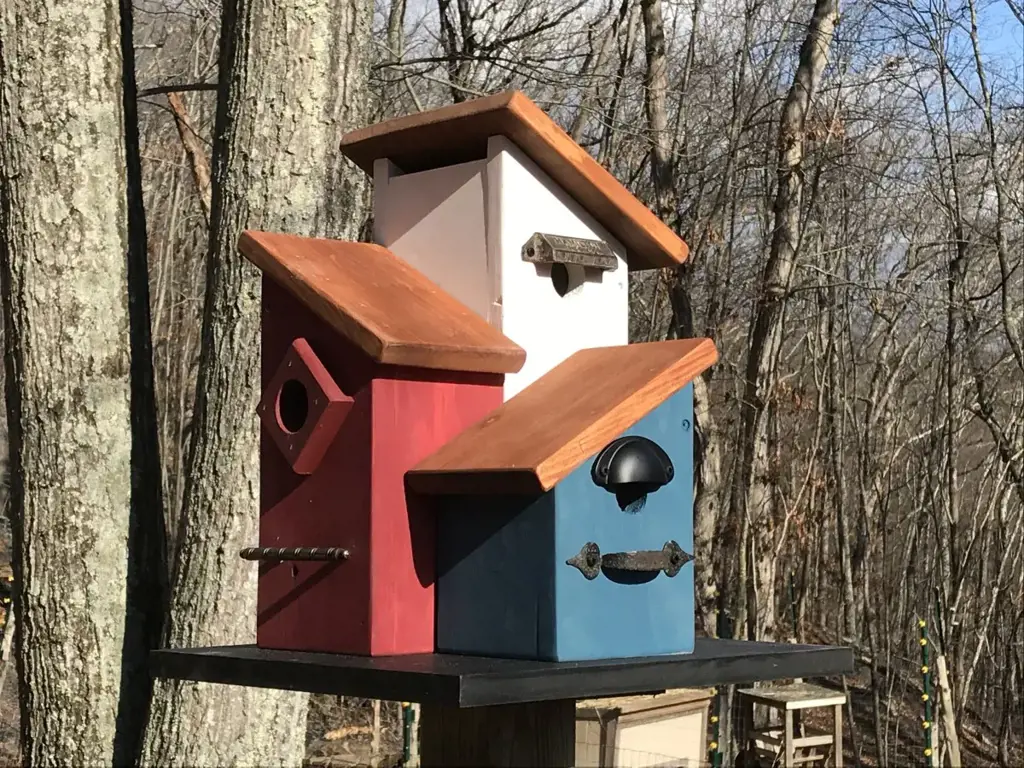
If you have old hard drives lying around your place, it's time to get creative with them. You may be wondering what to do with these old technological beasts. It is time to turn them into something beautiful and functional. In this article, we will explore the idea of turning old hard drives into a birdhouse.
Birdhouses are not only decorative, but they also provide nesting opportunities for the birds in your neighborhood. If you have spare hard drives, you can use them to create a unique and modern-looking birdhouse. Here's how you can do it:
Materials needed:
- Old hard drive(s)
- A drill or screwdriver
- Nuts and bolts or glue
- A metal saw
- A piece of wire or string
- Sandpaper
- Metal file
- Bird feed
Instructions:
Preparing the hard drive
The first step is to clean and prepare your hard drive. Remove any screws or components that could get in the way of the birdhouse design. If you are using any magnets, be careful not to damage them. Sand down any rough edges of the hard drive with sandpaper. A flat, clean surface is needed for birds to build their nests.
Cutting the entrance hole
Using a metal saw, carefully cut out an entrance hole on the hard drive. The entrance hole should be big enough for birds to enter and exit comfortably, but not too big for predators to enter.
Drilling or gluing
Using nuts and bolts, drill the hard drive onto a sturdy base or attach it using glue. Be sure to secure it well, as you don't want your birdhouse to fall down.
Adding a perch
After securing the hard drive, add a small perch beneath the entrance hole. This gives birds a place to land before they jump into the birdhouse.
Adding a wire or string
Attach a wire or string to the top of the hard drive to hang it up. Make sure it’s secure as well, so it doesn’t fall down after being hung.
Filling up with bird feed
Finally, fill the hard drive with bird feed to attract birds to your new birdhouse. You may need to remove the hard disk drive platters since they can damage bird’s claws if they want to build nests inside the birdhouse.
By following these simple steps, you can turn your old hard drive into a quirky and unique birdhouse. Not only is this a fun project to do, but it also serves a significant purpose in providing a safe nesting area for local birds.
14 Fun Things to Do in McDonough, GA
You may want to see also
![]()
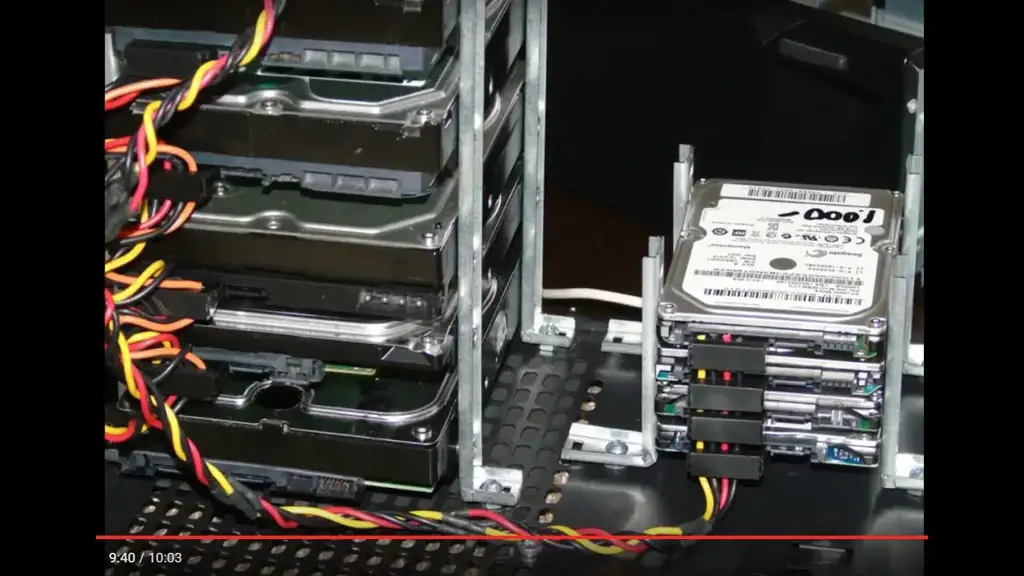
Build a mini computer

Do you have a bunch of old hard drives lying around your house? Don't throw them away just yet! You can still make use of them by building a mini computer. Here's how to do it:
Step 1: Gather your materials
You will need a few things to get started:
- One or more old hard drives
- A Raspberry Pi or similar mini computer board
- An SD card (for the Raspberry Pi)
- A power supply for the Raspberry Pi
- A USB keyboard and mouse
- A monitor or TV with an HDMI port
- An HDMI cable
- A case for the Raspberry Pi (optional)
You may also need a few tools, such as a screwdriver and pliers.
Step 2: Remove the hard drives from their cases
Most hard drives come in cases that are meant to be opened. Use a screwdriver to remove the screws and open up the case. You should be left with the hard drive itself, which is a rectangular metal box.
Step 3: Install the Raspberry Pi
Depending on the case you chose for your Raspberry Pi, you may need to do some assembly. Follow the instructions that came with the case to put everything together. Once your Raspberry Pi is secure in its case, insert the SD card and plug in the power supply, keyboard, mouse, and monitor (or TV).
Step 4: Connect your hard drives
Using pliers, remove the connectors from your hard drives. You should be left with the bare pins. These pins can be plugged directly into the Raspberry Pi's GPIO (General Purpose Input/Output) pins. There are several guides online that can show you how to do this step-by-step, depending on the type of hard drive you have.
Step 5: Install your operating system
Your Raspberry Pi will come with a default operating system, but you may want to install a different one depending on your needs. You can download an operating system such as Raspbian for free online and install it onto your SD card.
Step 6: Configure your system
Once your operating system is installed, you can configure your system however you like. You can use your mini computer as a media center, a file server, a web server, or even a retro gaming console.
Building a mini computer from old hard drives is a fun and creative way to repurpose old technology. Plus, the end result is something that is functional and useful. So if you have some old hard drives lying around, give it a try!
12 Best Things to Do in Tucker GA
You may want to see also
![]()
Use as a platter for serving food
Have you ever thought about what to do with your old hard drives that are no longer in use? Instead of simply throwing them away, why not repurpose them into something cool and useful? One idea that might surprise you is using old hard drives as plates for serving food!
The large flat surface area of hard drives makes them a great platform for serving small appetizers or dessert tasters. But before using a hard drive as a plate, make sure to sanitize it thoroughly in hot soapy water. And if you want to serve anything hot, ensure that the hard drive is made of heat-resistant materials so that it can withstand the heat.
If you want to take it up a notch, you can also create a custom food holder by attaching small metal stands to the bottom of the hard drive. This will lift the plate off the table and give it a more stylish and professional look.
Apart from using them as serving plates, you can also use old hard drives in other creative ways. One popular way is to turn them into clocks by attaching clock hands to the center spindle of the hard drive. This will give you a unique clock that nobody else has.
Another way to reuse old hard drives is by converting them into an external hard drive case by attaching a SATA to USB converter. You can use this to store and transfer data between computers, and it’s a great way to keep your data secure and easily accessible.
In conclusion, old hard drives may no longer be of use for their original purpose, but they can be used in many ways that are both creative and practical. So, don’t throw them out just yet. With a little bit of creativity, you can repurpose them into something that’s both cool and useful.
10 Must-Do Activities in Union Square NYC
You may want to see also
![]()
Create a DIY speaker
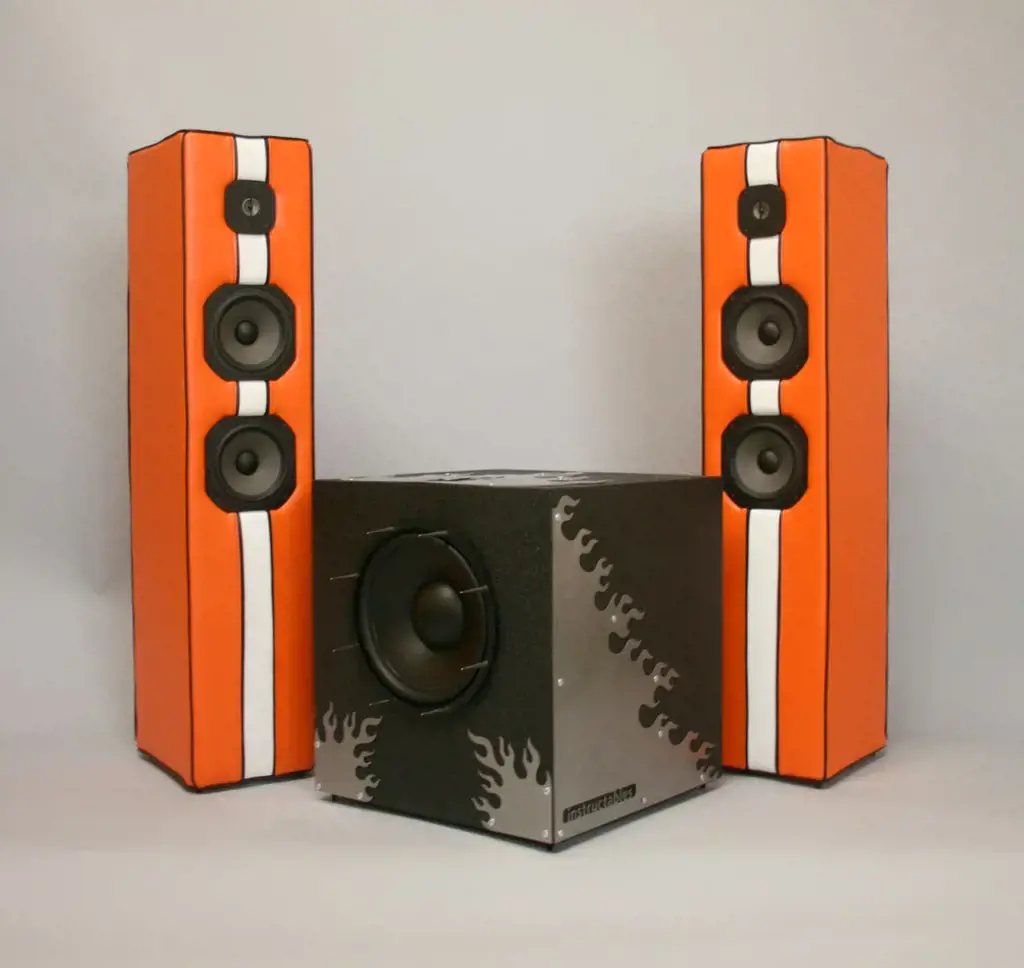
Do you have an old hard drive lying around that you don't know what to do with? Instead of throwing it away, why not turn it into a DIY speaker? This is a fun and creative project that can result in a unique speaker that looks cool and sounds great. Here's how to do it:
Materials needed:
- Old hard drive
- Screwdriver
- Audio cable
- Amplifier
- Speaker wire
- Power drill
- Sandpaper
- Hot glue gun
Instructions:
- Begin by disassembling the hard drive. Use a screwdriver to remove the screws from the casing and carefully take apart the different components. You should be left with the hard disk platter, which is the circular metal disc inside the drive.
- Prepare the platter by sanding it down lightly with fine-grit sandpaper to remove any residue or dust. Be careful not to scratch the surface.
- Mark the center of the platter and drill a hole in the center using a power drill. This will be where the audio cable is inserted.
- Cut a section of speaker wire and strip the ends. Attach one end to the audio cable and the other end to the amplifier.
- Insert the audio cable through the hole in the center of the platter and secure it in place with hot glue. Make sure it is centered and secure.
- Reassemble the amplifier and test out the speaker. You can adjust the volume and fine-tune the settings as needed until you get the desired sound quality.
- If you want to make the speaker look more polished, you can create a base for it using wood or other materials. This will help stabilize the speaker and give it a more finished look.
By following these steps, you can turn an old hard drive into a DIY speaker that is functional and looks cool. This is a great way to repurpose old technology and breathe new life into it. Plus, you'll have a unique and eye-catching speaker that is sure to impress your friends and family.
14 Amazing Things to Do in Venice Beach, CA
You may want to see also
![]()
Turn into a keychain
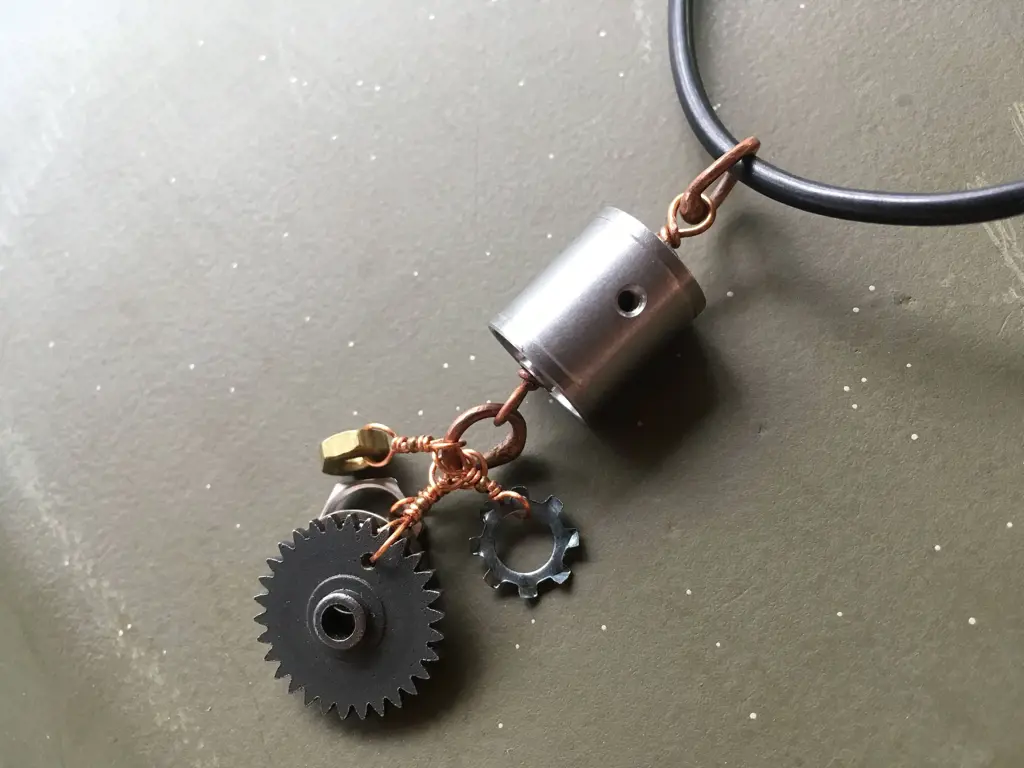
If you have old hard drives lying around but don't know what to do with them, here's an idea: turn them into a keychain!
Not only will this repurpose your old hardware, but it will also give you a cool and unique accessory to carry your keys. Plus, it's a great conversation starter and a way to showcase your tech skills.
So, how do you turn an old hard drive into a keychain? Let's walk through the steps.
Step 1: Gather materials
You'll need a few things to get started:
- An old hard drive
- A screwdriver
- Pliers
- A keyring
- Optional: paint or other decorations
Step 2: Disassemble the hard drive
Using a screwdriver, remove the screws from the hard drive casing. Once the lid is off, you can see the platters, spindle, and other components. Carefully remove the platters using pliers, as they are often held in place with a magnet.
Step 3: Clean and decorate (optional)
Now that you have a set of platters, you can clean them with a cloth or alcohol wipes. If you want to add some decoration, you can paint the platters or add stickers, decals, or other items.
Step 4: Add the keyring
Take the keyring and thread it through one of the screw holes on the hard drive casing. If the casing doesn't have any holes, you can use pliers to create one. Alternatively, you can thread the keyring through a hole in one of the platters.
Step 5: Reassemble the hard drive
Put the lid back on the hard drive casing, and replace the screws. You can keep the platters separate or stack them on the spindle if you want them to be more visible.
And voila! You now have a unique and cool keychain made from your old hardware. You can show it off to your friends, or use it as a reminder of your tech savviness.
In conclusion, turning an old hard drive into a keychain is just one way to repurpose your old hardware. It's a fun and creative way to showcase your DIY skills, and it's also an eco-friendly option for reducing e-waste. Give it a try and see what cool designs you can come up with!
13 Exciting New Year's Eve Activities in San Diego
You may want to see also
![]()
Make a wind chime
Are you wondering what to do with your old hard drives? Instead of throwing them away, you can create an amazing wind chime that will spruce up your backyard or outdoor living space. Here are the simple steps to make a wind chime out of your old drives.
Materials required:
- Old hard drives (3-5)
- Screwdriver
- Metal-cutting blade
- Pliers
- Small hooks
- Fishing line
- Beads (optional)
Step 1: Disassemble the hard drives
Using a screwdriver, carefully remove the screws that hold the hard drive casing together. Next, remove the internal parts, including the disks and the spindle motor. Keep the screws and the small parts as you might need them later.
Step 2: Remove the hard drive casing
Using a metal-cutting blade or pliers, remove the hard drive casing, which usually consists of an aluminum cover and a base. The cover will be used to create the disks that will make up your wind chime.
Step 3: Cut the disks
Using metal-cutting blades or pliers, cut the disks from the aluminum cover. You can make the disks in different sizes, but make sure they are not too big or too small. You can also decorate the disks with beads or paint them to give them an aesthetic appeal.
Step 4: Drill the holes
Using a metal bit, drill a small hole at the top of each disk that will be used to attach them to the fishing line.
Step 5: Attach the disks
Attach the small hooks to the fishing line, then tie one end of the fishing line to a hook, and thread it through the drilled hole in the disk. Repeat this for each disk, leaving enough space between each disk. Adjust the length of the fishing line as you go, so that your wind chime has a symmetrical look.
Step 6: Add the finishing touches
Once you have attached all the disks, add some beads to the fishing line to create a clinking sound when the wind chime moves. You can also use the remaining parts of the hard drives to create a top piece to hang the wind chime from.
Your wind chime is now ready to be hung outdoors, and it will create a beautiful sound whenever the wind blows. Not only will you be reusing your old hard drives, but you will also be adding a unique and artistic piece to your outdoor décor that will impress your family and friends. So, go ahead and make that wind chime today!
12 Epic Activities to Experience in Sovngarde
You may want to see also
![]()
Use as bookends
Are you cleaning out your old computer and wondering what to do with the old hard drives? Don't throw them away just yet! With a bit of creativity, there are a variety of cool things you can do with old hard drives. One example is to use them as bookends on your bookshelf.
Hard drives are typically made of metal, which makes them durable and sturdy enough to hold up books. Simply remove the cover of the hard drive and use it as a base for your bookend. If needed, you can hot glue it to the bottom of the hard drive to keep it in place.
Some people even paint or decorate the hard drive to make it more visually appealing. You can add a coat of spray paint or add stickers to match the theme of your bookshelf. You can also use other materials, such as wood or plastic, to create a stand for the hard drive to make it look more polished.
Using old hard drives as bookends not only helps to keep your books organized and neat but also adds a unique touch to your bookshelf. Plus, it's a great way to reuse a product that you would otherwise toss into the trash.
In conclusion, repurposing old hard drives as bookends is a great way to add a touch of creativity to your bookshelf while reusing materials that would otherwise end up in the trash. So go ahead and give this idea a try and impress your friends with your recycling skills!
13 Fun and Unique Things to Do in Normal, IL
You may want to see also
![]()
Build a hard drive shredder
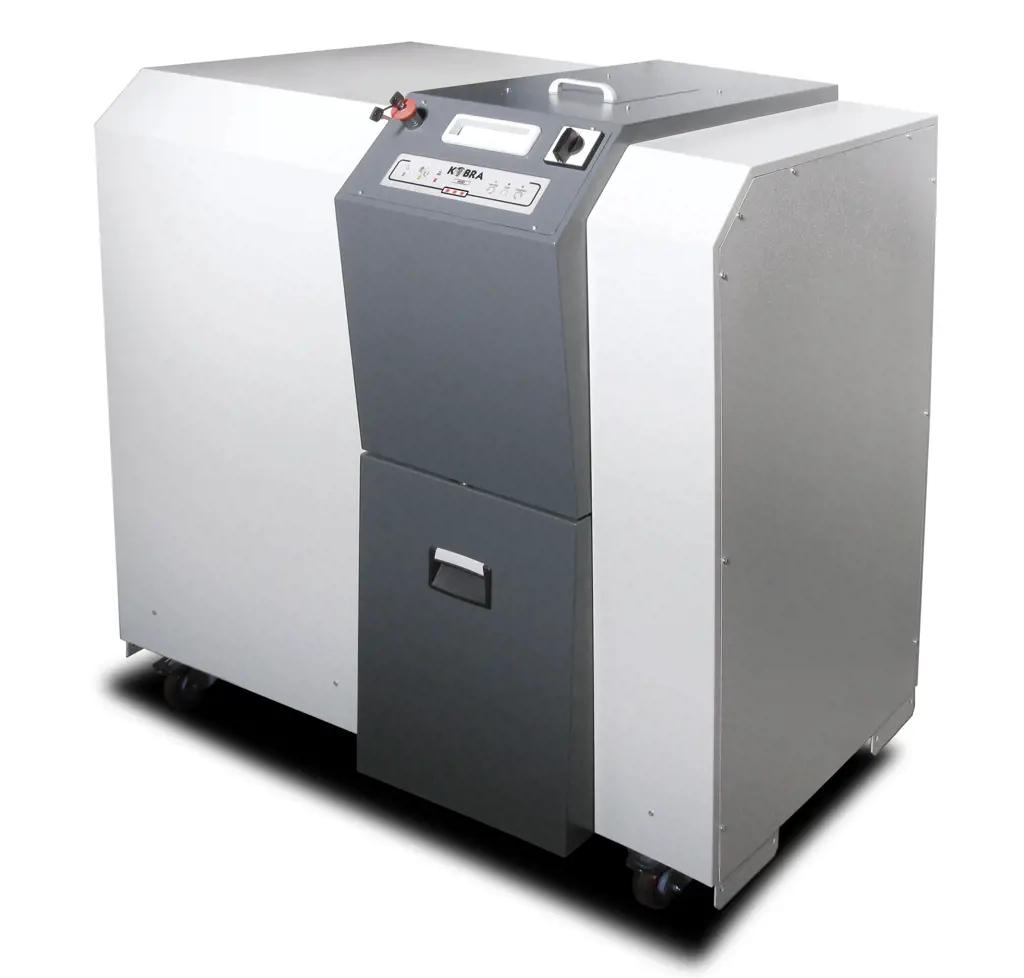
If you have a pile of old hard drives lying around your house, you might be wondering what to do with them. Sure, you can wipe the data on them and recycle them, but where's the fun in that? Why not turn them into a cool DIY project instead? One of the most satisfying things you can do with an old hard drive is to build a hard drive shredder.
A hard drive shredder is a bulky machine that destroys a hard drive beyond repair, rendering it useless and incapable of being used for data recovery in the future. Some organizations and businesses use commercial hard drive shredders for the destruction of confidential and sensitive data. Building your shredder is a fun and cost-effective way to do this at home.
Firstly, you'll need to gather the materials. You'll need a couple of old hard drives that you don't mind destroying; a jigsaw; metal cutting blades, a drill; metal drill bits, heatproof gloves and a metal or plastic container. Begin by taking the hard drives apart, removing the circuit board and platters with a screwdriver.
Once you've taken the hard drive apart, use the drill to create four holes, one in each corner of the hard drive platters. These should be large enough for the jigsaw blade to fit through. After that, slide the metal cutting blade into the jigsaw, and begin to cut the platters around the holes. You'll need to do this several times, gradually cutting the platters into smaller and smaller pieces.
If you're nervous about handling the hard drive as you're cutting it, make sure you put on your heatproof gloves for this part. You don't want to risk any cuts or injuries. Once you've cut the platters into small enough pieces, place them into a metal or plastic container for safe disposal. This could be an old paint can or something similar.
By the end of this process, you'll have a hard drive shredder that can destroy a hard drive in a matter of seconds. It's also an excellent way to experiment with basic tools and gain some hands-on experience. Additionally, the shredder can come in handy if you want to destroy any confidential documents or data in the future.
In conclusion, building a hard drive shredder is a fun and practical DIY project. Not only does it enable you to destroy your old hard drives and protect your data, but it also gives you an opportunity to learn about basic tools and gain some hands-on experience. Try it out today!
10 Fun-Filled Things to Do in Pittsburgh in July
You may want to see also
Frequently asked questions
- You can turn them into external hard drives for additional storage, create a RAID array for faster data processing, or use them for DIY projects like clock-making or constructing a miniature arcade cabinet.
- Absolutely! Old hard drives can be transformed into unique pieces of technology-inspired art, jewelry, or even furniture like a coffee table. Alternatively, you can use the parts to create functional tools like a portable screwdriver or a bottle opener.
- Yes, there are potential security risks when repurposing old hard drives, especially if they contain sensitive personal or business data. To ensure all data is disposed of safely, it is important to wipe the drives clean using a data erasure tool or destroy the drives physically such as drilling a hole through them or using a hard drive destroyer.


3 Comments
Rafe Branch
Lilli Miranda
Aaminah Nash