
Are you tired of only using your riding mower for cutting grass? Well, fear not, because we have compiled a list of 14 cool ways to make the most of your riding mower! From using it to tow heavy items to creating intricate lawn designs, these tips will not only make your mowing experience more fun, but also more productive. So, hop on your mower and get ready to explore the endless possibilities of what it can do!
What You'll Learn
- Attach a snow blade for winter snow removal
- Use a grass catcher for easy lawn cleanup
- Install a hitch for pulling trailers or carts
- Add a mulching kit for a healthier lawn
- Use a spreader for fertilizing and weed control
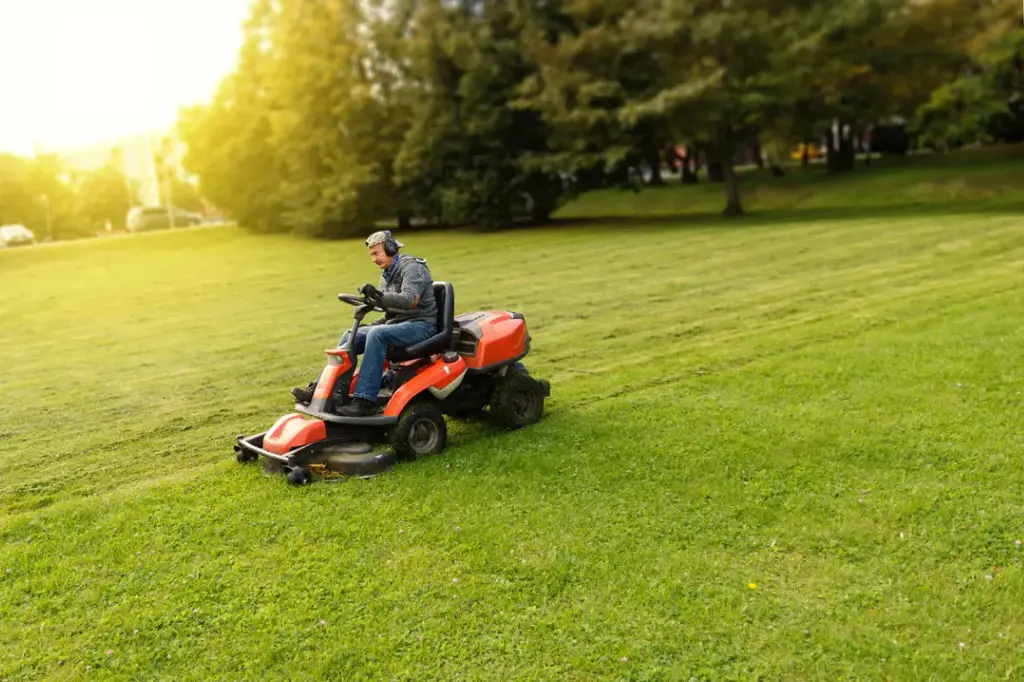
- Attach a light kit for night time mowing
- Use a power brush for sweeping driveways and sidewalks
- Connect a leaf blower for yard cleanup
- Attach a dethatcher to remove dead grass and thatch
- Use a lawn striping kit for a professional-looking lawn
- Install a sun shade to protect from harmful UV rays
- Use a front bumper for added protection
- Add a fuel stabilizer to extend the life of your mower
- Use a snow blower attachment for heavy snowfall (if available)
![]()
Attach a snow blade for winter snow removal
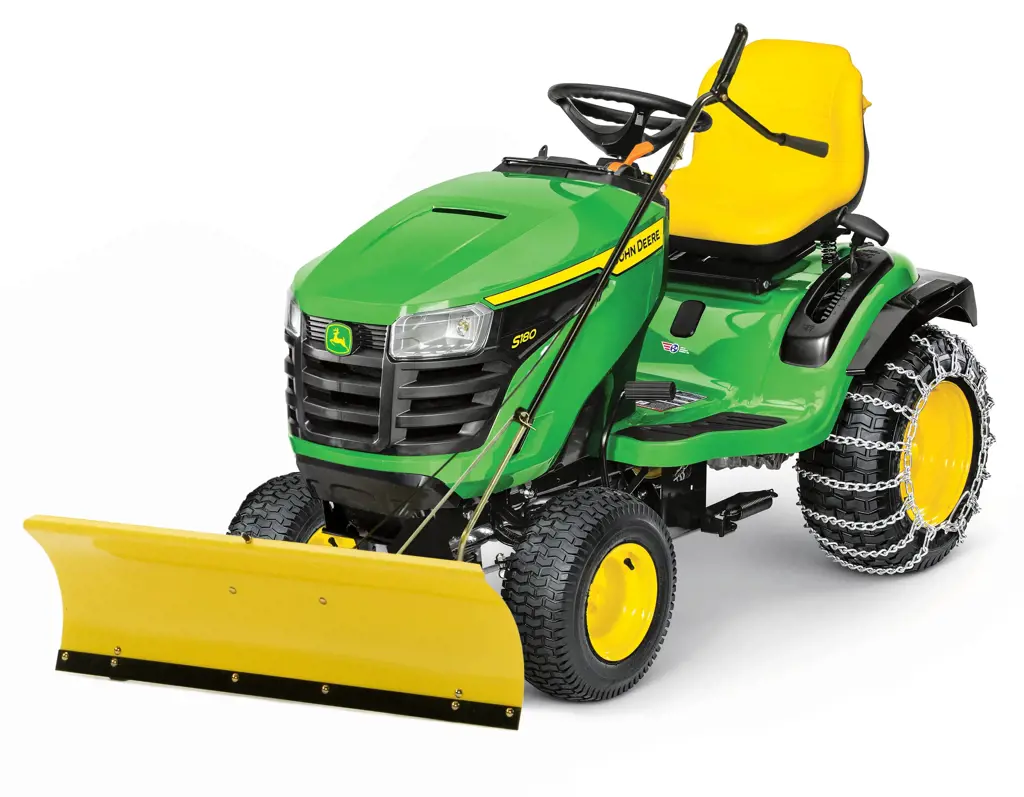
Riding mowers are not just for cutting grass and maintaining the lawn. With some simple tweaks, these machines can do many tasks beyond their original purpose. One of the coolest things you can do with a riding mower is attaching a snow blade for winter snow removal.
Clearing snow from your driveway and walkways can be a time-consuming and exhausting task. A riding mower equipped with a snow blade can make it easier and faster. The snow blade is a metal attachment that mounts to the front of the mower and can push snow out of the way.
To attach a snow blade to your riding mower, you will first need to purchase the right type of blade for your machine. You should carefully measure your mower's front frame to ensure you get the correct size. You can find snow blades in home improvement stores, online stores, or directly from the manufacturer.
Once you have the blade, you need to install it on your riding mower. You should remove the mower deck and any other attachments on the front of the mower. Then, you can mount the snow blade to the mower's frame using bolts and brackets that come with the blade. Make sure all the bolts are tightened securely before use.
When the snow comes, it's time to fire up your riding mower and start removing snow. Start by pushing the blade into the snow, then slowly drive forward while lifting the blade a few inches above the ground. This allows the snow to slide off the blade and avoid damaging your pavement. Repeat this process until you've cleared the entire area.
A snow blade can save you a lot of time and energy compared to using a shovel or snow blower. Plus, you can have fun driving your riding mower around in the snow. Just make sure you take the necessary safety precautions, such as wearing warm clothing and protective gear, and avoiding steep slopes or icy surfaces.
In conclusion, attaching a snow blade to your riding mower is a cool and practical way to deal with winter snow. It's a relatively easy and affordable modification that can transform your mower into a multi-purpose machine. Give it a try, and you might find yourself looking forward to winter instead of dreading it.
10 Free Things to Do in Denton: From Art to Nature Trails.
You may want to see also
![]()
Use a grass catcher for easy lawn cleanup
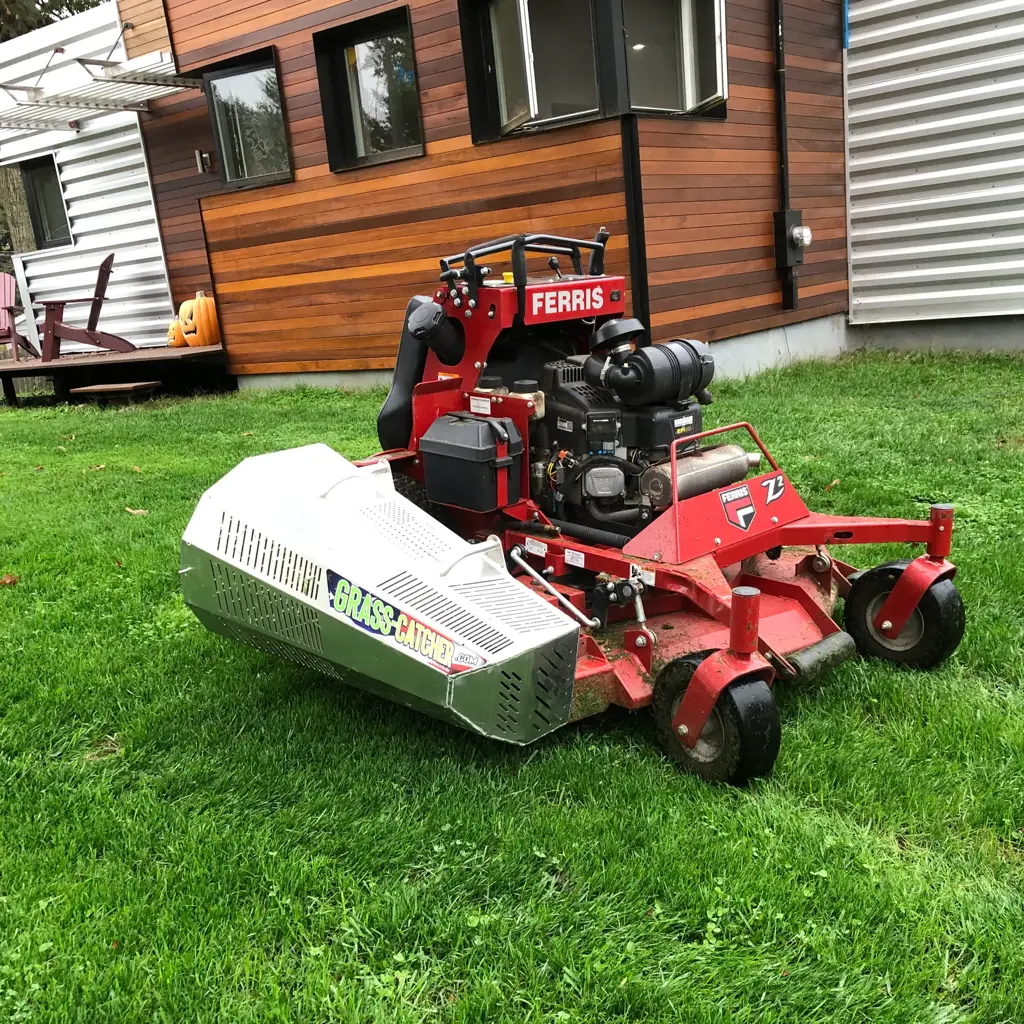
Riding mowers are versatile and can be used for more than just mowing the lawn. With a few attachments and additions, you can use your mower to complete various outdoor tasks. One of the most significant and useful attachments you can add to your riding mower is a grass catcher. A grass catcher is a bucket-like attachment that attaches to the back of your mower and collects grass clippings and debris as you mow your lawn. It’s a great investment for anyone who wants to make lawn cleanup a breeze.
Using a grass catcher attachment with your riding mower is an effortless way to keep your lawn looking great while saving time and energy. The catcher collects the grass clippings and leaves, eliminating the need to rake them up later. Instead, you can easily remove the catcher and empty its contents directly into a compost bin. This process makes lawn waste disposal much more manageable and efficient.
Grass catchers come in various sizes and styles to fit most mowers. They are made of durable materials that allow for easy cleaning and maintenance. Not only does a grass catcher attachment help you keep your lawn clean, but it also promotes a more beautiful and healthy lawn. The collected grass clippings can be used as natural mulch for your garden, providing essential nutrients back to the soil.
Compared to other lawn cleanup methods, using a grass catcher with your riding mower is an excellent investment that will ultimately save you time and effort. By collecting grass clippings and leaves as you mow, you can avoid the tedious task of raking them up later. Additionally, using a catcher attachment ensures that your lawn remains free of debris, promoting healthy growth and maintenance.
In conclusion, adding a grass catcher attachment to your riding mower is a simple yet effective way to elevate your lawn care game. There are several different types of grass catchers on the market that can fit your budget and needs. They make lawn cleanup effortless and even provide natural mulch for your garden. Invest in a grass catcher for your mower today and watch your lawn maintenance become a breeze.
12 Fun Things to Do in Palmer, Alaska
You may want to see also
![]()
Install a hitch for pulling trailers or carts
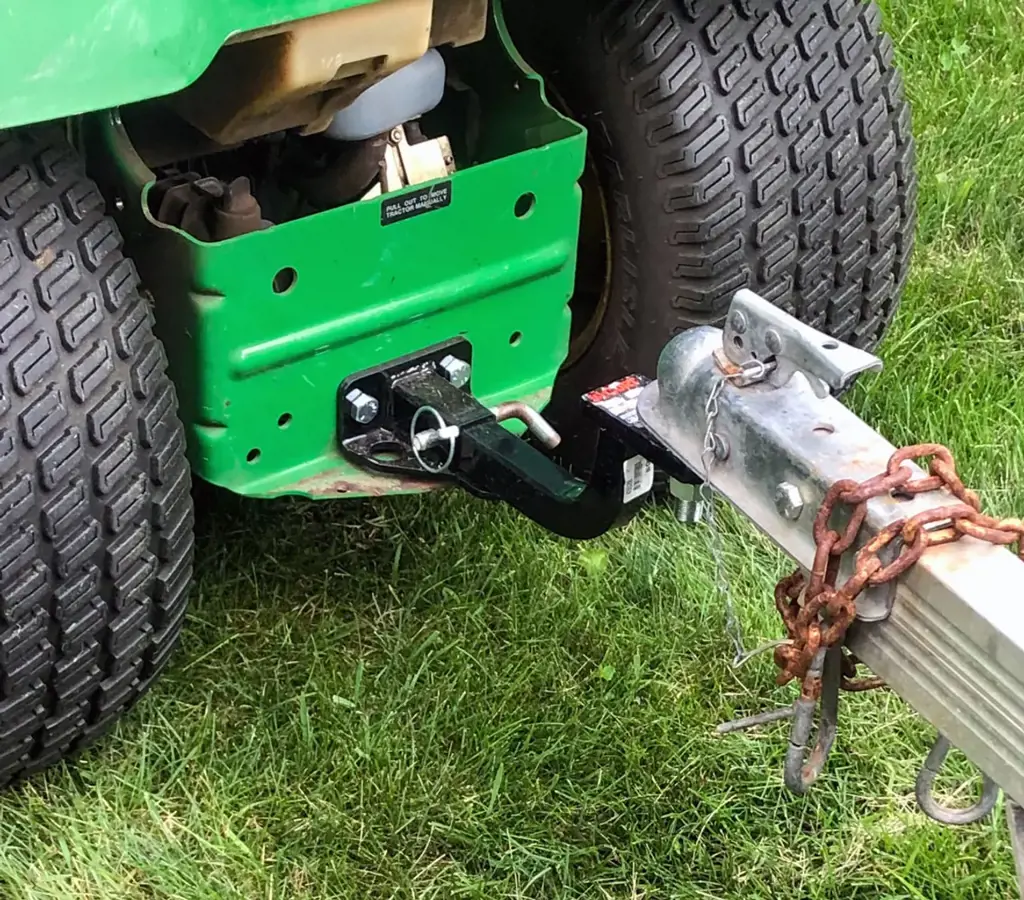
If you're the owner of a riding mower, you know how immensely helpful it can be in taking care of your lawn. But did you know that with a few modifications, it can offer a whole new world of possibilities? One cool thing you can do with a riding mower is to install a hitch, which allows you to pull trailers or carts. This can come in handy for a variety of tasks that you may not have considered before.
Installing a hitch on your riding mower is not a difficult process, although it does require a bit of mechanical know-how. You'll need to purchase a hitch kit that is compatible with your specific riding mower model. This kit should include a mount, a hitch receiver, and any necessary hardware. Be sure to follow the manufacturer's instructions closely when installing the hitch.
Once the hitch is installed, you can start using it to pull a wide range of trailers or carts. If you're a gardener, this is especially helpful for carrying soil, mulch, or heavy pots around your yard. You can also use it to transport bulky items such as firewood or large tools. If you have kids, attach a cart and give them a ride around the yard or even around the neighborhood.
One of the most useful applications for a riding mower with a hitch is for lawn care. You can attach a trailer that is designed to carry bags of grass clippings, which is a great alternative to using a wheelbarrow or trying to carry multiple bags by hand. This not only saves you time, but also spares you from any potential back strain.
Overall, installing a hitch on your riding mower opens up a world of possibilities. From gardening to lawn care to simply giving your kids a fun ride around the yard, the ability to easily pull trailers or carts will make your riding mower even more versatile. So if you're looking for a fun project to try out this summer, why not install a hitch on your mower and see what all you can do?
11 Fun Things to Do in Grayling, MI
You may want to see also
![]()
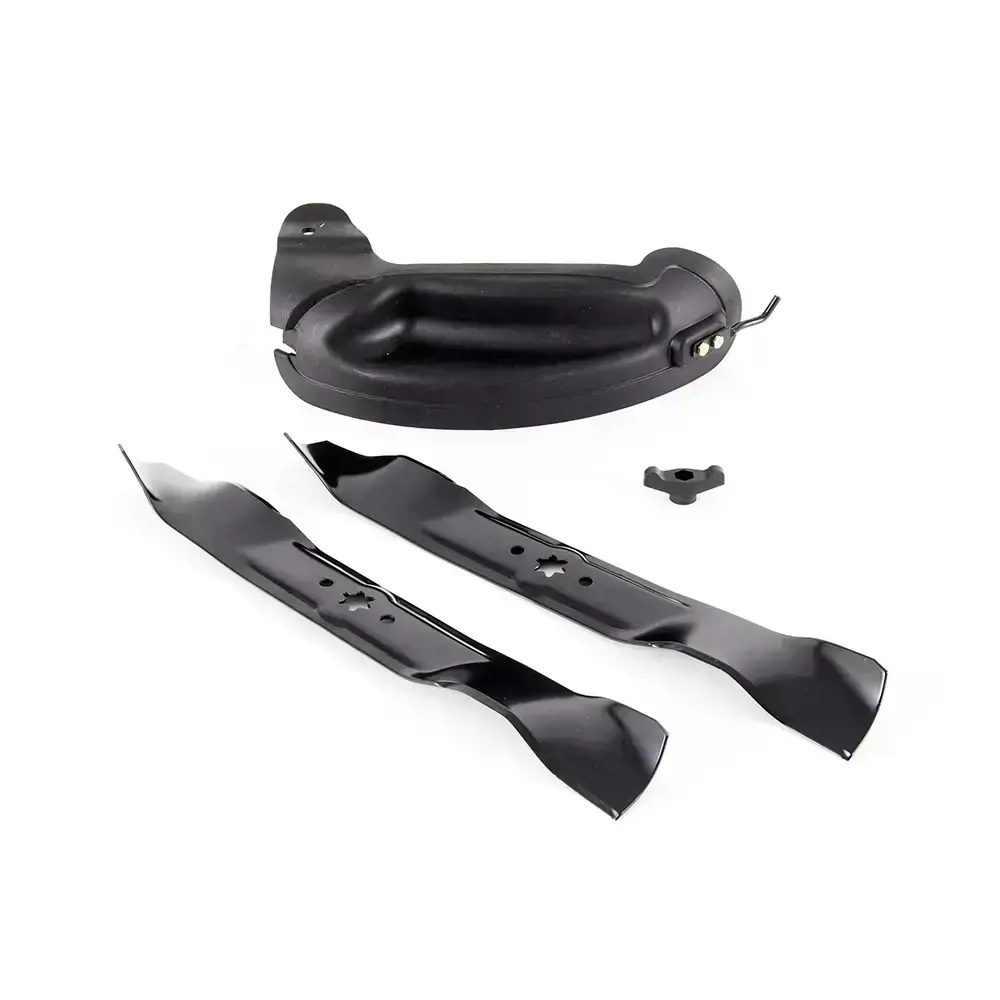
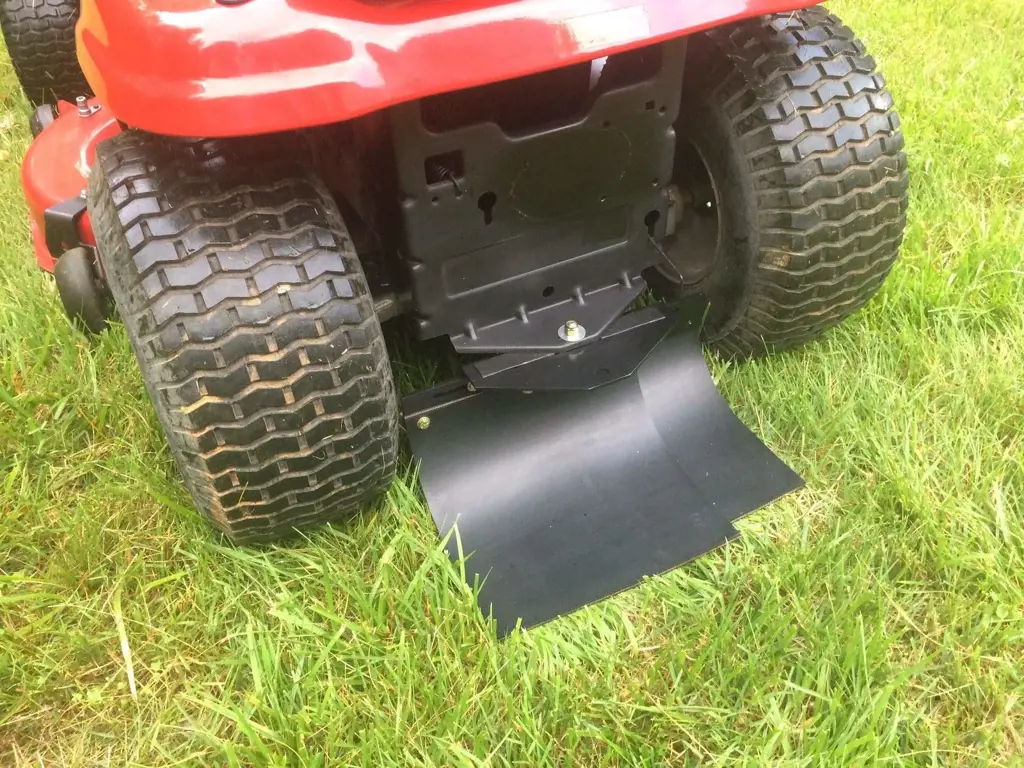
Add a mulching kit for a healthier lawn
If you're lucky enough to own a riding mower, you already know the convenience and time savings they offer when it comes to mowing your lawn. But did you know there are other cool things you can do with your riding mower that can benefit your lawn?
One of those cool things is adding a mulching kit to your mower. Mulching is the process of chopping grass clippings into tiny pieces and spreading them back onto your lawn. The result is a healthier lawn with enhanced soil fertility, reduced weed growth, and decreased watering needs.
Here's how adding a mulching kit to your riding mower works:
Step 1: Purchase a Mulching Kit
There are a variety of mulching kits available on the market, so make sure to choose one that will fit your mower's make and model. Most kits include a set of blades specifically designed for mulching, a discharge chute block-off plate, and hardware to mount the kit onto your mower.
Step 2: Remove the Mower Deck
Before installing the mulching kit, you'll need to remove the mower deck from your mower. This will give you access to the blades and allow you to swap them out for the mulching blades that came with your kit.
Step 3: Swap Out the Blades
Using the instructions included with your mulching kit, replace the standard mower blades with the mulching blades. These blades have unique serrations that chop the grass into small pieces as you mow, allowing the clippings to be spread evenly across the lawn.
Step 4: Install the Discharge Chute Block-Off Plate
Your mulching kit will also include a discharge chute block-off plate that prevents grass clippings from being discharged out the side of the mower deck. Instead, the clippings will be recirculated and chopped up into smaller pieces.
Step 5: Re-Attach the Mower Deck
Once you've installed the mulching kit, it's time to re-attach the mower deck to your riding mower.
Step 6: Mow Your Lawn
With your new mulching kit installed, you're ready to start mowing your lawn. As you go, the mulching blades will chop the grass into small pieces, which will then be spread back onto your lawn as you mow. The result is a healthier, greener lawn that requires less maintenance.
In addition to the benefits mentioned above, mulching also helps to reduce the amount of time and effort you spend cleaning up your lawn after mowing. With no clumps of grass to deal with, you can spend more time enjoying your lawn and less time hauling away yard waste.
So, if you're looking for a cool and beneficial project to tackle with your riding mower, consider adding a mulching kit. It's a simple upgrade that will pay off in spades when it comes to the health and beauty of your lawn.
12 Fun Things to Do in Coldwater, MI
You may want to see also
![]()
Use a spreader for fertilizing and weed control
Riding mowers are not only excellent for mowing the lawn; they can be used for a variety of other tasks as well. One of these tasks is fertilizing and weed control. A spreader attached to a riding mower can be an excellent tool for spreading fertilizer and herbicides over a large area of lawn.
Using a spreader attached to a riding mower makes the job of fertilizing and controlling weeds much easier and faster. The spreader can be filled with the appropriate amount of fertilizer or herbicide, and the riding mower can be driven around the lawn, releasing the product evenly as it goes.
One of the advantages of using a spreader attached to a riding mower is that it saves time and effort. The spreader spreads the product evenly over the lawn, which means that the user does not have to undertake the tedious task of spreading the product by hand. This can be especially beneficial for larger lawns, where spreading the product by hand can be an exhausting and time-consuming task.
Another advantage of using a spreader attached to a riding mower is that it ensures an even application of the product. Hand spreading can be haphazard, resulting in uneven distribution of the product and patches of over-fertilized or under-fertilized lawn. With a spreader attached to a riding mower, the product is distributed evenly over the entire lawn, resulting in a healthy, lush green lawn.
When using a spreader attached to a riding mower for fertilizing and weed control, it is essential to follow the manufacturer's instructions for the product being used. Over-application of fertilizer or herbicides can damage the lawn, making the lawn's condition worse instead of improving it.
In conclusion, using a spreader attached to a riding mower for fertilizing and weed control is an excellent idea. It saves time and effort, ensures an even application of the product, and helps make the lawn look more beautiful and healthy. Those who own a riding mower can try this simple trick and enjoy a more efficient way of maintaining a beautiful lawn.
12 Fun Activities Near Savannah Airport
You may want to see also
![]()
Attach a light kit for night time mowing
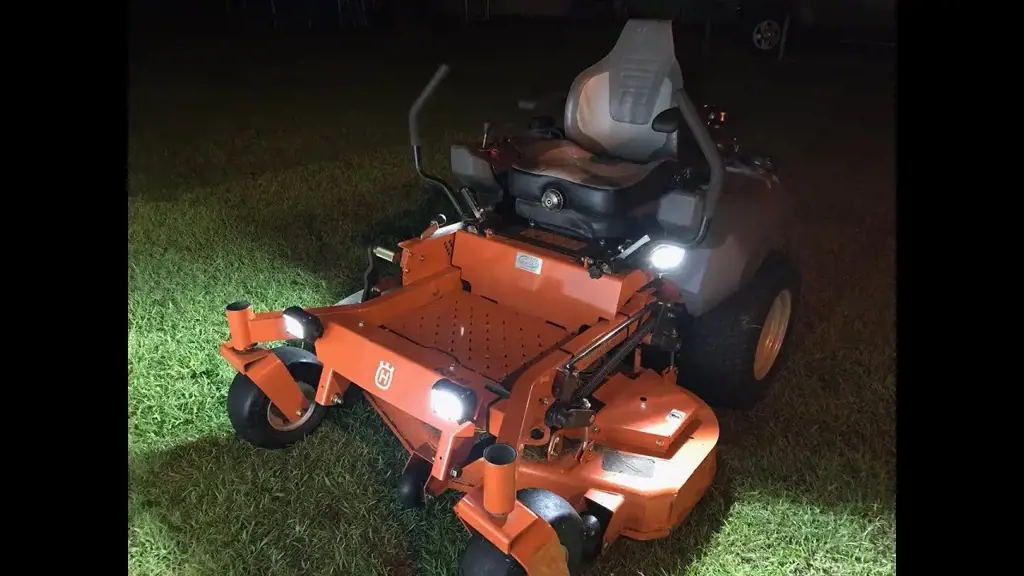
If you own a riding mower, you know how convenient it is to keep your lawn neat and tidy. However, mowing at night can be difficult if your yard isn't properly lit. Luckily, there is a solution to this problem: installing a light kit on your riding mower.
Attaching a light kit to your riding mower is an excellent way to help you navigate your lawn in the dark. You won't have to worry about missing spots, and you'll also be able to avoid obstacles such as rocks or tree stumps, which could be challenging to see in the dim light.
Installing the light kit is relatively easy and can be done in just a few steps. Here is a step-by-step guide on how to do it:
Step 1: Purchase a Light Kit
The first thing you need to do is to purchase a light kit that is designed for your specific model of riding mower. You can find light kits at most hardware and home improvement stores. Make sure to choose a kit that includes everything you need, such as wiring and a switch.
Step 2: Locate the Mounting Bracket
Once you have the light kit, you need to locate the mounting bracket on your riding mower. Typically, this is located near the headlights or on the dashboard. Once you have found the mounting bracket, attach the light kit to it according to the manufacturer's instructions.
Step 3: Install the Lights
Next, you need to install the lights themselves. This involves attaching the headlights to the brackets and securing them with screws. Be sure to follow the instructions carefully to ensure that the lights are installed correctly and securely.
Step 4: Connect the Wiring
The final step is to connect the wiring. Depending on the light kit you purchased, you may need to splice the wires or connect them using connectors. Make sure to follow the manufacturer's instructions carefully to avoid any errors or electrical issues.
Once the light kit is installed, you can safely mow your lawn at night. You'll enjoy the convenience of being able to mow when it's cooler outside, and you won't have to worry about missing spots or hazards. Additionally, if you have a large lawn, the lights can help you mow at a faster pace and get the job done more efficiently.
In conclusion, attaching a light kit to your riding mower is a simple and cost-effective way to make mowing at night more convenient and safe. With just a little effort, you can enjoy a beautifully manicured yard, day or night.
11 Fun and Free Things to Do in Melbourne, FL
You may want to see also
![]()
Use a power brush for sweeping driveways and sidewalks

Riding mowers are not just for cutting grass anymore. With the right attachments and tools, you can convert your mower into a versatile machine that can tackle a variety of tasks around your property. One of the cool things you can do with your riding mower is to use it to sweep driveways and sidewalks using a power brush attachment.
The power brush attachment is a tool that can be attached to the front of your riding mower. It features bristles that rotate to sweep debris and dirt from the surface of your driveway or sidewalk. The tool is designed to be used on flat or slightly sloped surfaces and can be particularly useful during fall when leaves and twigs cover your driveway and sidewalk.
To attach the power brush to your riding mower, you need to locate the mounting bracket on the front of the mower. Most mowers have a universal mounting bracket that can accommodate different types of attachments. Once you have located the mounting bracket, you can then attach the power brush by aligning the holes on the brush with the pins on the mower.
To use the power brush, simply start your mower and engage the power brush. The bristles will rotate, sweeping any debris and dirt from your driveway or sidewalk. You can easily steer your mower to cover the entire surface of the driveway or sidewalk, ensuring that every inch is swept clean. The power brush can be operated at different speed settings, depending on the amount of debris you need to clear.
Using your riding mower to sweep your driveway and sidewalk is an easy and efficient way to keep your property looking neat and tidy. It is also a great time-saver, as you can clean your entire driveway and sidewalk in just a few minutes. Additionally, using a power brush to sweep your driveway and sidewalk is eco-friendly, as it eliminates the need for gas-powered leaf blowers or brooms.
To get the most out of your power brush attachment, make sure you regularly maintain it by cleaning the bristles and replacing any worn-out parts. Before using the power brush, ensure that the surface you are cleaning is free of any large rocks or debris that may damage the bristles. Finally, always wear safety gear, including gloves and eye protection, when using the power brush.
In conclusion, a power brush attachment is a cool gadget that can transform your riding mower into a powerful sweeping machine. Using a power brush is an easy, efficient, and eco-friendly way to maintain your driveway and sidewalk. However, before purchasing a power brush, ensure that it is compatible with your riding mower and that it will meet your specific cleaning needs.
13 Fun Things to Do in Edgewater, NJ
You may want to see also
![]()
Connect a leaf blower for yard cleanup
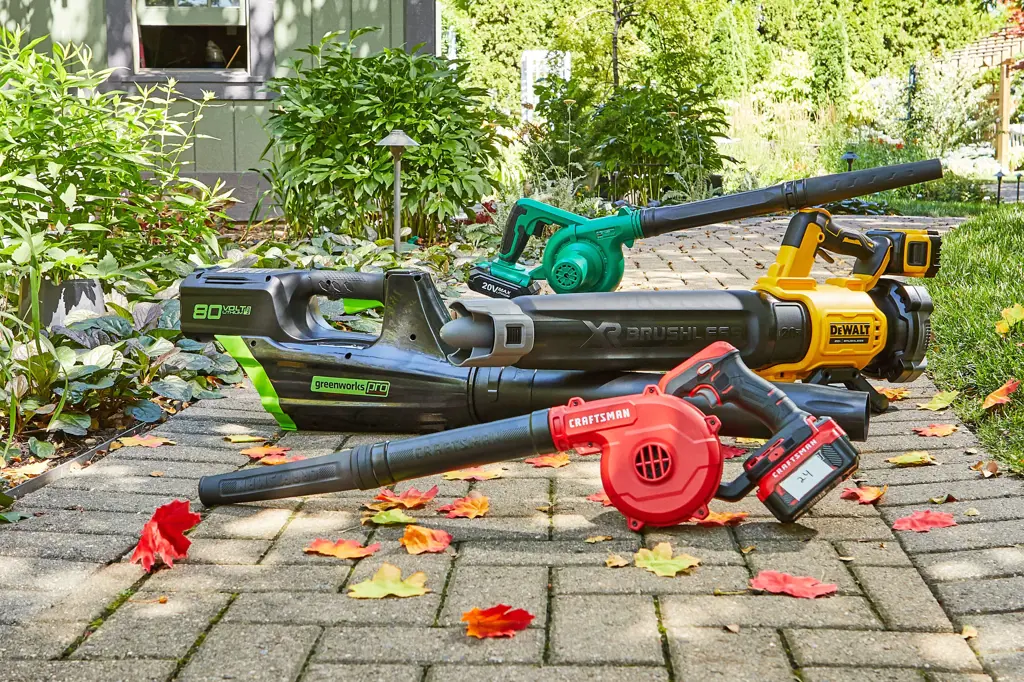
Cool Things to Do with Riding Mower: Connect a Leaf Blower for Yard Cleanup
Are you finding it challenging to clean up your property during fall season? Besides mowing your lawn, did you know you can connect a leaf blower to your riding mower to make yard cleanup easier and quicker? It's an easy yet effective way to clear off your lawn or driveway and keep it looking neat and tidy all year round. Here's how to hook it up:
Step 1: Check Whether Your Riding Mower is Compatible with a Leaf Blower
First, check the compatibility of your riding mower, whether it has a hitch and power takeoff (PTO) port. This port is located at the back of your rider, where the trailer attachment goes. If your mower has one, then it's compatible with almost any leaf blower.
Step 2: Choose the Right Leaf Blower
Choose the right leaf blower that is compatible with your riding mower's PTO port and hitch. You can either go for backpack-style leaf blowers, handheld leaf blowers, or wheeled vacuums. Pick the one that suits your needs, budget, and type of lawn or landscape you have.
Step 3: Install the Hitch and Attach the Leaf Blower
Install the hitch to the back of your riding mower if it's not already there. Once the hitch is in place, attach the leaf blower to the hitch where you typically attach a trailer. You may need to use a few bolts to attach the blower tightly to the hitch.
Step 4: Connect the PTO Shaft
Connect the PTO shaft that came with your leaf blower to your riding mower's PTO port. Usually, the shaft will come with the blower, and all you have to do is to slide it in and lock it in place.
Step 5: Check Everything is Secured
Before you start the leaf blower, make sure everything is secured properly. Check that the shaft and hitch are tightly secured, and double-check that there is enough fuel in the leaf blower to run it without interruption.
Step 6: Turn on the Riding Mower and Leaf Blower and Begin Work
Start your riding mower, and then turn on the leaf blower. You will hear the blower running while you drive the machine around your lawn. It's recommended to go slowly when cleaning up around your hard or soft-scape to avoid damaging any landscaping elements.
In Conclusion:
With this simple guide, connecting a leaf blower to your riding mower is an easy process. Now, yard clean-up doesn't have to be backbreaking, and you'll have more time to enjoy your property. Give your riding mower a new lease on life by attaching a leaf blower, and you'll wonder how you ever went without it. Happy mowing!
13 Fun Activities Near Florissant, CO
You may want to see also
![]()
Attach a dethatcher to remove dead grass and thatch
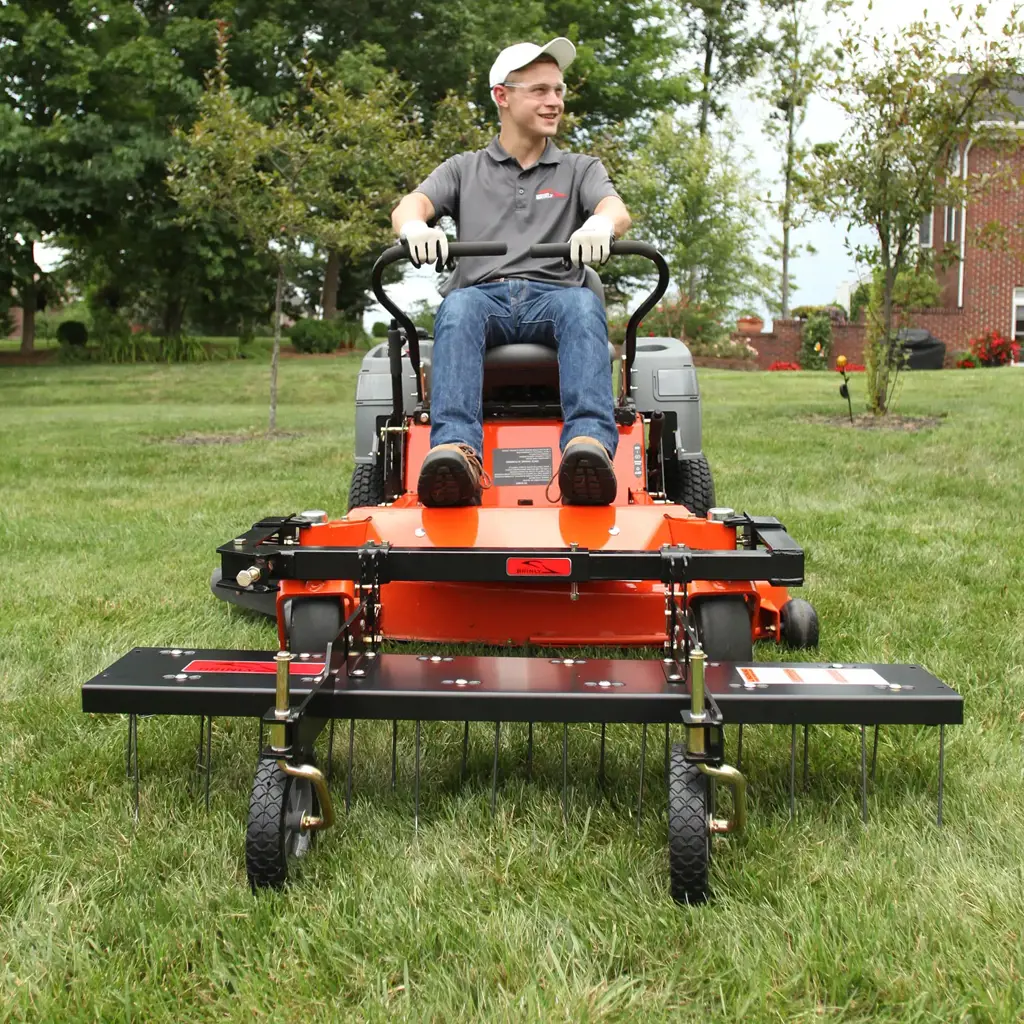
If you have a riding mower, you may be wondering what kinds of cool things you can do with it besides mowing the lawn. One thing you may not have considered is attaching a dethatcher to your riding mower. A dethatcher is a tool that removes dead grass and thatch, which can improve the health of your lawn. Here's how to attach a dethatcher to your riding mower and get the most out of it.
First, you'll need to find a compatible dethatcher for your riding mower. Many dethatchers are designed to be attached to lawn tractors or zero-turn mowers, but you should be able to find one that fits your riding mower's specifications. You can check with the manufacturer of your riding mower or look online for a compatible dethatcher.
Once you have your dethatcher, you'll need to attach it to your riding mower. This can be done by following the instructions that came with the dethatcher. Typically, you'll need to attach the dethatcher to the hitch on the back of your riding mower, and then connect it to the mower's power source.
Once your dethatcher is attached, you can start using it to remove dead grass and thatch from your lawn. The best time to dethatch your lawn is in the spring or fall, when the grass is actively growing. You should avoid dethatching during periods of drought or extreme heat, which can stress your lawn.
To use your dethatcher, you'll need to drive your riding mower across your lawn in a straight line, making sure to cover all areas evenly. The dethatcher will pull up dead grass and thatch, which you can then rake up and dispose of. You may need to make several passes over your lawn to remove all the dead grass and thatch.
Dethatching your lawn can have several benefits. It can improve the health and appearance of your lawn by allowing more air, water, and nutrients to reach the soil. It can also help prevent pests and diseases from taking hold in your lawn. Plus, it's a cool and unique way to use your riding mower.
In conclusion, attaching a dethatcher to your riding mower can be a cool and useful way to maintain your lawn. It's important to choose a compatible dethatcher, attach it properly, and use it at the right time and in the right conditions. With a little bit of effort, you can have a healthy and attractive lawn that's the envy of your neighbors.
12 Fun Activities to Enjoy in Lake Tahoe on Memorial Day Weekend
You may want to see also
![]()
Use a lawn striping kit for a professional-looking lawn
A riding mower is a great investment for any homeowner with a large lawn to maintain. Not only does it make cutting grass less time-consuming, but it can also be a lot of fun to drive around. However, simply mowing your lawn is not the only cool thing you can do with a riding mower. By using a lawn striping kit, you can achieve a professional-looking lawn that will be the envy of your neighborhood.
A lawn striping kit is an attachment that you can add to your riding mower that will create a striped effect on your lawn. The kit works by bending the blades of grass in opposite directions as the mower passes over them, creating a light-reflecting effect that gives the lawn a professional look. The kit is easy to install and can be purchased from most home improvement stores.
To use the lawn striping kit, adjust your mower to the desired cutting height. Attach the kit to your mower and then start mowing as you normally would. Make sure to mow the length of your lawn in straight lines to create even stripes. It is important to overlap each stripe slightly to ensure the effect is consistent.
There are a few things to keep in mind when using a lawn striping kit. First, make sure to mow your lawn when it is dry. Wet grass will not stand up as easily, and the striping effect may not be as noticeable. Second, avoid mowing over the same spot twice, as this can damage the grass and create uneven stripes. Finally, make sure to thoroughly clean your mower and striping kit after each use to extend their lifespan.
In conclusion, using a lawn striping kit with your riding mower is a cool and easy way to achieve a professional-looking lawn that will make your neighbors jealous. Not only is it simple to install and use, but it also adds another level of fun to an already enjoyable activity. So, the next time you mow your lawn, consider adding a lawn striping kit for even more excitement and outstanding results.
14 Fun Things to Do in Manteo, NC
You may want to see also
![]()
Install a sun shade to protect from harmful UV rays
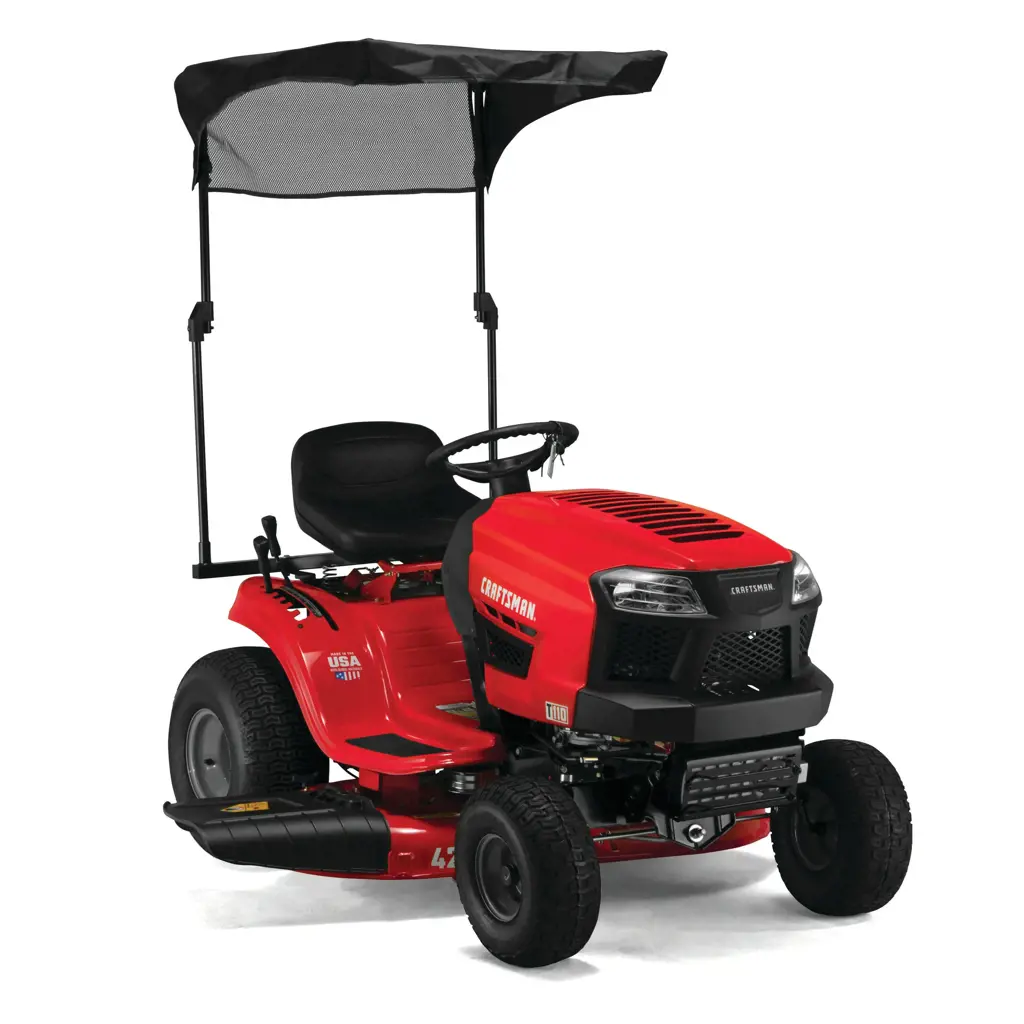
If you own a riding mower, you probably love using it to maintain your lawn. However, spending hours under the hot sun can be harmful to your health. This is why installing a sun shade for your mower can be a great investment. Not only will it protect you from harmful UV rays, but it will also make mowing more comfortable and enjoyable. In this article, we will discuss the benefits of installing a sun shade on your riding mower and how to do it.
Benefits of Installing a Sun Shade
Installing a sun shade on your riding mower will provide a range of benefits for you and your mower. First and foremost, it will protect you from harmful UV rays. Exposure to the sun can cause skin cancer, and it is essential to take precautions to protect yourself from it. Secondly, it will keep you cool and comfortable while mowing. Riding mowers generate a lot of heat, which can be exhausting during long mowing sessions. With a sunshade, you can stay cool and comfortable in your seat. Finally, it will protect your mower from the sun's damaging effects. UV rays can cause damage to the paint, tires, and engine of your mower. A sun shade will prevent this damage, keeping your mower in top condition.
Installing a Sun Shade
Installing a sun shade on your riding mower is a simple process, and you can do it on your own. Follow these steps to install a sunshade on your mower:
- Choose a sun shade: There are many types of sunshades to choose from, including canopies, umbrellas, and screens. Consider the size of your mower and the amount of protection you need before making your choice.
- Install the mounting brackets: Most sunshades come with mounting brackets that attach to the frame of your mower. You will need to drill holes into the frame and bolt the brackets in place.
- Attach the sun shade: Once the brackets are in place, you can attach the sunshade to them. This typically involves sliding the sunshade into place and tightening the bolts.
- Adjust the sun shade: Once the sunshade is attached, you will need to adjust it to provide the best coverage. Most sunshades can be adjusted for height and angle to suit your needs.
A sun shade is an excellent addition to any riding mower. It will protect you from harmful UV rays, keep you comfortable while mowing, and prevent damage to your mower. With a range of sunshades available, you can choose one that suits your needs and budget. Installing a sunshade is a simple process that you can do on your own, providing immediate benefits for you and your mower. So, if you want to make the most of your mowing sessions, consider installing a sun shade on your riding mower today.
10 Free Things to Do in Winston Salem: Exploring the City's Many Attractions
You may want to see also
![]()
Use a front bumper for added protection
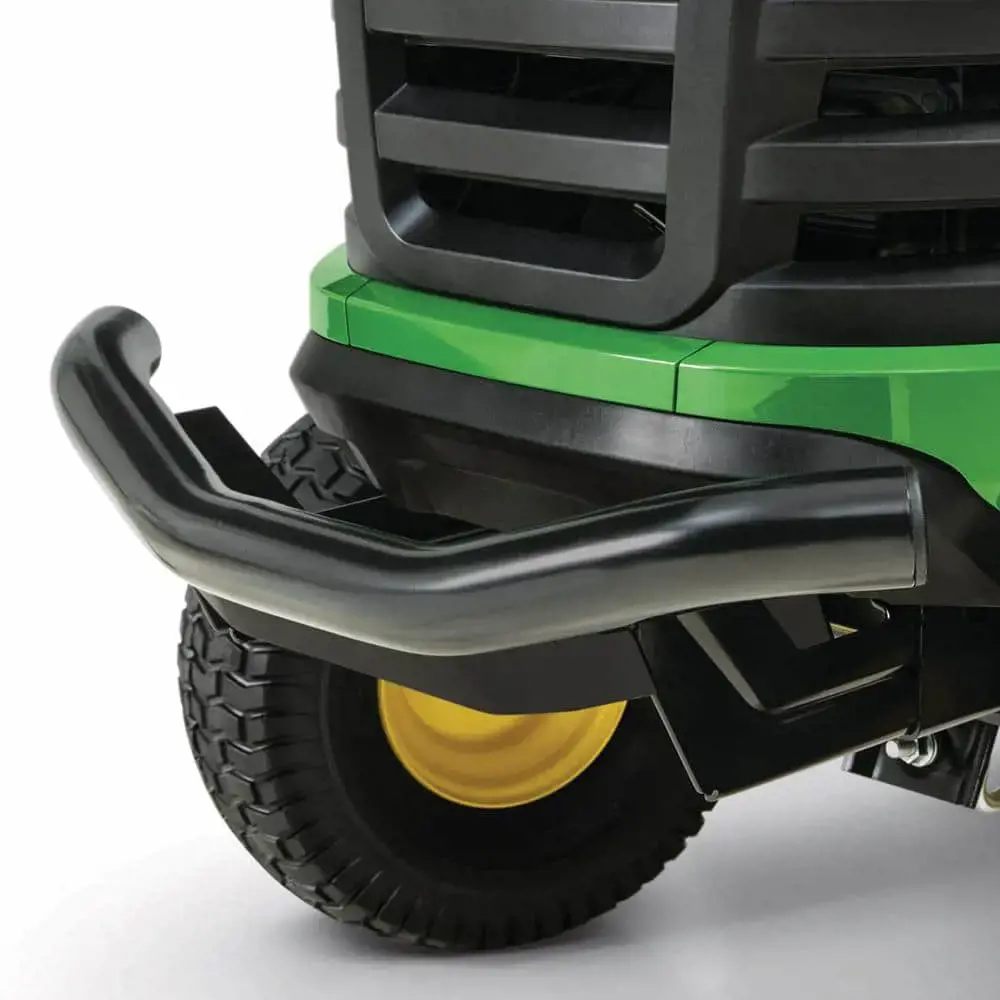
One of the cool things that you can do with your riding mower is to install a front bumper. Not only does it add an aesthetic touch to your machine, but it also offers added protection to your mower and yourself.
A front bumper is a metal or plastic cover that is mounted on the front of your riding mower. It acts as a barrier that helps prevent collisions and impacts with obstacles like trees, stones, or other equipment. A bumper absorbs the shock of an impact and protects the front end of your mower from damage.
The installation of a front bumper is relatively easy, even for those with minimal mechanical skills. Most bumpers come with easy-to-follow instructions, and all the necessary hardware is included. You can also customize your bumper by painting it to match your mower's color or adding LEDs for better visibility.
Apart from protection, a front bumper can also enhance the look of your mower. They come in different styles and sizes, ranging from simple, low-profile bumpers to more elaborate bull bars. You can choose one that complements the overall design of your mower and gives it a meaner look.
Moreover, having a front bumper on your mower can also increase the resale value of your machine. It shows that you've taken extra steps to maintain and protect your asset, which will be a selling point for any future buyers.
In conclusion, a front bumper is an excellent addition to your riding mower, providing protection, style, and improved resale value. When shopping for one, ensure that it fits your mower's make and model and is easy to install. With a front bumper, you can ride confidently and tackle any obstacle that comes along the way.
14 Fun Things to Do in Driggs, ID for an Unforgettable Vacation
You may want to see also
![]()
Add a fuel stabilizer to extend the life of your mower
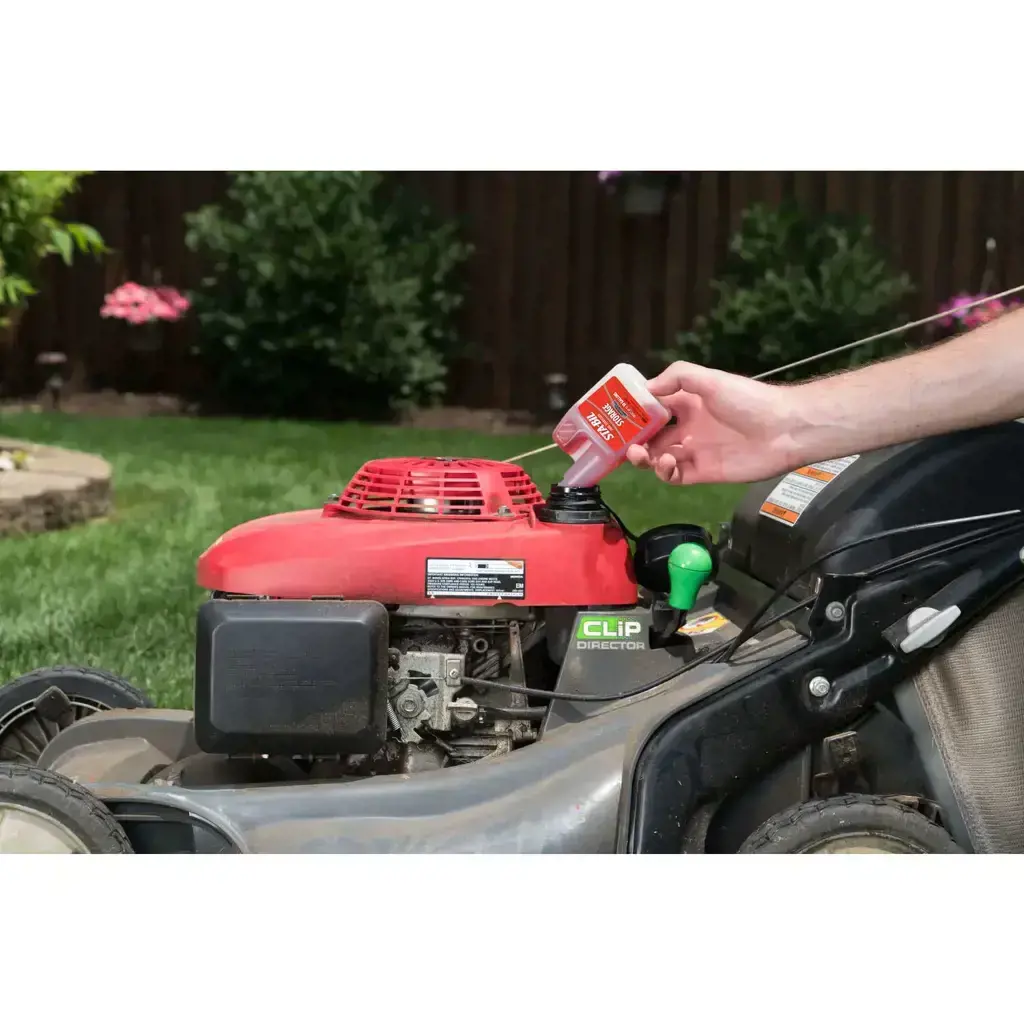
If you are a proud owner of a riding mower, then you know how useful it can be when it comes to maintaining your lawn and keeping it well-groomed. Riding mowers make it much easier to get your yard work done without breaking your back. But did you know that adding a fuel stabilizer to your riding mower can extend its life and keep it running smoothly? Here's how fuel stabilizers work and why they are an essential ingredient for keeping your mower running efficiently.
Fuel stabilizers are chemical additives that are added to fuel to extend its life and prevent it from breaking down. They work by preventing the fuel from absorbing moisture or becoming oxidized. Fuel stabilizers are typically used to protect gas-powered engines, such as riding mowers, boats, and generators, that are stored for long periods without being used. They can be found at most hardware stores and online retailers.
If you leave fuel in your mower's fuel tank for an extended period, it can start to break down and become stale. This can lead to problems such as clogged fuel lines, carburetor issues, and engine damage. Fuel stabilizers can prevent these problems by keeping the fuel fresh and preventing it from breaking down over time. They can also protect your mower's engine from corrosion caused by moisture buildup.
How to add a fuel stabilizer to your riding mower
Adding a fuel stabilizer is an easy process that takes only a few minutes. Simply follow these steps:
- Drain the mower's fuel tank completely.
- Mix the recommended amount of fuel stabilizer into a can of fresh gas.
- Fill the mower's fuel tank with the fuel stabilizer mixture.
- Run the mower for a few minutes to allow the fuel stabilizer to circulate throughout the engine.
- Turn off the mower and store it as you normally would.
It's essential to add a fuel stabilizer before storing your riding mower for an extended period. It can prevent costly repairs caused by stale fuel and keep your mower running smoothly for years to come.
Adding a fuel stabilizer to your riding mower may seem like a small step, but it can have a significant impact on the overall lifespan of your machine. It can prevent serious engine damage caused by stale fuel and save you money on costly repair bills. Fuel stabilizers are easy to find, simple to use, and should be a part of any routine maintenance plan for your riding mower. So, the next time you fill up your mower's gas tank, make sure to add a fuel stabilizer, and enjoy a smoother, longer-lasting machine.
14 Fun and Exciting Things to Do in Montecito
You may want to see also
![]()
Use a snow blower attachment for heavy snowfall (if available)
_20230603043242.webp)
If you live in an area where heavy snowfall is a common occurrence, then you know just how important it is to have an effective snow removal strategy. While shoveling walkways and driveways may seem like a feasible option for light snow, heavy snowfall can be a nightmare to deal with. Fortunately, if you have a riding mower, you can easily attach a snow blower attachment and make your life a whole lot easier.
Snow blower attachments are specialized add-ons for riding mowers that are specifically designed for removing snow. They are designed to mount onto the front of your mower and utilize the power of your engine to drive the auger and impeller within the attachment, which breaks up and propels snow out of the way.
Here's how you can use a snow blower attachment with your riding mower to clear heavy snowfall:
- Install the attachment: Remove the mower deck from your riding mower and install the snow blower attachment in its place. Follow the manufacturer's instructions for proper installation to ensure that the attachment is mounted securely.
- Adjust the height: Set the height of the attachment correctly so it will skim the surface of the snow. This will ensure that the snow blower auger can effectively break up the snow and propel it out of the way.
- Start the engine: Start your mower's engine and engage the snow blower attachment's auger and impeller.
- Start moving: Drive your riding mower in the direction you wish to clear the snow. The snow blower attachment will break up the snow and throw it to the side.
- Repeat until done: Work your way through your driveway and sidewalks, covering as much area as possible. When you reach the end of your driveway, angle your snow blower attachment so it blows the snow away from traffic.
While using a snow blower attachment with a riding mower may be more expensive than manually removing snow with a shovel, it is a cost-effective solution for individuals who live in areas that receive heavy snowfall. Additionally, this method of snow removal is faster, requires much less physical effort, and allows you to cover a larger area in less time.
In conclusion, a snow blower attachment for your riding mower is a great investment if you are looking for an efficient way to remove snow during heavy snowfall. Properly installing and operating your snow blower attachment can make the running of your snow removal chores a lot easier and save you time and energy. In addition, the attachment can be used for other maintenance chores beyond winter and make your mower more versatile for year-round use.
12 Best Outdoor Activities near Stone Mountain NC
You may want to see also
Frequently asked questions
Can I use my riding mower to pull a small trailer? - Yes, you can attach a trailer to the back of your riding mower for hauling small loads, like firewood or yard waste.
Can I use my riding mower to give my kids a ride around the yard? - It is not recommended to give rides to your kids since riding mower accidents happen more often than you think.


3 Comments
Nelson Logan
Charis Hayes
Naim Haliti
Author