Embroidery floss is a versatile and colorful material that can add a touch of personality to any DIY project. Whether you're a seasoned embroiderer or a beginner just starting to experiment with this craft, there are countless ways to incorporate embroidery floss into your creations. In this article, we'll explore 11 unique and creative ways to use embroidery floss in your DIY projects, from adding intricate details to clothing to creating beautiful wall art pieces. So grab your needle and thread and let's get started!
| Things to Do with Embroidery Floss | Description |
|---|---|
| Cross-stitch | Create beautiful patterns on fabric using floss |
| Friendship bracelets | Perfect for making matching bracelets with friends |
| Tassels | Decorate bags, keychains, or home decor |
| Pom-poms | Add a pop of color to a hat or scarf |
| Needlepoint | Create intricate designs on a canvas |
| Embroidery | Stitch designs onto clothing or home decor |
| Kumihimo braiding | Make colorful cords for jewelry or accessories |
| Macrame | Create delicate wall hangings or plant hangers |
| Weaving | Use embroidery floss to add color and texture to woven pieces |
What You'll Learn
- Create tassels for jewelry and accessories
- Add colorful braids to hair
- Stitch names or lyrics onto jackets
- Make friendship bracelets
- Create personalized embroidery hoop art
- Add tassels to pillows
- Sew patches onto jean jackets or backpacks
- Embellish hats with stitching
- Create colorful keychains
- Make decorative bookmarks
- Add unique details to shoes
![]()
Create tassels for jewelry and accessories
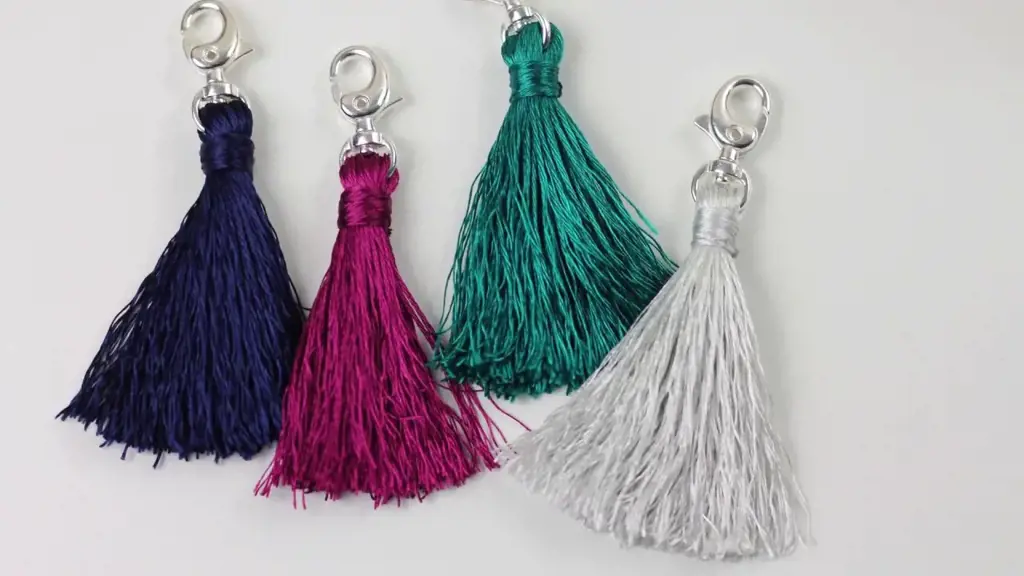
Embroidery floss is a versatile material that can be used for a variety of craft projects, including creating tassels for jewelry and accessories. Tassels are a classic embellishment that can add a stylish touch to bags, keychains, necklaces, earrings, and more. In this article, we will discuss how to create tassels using embroidery floss.
Materials Needed:
- Embroidery floss
- Scissors
- A small piece of cardboard or a tassel maker (optional)
Step 1: Choose the color of the embroidery floss you want to use for your tassel. You can use one color or combine multiple colors to create a multicolored tassel.
Step 2: Cut a piece of cardboard to the desired length of your tassel. The longer the cardboard, the longer the tassel will be. Alternatively, you can use a tassel maker, which is a tool specifically designed for making tassels.
Step 3: Hold the end of the embroidery floss against the cardboard or tassel maker, leaving some extra length at the top to attach to your project. Begin wrapping the floss around the cardboard, making sure each wrap is tight and close together.
Step 4: Continue wrapping until you reach your desired thickness for the tassel. The more wraps you make, the thicker the tassel will be.
Step 5: Cut the end of the embroidery floss and use a separate piece of floss to tie a knot around the top of the wrapped floss. Make sure the knot is tight and secure.
Step 6: Slide the tassel off the cardboard or tassel maker, keeping the knot at the top.
Step 7: Cut a small piece of embroidery floss and wrap it around the top of the tassel several times, tying it in a knot to secure it. Cut off any excess floss.
Step 8: Trim the bottom of the tassel to make it even. You can choose to trim it straight across or at an angle for a more dynamic look.
Step 9: Attach the tassel to your project using the extra length of floss at the top of the tassel.
With these easy steps, you can create beautiful tassels that can be used to enhance the look of any accessory or jewelry piece. Experiment with different colors and sizes to create tassels that are unique and stylish. Happy crafting!
12 Fun Things to Do in Yardley, PA
You may want to see also
![]()
Add colorful braids to hair
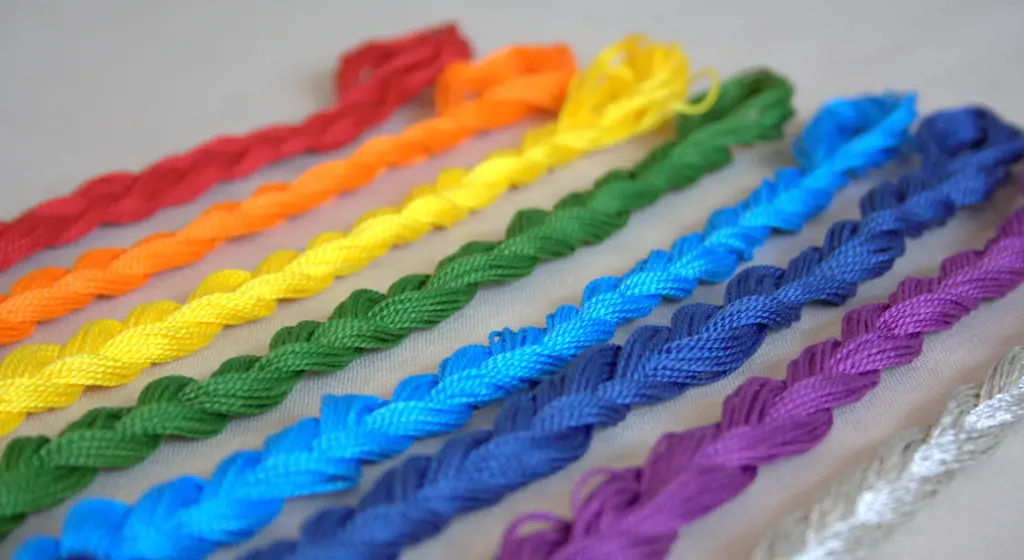
Embroidery floss is a versatile and colorful crafting material that can be used in a variety of ways. One fun way to utilize embroidery floss is by adding colorful braids to your hair. This creates a unique and eye-catching look that is perfect for festivals or any casual occasion.
To get started, you will need a few supplies. These include embroidery floss in your desired colors, a hairbrush, some hair elastics, and a pair of scissors. Once you have gathered all of your supplies, follow these steps to create colorful braids in your hair:
Step 1: Prep your hair
Start by brushing your hair to ensure that it is free of knots and tangles. You can do this either when it's dry or wet, depending on your hair type. If your hair is prone to tangles, consider using a detangling spray or serum to help smooth it out.
Step 2: Tie off a section of hair
Choose a section of hair that you want to braid, and tie off the rest with a hair elastic. This will keep it out of the way while you work on the braid.
Step 3: Cut embroidery floss
Cut a length of embroidery floss that is twice as long as the section of hair you are braiding. Fold it in half and tie a knot at the top of the loop. This will create a loop of floss that is twice as thick and strong enough to braid with.
Step 4: Start braiding
Take the loop of floss and place the knot at the base of the section of hair you are braiding. Divide the hair into three even sections and start braiding the floss in with the hair. Make sure to keep the tension even so that the braid is neat and tidy.
Step 5: Finish the braid
Once you've braided all the way to the end of the section of hair, tie off the braid with another hair elastic. You can also tie a knot in the floss to secure it in place.
Step 6: Repeat
Repeat steps 2-5 with the remaining sections of hair that you want to add braids to. You can use different colors of embroidery floss for each braid, or mix and match to create a rainbow effect.
Step 7: Style your braids
Once all of your braids are done, you can style them to your liking. You can wear them loose or tie them back into a ponytail or bun. You can also pin them up to create intricate designs or wrap them around your head like a crown.
In conclusion, adding colorful braids to your hair with embroidery floss is a fun and easy way to experiment with your look. It's perfect for festivals, picnics, or any casual occasion. With a little creativity and a few supplies, you can make your hair stand out and turn heads wherever you go.
12 Top Things to Do in Addis Ababa
You may want to see also
![]()
Stitch names or lyrics onto jackets
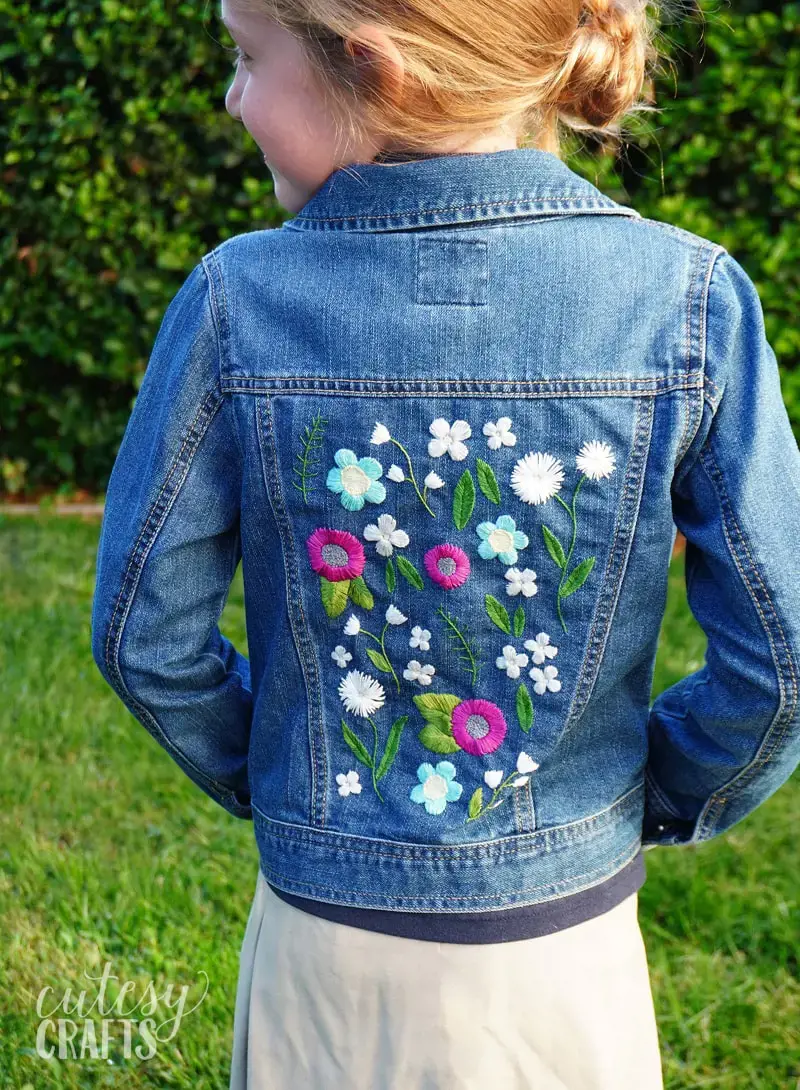
Embroidery floss is an incredibly versatile and useful material that can be used in a variety of different ways. One fun and creative way to use embroidery floss is to stitch names or lyrics onto jackets. This is a great way to personalize your wardrobe and add some unique and eye-catching touches to your clothing.
To get started with this project, you will need some basic materials, including embroidery floss, a needle, and a jacket or other piece of clothing that you want to embellish. The first step is to choose the text that you want to stitch onto your jacket. This could be your name, a favorite song lyric, a quote, or any other words that resonate with you.
Next, you will want to choose a font or style for your stitching. This could be a simple and classic font, or you could get more creative and choose a more decorative style. You can experiment with different types of stitches, such as backstitch or satin stitch, to create the best effect.
Once you have your text and style chosen, it's time to start stitching! Thread your needle with the embroidery floss and carefully stitch your text onto the jacket. Be sure to take your time and work carefully to create neat and even stitches. You may want to use a ruler or other straight edge to help you create perfectly straight lines.
As you stitch, be sure to leave enough space between each letter or word so that your text is easy to read. You may also want to choose a color of floss that contrasts nicely with the color of your jacket to ensure that your stitching really stands out.
After you have completed your stitching, be sure to tie off your thread and snip any loose ends. You can then enjoy your personalized jacket and show off your creative skills to the world! With embroidery floss, the possibilities are endless, so be sure to experiment and have fun with this fun and creative craft.
12 Fun Things to Do in Holly Springs, NC
You may want to see also
![]()
Make friendship bracelets

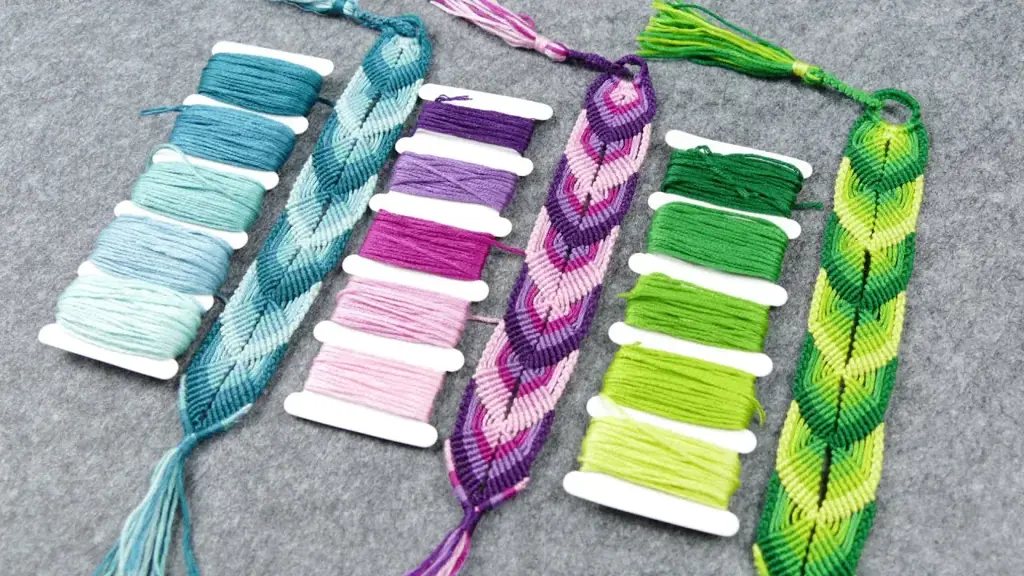
Embroidery floss is a versatile crafting material that can be used for a variety of projects. One of the most common and popular things to make with embroidery floss are friendship bracelets.
Friendship bracelets have been around for generations and are a symbol of friendship, love, and unity. They can be made in different colors, patterns, and styles. Making friendship bracelets with embroidery floss is a fun and relaxing activity that can be enjoyed by people of all ages.
To make friendship bracelets with embroidery floss, you will need:
- Embroidery floss in different colors
- Scissors
- Clipboard or tape
- Tapestry needle (optional)
Steps to make a basic friendship bracelet:
- Select the colors you want to use and cut 6 strands of embroidery floss, each about 12 inches long.
- Take all the strands and tie a knot at one end, leaving a small loop. This loop will be used to attach the bracelet to your wrist while making it.
- Secure the knot to a clipboard or use tape to attach it to a tabletop.
- Arrange the strands in the order you want the colors to appear.
- Take the first strand and make a forward knot over the second strand. To do this, take the first strand and make a "4" shape over the second strand. Then, bring the end of the first strand under the second strand and through the loop of the "4" shape. Pull the knot tight.
- Repeat step 5 with the same strand for the rest of the strands.
- When you reach the end of the bracelet, tie a knot and trim the ends.
- To make the bracelet sturdier and prevent the knots from coming undone, you can add a drop of glue or use a tapestry needle to weave the ends under a few of the knots.
There are many variations of friendship bracelets that you can make with embroidery floss, such as the spiral, chevron, and diamond patterns. You can also add beads, charms, or other decorations to make your bracelet unique.
In conclusion, making friendship bracelets with embroidery floss is an enjoyable activity that can be done anytime and anywhere. It is a great way to express your creativity, bond with your friends, and share good vibes. So why not try it and see what beautiful bracelets you can make with this simple yet fantastic material?
13 Fun Things to Do in St. Charles, IL
You may want to see also
![]()
Create personalized embroidery hoop art
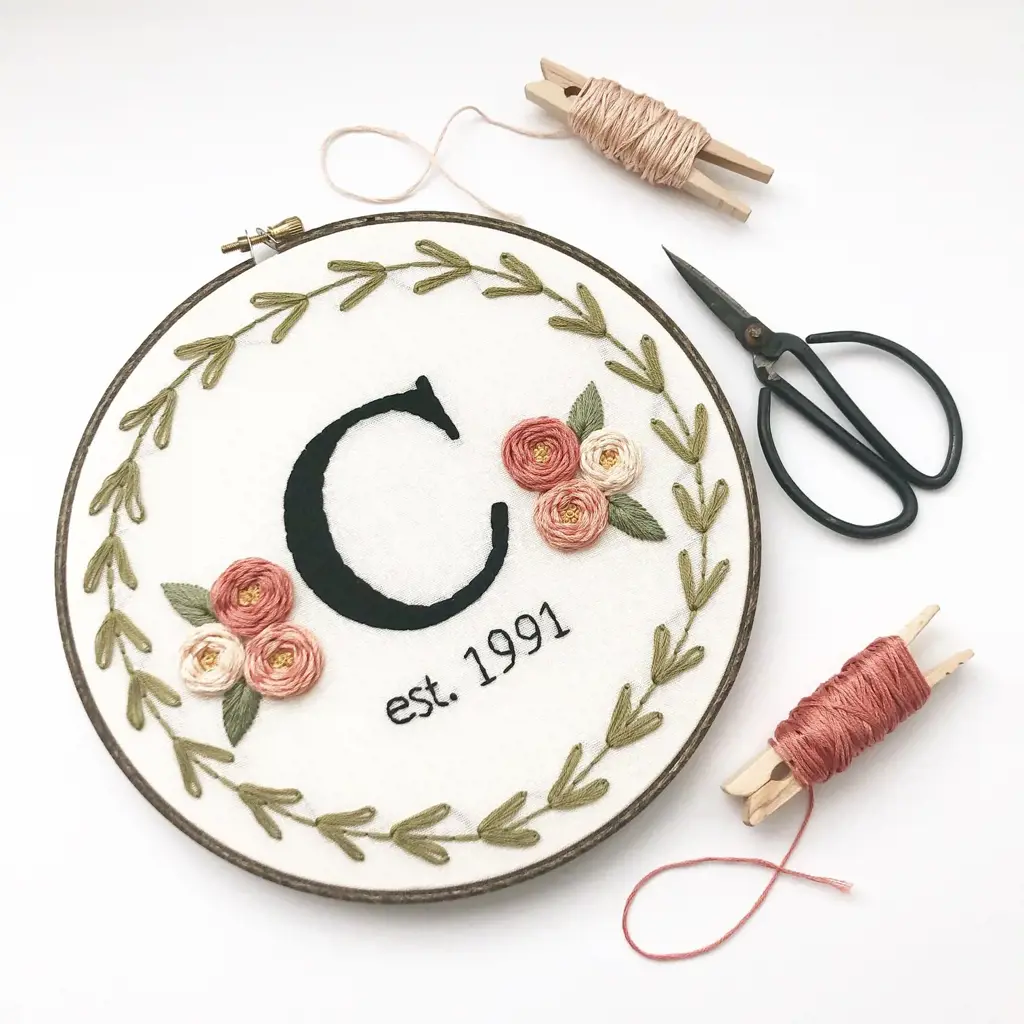
Embroidery floss is an excellent material for creating personalized and unique hoop art that you can proudly display in your home. With just a few simple techniques and some creativity, you can create beautiful and eye-catching wall art using embroidery floss. In this article, we'll explore some of the ways you can use embroidery floss to create personalized embroidery hoop art.
Choose Your Colors
The first step in creating personalized embroidery hoop art is choosing your colors. Embroidery floss comes in a wide range of colors, so the possibilities are endless. You can choose a color scheme that matches your decor, or you can create something more whimsical with bright and bold colors. Whatever your preference, make sure you have plenty of thread in your chosen colors before you begin.
Select Your Design
Once you have your colors, it's time to choose your design. There are countless patterns and designs available online to inspire you. You may want to create something simple and modern, or you may prefer a more intricate and detailed design. Whatever you choose, make sure it speaks to your personal style and preferences.
Prepare Your Hoop
To start your embroidery hoop art, you'll need to prepare your hoop. Choose a hoop that is the right size for your design, and tighten the screw on the top of the hoop so that the embroidery fabric is taut. Then, cut the excess fabric away, leaving only a small border of fabric around the hoop.
Begin Stitching
With your colors and design selected and your hoop prepared, it's time to start stitching. There are several methods you can use, including the popular satin stitch, backstitch, and French knot. You can use these stitches to outline your design or fill it in completely.
Experiment with different stitch techniques, and don't be afraid to try something new. Embroidery is a forgiving art form, so you can always undo and redo stitches until you get the look you want.
Add Finishing Touches
Once you have finished stitching, it's time to add the finishing touches. Consider using a contrasting color for the border around the hoop, or adding embellishments like beads or sequins to make your embroidery hoop art even more unique.
Hang Your Artwork
Finally, it's time to display your finished embroidery hoop art. Hang it in a prominent place in your home where everyone can see and appreciate your creativity.
Embroidery floss is a versatile and fun material to work with, and with these tips, you can create personalized embroidery hoop art that you can be proud of. The possibilities are endless, so let your imagination run wild, and enjoy the creative process.
12 Fun Things to Do in BitLife for Maximum Enjoyment!
You may want to see also
![]()
Add tassels to pillows
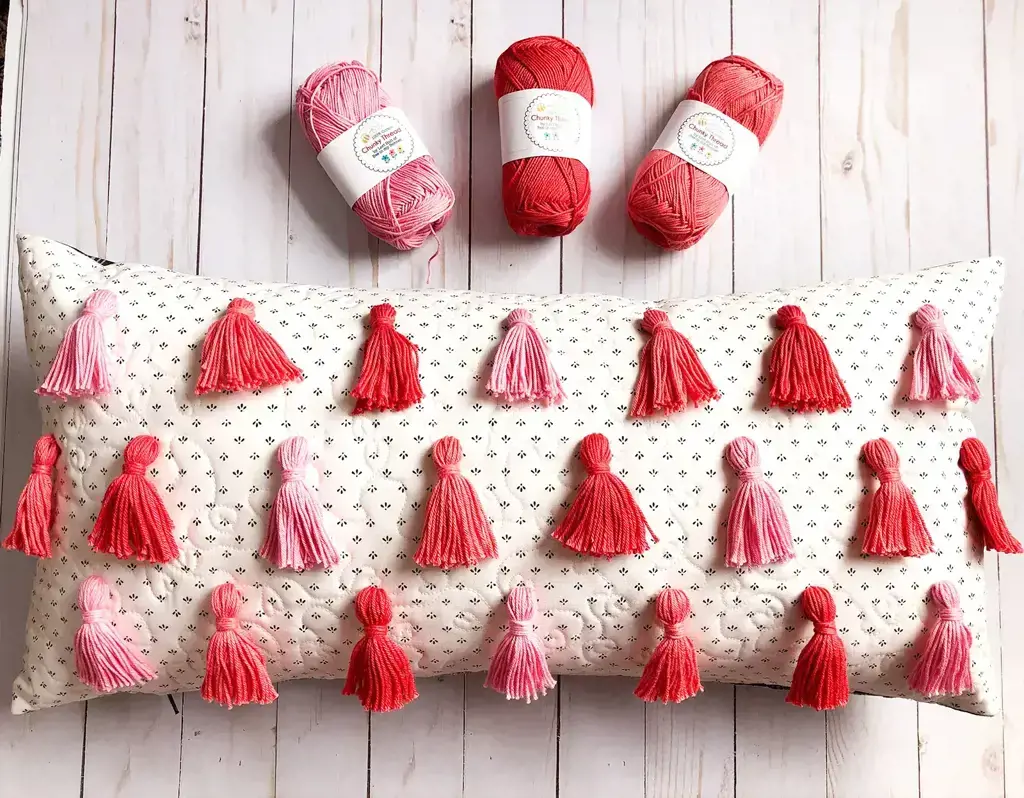
Embroidery floss is a versatile material that can be used for a variety of crafts. One fun and simple project is adding tassels to pillows. In just a few easy steps, you can upgrade the look of any old pillow into a trendy and unique piece of decor.
Materials:
- Embroidery floss (in your desired color)
- Scissors
- Needle
- Pillow (either store-bought or handmade)
Instructions:
Step 1: Cut your embroidery floss to your desired length. If you have a large pillow, you may want longer tassels, while smaller pillows will require shorter lengths.
Step 2: Take one strand of the embroidery floss and fold it in half. Thread a needle with the folded end and pull the needle through the center of the pillow.
Step 3: Pull the needle until the folded end of the embroidery floss is completely through the pillow.
Step 4: With the embroidery thread now sticking out both ends of the pillow, tie a knot tightly around the folded end.
Step 5: Take another strand of embroidery floss and wrap it tightly around the top of the tassel (near the knot) several times, tying it off tightly in a knot.
Step 6: Cut off any excess embroidery floss and trim the bottom of the tassel to your desired length.
Step 7: Repeat steps 2-6 until you have added as many tassels as you would like to your pillow.
Step 8: Fluff your tassels and admire your new unique pillow!
Adding tassels to pillows is a fun and easy way to add some personality to any room in your house. With a wide variety of embroidery floss colors available, you can customize your tassels to match any decor scheme. This project is also a great way to use up any leftover embroidery floss you may have lying around from other projects. So, gather your materials and get tasseling!
14 Fun Things to Do in Caseville, Michigan
You may want to see also
![]()
Sew patches onto jean jackets or backpacks

Embroidery floss is more than just a string of colored threads. It's a crafting utility that can jazz up anything from a boring tote bag to a plain jean jacket. One of the best ways to use embroidery floss is by sewing patches onto clothing items. Here's how to do it in a few easy steps.
Step 1: Choose your patches
The first step in this project is picking out the patches you want to sew onto your jean jacket or backpack. Patches come in all sorts of shapes, sizes, and designs, so it's essential to choose ones that complement the color scheme of your item. You can either pick patches with iron-on backing or choose to sew them on by hand.
Step 2: Thread your needle
Once you have your patches, you'll need to thread your needle. Cut a piece of embroidery floss about 18 inches long and thread it through the eye of a large enough needle. Tie a knot at the end of the floss, so it doesn't come undone while you're sewing.
Step 3: Pin the patch
Take one of the patches you want to sew onto your item and place it where you would like it to go. Pin it into place on your item so that it doesn't shift around while you're sewing it on.
Step 4: Start sewing
Begin to sew your patch onto your item by bringing your needle up through the underside of the patch and the first layer of fabric from your item. Run your needle back through the patch and fabric and continue back and forth like this until you've sewn around the entire patch. Make sure you're taking small, even stitches to keep the patch securely attached to the item.
Step 5: Finishing touches
Once you've sewn around the patch, tie off your thread by knotting it a few times on the underside of your item. Trim the excess floss, and you're done!
Sewing patches onto jean jackets and backpacks is an easy and fun way to add personality to your favorite items. Using embroidery floss makes the process simple and enjoyable. Whether you're an embroidery enthusiast or a newbie to the craft, this project is one that anyone can tackle. Get creative and start jazzing up your clothes and accessories with embroidery floss today.
12 Fun Activities to Do Near Legoland Florida
You may want to see also
![]()
Embellish hats with stitching
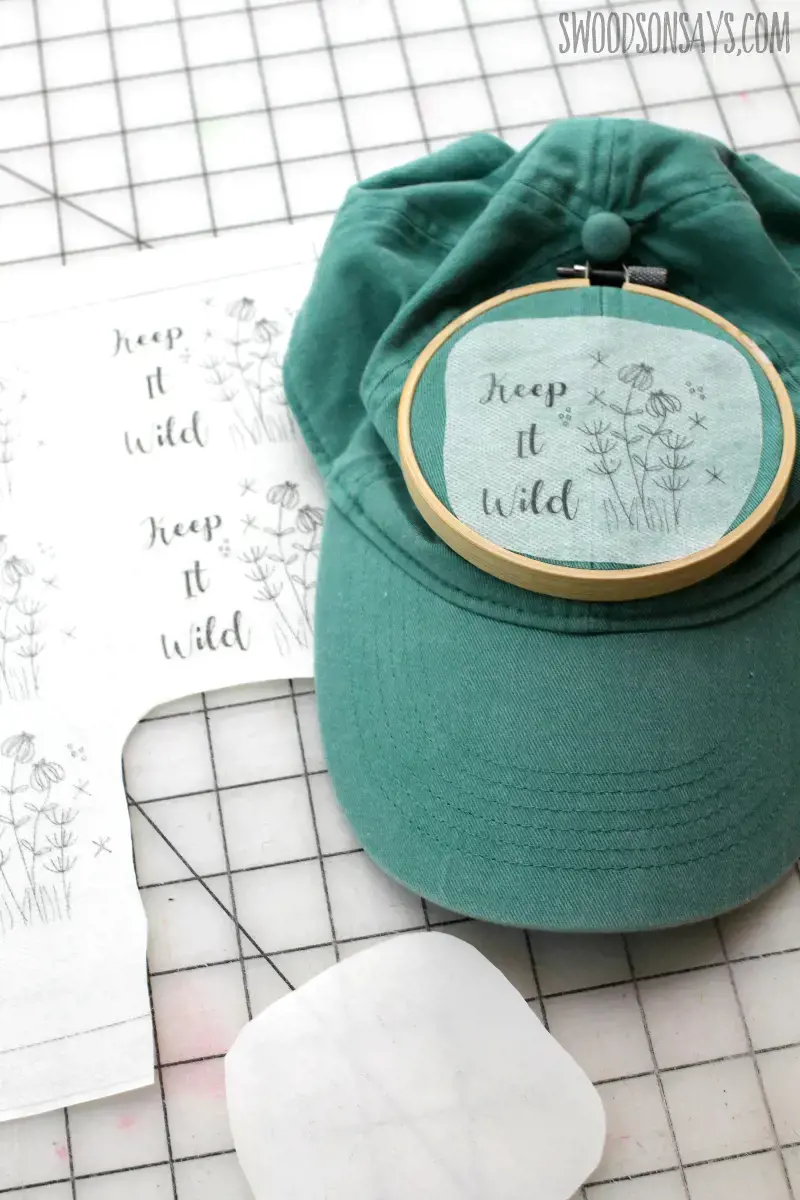
Embroidery floss is a versatile material that can be used for a variety of crafting projects. One fun and creative way to use embroidery floss is to embellish hats with stitching. Here’s how you can create one-of-a-kind hats with just a few simple tools and materials.
Materials:
- Hat (Choose a plain hat made out of a material that can be stitched through, such as cotton or wool)
- Embroidery floss in various colors
- Needle
- Scissors
Instructions:
- Choose a hat that you would like to embellish. You can choose any type of hat, from a baseball cap to a beanie.
- Choose the colors of embroidery floss that you want to use. You can use as many or as few colors as you like. Consider the color of the hat and choose colors that will complement it.
- Thread a needle with one of the colors of embroidery floss. Tie a knot at the end of the floss.
- Decide where you want to begin stitching on the hat. You can start at the brim, the top of the hat, or anywhere in between.
- Take the needle and push it from the inside of the hat to the outside, where you want to start stitching. Pull the needle and floss all the way through until the knot stops it.
- Begin stitching in your desired pattern. You can create a design, write a word or phrase, or simply stitch randomly. Be creative and have fun!
- Repeat steps 3-6 with each color of embroidery floss that you want to use. Mix and match colors to create a unique design.
- Once you have finished stitching, tie a knot in the floss on the inside of the hat and cut off the excess.
- Repeat the above steps on other areas of the hat until you achieve the desired look.
Embroidery floss makes it easy to create personalized and unique designs on hats. By following these easy steps, you can create a customized hat that will showcase your creativity and style. So grab your embroidery floss and get stitching!
12 Fun Things to Do in Lenoir City, TN
You may want to see also
![]()
Create colorful keychains
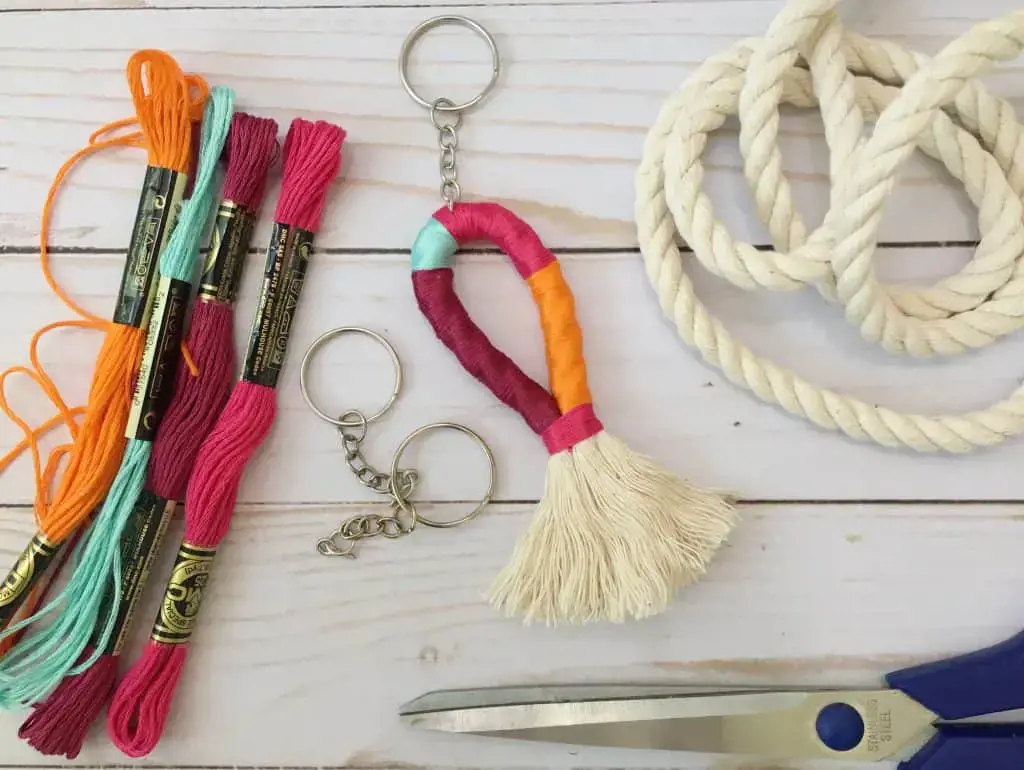
Embroidery floss is a versatile crafting material that can be used to create a wide range of projects, from clothing embellishments to home decor items. One fun and easy project you can make with embroidery floss is a colorful keychain. Here are some tips and tricks to help you create your own:
Materials needed:
- Embroidery floss in various colors
- Keychain rings
- Scissors
Instructions:
- Choose the colors of embroidery floss you want to use for your keychain. You can use as few as two or as many as you'd like – the more colors you use, the more colorful your keychain will be.
- Cut your embroidery floss into strands that are about 6 inches long. You'll need one strand of each color you're using.
- Tie the strands of embroidery floss together in a knot at one end, leaving a tail that's about an inch long.
- Take the knot and thread it through the keychain ring. This will be how you attach the keychain to your keys.
- Arrange the strands of embroidery floss so they're all the same length, with the knot at the top and the tail at the bottom.
- Divide the strands of embroidery floss into groups of two (or three, if you're using an odd number of colors). Tie each group of strands into a knot about an inch from the top of the keychain. This will create a series of knots that will give your keychain a textured look.
- Continue knotting the strands of embroidery floss until you reach the length you want for your keychain. You can experiment with different knotting techniques to create different textures and patterns.
- When you're finished knotting, tie all the strands of embroidery floss together in a knot at the end, leaving a tail that's about an inch long.
- Trim the ends of the embroidery floss so they're all even.
Your colorful keychain is now complete! You can experiment with different colors and knotting techniques to create a variety of keychains to match your personality and style. These also make great homemade gifts for friends and family. Happy crafting!
13 Fun Things to Do in Broken Arrow, Oklahoma
You may want to see also
![]()
Make decorative bookmarks
Embroidery floss is a versatile crafting material that can be used for a variety of projects. One fun and simple project you can make with embroidery floss is a decorative bookmark. All you need is a few basic materials and some creativity to create a unique and functional piece of art.
Materials:
- Embroidery floss in your desired colors
- Scissors
- Ruler or tape measure
- Cardboard or stiff paper
- Pencil or pen
- Tape or glue
Instructions:
- Choose your colors: Select the colors of embroidery floss you want to use for your bookmark. You can use one color or several colors depending on your preference.
- Cut your cardboard or stiff paper to size: Cut a piece of cardboard or stiff paper to the desired size of your bookmark. A typical size for a bookmark is 2 inches by 6 inches.
- Create a pattern: Use a pencil or pen to sketch out a simple pattern or design on your cardboard or paper. This could include stripes, dots, shapes, or lettering.
- Cut your embroidery floss: Cut strands of embroidery floss in your desired colors to the length you need to fill your design.
- Thread your needle: Thread your needle with one of the strands of embroidery floss.
- Start stitching: Begin stitching your pattern onto the cardboard or paper. Depending on your design, you may use a simple backstitch or a more complicated stitch such as the chain stitch or satin stitch.
- Add more colors: As you fill in your design, switch to different colors of embroidery floss to add visual interest.
- Finish your bookmark: Once you have finished stitching your design, trim any excess embroidery floss and glue or tape the back of your cardboard or paper to give it extra stability.
- Enjoy your new bookmark: Your decorative bookmark is now complete and ready to be used in your favorite book.
Embroidery floss bookmarks make great gifts for book lovers, or you can use them to add a personal touch to your own reading time. With just a few materials and some creativity, you can create beautiful and functional pieces of art that will be enjoyed for years to come. Happy crafting!
13 Fun Things to Do in Seguin, Texas
You may want to see also
![]()
Add unique details to shoes
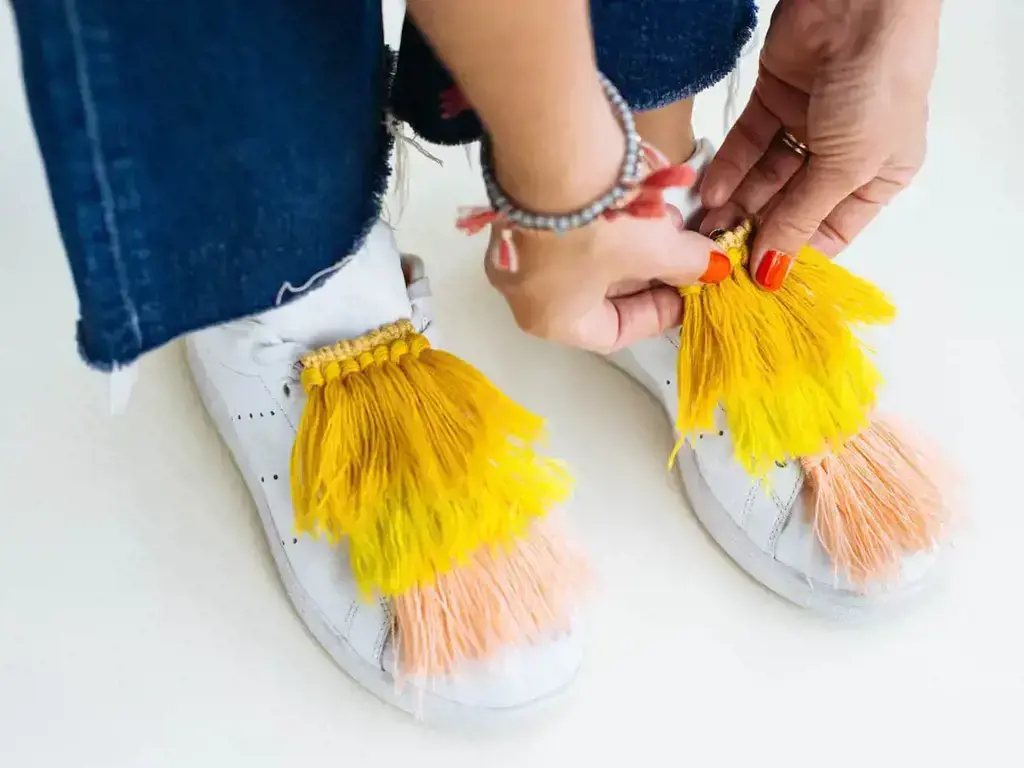
Embroidery floss is not only useful for creating beautiful hand-sewn pieces. It can also be utilized to add unique details to various items such as clothing, accessories, and even shoes. If you’ve got extra embroidery floss laying around, try changing up your footwear game and adding an interesting twist to your footwear collection.
Here are some ideas for incorporating embroidery floss into your shoe designs:
- Wrap the laces - Instead of plain, boring shoe laces, switch them up by wrapping them with colorful embroidery floss. This technique is best used on sneakers or canvas shoes with flat, wide shoelaces. First, remove the original laces and replace them with a longer, plain shoelace. Starting at one end, loop the floss around the shoelace and tie a knot. Then, continue to wrap the floss around the shoelace and knot at the opposite end. Repeat this process until the shoelace is wrapped in the desired amount of floss.
- Add tassels - Use embroidery floss to make tassels to attach to the end of shoe laces. Simply wrap the floss around your four fingers and tie a knot at the top. Cut the bottom loops and attach the tassel to the shoelace using a small knot.
- Embroider the fabric - Embroidery floss can also be used to add colorful accents to the fabric on your shoes. Choose a plain canvas shoe or one with a small, simple design. Use a pencil to sketch out the design and thread a needle with the embroidery floss. Start stitching from the inside of the shoe, so the knots are hidden. Use long, straight stitches or try a more intricate embroidery technique to create a unique design.
- Create a foot bracelet - Use embroidery floss to create a bracelet that goes around your ankle and hangs over your foot. Choose a color or colors that coordinate with your shoes, and tie the floss in several knots to secure it to your ankle. Then, using a needle, weave the floss in and out of the spaces between your toes and attach a few beads or charms for extra detail.
There are plenty of ways to use embroidery floss to add unique touches to your shoes. Whether you’re adding tassels to your shoelaces or embroidering a design onto your shoes, the possibilities are limitless. Not only will your shoes stand out with the added details, but you’ll also have the satisfaction of knowing you’ve created something truly unique. So, next time you’re looking to spice up your shoe game, try incorporating embroidery floss into your designs.
13 Fun Things to Do in Palatka, FL That You Can't Miss!
You may want to see also
Frequently asked questions
There are various types of embroidery floss available, including cotton floss, silk floss, rayon floss, metallic floss, and wool floss.
Embroidery floss is usually a bit thicker than ordinary thread, which makes it easier to work with while embroidering. Moreover, the floss comes in multiple colors, making it ideal for decorative stitching.
You can store embroidery floss in a variety of ways, including the use of floss bobbins or floss organizers. It is crucial to store your thread in a dry and cool place, preferably away from direct sunlight.
One way to avoid embroidery floss from tangling is to use a thread conditioner, such as beeswax, which makes the thread smoother and prevents tangling. Additionally, you can pull the floss from the skein from the end rather than the center.


5 Comments
Carrie Washington
Julie Hanson
Melissa Carey
AuthorAlfred Coffey
Michaela Krajanova
Author