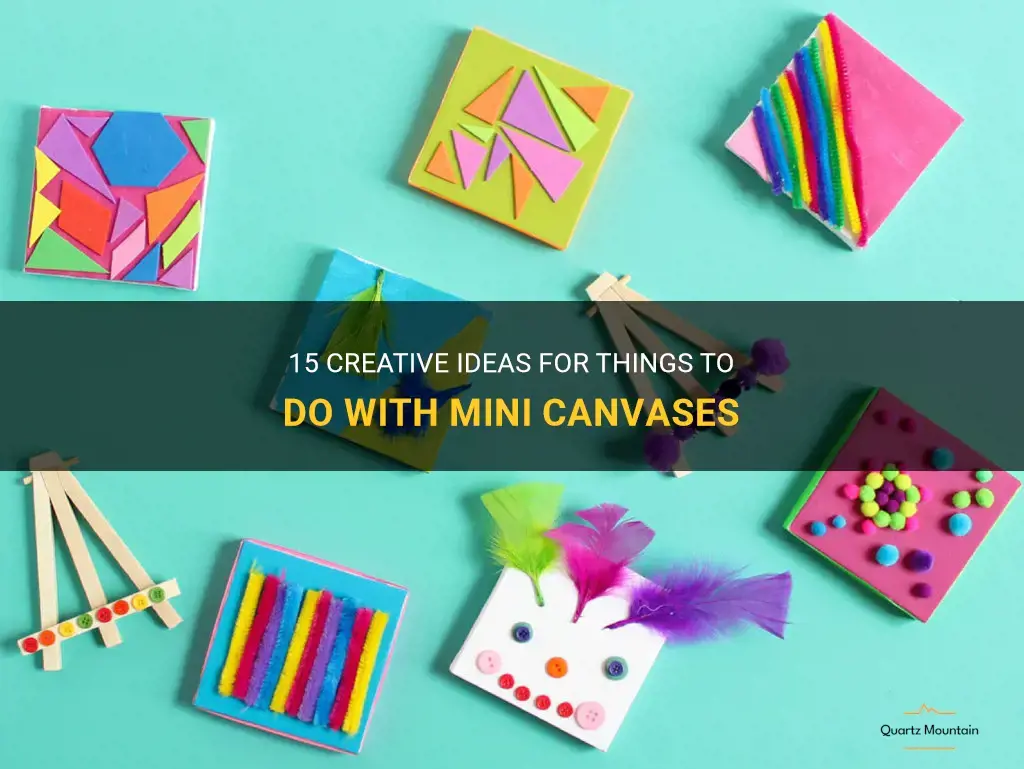
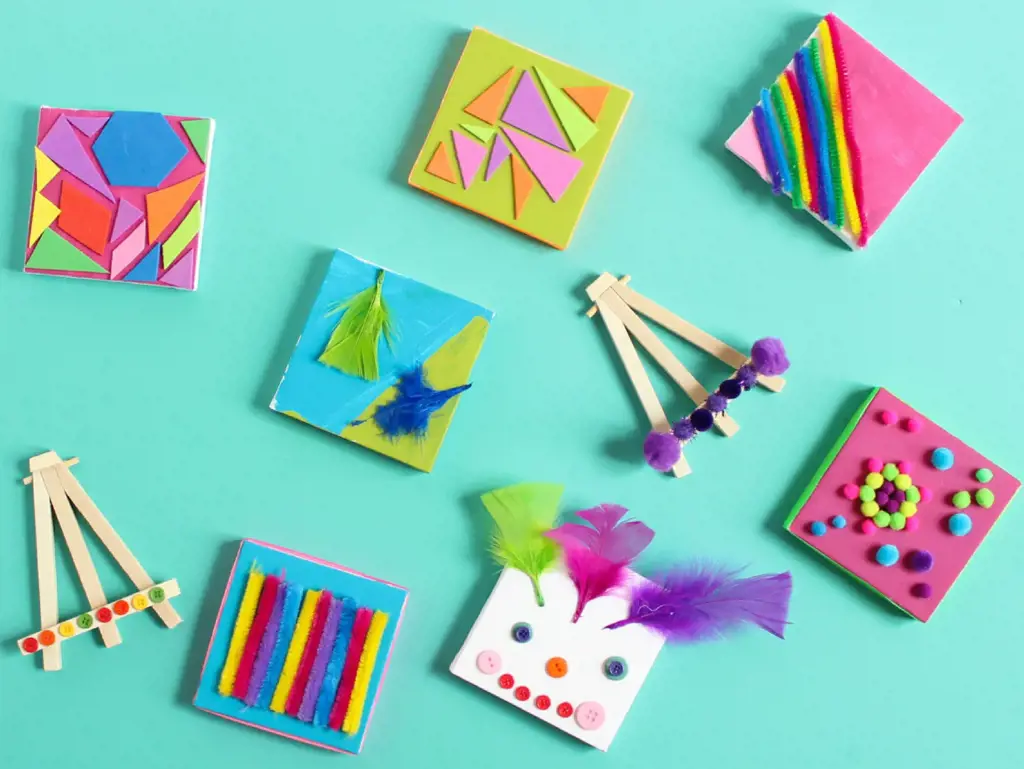
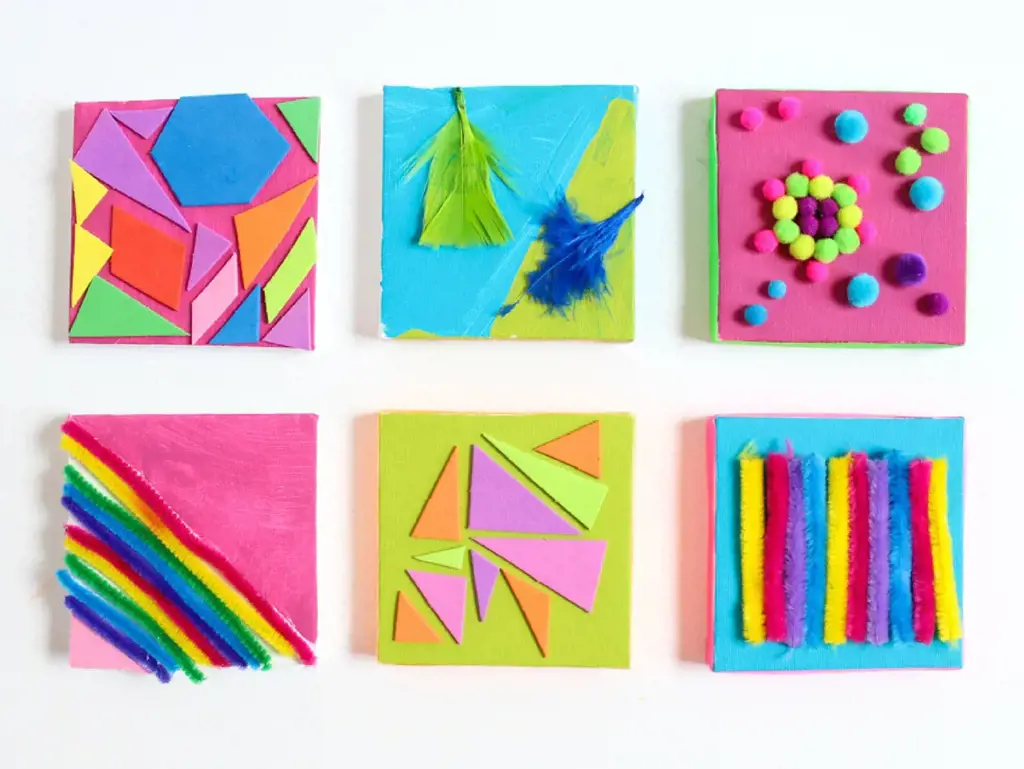
If you're a fan of arts and crafts, chances are you've come across mini canvases. These small, adorable versions of traditional canvases are not only cute but also offer endless possibilities for creative projects. Whether you're a seasoned artist or just looking for a fun way to spend your free time, we've compiled a list of 15 creative ideas for things to do with mini canvases. From painting miniature masterpieces to creating unique home decor pieces, these ideas will inspire you to unleash your inner artist and create something truly special. So grab your paintbrushes and get ready to explore the world of mini canvases!
| Activity | Description |
|---|---|
| Mini Canvas Painting | Use acrylic or oil paints to create small masterpieces |
| Mini Canvas Collage | Create a collage using various materials on a mini canvas |
| Mini Canvas Decoupage | Decorate the canvas with cut-out images and seal with glue |
| Mini Canvas Embroidery | Embroider a design or pattern on a small canvas |
| Mini Canvas Stamping | Use stamps and ink to create designs on mini canvases |
| Mini Canvas Mixed Media | Combine various art techniques on a small canvas |
| Mini Canvas Resin Art | Pour resin onto a mini canvas to create a glossy finish |
| Mini Canvas Wire Wrapping | Wrap wire around a mini canvas to create a unique design |
| Mini Canvas String Art | Create geometric or abstract designs using strings |
| Mini Canvas Alcohol Ink Art | Use alcohol ink to create vibrant and abstract designs |
What You'll Learn
- Create mini paintings and hang them on a mini gallery wall in your home
- Use mini canvases as coasters for your drinks
- Paint mini canvases and turn them into unique refrigerator magnets
- Use mini canvases as place cards or table numbers for a special event or dinner party
- Decorate mini canvases and turn them into unique gift tags for presents
- Paint mini canvases and attach them to a string to create a festive mini bunting/banner
- Use mini canvases as inspirational quotes or affirmations for your workspace or bedroom
- Paint mini canvases and attach them to hairpins or brooches for unique accessories
- Decorate mini canvases and use them as unique keychains
- Create mini canvases with your favorite recipes and hang them in your kitchen
- Paint mini canvases and turn them into bookmarks for your favorite books
- Decorate mini canvases and use them as unique and personalized Christmas ornaments
- Paint mini canvases and turn them into unique wall hooks or hangers for jewelry or scarves
- Use mini canvases as mini mood boards to display your favorite quotes, images, or inspirations
- Create mini canvases with positive affirmations and leave them in public places as random acts of kindness
![]()
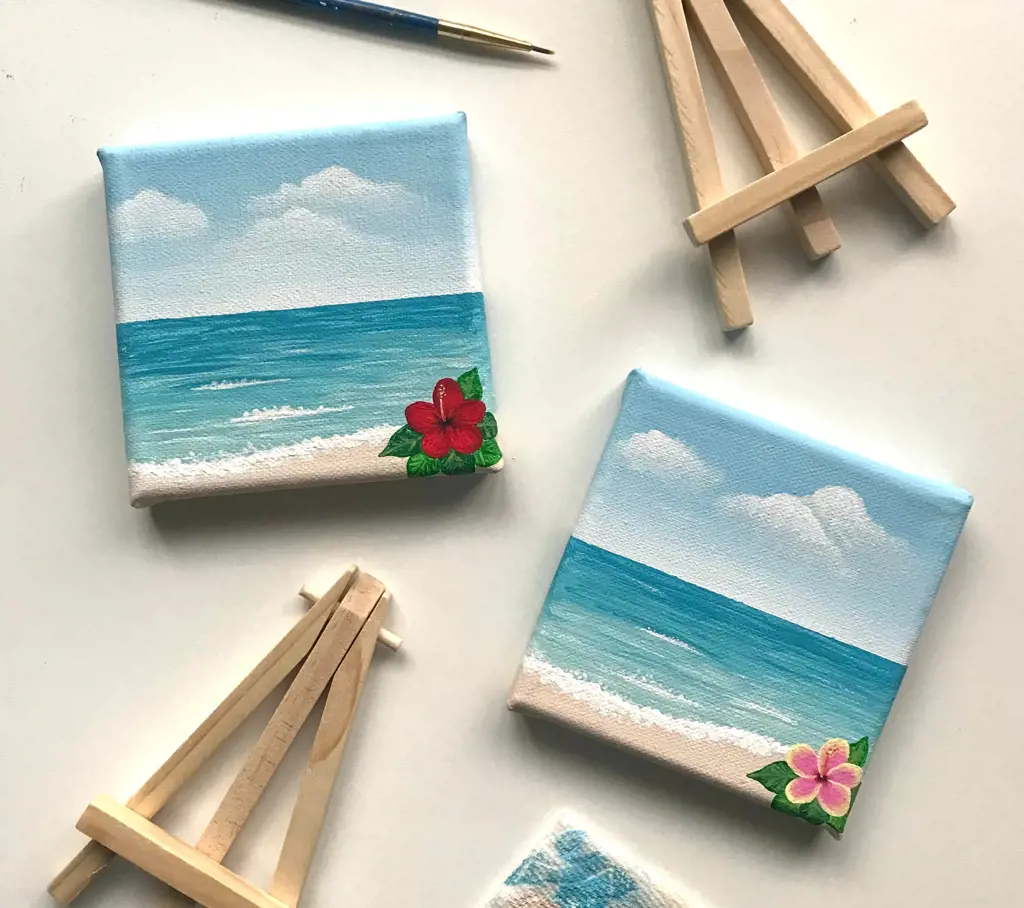
Create mini paintings and hang them on a mini gallery wall in your home
When it comes to mini canvases, the possibilities are endless! These tiny masterpieces can be a fun and creative way to add a personal touch to your home decor. One great idea is to create mini paintings and hang them on a mini gallery wall in your home. Here are some tips and ideas to get you started.
First, gather your supplies. You will need mini canvases, which can typically be found at any art supply store. These canvases are usually around 3x3 inches or 4x4 inches in size. You will also need paintbrushes, acrylic paints, and any other materials you want to use for your paintings, such as markers, pens, or even glitter.
Next, brainstorm some ideas for your mini paintings. The beauty of mini canvases is that you can experiment with different styles and techniques without committing to a larger canvas. You can paint landscapes, portraits, abstract designs, or even create mini replicas of famous artworks. Let your imagination run wild!
Once you have your ideas, start painting! Remember to take your time and enjoy the process. Mini canvases can be challenging to work on due to their small size, but they also allow for intricate and detailed work. Experiment with different brushstrokes, color combinations, and textures. Don't be afraid to make mistakes – that's part of the fun!
Once your mini paintings are complete, it's time to create your mini gallery wall. You can choose a small section of your wall or even a shelf to display your creations. Start by arranging your mini canvases in a visually appealing way. You can opt for a symmetrical layout or a more organic arrangement. You can also mix and match different sizes of mini canvases to create visual interest.
When hanging your mini paintings, consider using adhesive hooks or mini easels. Adhesive hooks are a great option if you want a more temporary display, as they can be easily removed without damaging your walls. Mini easels, on the other hand, can give your mini gallery wall a more artistic and traditional look.
To enhance your mini gallery wall, you can also add other decorative elements. Consider including miniature frames around some of your mini paintings or adding small trinkets and objects that complement the overall theme. Remember that the goal is to create a cohesive and visually appealing display.
Lastly, don't forget to step back and admire your mini gallery wall. Mini canvases are a unique and creative way to express yourself and showcase your artistic talents. Whether you choose to follow a specific theme or mix and match different styles, your mini gallery wall will surely become a focal point in your home.
In conclusion, mini canvases offer endless possibilities for creativity. Creating mini paintings and hanging them on a mini gallery wall is a great way to add a personal touch to your home decor. So grab your supplies and let your imagination run wild! Your mini gallery wall is waiting to be filled with tiny masterpieces.
12 Must-Do Activities in Florence AL This Weekend
You may want to see also
![]()
Use mini canvases as coasters for your drinks

Mini canvases are not just for painting beautiful artworks; they can also be used for various other purposes. One creative way to utilize these small canvases is by turning them into unique coasters for your drinks. Not only will this add a touch of artistry to your home decor, but it will also protect your furniture from those pesky water rings.
To transform your mini canvases into coasters, you will need a few supplies. Firstly, gather your mini canvases along with some protective sealant. Acrylic paint and paintbrushes will also be necessary if you wish to add your own artistic flair to them. Lastly, grab some adhesive cork or felt pads to attach to the bottom of the coasters to prevent any scratches on your surfaces.
Before starting, make sure to clean your mini canvases thoroughly to remove any dirt or debris. Once they are ready, you can either leave them blank or unleash your creativity by painting them in various designs. This could be abstract patterns, landscapes, floral motifs, or anything that suits your personal taste and home decor.
When painting, acrylic paint works best as it dries quickly and adheres well to the canvas. However, feel free to experiment with other types of paint if you prefer, such as watercolors or gouache. Remember to let your creativity flow – you can create a matching set or make each coaster unique and distinctive.
After your artwork is complete and the paint has dried, it’s time to protect the coasters. Applying a protective sealant, such as a clear gloss varnish or acrylic sealer, will not only preserve your artwork but also make the coasters easy to clean. Be sure to follow the manufacturer's instructions for the sealant you choose.
To prevent the coasters from sliding or scratching your furniture, attach adhesive cork or felt pads to the bottom of each one. These can easily be found at craft stores or online. Cut them into small squares or circles and stick them firmly onto the corners or center of the coaster.
Once you have completed all these steps, your mini canvas coasters are ready to be used. Place them strategically around your living room or dining table, and they will not only protect your furniture but also serve as mini works of art. They can also make for great conversation starters when guests visit your home.
Furthermore, these mini canvas coasters can be personalized and given as thoughtful gifts. You can create custom designs based on your friends' interests or hobbies or even replicate famous artworks. Package them in a cute box or wrap them with a pretty ribbon to make them even more appealing.
In summary, mini canvas coasters are a fantastic way to add a touch of creativity and artistry to your home decor while also serving a practical purpose. With a little bit of painting and sealing, you can transform these small canvases into unique and personalized coasters. So why settle for ordinary coasters when you can showcase your artistic side with mini canvas coasters? Get creative and start crafting today!
12 Fun Christmas Things to Do in Chattanooga
You may want to see also
![]()
Paint mini canvases and turn them into unique refrigerator magnets
If you're looking for a fun and creative project to do with mini canvases, why not try turning them into unique refrigerator magnets? This is a great way to showcase your artistic skills and add a personal touch to your kitchen decor. Here's how to do it:
- Gather your supplies: You'll need mini canvases, acrylic paint, paintbrushes, strong adhesive magnets, and any additional decorations or embellishments you'd like to use.
- Prep your canvas: Start by prepping your mini canvas. You can either leave it as it is or apply a layer of gesso to create a smooth surface for painting. This step is optional but can help your paint adhere better.
- Plan your design: Before diving into painting, it's a good idea to plan out your design. Consider the size of the canvas and the space available on your refrigerator. You can go for a simple and abstract design or try something more detailed like a miniature landscape or still life.
- Start painting: Once you have your design in mind, start painting on your mini canvas. Acrylic paint is a great choice for this project as it dries quickly and provides excellent coverage. Be sure to use thin layers of paint and let each layer dry before adding more details or colors.
- Add embellishments: If you want to add some extra flair to your mini canvas magnets, consider using additional decorations or embellishments. You can use glitter, sequins, beads, or even small cutouts of paper or fabric. Get creative and experiment with different textures and materials.
- Let it dry: Once you're satisfied with your painting and any additional decorations, set the mini canvas aside to dry completely. This usually takes around 1-2 hours depending on the thickness of the paint and the climate.
- Attach the magnet: Once your mini canvas is dry, it's time to attach the magnet. Use a strong adhesive magnet that can securely hold the weight of the canvas. Apply a small amount of adhesive to the back of the canvas and press the magnet onto it firmly. Let it dry according to the adhesive's instructions.
- Display your mini canvas magnets: Finally, it's time to display your mini canvas magnets on your refrigerator or any other magnetic surface. Arrange them in a grid or scatter them around for a playful and artistic touch.
Creating mini canvas magnets is a fantastic way to explore your creativity and personalize your kitchen space. It's a fun project that can be done alone or with friends or family. Plus, it's a great way to showcase your artistic skills in a small and unique format. So gather your supplies, let your imagination run wild, and start painting those mini canvases into beautiful and functional refrigerator magnets today!
14 Fun Things to Do Near the Airport
You may want to see also
![]()
Use mini canvases as place cards or table numbers for a special event or dinner party
Mini canvases can be a creative and unique way to add a personal touch to any special event or dinner party. Whether you are hosting a wedding, birthday celebration, or a simple gathering with friends, using mini canvases as place cards or table numbers can add a charming and artistic element to your event. Here are some ideas on how to use mini canvases for this purpose:
Custom Designs:
Instead of using plain cardstock or pre-made place cards, why not create custom designs on mini canvases? You can use acrylic paints, markers, or even decoupage techniques to personalize each mini canvas with the names of your guests or the table numbers. This not only adds a unique touch but also serves as a special keepsake for your guests to take home.
Miniature Artworks:
If you prefer a more artistic approach, consider treating each mini canvas as a miniature artwork. Paint or draw a small picture or design on each canvas that relates to the theme of your event. For example, if you are hosting a beach-themed wedding, you can paint a mini seascape on each canvas. This way, your guests will have a little artwork to enjoy and remember your celebration.
Photo Displays:
Another idea is to turn mini canvases into photo displays. Print out small photos of your guests and attach them to the canvases. You can either paint or draw a small frame around the photo or leave the canvas blank with just the photo attached. This not only serves as a place card but also allows your guests to easily find their seats while enjoying a glimpse of memorable moments.
Calligraphy and Hand Lettering:
If you have beautiful handwriting or calligraphy skills, consider using mini canvases as an elegant way to display your guests' names. Use a calligraphy pen or a fine-tip marker to write each name on a mini canvas. You can experiment with different lettering styles or add decorative flourishes to create an impressive and sophisticated look.
Mini Easels or Display Stands:
To showcase your mini canvas place cards or table numbers, you can place them on mini easels or display stands. These can be easily found at art supply or craft stores. Mini easels not only elevate the mini canvases but also make them more noticeable and add a touch of elegance to your tablescape.
Using mini canvases as place cards or table numbers for your special event or dinner party can create a beautiful and artistic atmosphere for your guests. Whether you choose to customize each canvas with names, miniature artworks, or photos, or opt for elegant calligraphy, these mini canvases will surely leave a lasting impression on your guests. So, get creative and bring a touch of artistic flair to your next event.
13 Fun Things to Do at Buckeye Lake
You may want to see also
![]()
Decorate mini canvases and turn them into unique gift tags for presents
Mini canvases are a versatile and fun medium to work with when it comes to creating unique crafts. One great idea for mini canvases is to decorate them and turn them into beautiful gift tags for presents. Not only will this add a personal touch to your gifts, but it will also double as a small piece of art that the recipient can keep.
Here's a step-by-step guide on how to decorate mini canvases and transform them into stylish gift tags:
Gather your supplies:
- Mini canvases (available at most craft stores)
- Paints (acrylic or watercolor)
- Paintbrushes in various sizes
- Stencils, stamps, or other design elements
- Ribbon or twine
- Scissors
- Hole punch
- Glue or adhesive
Prepare your mini canvases:
Start by laying out your mini canvases on a flat surface covered with a protective sheet or old newspaper. This will help prevent any paint or other materials from getting on your table. If your mini canvases are not already primed, you can apply a thin layer of gesso to create a smoother surface for painting.
Choose your design:
Think about the theme or style you want to create for your gift tags. You can go for a traditional holiday look with red and green colors, or opt for a more modern and abstract design. Decide whether you want to hand-paint your design or use stencils, stamps, or other design elements to add patterns and shapes.
Start painting:
Using your paintbrushes, apply your chosen colors to the mini canvases. You can experiment with different painting techniques, such as blending colors or creating textured brush strokes. Allow the paint to dry completely before moving on to the next step.
Add additional design elements:
If you're using stencils or stamps, carefully position them on the mini canvases and apply the paint. You can mix and match different stencils and stamps to create unique patterns. Alternatively, you can use a fine-tip brush to add details, such as flowers, dots, or lines.
Personalize your gift tags:
Once the paint and additional design elements have dried, it's time to personalize your gift tags. You can write the recipient's name, a short message, or even their initials using a contrasting color paint or a permanent marker. This will add a personal touch and make each gift tag special.
Attach ribbon or twine:
To turn your mini canvases into gift tags, you will need to attach ribbon or twine. Using a hole punch, create a small hole at the top of each mini canvas. Then, cut a length of ribbon or twine and thread it through the hole. Tie a knot or a bow to secure it in place.
Attach the gift tags:
Your mini canvas gift tags are now ready to be attached to your presents. Use glue or adhesive to secure them to the wrapping paper or gift box. You can also tie them directly onto the ribbon or bow for a more rustic look.
Decorating mini canvases and turning them into unique gift tags is a simple and enjoyable craft project that will add a special touch to your presents. Whether you choose to paint intricate designs or keep it simple with a few brushstrokes, these mini canvas gift tags are sure to impress the recipients and make your gifts stand out.
13 Fun Things to Do in Pawleys Island, South Carolina
You may want to see also
![]()
Paint mini canvases and attach them to a string to create a festive mini bunting/banner

Are you looking for a fun and creative way to decorate your space? Look no further than mini canvases! These tiny canvases are a great way to express your artistic side and add a unique touch to any room. In this article, we'll explore one exciting option for using mini canvases: creating a festive mini bunting or banner.
What you'll need:
- Mini canvases: You can find these at art supply stores or online. They come in various sizes, so choose the ones that suit your preferences.
- Acrylic paint: Select a variety of colors to make your mini bunting vibrant and eye-catching.
- Paintbrushes: Have a range of brush sizes to allow for different brushstrokes and details.
- String or twine: This will be used to connect the mini canvases together and hang the bunting.
- Mini clothespins or clips (optional): If you want to make it easier to hang the canvases, mini clothespins or clips can be a handy addition.
Let's get started:
- Choose your color palette: Decide on the colors you want to use for your mini bunting. You can stick to a specific theme or go for a rainbow effect with a variety of hues.
- Paint the mini canvases: Lay out your mini canvases on a protected surface and begin painting. Get creative with your designs! You can experiment with patterns, abstract shapes, flowers, or even mini landscapes. Remember to let each canvas dry completely before moving on to the next.
- Attach the mini canvases to a string: Once your mini canvases are dry, lay them out in the desired order. Cut a length of string or twine that is long enough to accommodate all the canvases with some extra length for hanging. Attach the mini canvases to the string using mini clothespins or clips, spacing them evenly along the string.
- Hang your mini bunting/banner: Find a suitable spot to hang your festive creation. You can hang it on a wall, across a window, or even above a fireplace mantel. Use a nail, a hook, or some sticky adhesive hooks to secure the string.
- Enjoy your mini bunting: Step back and admire your handiwork! Your mini bunting is sure to add a colorful and joyful touch to any space. Feel free to get creative with the placement of your mini canvases and experiment with different lengths of string to create an interesting visual display.
Tips:
- If you're feeling adventurous, try adding additional embellishments to your mini canvases. You can incorporate glitter, sequins, or even small beads to make your bunting extra festive.
- Make sure to prime your mini canvases with a thin coat of white or colored acrylic paint before you start creating your designs. This will help the colors stand out better.
- If you want to make your mini bunting even more personalized, consider adding hand-lettered messages or quotes to some of the canvases. This will give it a unique and special touch.
Mini canvases are a fantastic way to explore your artistic side and create beautiful, personalized decorations for your space. By following the steps above, you can easily create a festive mini bunting or banner that will brighten up any room. So gather your materials, let your imagination run wild, and have fun creating your mini masterpiece!
10 Must-Do Fall Activities in Lancaster, PA
You may want to see also
![]()
Use mini canvases as inspirational quotes or affirmations for your workspace or bedroom
Mini canvases are a versatile and fun medium to work with. They are the perfect size for creating unique and inspiring pieces of art. One great idea for using mini canvases is to create inspirational quotes or affirmations for your workspace or bedroom. Not only will these mini canvases add a pop of color and creativity to your space, but they will also serve as daily reminders of positivity and motivation.
To start, gather your mini canvases, which can be found at any art supply store or online. Choose a size that fits your vision for the artwork. Next, gather your art supplies, such as acrylic paints, paintbrushes, and markers. You can also consider using stencils or stamps to add additional patterns or designs to your canvases.
The first step in creating your inspirational quotes or affirmations is deciding on the message you want to convey. Think about what words or phrases resonate with you and inspire you the most. This could be a motivational quote, a mantra that you live by, or even a simple word that holds significance for you.
Once you have chosen your message, plan out the layout of your mini canvas. You can sketch out your design lightly in pencil before painting to ensure that the words are centered and spaced evenly. However, if you prefer a more organic and freehand approach, you can skip this step and paint directly onto the canvas.
Now it's time to start painting! Use your acrylic paints to fill in the background of the canvas. You can choose a single color or create a gradient effect using multiple colors. Allow the background to dry completely before moving on to the next step.
Once the background is dry, you can start adding your chosen words or phrases. Use a small paintbrush or markers to carefully write out the text onto the canvas. You can experiment with different fonts and styles to make your artwork unique. If you feel more comfortable, you can also use stencils or stamps to create the text.
To add extra flair to your mini canvases, consider adding additional decorative elements. This could be embellishments such as glitter, sequins, or small rhinestones. You could also add small illustrations or symbols that complement the message of your artwork. This will make your mini canvases truly one-of-a-kind.
Once you have finished creating your inspirational quotes or affirmations, let the artwork dry completely. You can then display your mini canvases on a shelf, hang them on the wall, or even prop them up on your desk. Seeing these positive messages every day will help to uplift your mood and remind you of your goals and aspirations.
In conclusion, using mini canvases to create inspirational quotes or affirmations for your workspace or bedroom is a fantastic way to add creativity and positivity to your surroundings. With a few art supplies and some imagination, you can create unique and meaningful artwork that will inspire you each day. So grab some mini canvases and start creating!
12 Fun Activities for Thanksgiving in Panama City Beach
You may want to see also
![]()
Paint mini canvases and attach them to hairpins or brooches for unique accessories
Mini canvases are a great way to showcase your artistic skills on a smaller scale. These small canvases are not only perfect for creating unique pieces of art to display on a shelf or desk, but they can also be repurposed into accessories. In this article, we will explore how you can paint mini canvases and attach them to hairpins or brooches for one-of-a-kind accessories.
The first step in this DIY project is to gather all the necessary materials. You will need mini canvases, which are usually around 2x2 inches in size, acrylic paints, paint brushes, hairpins or brooches, strong adhesive or hot glue gun, and a clear varnish or sealer.
Once you have gathered all your supplies, it's time to get creative! Start by brainstorming some designs or themes for your mini canvases. You can create landscapes, abstract patterns, floral designs, or even miniature portraits. The possibilities are endless, so let your imagination run wild!
Next, prepare your mini canvases by using a light sandpaper to smoothen any rough surfaces. This will ensure a better paint application. Once your canvases are ready, start painting your desired designs. Use thin brushes for intricate details, and larger brushes for broader strokes. Remember to wait for each layer to dry before adding another one to prevent smudging or blending of colors.
Once your paintings are complete and fully dried, it's time to attach them to your accessories. If you are using hairpins, apply a strong adhesive to the back of the mini canvas, and attach it securely to the flat part of the hairpin. Press firmly and let it dry completely before using. If you prefer to use brooches, the process is similar. Apply adhesive to the back of the mini canvas and press it onto the flat part of the brooch. Again, let it dry completely before wearing.
To ensure the longevity of your mini canvas accessories, it's recommended to seal them with a clear varnish or sealer. This will protect the painting from external elements and prevent it from chipping or fading over time. Simply apply a thin layer of varnish over the entire surface of the painting and let it dry completely.
Once your mini canvas accessories are finished, you can proudly wear or display them. These unique pieces will surely catch the attention of others and make for interesting conversation starters. You can also give them as personalized gifts to friends and family, as they are truly one-of-a-kind creations.
In conclusion, mini canvases offer a fun and creative way to express yourself artistically. By painting them and attaching them to hairpins or brooches, you can transform them into beautiful accessories that reflect your style and personality. So, grab your brushes and canvases, and start creating your own wearable masterpieces!
13 Things to Do in Otavalo for an Unforgettable Experience.
You may want to see also
![]()
Decorate mini canvases and use them as unique keychains

Mini canvases are a great way to showcase your creativity and add a unique touch to your everyday items. One creative way you can use mini canvases is by decorating them and turning them into keychains. This not only adds a personal touch to your keys but also serves as a mini work of art that you can carry with you wherever you go.
To get started, you will need mini canvases, acrylic paints, paintbrushes, varnish, keychain rings, and a drill or a small hole puncher.
First, start by gathering your materials and laying them out on a clean workspace. Make sure to protect your surface with newspaper or a plastic sheet to avoid any paint spills or stains.
Next, think about the design or theme you want for your mini canvases. You can choose to replicate your favorite paintings, create abstract patterns, or even paint tiny landscapes. The possibilities are endless, so let your creativity flow.
Once you have your design in mind, start by applying a layer of gesso on your mini canvases. Gesso is a primer that helps the paint adhere better to the canvas and creates a smoother surface for painting. Let the gesso dry completely before moving on to the next step.
Now, start painting your design on the mini canvases using acrylic paints. Acrylic paints are versatile and easy to work with, making them an excellent choice for this project. Use thin brushes for finer details and larger brushes for broader strokes. Experiment with colors, shading, and different techniques to make your mini canvases unique and eye-catching.
Allow the paint to dry completely before applying a layer of varnish. Varnish helps protect your artwork from dust, moisture, and fading, ensuring that your mini canvases stay vibrant and durable. Follow the instructions on the varnish bottle for the best results.
Once the varnish is dry, it's time to turn your mini canvases into keychains. Using a drill or a small hole puncher, carefully make a hole near the top edge of each canvas. Make sure the hole is large enough to accommodate the keychain ring.
Finally, attach the keychain rings to the holes on your mini canvases. You can also add decorative beads or charms to make your keychains even more personalized and unique.
Now you have beautiful mini canvas keychains that reflect your artistic style and can be used to carry your keys. These keychains can also make thoughtful gifts for friends and family, as they are one-of-a-kind and made with love.
Remember to take proper care of your mini canvas keychains by avoiding exposure to extreme temperatures or rough handling. With proper care, they will last for a long time and continue to bring joy and creativity to your everyday life.
12 Exciting Activities to Experience in Gdynia
You may want to see also
![]()
Create mini canvases with your favorite recipes and hang them in your kitchen
If you're looking for a fun and unique way to decorate your kitchen, consider creating mini canvases with your favorite recipes. Not only will these canvases serve as stylish decor, but they will also provide easy access to your go-to recipes while you're cooking. Here's how you can create these mini canvases and hang them in your kitchen.
First, gather all the materials you'll need. This includes mini canvases (you can find them at your local craft store or online), acrylic paints in your preferred colors, paintbrushes, and any additional embellishments you'd like to add, such as stickers or washi tape. You'll also need copies of your favorite recipes, either printed out from a computer or written by hand.
Once you have your materials ready, start by painting the backgrounds of your mini canvases. Choose colors that complement your kitchen decor or that match the theme of your recipes. You can go for a simple solid color or get creative with patterns or textures. Allow the paint to dry completely before moving on to the next step.
Next, you'll want to transfer your recipes onto the mini canvases. If you're using printed copies, you can simply cut them to fit the size of your canvases and glue them on using a strong adhesive. If you're using handwritten recipes, you can either write directly onto the canvases or transfer them using transfer paper or carbon paper. Make sure to position the recipes in a way that allows for easy reading and doesn't obstruct any important details.
Once your recipes are attached, you can add any additional embellishments to personalize your mini canvases. Be mindful not to overcrowd them, as you still want the focus to be on the recipes. For example, you can add small stickers related to cooking or food, or use washi tape to create borders or frames around the edges of the canvases.
Finally, it's time to hang your mini canvases in your kitchen. You can either attach small hooks to the back of each canvas and hang them on a wall, or use string or twine to create a gallery-style display. Consider arranging them in a grid or a vertical line for a polished look.
Not only will these mini canvases add a touch of personalization to your kitchen, but they'll also serve as a practical way to access your favorite recipes. Next time you're whipping up a meal, you won't need to dig through your recipe box or search online – your go-to recipes will be right there on your mini canvases. Get creative and have fun with this DIY project, and enjoy the stylish and functional results in your kitchen.
12 Exciting Things to Do in San Diego this November
You may want to see also
![]()
Paint mini canvases and turn them into bookmarks for your favorite books
Mini canvases are a fun and creative way to express your artistic side. They are small, affordable, and provide a great opportunity to experiment with different painting techniques and styles. One unique and practical idea for mini canvases is to turn them into bookmarks for your favorite books.
To start, gather your mini canvases, which you can find at most art supply stores or online. They typically come in packs of four or more, so you will have plenty to work with. You will also need acrylic paints, brushes, a palette, and a clear varnish or sealant to protect your artwork.
Once you have your materials ready, it's time to unleash your creativity. Choose a design or theme for your bookmarks. It could be something simple, like abstract patterns or geometric shapes, or something more complex, like landscapes or portraits. Sketch out your design lightly on the canvas using a pencil, or you can also freehand your painting if you prefer.
Next, start applying your acrylic paints to the canvas. Mini canvases are small, so they don't require a lot of paint. Use thin layers and build up your colors gradually. Acrylic paints dry quickly, so you can easily add layers and details without waiting too long.
Experiment with different painting techniques, such as blending colors, creating textures, or using different brush strokes. Mini canvases are a great way to try out new techniques and see how they work on a smaller scale. Don't be afraid to make mistakes or take risks – that's part of the creative process!
When you are satisfied with your painting, let it dry completely. Once dry, you can apply a clear varnish or sealant to protect your artwork and make it more durable. This step is especially important for bookmarks, as they will be subjected to frequent handling and use.
To transform your mini canvas into a functional bookmark, you can attach a ribbon or string to one of the corners. Simply punch a small hole with a hole punch or a sharp object, such as a needle or pin, and thread the ribbon through. You can tie a knot or add a small bead or charm to the end of the ribbon for decoration.
Now, your mini canvas bookmark is ready to use! Slide it between the pages of your favorite book and let the artwork peek out. It's a great way to add a personal touch to your reading experience and make your books even more special.
Mini canvases are a versatile medium for artistic expression, and turning them into bookmarks is just one of many possibilities. You can also use them to create miniature paintings for display or gifts, or even incorporate them into mixed-media projects. The small size makes them perfect for experimentation and allows you to explore different techniques and styles without committing to a larger canvas.
So, the next time you have a pack of mini canvases lying around, grab your paints and brushes and let your imagination run wild. Paint mini canvases and turn them into bookmarks for your favorite books, or explore other creative ideas. The possibilities are endless, and you never know what masterpiece you might create!
13 Exciting Things to Do Between Houston and San Antonio
You may want to see also
![]()
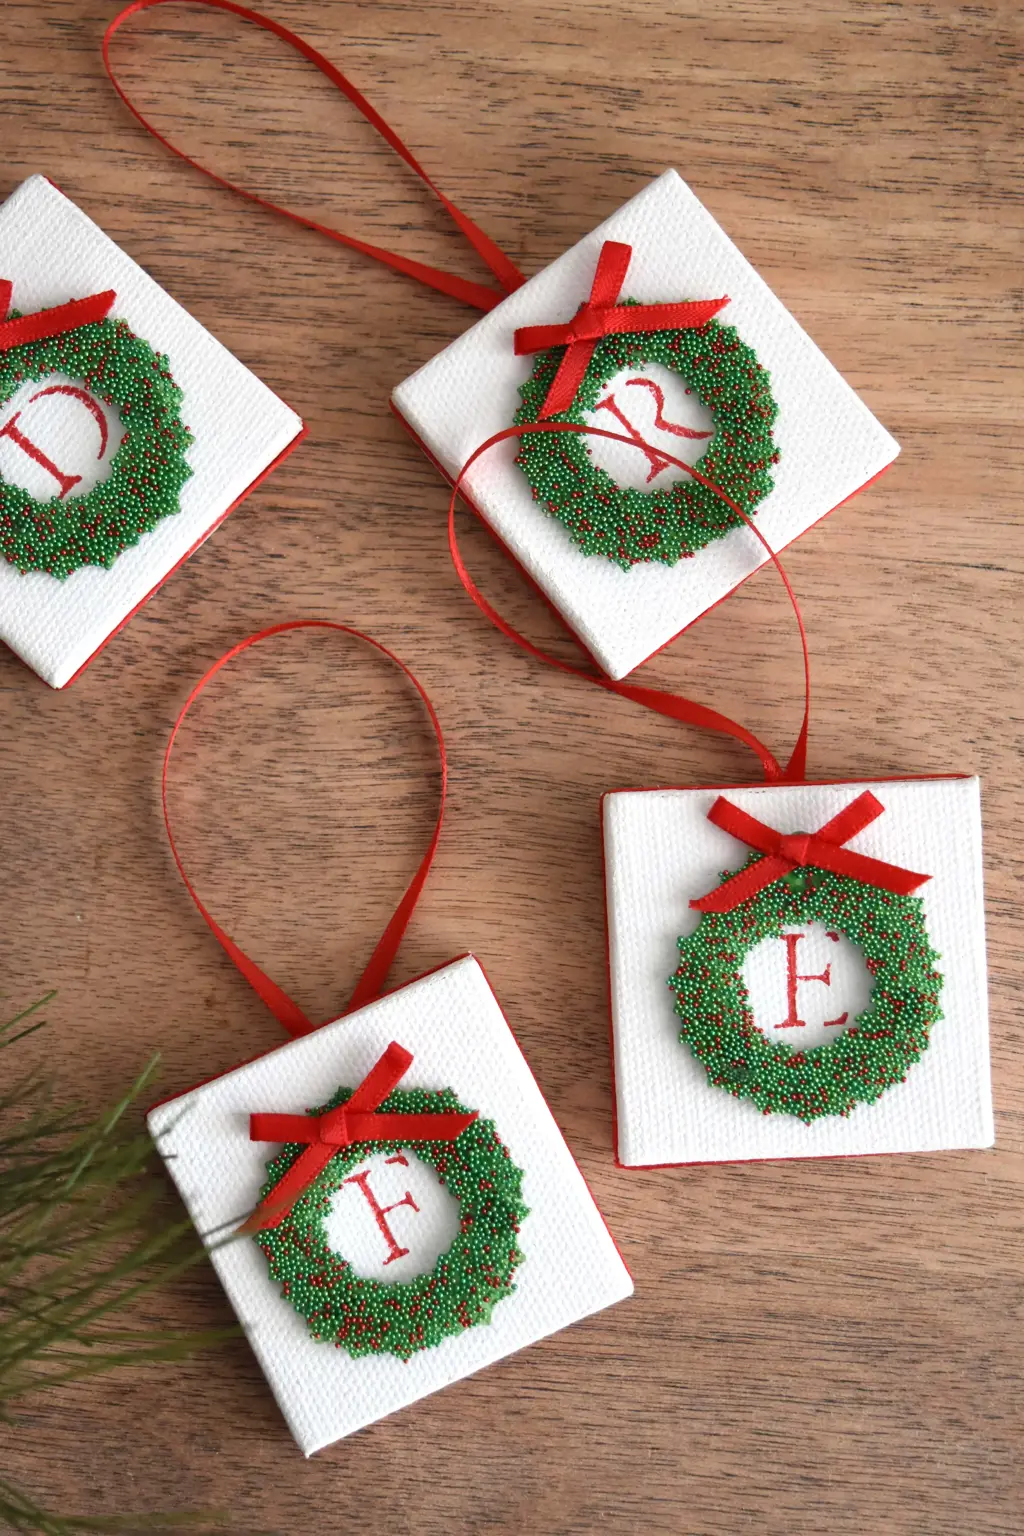
Decorate mini canvases and use them as unique and personalized Christmas ornaments
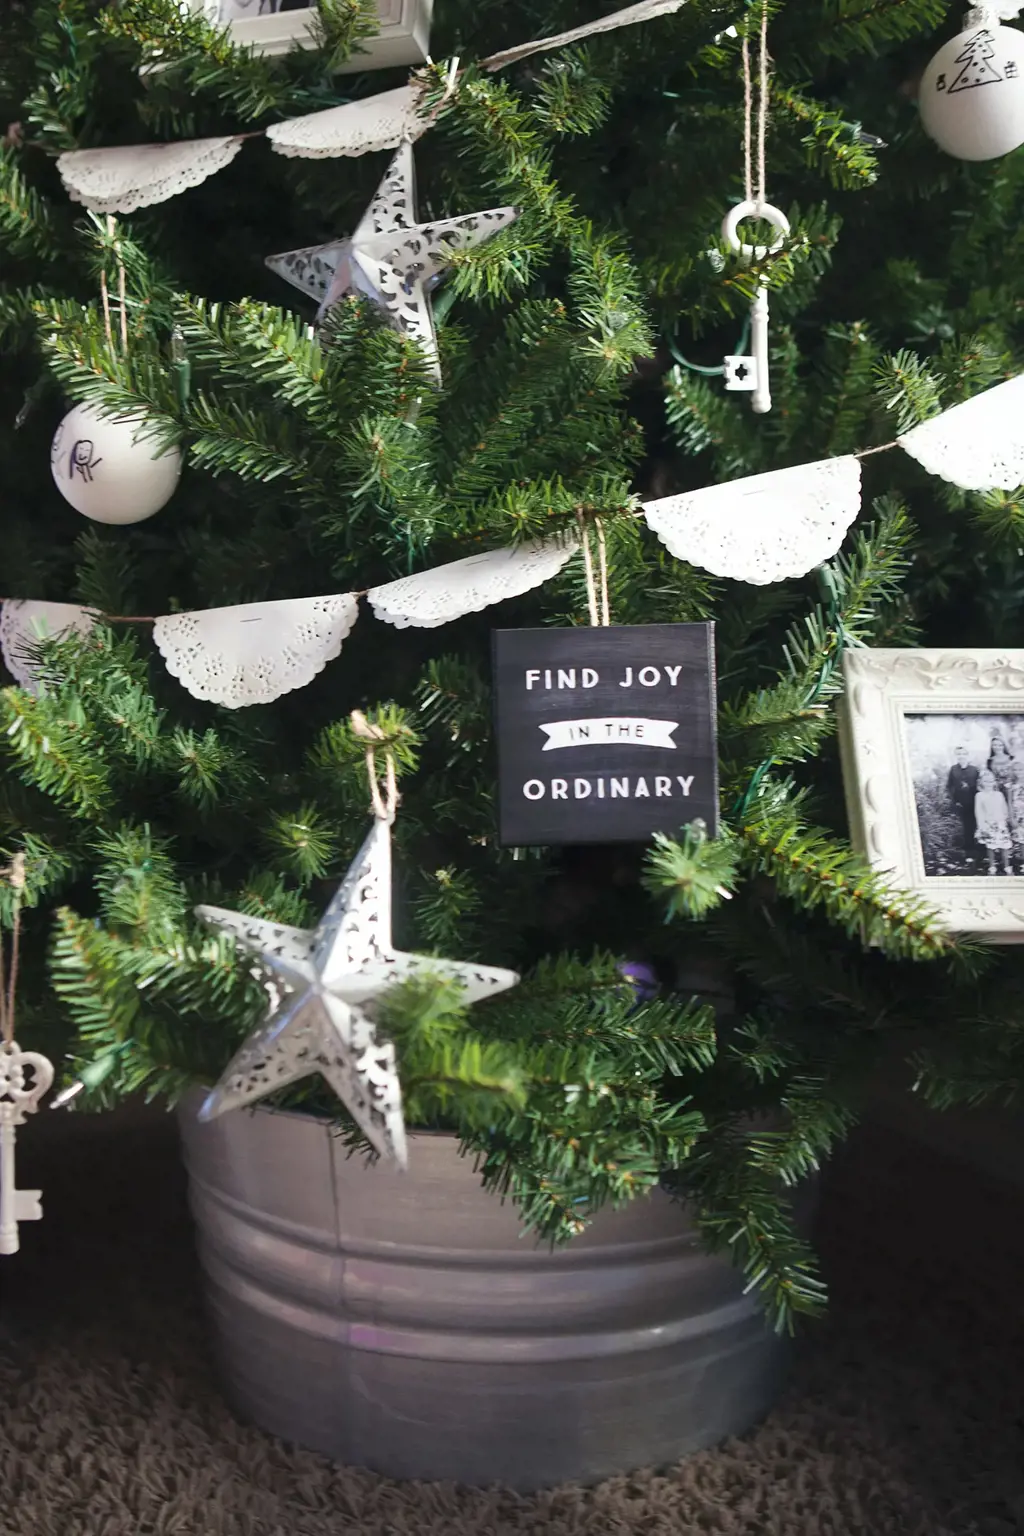
Christmas is a time for creativity and adding a personal touch to your home decor. One way to do this is by decorating mini canvases and using them as unique and personalized Christmas ornaments. This activity is not only fun and engaging but also allows you to showcase your creativity and add a personal touch to your Christmas tree.
To get started, you will need a few mini canvases, acrylic paint, paintbrushes, ribbon or twine, and any additional embellishments you may want to add, such as glitter or sequins. Mini canvases can be found at most art supply stores or online, and come in various sizes, allowing you to choose the ones that work best for your Christmas tree.
Once you have your supplies ready, begin by painting the mini canvases with your desired Christmas-themed designs. You can go for traditional holiday motifs such as snowflakes, Christmas trees, or Santa Claus, or let your imagination run wild and create your own unique designs. Acrylic paint works well on canvases and allows you to layer colors and create textures.
After you have finished painting the canvases, allow them to dry completely before moving on to the next step. Once dry, you can add additional embellishments such as glitter or sequins to give your ornaments an extra sparkle. Be sure to use glue or adhesive that is suitable for adhering to the canvas surface.
When your mini canvases are fully decorated and all embellishments are dry, it's time to add the final touch – a ribbon or twine for hanging. Carefully attach a piece of ribbon or twine to the back of each canvas, either by tying it or using a strong adhesive. Make sure the ribbon or twine is securely attached to ensure that your ornaments hang safely on the Christmas tree.
Now that your mini canvases are ready, you can hang them on your Christmas tree as unique and personalized ornaments. Their small size and intricate designs will add a touch of creativity and charm to your holiday decorations. You can even make a collection of mini canvases and display them together on a wall or mantelpiece.
Decorating mini canvases and using them as Christmas ornaments is a great way to express your creativity and add a personal touch to your holiday decor. Whether you choose to paint traditional holiday motifs or create your own unique designs, these mini canvases will surely become cherished ornaments that bring joy to your Christmas celebrations year after year. So grab your paintbrushes and get ready to create beautiful and personalized mini canvas ornaments for your Christmas tree.
Top 10 Things to Do at Excalibur Hotel Las Vegas
You may want to see also
![]()
Paint mini canvases and turn them into unique wall hooks or hangers for jewelry or scarves
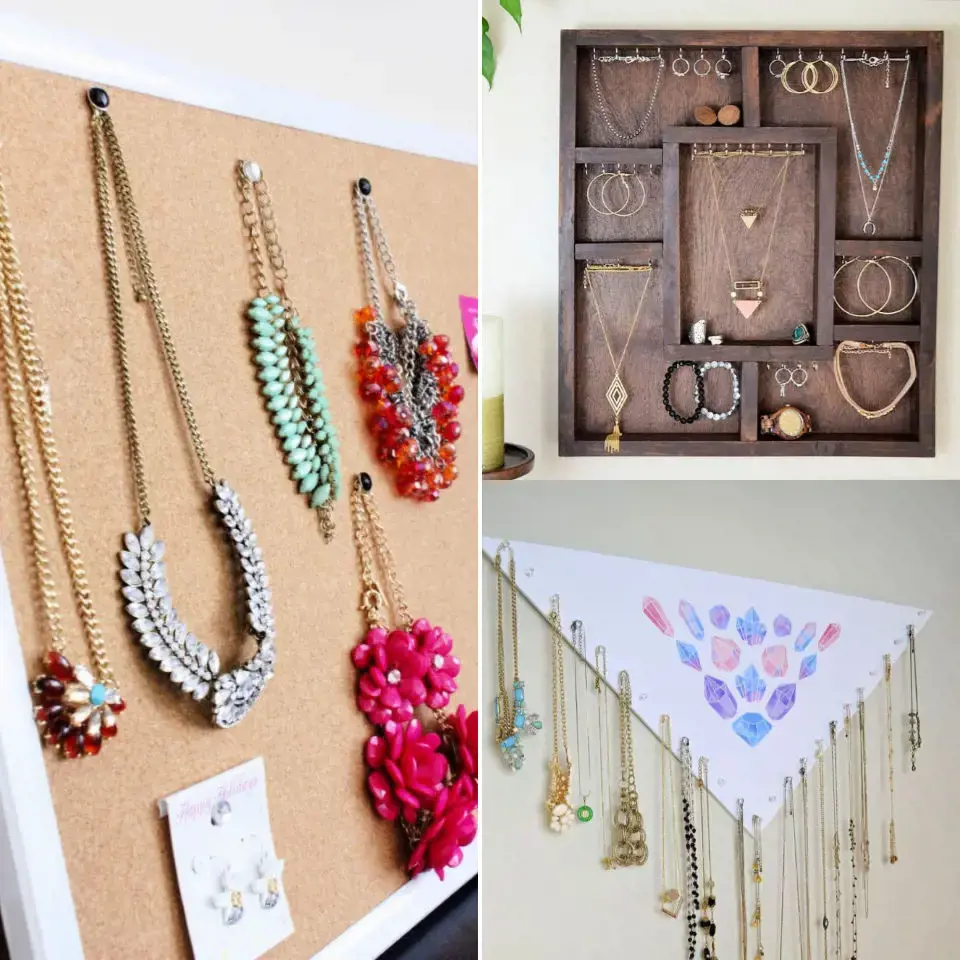
Mini canvases offer a perfect way to unleash your creativity and create unique pieces of art. These small canvases, usually measuring around 2x2 inches, are great for experimenting with different painting techniques, colors, and designs. If you're looking for some inspiration on what to do with your mini canvases, here's an idea: turn them into wall hooks or hangers for your jewelry or scarves.
To start this project, gather your mini canvases, acrylic paints, paintbrushes, and a drill with a small drill bit. You'll also need some decorative hooks or hardware, depending on the type of hanger you want to create.
First, think about the design you want to paint on your mini canvases. You can opt for simple abstract patterns, geometric shapes, or even mini landscapes. Use a pencil to lightly sketch your design on the canvas before painting to ensure accuracy.
Next, apply a base coat of your desired color onto the canvas. This step will serve as the background of your design and make it easier for the other colors to stand out. Let the base coat dry completely before moving on to the next step.
Once your base coat is dry, start painting the details of your design. Use different brushes to achieve various effects, such as thin lines or textured brushstrokes. Experiment with colors and techniques to create a unique and eye-catching design on each canvas. Don't be afraid to be bold and adventurous with your choices!
After completing the painting, let the canvases dry thoroughly. Then, it's time to drill holes for the hooks or hardware. Choose a spot on the canvas where the design won't be obstructed by the hooks. Carefully drill small holes that are big enough to accommodate the hardware, but not so big that it compromises the integrity of the canvas. If you're unsure about drilling, you can also try attaching the hooks using strong adhesive, although drilling will provide a more secure hold.
Once the holes are drilled, attach the hooks or hardware according to the manufacturer's instructions. Make sure they are securely fastened and can support the weight of your jewelry or scarves without any issues. You can use decorative hooks, such as vintage-style knobs or colorful shapes, to further enhance the visual appeal of your mini canvas hangers.
Once your mini canvas hangers are complete, find a suitable spot on the wall to display them. Arrange them in a formation that complements your overall decor theme, or display them individually as mini art pieces. Hang your jewelry or scarves on the hooks, and admire how your creative endeavors have transformed into functional and stylish hangers.
By transforming mini canvases into wall hooks or hangers, you not only get a chance to showcase your artistic skills but also create unique and personalized storage solutions for your accessories. These mini canvas hangers will add a touch of creativity and charm to your wall while keeping your jewelry or scarves organized and easily accessible. So, grab your mini canvases and paints, and start turning them into functional and beautiful pieces of art today!
13 Exciting Activities in Burgenland
You may want to see also
![]()
Use mini canvases as mini mood boards to display your favorite quotes, images, or inspirations

Mini canvases are a great way to showcase your creativity and add a personal touch to your living space. One fun and meaningful way to use mini canvases is to create mini mood boards. These can be used to display your favorite quotes, images, or inspirations. Here are some ideas to get you started:
- Inspirational quotes: Use mini canvases to display your favorite motivational quotes. Choose quotes that resonate with you and inspire you on a daily basis. You can either handwrite these quotes using colorful markers or print them out and glue them onto the canvas. Arrange the mini canvases on a wall or shelf to create a mini gallery of inspiration.
- Collage of memories: Create a mini canvas collage of your favorite memories. Print out small photos of special moments, such as vacations or family gatherings, and arrange them on mini canvases using glue or double-sided tape. You can also add small mementos like postcards, ticket stubs, or dried flowers to enhance the collage. Hang these mini canvases in a cluster or line them up to create a visual timeline of your most cherished memories.
- Vision board: Use mini canvases to create a vision board that represents your goals and aspirations. Cut out pictures or words from magazines that symbolize what you want to achieve or attract into your life. Arrange these cutouts on mini canvases and glue them down. You can also add personal affirmations or visualizations to reinforce your desires. Hang this vision board in a prominent place where you will see it every day to stay focused on your goals.
- Nature-inspired art: Another idea is to create mini canvases that celebrate the beauty of nature. Paint or draw small scenes of landscapes, flowers, or animals onto the canvases. You can also use small dried leaves, petals, or feathers to add texture and depth to your nature-inspired art. Arrange these mini canvases in a grid or scatter them throughout your space to bring a touch of the outdoors inside.
- Word art: Get creative with mini canvases by using them as a canvas for your own word art. Write meaningful words or phrases using different fonts and colors to create unique and eye-catching designs. You can also experiment with different techniques such as doodling, calligraphy, or lettering to add even more visual interest. Hang these mini canvases in a collage or display them individually to showcase your artistic skills.
Mini canvases provide a great opportunity to express your creativity and create meaningful displays. Whether you choose to showcase your favorite quotes, memories, goals, nature-inspired art, or word art, mini canvases are a versatile and fun way to personalize your living space. So grab some mini canvases, let your imagination run wild, and start creating mini mood boards that reflect your style and personality.
12 Fun Christmas Things to Do in Connecticut This Holiday Seaso
You may want to see also
![]()
Create mini canvases with positive affirmations and leave them in public places as random acts of kindness
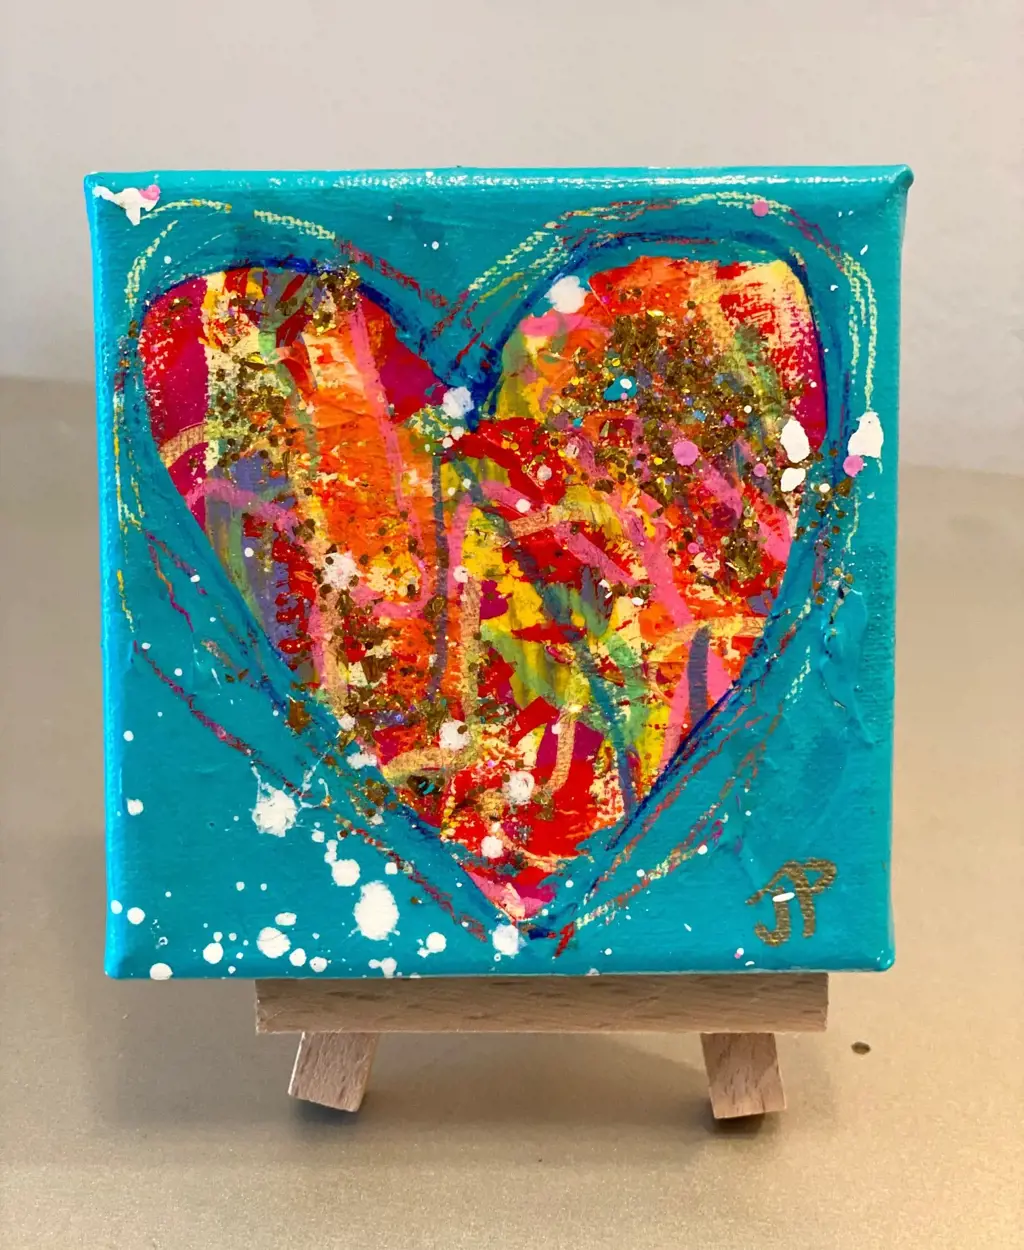
Mini canvases are a trendy and fun way to express your creativity. These small-sized canvases provide the perfect canvas for creating beautiful works of art. Whether you are a seasoned artist or just starting out, mini canvases offer endless possibilities for your artistic endeavors.
One unique and meaningful way to use mini canvases is by creating positive affirmations and leaving them in public places. Random acts of kindness have become increasingly popular, and what better way to spread positivity than through art?
To start, gather your mini canvases and art supplies. Acrylic paints, paintbrushes, and markers are great tools to begin with. Decide on the positive affirmations that you want to create. They can be short and simple, such as "You are loved" or "You are capable." The key is to choose affirmations that will uplift and inspire anyone who comes across your mini canvases.
Before you start painting or drawing, give some thought to the design and colors you want to use. Bright and vibrant colors tend to catch people's attention and evoke positive emotions. Consider using a mix of colors or even creating a rainbow-themed design.
As you start creating your mini canvases, remember to have fun and let your creativity flow. Don't worry about making them perfect; imperfections add character and authenticity to your artwork.
Once your mini canvases are complete, it's time to take them out into the world. Look for public places where people gather, such as parks, coffee shops, or bus stops. Carefully place your mini canvases in these locations, making sure they are visible but not obstructing any paths or walkways.
Leaving your mini canvases in public places serves two purposes. First, it spreads positivity and joy to those who come across them. Imagine the delight someone feels when they stumble upon a mini canvas with a heartfelt affirmation on a gloomy day. Your artwork has the power to brighten someone's day and make them feel seen and valued.
Secondly, your random acts of kindness with mini canvases can inspire others to do the same. When people witness the impact of your art on others, they may be inspired to create their own mini canvases and spread positivity in their own unique ways. It becomes a ripple effect of kindness and creativity.
If you want to take your random acts of kindness a step further, consider adding a note or a hashtag to your mini canvases. Encourage anyone who finds them to share a photo on social media using your designated hashtag. This way, you can follow along with the journey of your mini canvases and see the impact they have on people's lives.
Creating mini canvases with positive affirmations and leaving them in public places as random acts of kindness is a beautiful way to spread positivity in the world. Through art, you have the power to brighten someone's day and inspire others to do the same. So grab your mini canvases and let your creativity shine. Who knows, you might just change someone's life with a simple stroke of a paintbrush.
12 Fun and Exciting Things to Do in South Hill, VA
You may want to see also
Frequently asked questions
Yes, mini canvases can absolutely be used for regular painting. Despite their smaller size, they are still made of high-quality materials and provide a sturdy surface for painting. Many artists enjoy working on mini canvases because they allow for quick and spontaneous artwork, and they are also great for creating small studies or experimenting with new techniques and ideas.
The best medium to use on mini canvases largely depends on personal preference and the desired effect. However, acrylic paint is a popular choice for mini canvases as it dries quickly and can be easily layered. It also allows for easy clean-up and is generally more beginner-friendly compared to other mediums like oil paint. That being said, oil paint, watercolors, and even markers or colored pencils can also be used on mini canvases, depending on the desired effect and the artist's style.
Absolutely! Mini canvases are an excellent surface for mixed media artwork. Because they are small, they can easily accommodate layers of different materials and textures without becoming too cluttered or overwhelming. Artists often combine various elements such as acrylic paint, collage, ink, stencils, and found objects to create unique and visually interesting mixed media pieces on mini canvases.
While mini canvases may not be as commonly used for professional artwork as larger canvases, they certainly can be suitable for professional use. Many artists use mini canvases to create small, affordable artworks that can be displayed and sold as part of a larger collection or series. Mini canvases can also be a great option for artists participating in art shows or fairs, as they are easy to transport and display. Ultimately, the suitability for professional artwork comes down to the skill and creativity of the artist, rather than the size of the canvas.