In a world filled with digital technology and virtual experiences, it's easy to overlook the humble printer as just a device to output documents and photos. However, you might be surprised to learn that a printer can actually be a versatile tool with a range of cool and unexpected functionalities. Whether you're a creative enthusiast, a tech-savvy hobbyist, or simply looking to get more out of your printer, this article will reveal 10 surprisingly cool things you can do with this seemingly mundane device. From printing your own custom t-shirts to creating three-dimensional objects, prepare to be amazed by the endless possibilities unlocked by your printer. Get ready to embark on a journey of printing exploration that will revolutionize the way you see this seemingly ordinary machine.
| Activity | Description |
|---|---|
| Print and frame photos | Print out your favorite photos and frame them to decorate your home or give as gifts. |
| Create custom greeting cards | Design and print personalized greeting cards for birthdays, holidays, or special occasions. |
| Make homemade stickers | Use sticker paper and your printer to create unique and customized stickers for crafts or personalizing items. |
| Print coloring pages | Find and print coloring pages for children or adults to enjoy coloring and relaxation. |
| Design and print labels | Use your printer to design and print labels for organizing and categorizing items at home or in the office. |
| Print custom t-shirts | Use heat transfer paper to print designs on t-shirts, creating your own custom apparel. |
| Print sudoku or crossword puzzles | Generate and print puzzles to challenge your mind and pass the time. |
| Print paper crafts | Find and print templates for paper crafts like origami, paper models, or paper dolls. |
| Create personalized planner | Design and print your own planner pages to stay organized and track your goals and tasks. |
| Print educational materials | Download and print worksheets, flashcards, or study guides for learning and educational purposes. |
What You'll Learn
- Print your own customized board games
- Create 3D models using a 3D printer
- Print edible designs with a food printer
- Print your own t-shirts using printable iron-on transfers
- Print your own unique phone cases
- Print stunning art reproductions for your home
- Design and print your own jewelry
- Print high-quality photo albums and scrapbooks
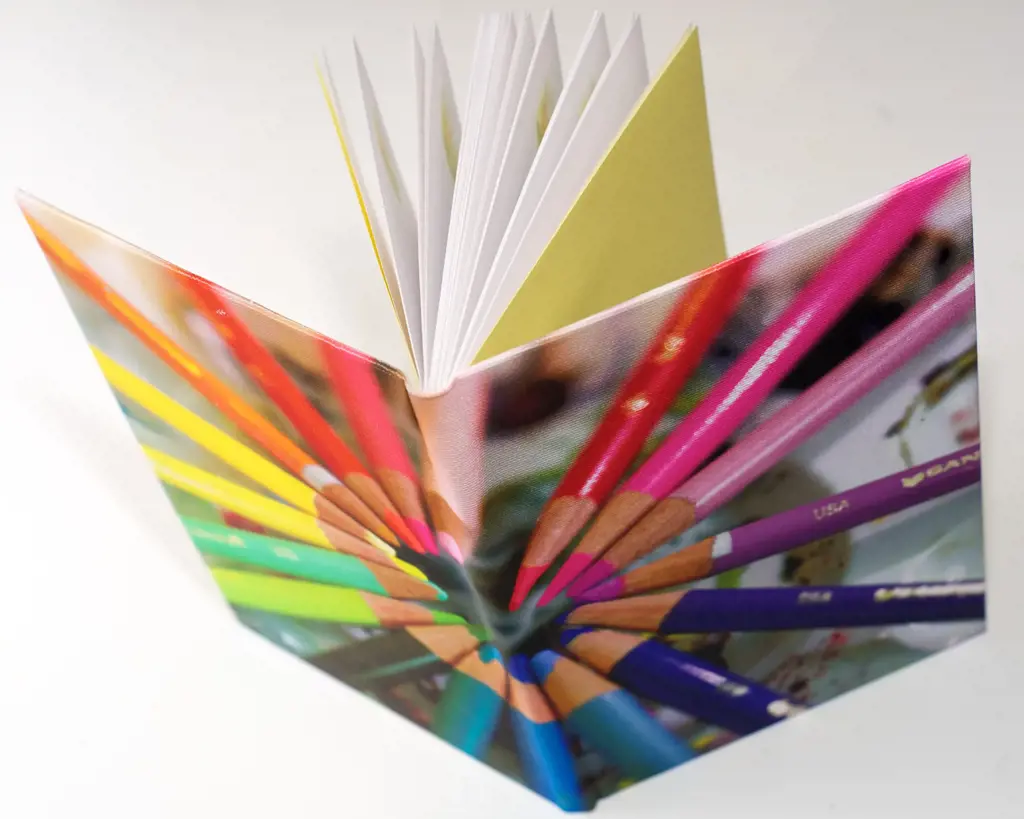
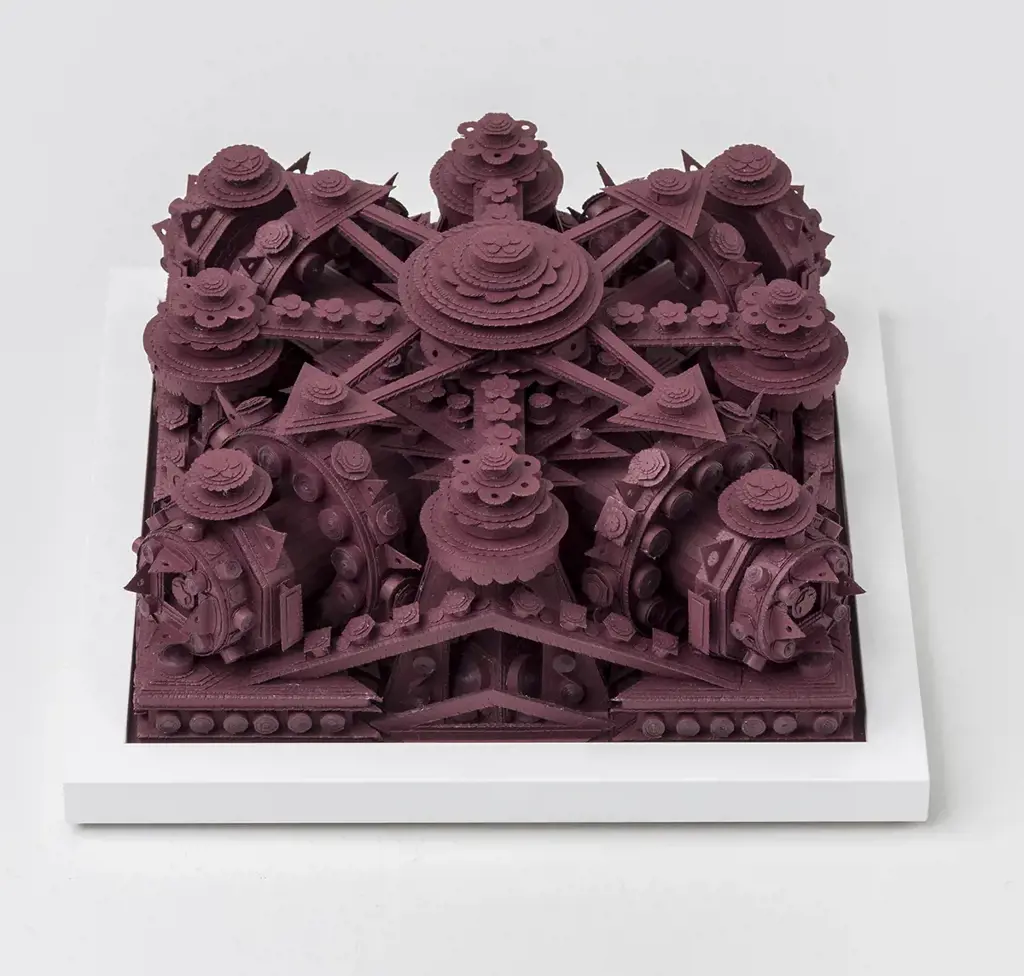
- Print intricate paper models
- Print your own personalized greeting cards
![]()
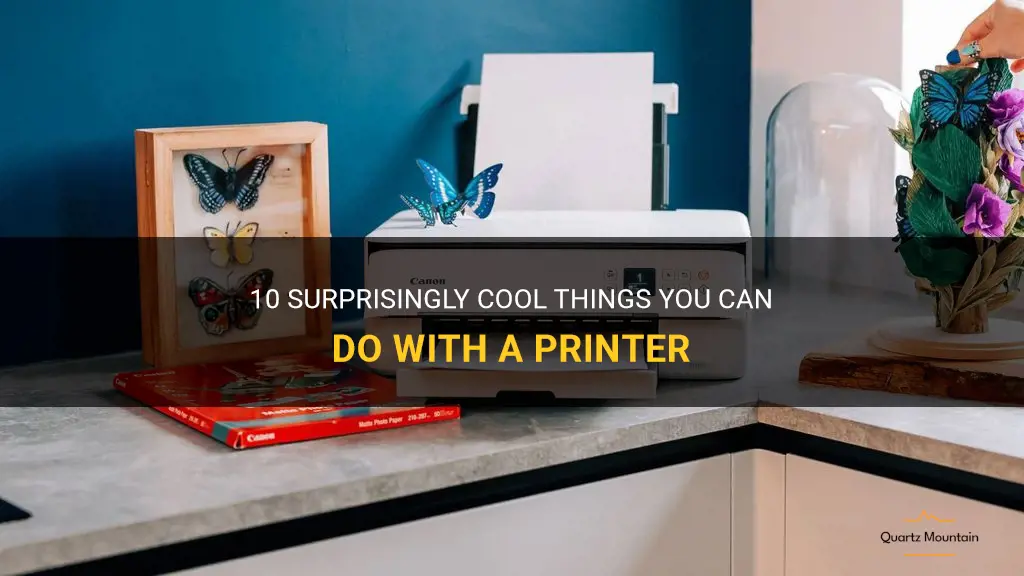
Print your own customized board games
If you have a printer at home, you probably use it for basic document or photo printing. But did you know that you can also use it to create your own customized board games? Here are some cool things you can do with a printer to make your game nights even more exciting:
- Design your own game board: With a decent design software and a printer, you can create your own game board. Use graphics, colors, and patterns that match the theme of your game. You can also experiment with different shapes and sizes to make it unique.
- Print custom game cards: Instead of using plain, generic game cards, why not print your own? You can create custom cards with personalized images or text. This allows you to tailor the game to your liking or even include inside jokes among friends.
- Create unique playing pieces: Enhance your gaming experience by printing unique playing pieces. You can design and print custom tokens, pawns, or figurines that represent the characters or objects in your game. This adds a personal touch to your board game.
- Make your own instructions and rulebook: Most board games come with instructions and rulebooks, but why not create your own? You can design and print detailed instructions that are easy to understand and visually appealing. This gives you complete control over the rules and allows you to add any modifications or house rules.
- Print game mats or playmats: If your game involves cards or miniatures, you can print game mats or playmats to enhance the gaming experience. These mats provide a designated space for cards or miniatures and can feature themed graphics or artwork.
- Print custom dice: While it may be more challenging to print actual dice, you can still create custom dice stickers. Simply print and stick the stickers onto regular dice to customize the faces. This allows you to have dice that match the theme or mechanics of your game.
- Personalize game accessories: Apart from the game components, you can also use your printer to personalize game accessories. Design and print custom scoreboards, player trackers, or even game boxes. By doing this, you can give your board game a professional and polished look.
Remember, the possibilities are endless when it comes to creating your own customized board games with a printer. Let your creativity shine and have fun designing unique games that will impress your friends and family. Game night will never be the same again!
12 Fun and Exciting Things to Do with Toddlers in Myrtle Beach!
You may want to see also
![]()
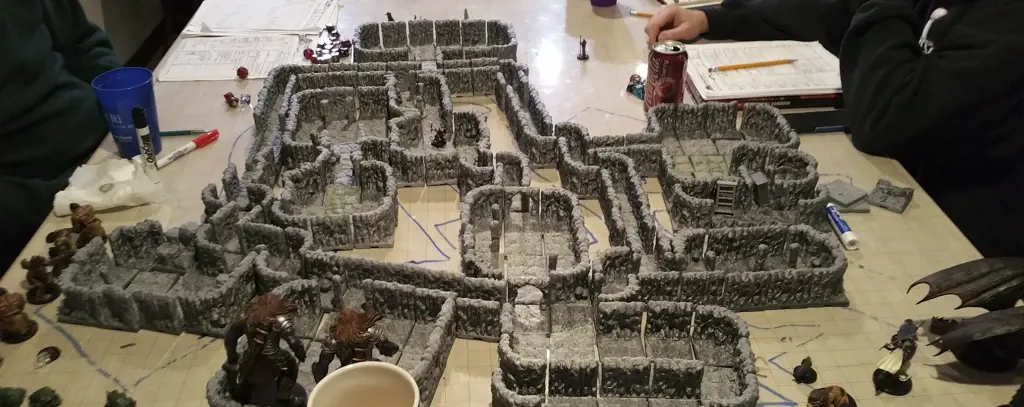
Create 3D models using a 3D printer
Technology has advanced so much in recent years that it is now possible to create three-dimensional objects using a 3D printer. This exciting technology has opened up a whole new world of possibilities, allowing people to create unique and customized items for their personal use or for commercial purposes. If you have access to a 3D printer, here are some cool things you can do:
- Create customized phone cases: With a 3D printer, you can design and print your own personalized phone cases. You can add your name, favorite patterns, or even create a case in the shape of your favorite character. The possibilities are endless, and you can have a phone case that perfectly reflects your personality.
- Make your own jewelry: If you're tired of wearing the same mass-produced jewelry as everyone else, a 3D printer can come to your rescue. You can design and print your own one-of-a-kind earrings, necklaces, rings, and bracelets. You can experiment with different materials and colors to create unique pieces that will make a statement.
- Design and print toys: Kids and adults alike can have a blast designing and printing their own toys. Imagine being able to bring your own creations to life and have a toy that no one else has. Whether you want to create action figures, puzzles, or board games, a 3D printer allows you to let your imagination run wild.
- Make prototypes: If you're an inventor or designer, a 3D printer can be a valuable tool for creating prototypes of your ideas. Instead of hiring a manufacturer and going through a lengthy and expensive process, you can print a prototype of your invention and test it out for yourself. This allows you to quickly make changes and improvements before you commit to mass production.
- Create home decor items: Add a personal touch to your home by designing and printing your own home decor items. You can create unique vases, candle holders, wall art, or even furniture. You can experiment with different shapes, patterns, and colors to match your personal style and create a space that is truly yours.
- Build architectural models: Whether you're an architect, student, or simply fascinated by architecture, a 3D printer can help you bring your designs to life. You can print detailed and accurate models of buildings, houses, or landscapes to better visualize your ideas or showcase your projects.
- Print personalized gifts: Nothing says "I care" more than a personalized gift. With a 3D printer, you can design and print thoughtful and unique gifts for your loved ones. Whether it's a custom keychain, a personalized photo frame, or a mini sculpture of their favorite animal, you can create something truly special that they will cherish.
In conclusion, a 3D printer opens up a whole world of possibilities for creativity and customization. Whether you want to create customized phone cases, unique jewelry, toys, prototypes, home decor items, architectural models, or personalized gifts, a 3D printer can bring your ideas to life. The only limit is your imagination!
12 Fun Things to Do in Rockwall, Texas
You may want to see also
![]()
Print edible designs with a food printer
Printing technology has come a long way, and one of the coolest things you can do with a printer nowadays is printing edible designs with a food printer. This innovative device allows you to create intricate and detailed designs on various types of food, allowing for endless creative possibilities.
Gone are the days when printers were only used for printing documents and photos. With a food printer, you can now turn your kitchen into an art studio and experiment with different designs and patterns on your favorite edible creations. From personalized cakes and cookies to chocolates and even pasta, the possibilities are endless.
So how does a food printer work? It operates similarly to a regular printer but uses edible ink and specialized food-grade cartridges. The printer is equipped with a food-safe printhead that dispenses the ink onto the food surface, allowing you to create vibrant and detailed designs. Some food printers even come with multiple printheads, allowing you to print in different colors and layers for a more intricate design.
The design process is simple and user-friendly. You can either choose pre-existing designs from the printer's software or create your own using design software or apps. Once you have your design ready, you can simply load it into the printer and watch as it comes to life on your food.
Imagine the possibilities of printing personalized birthday cakes with your loved one's name or face on it. You can print intricate lace patterns on cookies or even create custom logos on chocolates for corporate events. With a food printer, you can take your baking skills to the next level and impress your friends and family with visually stunning and personalized creations.
Food printers are not only limited to desserts and sweets. You can also use them to print designs on savory dishes like pizzas, burgers, and sandwiches. Imagine serving your guests with a customized pizza topped with their favorite sports team's logo or a sandwich with their name spelled out in edible ink. The possibilities for creativity and personalization are truly endless.
Not only are food printers a fun and innovative way to create edible designs, but they can also be a great tool for those with dietary restrictions or allergies. By printing your own designs, you have complete control over the ingredients used, allowing you to customize your food to fit your specific dietary needs.
In conclusion, printing edible designs with a food printer is a cool and exciting way to unleash your creativity in the kitchen. From personalized cakes to intricate cookie designs, a food printer allows you to turn ordinary food into edible works of art. So why not take your baking skills to the next level and try out this cutting-edge technology for yourself? The possibilities are limited only by your imagination.
12 Exciting Events To Check Out In Savannah GA During March
You may want to see also
![]()
Print your own t-shirts using printable iron-on transfers
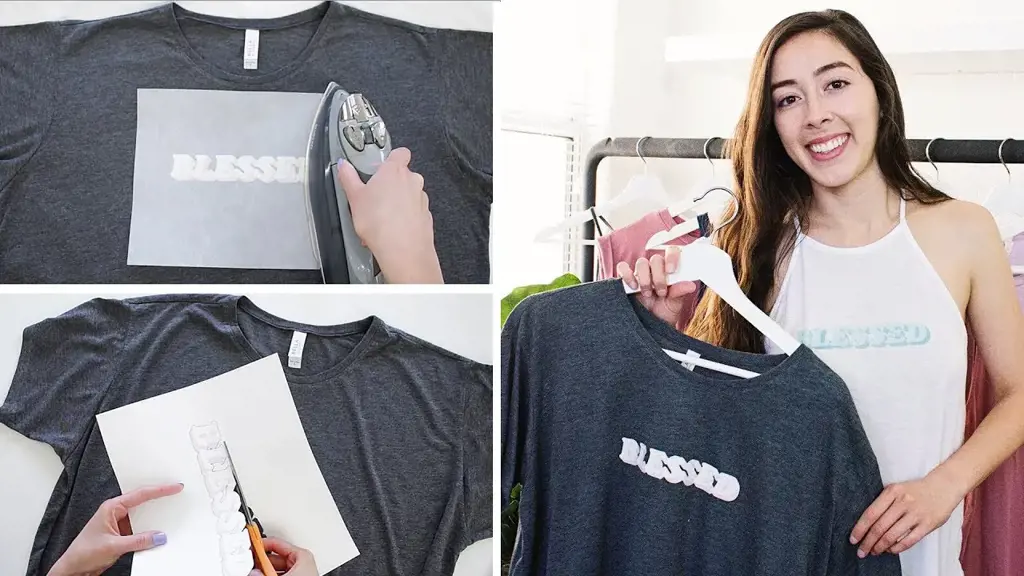
Printing your own t-shirts can be a fun and creative way to express yourself. With a printer and printable iron-on transfers, you can customize your t-shirts with unique designs and slogans. Here's a step-by-step guide on how to print your own t-shirts using printable iron-on transfers.
Step 1: Gather your materials
To get started, you'll need a few supplies. These include a printer, printable iron-on transfers, a plain t-shirt, an iron, and a hard flat surface like an ironing board or table.
Step 2: Choose your design
You can create your own design or find one online. Make sure to measure the dimensions of your t-shirt so that the design fits properly. Keep in mind that the design will be mirrored when transferred onto the t-shirt, so any text or logos should be reversed before printing.
Step 3: Print the design
Load the printable iron-on transfer paper into your printer according to the instructions provided. Make sure to place the transfer paper in the correct orientation to ensure the design is printed on the right side. Once you've loaded the transfer paper, send the design to the printer and let it print.
Step 4: Prepare the t-shirt
Before transferring the design onto the t-shirt, wash and dry it to remove any oils or residues that may interfere with the transfer process. Make sure the t-shirt is clean and iron out any wrinkles.
Step 5: Transfer the design
Cut out the design from the printed iron-on transfer paper, leaving a small border around the edges. Place the design face down onto the t-shirt in the desired location. Make sure it is centered and aligned correctly.
Step 6: Apply heat
Preheat your iron to the appropriate temperature according to the instructions on the iron-on transfer paper. Once heated, place a thin cloth or parchment paper over the transfer. This will prevent the iron from directly touching the transfer and protect the design. Apply firm and even pressure as you iron over the cloth, making sure to cover the entire design. Pay extra attention to the edges to ensure a secure bond.
Step 7: Let it cool
After ironing, let the t-shirt and transfer cool down completely. This will allow the design to set and adhere to the fabric properly. Avoid touching or moving the design until it has cooled down completely.
Step 8: Peel off the backing
Once the transfer has cooled down, carefully peel off the backing paper. Start from one corner and slowly peel back, making sure the design stays intact and adheres to the fabric. If any parts of the design start to lift, press them back down with the iron.
Congratulations! You've just printed your own t-shirt using printable iron-on transfers. Now you can proudly show off your custom design to the world. Remember, always follow the instructions provided with the iron-on transfer paper for the best results. Have fun experimenting with different designs and colors to create unique and personalized t-shirts.
12 Adventurous Activities to Experience in Malvern
You may want to see also
![]()
Print your own unique phone cases
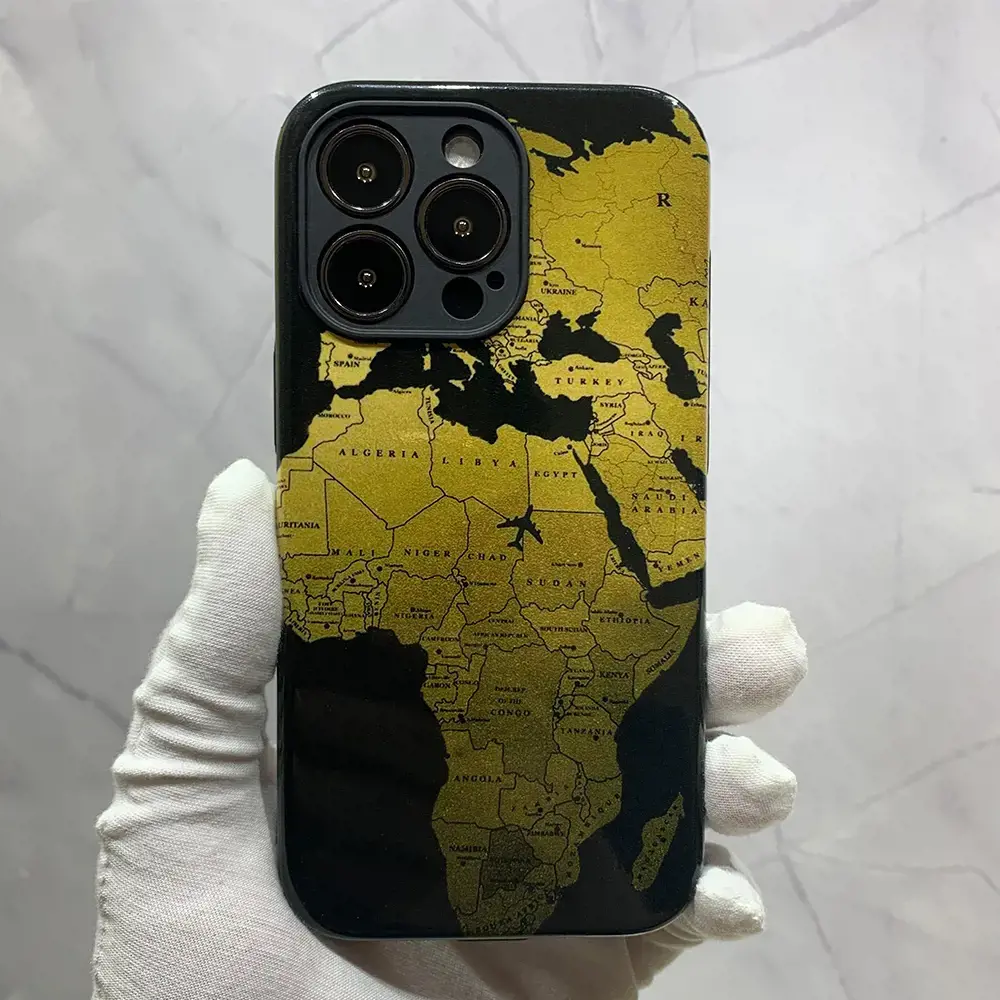
In today's digital age, it seems that there is no limit to what we can create with the help of technology. One such tool that has revolutionized the way we work and express our creativity is the printer. Gone are the days when printers were limited to printing documents and photos. With advancements in technology, printers are now capable of producing a wide range of materials, including phone cases.
Printing your own phone cases at home can be a fun and creative way to personalize your device. Whether you want to showcase your favorite artwork, a memorable photograph, or a unique design, printing custom phone cases allows you to express yourself and stand out from the crowd. Here are some cool ideas to get you started:
- Design your own case: With the help of design software or online tools, you can create your own custom phone case design. Let your imagination run wild and experiment with different colors, patterns, and graphics. Once you have the perfect design, simply print it out and assemble it onto a blank phone case. Voila! Your one-of-a-kind phone case is ready to use.
- Print your favorite artwork: If you have a favorite piece of artwork, why not turn it into a phone case? Whether it's a famous painting, a digital illustration, or a photograph, printing it on a phone case can give it a whole new dimension. Not only will you be able to carry it with you wherever you go, but you'll also have a unique conversation starter.
- Capture memories: Printing photos on phone cases is a great way to preserve your favorite memories. Whether it's a family portrait, a vacation photo, or a picture of your beloved pet, having it on your phone case will keep those special moments close to you at all times.
- Customize for special occasions: Phone cases aren't just for everyday use; they can also be customized for special occasions. Whether it's a birthday, anniversary, or holiday, printing phone cases with festive designs or personalized messages can add a touch of celebration to your device.
- Make a statement: Phone cases can also be used to make a statement or express your personality. Print quotes, slogans, or meaningful symbols that reflect your beliefs or interests. It's a simple and effective way to let the world know who you are.
When it comes to printing phone cases, the possibilities are endless. With a printer at your disposal, you can create unique designs, showcase your favorite artwork, preserve precious memories, and make a statement wherever you go. So why settle for generic phone cases when you can print your own and stand out from the crowd? Get creative and let your imagination take flight!
14 Exciting Things to Do Near Camp Pendleton
You may want to see also
![]()
Print stunning art reproductions for your home
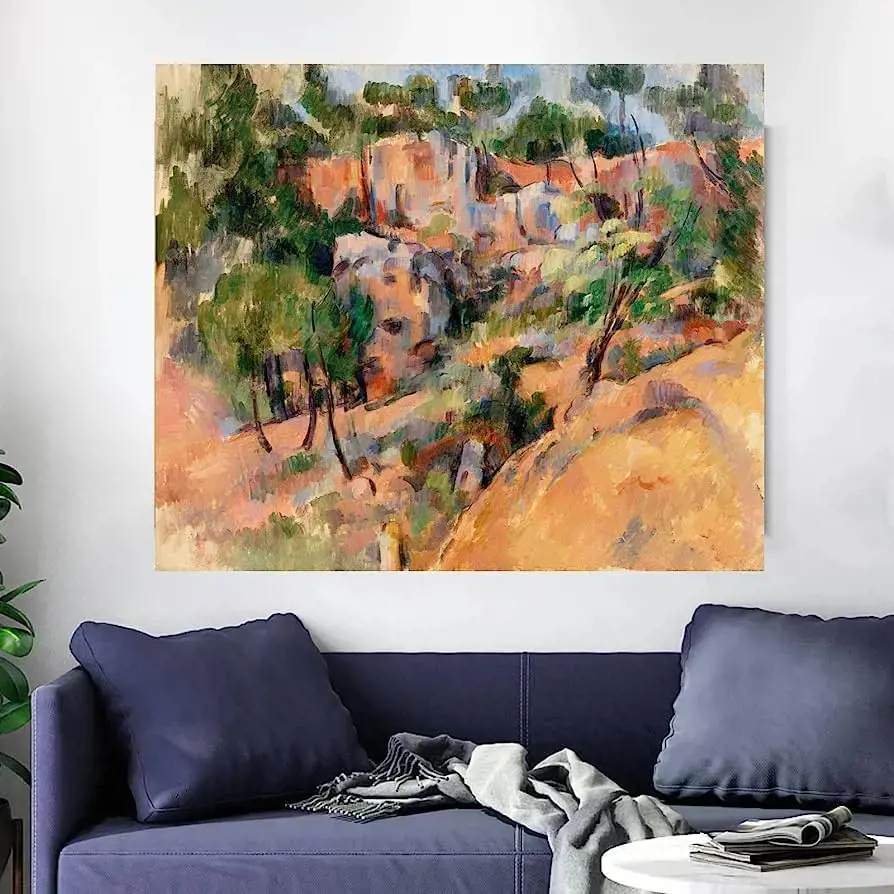
Are you looking to add some artistic flair to your home? Look no further than your trusty printer! With the right tools and a little bit of creativity, you can turn your printer into a powerful tool for producing stunning art reproductions for your home.
First, you'll need a high-quality printer. While most modern printers are capable of producing good quality prints, investing in a printer specifically designed for photo printing will yield the best results. Look for a printer with a high resolution and the ability to print on various paper sizes and types.
Next, you'll want to find the perfect artwork to reproduce. There are several options available for sourcing art, whether you choose to print your own digital creations or use images found online. Many artists and photographers offer high-resolution digital files for purchase, allowing you to print their work in your desired size and format.
Once you have your chosen artwork, it's time to prepare it for printing. Start by ensuring the image is in the correct resolution and color space for printing. You may need to resize or optimize the image to fit your desired print size. Additionally, consider adjusting the colors to match your home's decor or create a specific mood.
Now it's time to select the right paper for your print. There are a wide variety of paper options available, ranging from glossy to matte and textured to metallic. Each type of paper will affect the appearance of your print, so choose one that complements the style and mood of the artwork.
Before you hit the print button, it's essential to calibrate your printer. This process ensures that the colors on your monitor match those that will be printed. Calibration tools are available both online and as physical devices. Follow the instructions provided to achieve accurate and consistent color reproduction.
Finally, it's time to print your artwork. Make sure to select the highest print quality settings and allow the printer to make all necessary color adjustments. Once the printing process is complete, give the print time to dry before handling it, as wet prints are easily smudged.
To display your printed art, consider using a professional framing service. A well-chosen frame can enhance the aesthetic appeal of your print and protect it from damage. Alternatively, you can frame the print yourself using a ready-made frame or a DIY frame kit.
By using your printer to produce stunning art reproductions, you can transform the ambiance of your home and showcase your personal style. Whether you're printing your own digital creations or reproducing the work of established artists, the possibilities are endless. So, fire up your printer and get ready to turn your home into a gallery of beautiful art.
13 Fun Things to Do Near Denver International Airport
You may want to see also
![]()
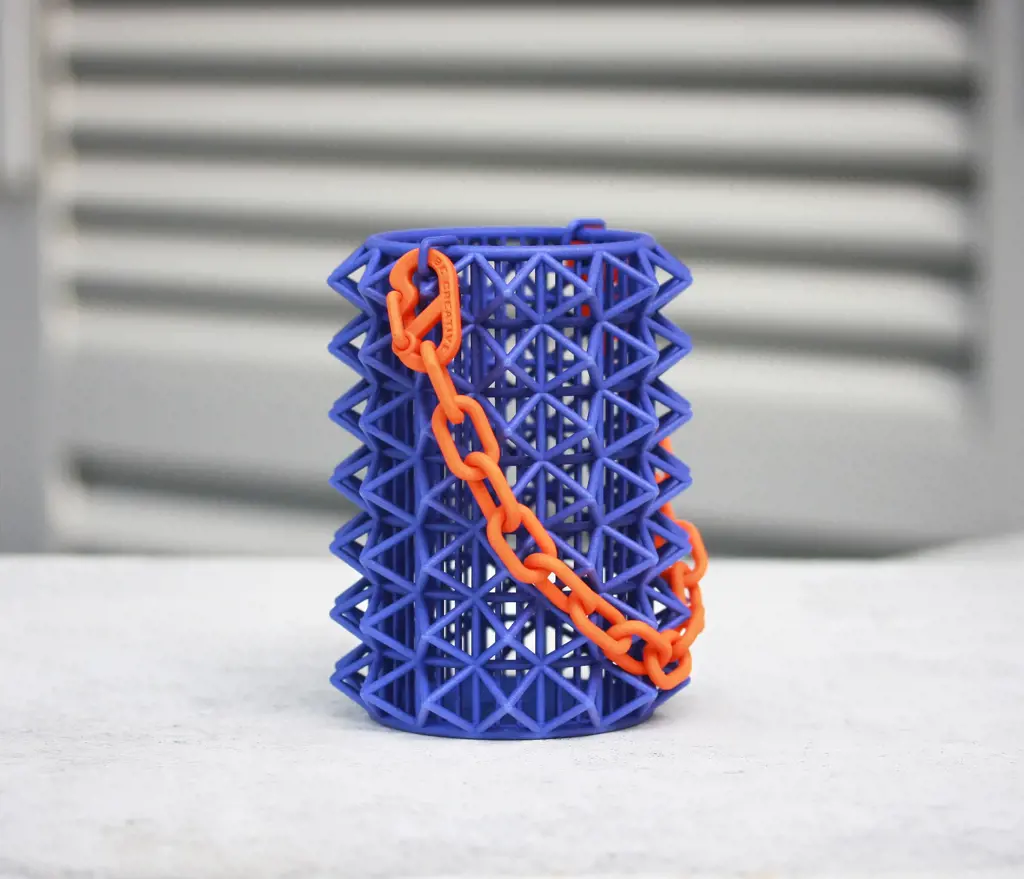
Design and print your own jewelry
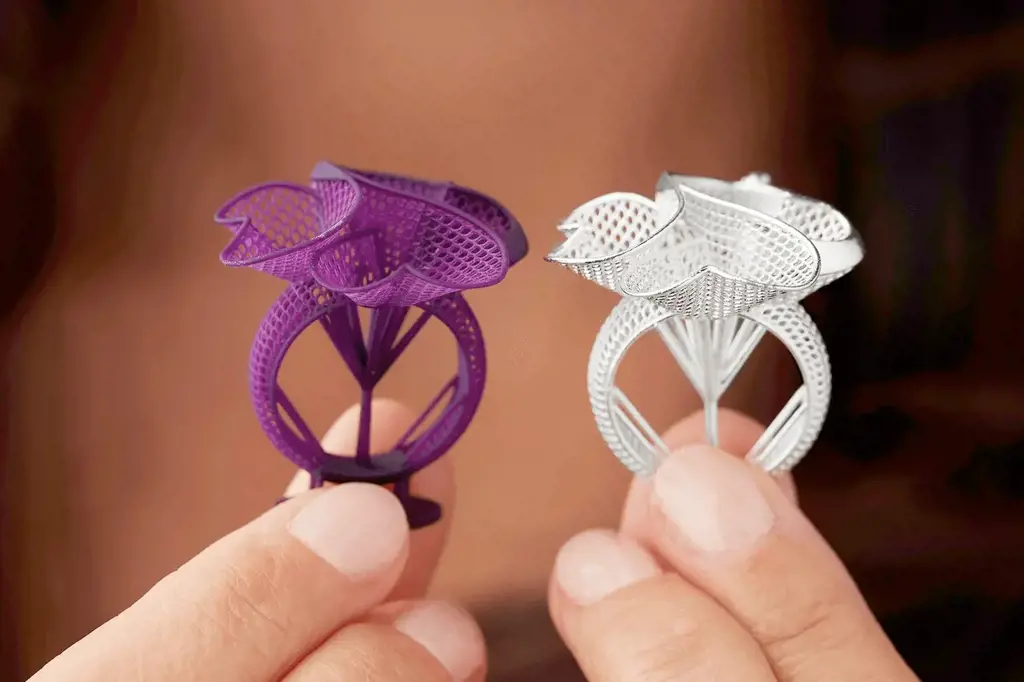
In today's digital age, the possibilities for creativity and innovation are endless. With the advancement of technology, specifically the availability of 3D printers, it is now possible to design and create your own jewelry from the comfort of your own home. This exciting development opens up a world of possibilities for jewelry enthusiasts, allowing them to bring their unique visions to life.
One of the coolest things you can do with a printer is to design and print your own jewelry. So, how does it work? Well, it all starts with a computer program or software that allows you to create your design. There are various free and paid programs available that cater to different skill levels, so whether you're a beginner or an experienced designer, there is something out there for you.
Once you have your design ready, you can then send it to your 3D printer. These printers work by layering thin slices of material, such as plastic or metal, on top of each other to build up the desired shape. The printer follows the instructions from the computer program, slowly building your jewelry piece layer by layer until it is complete.
The exciting part about designing and printing your own jewelry is that you have total creative control. You can experiment with different shapes, sizes, and materials to create something truly unique. Whether you prefer delicate and intricate designs or bold and statement pieces, the possibilities are endless. You can even incorporate other elements such as gemstones or beads into your design to add an extra touch of elegance.
Another benefit of designing and printing your own jewelry is cost-effectiveness. Traditional methods of jewelry production can be expensive, with additional costs for labor and materials. By utilizing a 3D printer, you can significantly reduce these costs and have more control over your budget. This allows you to invest in high-quality materials and create pieces that are truly one-of-a-kind.
Moreover, designing and printing your own jewelry allows for easy customization. If you are looking for a personalized gift for a loved one or want to create something special for yourself, a 3D printer can make it happen. You can incorporate names, initials, or special symbols into your design, making the piece truly meaningful and heartfelt.
In conclusion, designing and printing your own jewelry is an incredibly cool thing to do with a printer. It allows for endless creativity, personalization, and cost-effectiveness. With the right tools and software, you can bring your unique vision to life and create beautiful and one-of-a-kind pieces. So, why not give it a try and see where your imagination takes you? The possibilities are truly limitless.
12 Things to Do in Detroit on New Year's Eve
You may want to see also
![]()
Print high-quality photo albums and scrapbooks
If you have a printer at home, there are many cool things you can do with it that go beyond just printing documents. One fantastic way to utilize your printer is to print high-quality photo albums and scrapbooks. This allows you to showcase your favorite memories and create personalized keepsakes that can be cherished for years to come.
To start creating your photo album or scrapbook, gather your favorite photos and organize them in a digital format. You can use photo editing software to enhance the images, adjust the colors, or add filters if desired. Once you have your photos ready, you can begin designing the layout of your album.
There are various online platforms and software options available that offer templates and tools specifically designed for creating photo albums. These platforms allow you to arrange your photos in different layouts, add captions, and choose backgrounds, colors, and themes. You can further customize your album by including decorative elements such as graphics, stickers, or borders.
Once you have finalized the design of your photo album, you can easily print it using your home printer. To ensure the highest quality prints, it is recommended to use a printer that can produce high-resolution images. Additionally, investing in photo paper will give your prints a professional look and feel.
Before printing, make sure to preview the layout and settings of your album to avoid any potential errors. Adjust the printer settings such as paper type, print quality, and color settings to achieve the desired outcome. It is advisable to print a test page first to check the colors and overall appearance.
Once you are satisfied with the test print, proceed with printing the entire photo album. It is recommended to print one page at a time to avoid any paper jams or misalignment. Take your time to carefully feed the paper into the printer and ensure that each print comes out perfectly.
Once all the pages are printed, you can assemble them into a photo album or scrapbook using binders, photo corners, or even a hole punch and ribbon. You can also add journaling or decorative elements to provide additional context and personalization. The final result will be a beautiful, high-quality photo album or scrapbook that showcases your favorite memories.
Printing photo albums and scrapbooks at home not only allows you to save money but also gives you the freedom to customize every aspect of your creation. You can experiment with different layouts, themes, and decorations to make each album truly unique.
In addition to creating photo albums for yourself, you can also consider gifting them to friends and family on special occasions. A personalized photo album is a thoughtful and meaningful gift that can bring joy and nostalgia to the recipient.
In conclusion, printing high-quality photo albums and scrapbooks using your printer is a great way to showcase your favorite memories and create personalized keepsakes. With the right software, printer, and printing materials, you can easily design and print stunning albums that will be cherished for years to come. So, dust off your printer, gather your favorite photos, and start creating your own personalized photo albums and scrapbooks today!
12 Fun Things to Do in Lake City, Florida
You may want to see also
![]()
Print intricate paper models
Printers are often thought of as a tool for printing documents and photos, but they can also be a great resource for creating fun and unique projects. One cool and creative thing you can do with a printer is to print intricate paper models.
Paper models are three-dimensional objects made from paper that can range in complexity from simple geometric shapes to incredibly detailed replicas of famous landmarks and vehicles. With a good quality printer and some patience, you can print and assemble these models to create stunning works of art.
To get started, you will need a printer capable of printing in color and a selection of high-quality paper. It's important to choose a paper weight that is sturdy enough to hold the weight of the model without tearing, but not too thick that it becomes difficult to fold and shape.
Once you have your supplies ready, the next step is to find a paper model that you would like to print. There are countless websites and online communities dedicated to paper modeling that offer a wide variety of models to choose from. Whether you are interested in buildings, animals, or vehicles, there is sure to be a design that catches your eye.
After selecting a model, download the template and print it out on your printer. Depending on the complexity of the design, you may need to print multiple pages and then cut and glue them together to form the final model. Make sure to follow the instructions provided with the template carefully to ensure accurate printing and assembly.
Once your model is printed, it's time to start assembling it. This can be a time-consuming process, as you will need to carefully cut out each piece and then fold and glue them together to form the final shape. However, the end result is well worth the effort.
Printing and assembling intricate paper models can be a fun and rewarding way to put your printer to use. It's a great activity for both kids and adults, as it allows for creativity, problem-solving, and patience. Plus, once you have completed a model, you can proudly display it as a unique piece of art.
So, if you're looking for a cool and unique project to do with your printer, consider printing intricate paper models. With a little time and effort, you can transform ordinary sheets of paper into stunning three-dimensional objects that will impress everyone who sees them.
12 Best Outdoor Activities in Sevier County
You may want to see also
![]()
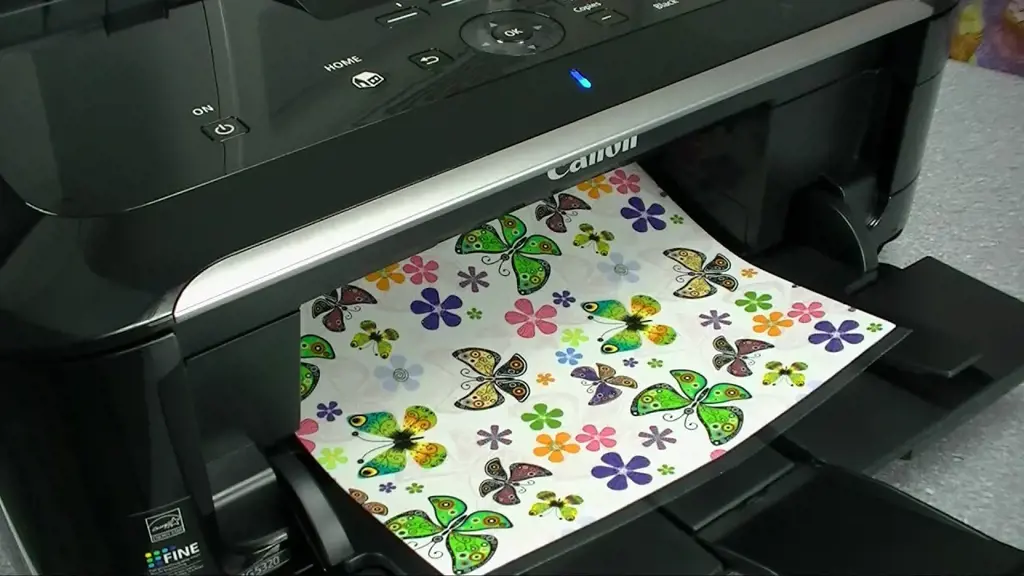
Print your own personalized greeting cards
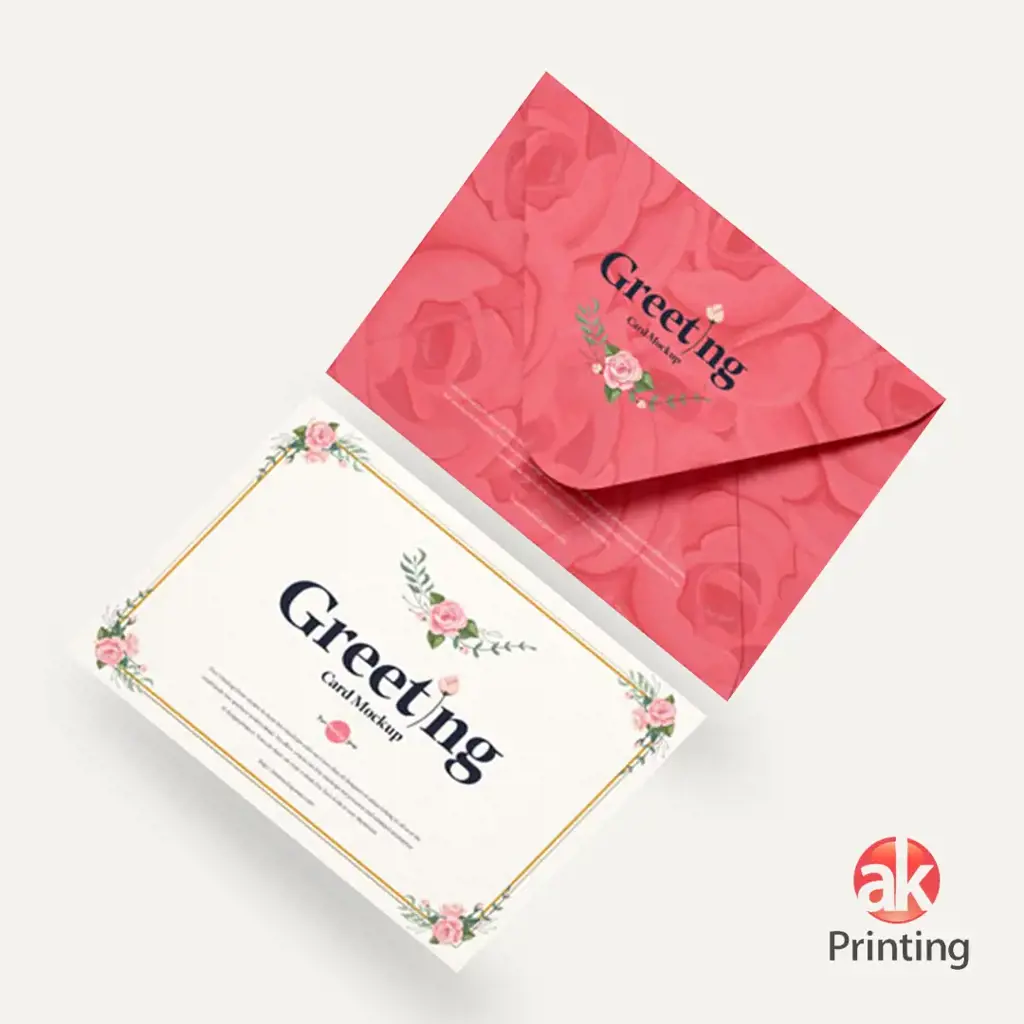
Printing your own personalized greeting cards is a fun and creative way to show your loved ones that you care. With a printer, you can easily design and customize your cards at home, saving you both time and money. Here are some cool things you can do with a printer to make unique greeting cards:
- Design your own card: Use software like Adobe Photoshop or Canva to design your own card from scratch. You can add personal photos, stylish fonts, and beautiful backgrounds to make it truly special.
- Use templates: If designing from scratch seems daunting, you can find plenty of printable card templates online. These templates are easy to edit and customize to suit your needs. Simply choose a design you like, add your personal message, and print it out.
- Print on different materials: Experiment with different cardstocks, papers, or even photo paper to make your cards stand out. Matte or glossy finishes can add a touch of elegance to your designs. You can also try printing on colored or textured paper to give your cards a unique and artistic look.
- Add personal touches: Once you have printed your card, you can further personalize it by adding handwritten notes, drawings, or even embellishments like ribbons, glitter, or stickers. These extra touches can make your cards feel even more special and thoughtful.
- Print in bulk: If you have a long list of people to send cards to, printing in bulk is a great option. Simply design one card, adjust the recipient's name or message, and print multiple copies at once. This saves time and ensures consistency in your card designs.
- Print envelopes too: Don't forget to print matching envelopes for your cards. You can find printable envelope templates online and customize them to match your card designs. This adds an extra touch of professionalism to your personalized greeting cards.
- Experiment with different card sizes: While traditional greeting cards are usually 5x7 inches, you can get creative and print cards in different sizes. Mini cards or oversized cards can make a big impact and stand out from the usual offerings.
- Add QR codes or personalized URLs: For a modern twist, consider adding a QR code or a personalized URL to your cards. This can lead the recipient to a special online message, photo gallery, or video greeting, making your card even more interactive and memorable.
- Print photo montage cards: If you have a collection of memorable photos, why not create a photo montage card? Select a few of your favorite pictures, arrange them in a collage-style design, and add heartfelt messages to create a truly personalized and nostalgic card.
- Include a detachable bookmark or magnet: Make your greeting card serve a dual purpose by including a detachable bookmark or magnet. This way, the recipient can keep your card as a useful reminder or keepsake.
Printing your own personalized greeting cards allows you to express your creativity and tailor-made cards for your loved ones. With the right tools and a little imagination, you can create unique, memorable, and heartfelt cards that will surely bring a smile to anyone's face. So, fire up your printer, let your creativity flow, and start spreading the love with personalized greeting cards.
Exploring the Best Nearby Attractions to Maker's Mark Distillery
You may want to see also
Frequently asked questions
Yes, a printer can be used to create custom designs on fabrics or other materials. Many printers are equipped with specialized settings and ink that allow for printing on various surfaces, including fabric. By using the appropriate settings and software, you can design and print your own custom patterns, images, or even text onto fabric or other materials. This can be a fun and creative way to personalize and customize items such as t-shirts, bags, pillows, and more.
Absolutely! With a printer and the right materials, you can easily print your own stickers or decals. There are sticker paper or decal sheets available that can be used with regular inkjet printers. You can design your own stickers using graphic design software or even use pre-made designs, and then print them onto the sticker paper or decal sheets. Once printed, simply cut out the stickers or decals and they are ready to be applied to any surface you desire. This opens up a world of possibilities for creating custom labels, decorations, or personalizing your belongings.
While most traditional printers are not designed for 3D printing, there are specific printers called 3D printers that are capable of creating three-dimensional objects. Unlike regular inkjet or laser printers, 3D printers use additive manufacturing techniques to build objects layer by layer. They utilize various materials such as plastics, metals, resins, or even food-grade materials to create intricate and complex designs. With a 3D printer, you can bring your imagination to life and create unique objects such as prototypes, toys, jewelry, or even replacement parts. It's an exciting and innovative technology that continues to advance and expand its applications.


3 Comments
Lydia Richards
Asma Lyons
Karisa Garcia
Author